

Lenovo e431windows error

php editor Xiaoxin brings you an article about "Lenovo E431 Windows Error". When using Lenovo E431 laptop, you sometimes encounter some Windows error problems, such as blue screen, system crash, etc. These errors may cause users to be unable to use the computer normally, causing trouble in work and life. This article will introduce how to solve Windows errors on Lenovo E431 laptop and help users quickly resume normal use. Whether you are a novice or a user with some computer knowledge, you can get practical solutions from this article.
Preparation tools SSD memory module optical drive position removable bracket screwdriverNote: I will not consider the purchase issue here, because the editor will write an article about the purchase of accessories in the future. At the same time, we do not consider whether the notebook supports hardware additions, because many notebooks do not have two memory slots or optical drives. Assume that we have prepared the appropriate accessories and the laptop meets the requirements for replacement.
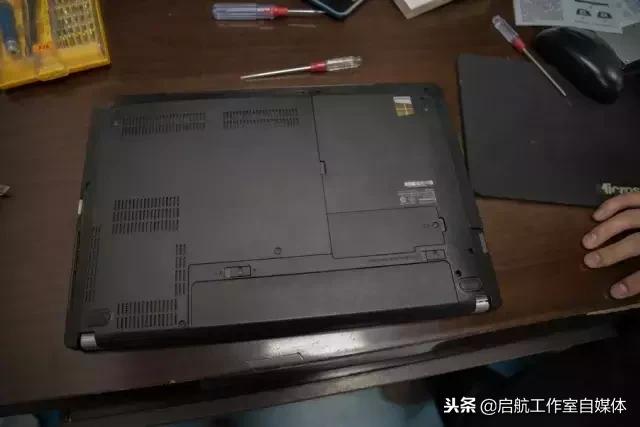
Replacement StepsThe computer to be replaced this time is Lenovo E431

The next step is very critical. Before disassembling the machine, please go online to find the disassembly tutorial for the corresponding model. Each model will have its own special disassembly method. This time, Lenovo E431 only needs to disassemble part of the D side to complete the replacement task. More importantly, looking for online disassembly tutorials is to find hidden screws, because often There are screws often behind the cooling pad or behind some stickers. Oh, by the way, speaking of stickers, if you don’t know anything about laptops, please be careful not to dismantle them by yourself, because if the warranty paper is damaged, the warranty will basically not be free. The laptops we disassembled this time have basically passed the free warranty. Warranty expired.
There is also a concept that needs to be popularized here. The front of the notebook is called side A, the display screen is called side B, the keyboard side is called side C, and the back of the notebook is called side D.
Turn to side D. The first thing to do when disassembling the computer is to remove the battery. Of course, if the battery is built into the computer, there is nothing you can do.

When removing screws, you can refer to online tutorials or do it yourself. If necessary, you only need to remove the three screws below, but in order to ensure the operation, I removed all the removable screws on the D side (marked by red circles).

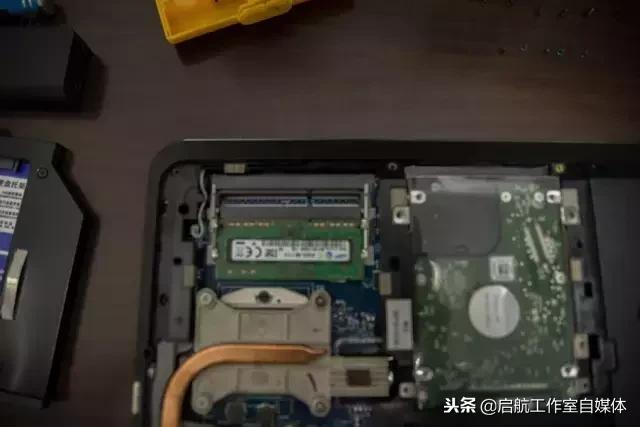
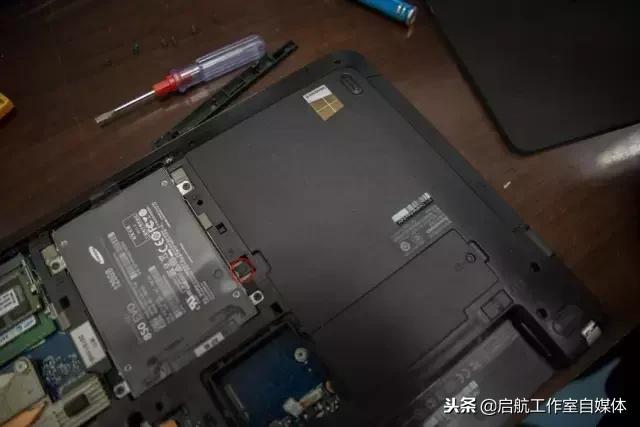
Open the cover and you can see the accessories inside. What needs to be replaced are the green things on the upper left. The one on the far left is the memory, and the one in the middle is the mechanical hard drive. We need to replace the mechanical hard drive with a solid state drive.
When installing, first align the card slot and put the memory in from the side.
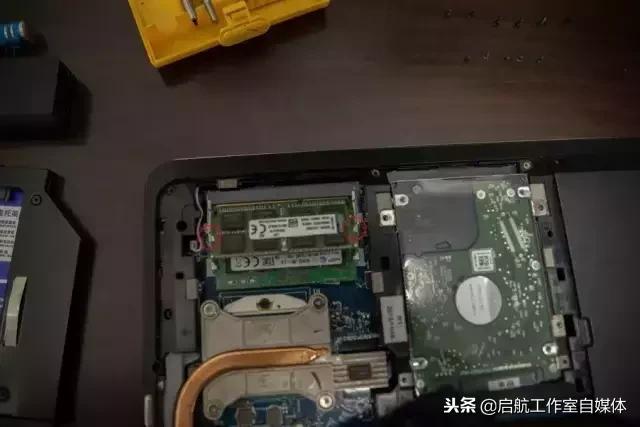
Press the new memory module down until the iron buckles on both sides lock the memory module. In this way, the memory module is installed.

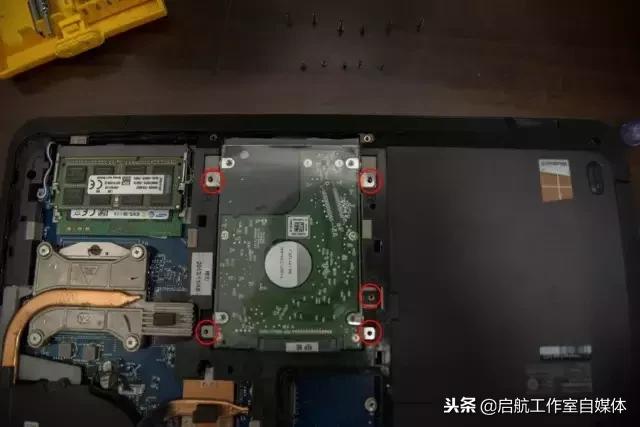
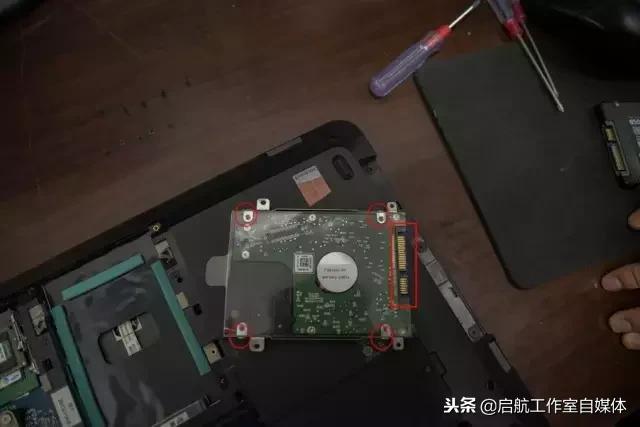
Before disassembling the hard drive, you need to remove the four screws related to the hard drive in the picture. After doing this, the hard drive can be slowly removed. In addition, there is a screw in the lower right corner, which is used to fix the optical drive. Because we need to uninstall the optical drive later, we also removed it. Sometimes, the optical drive screws may be covered by a soft pad, so look for them.
Note that it is best to find a small storage box to store the screws;
After taking out the hard drive, uninstall the four screws on both sides, which are used to fix the hard drive rack and the mechanical hard drive. Pay attention to the position of the interface at this time. The interface will look like this when the solid state drive is installed later.
Carefully separate the hard drive bracket and mechanical hard drive.

Pay attention to the position of the interface and insert the solid state drive, then reinstall the four screws on the side and place a picture of the old and new alternating.

Put the solid state drive and the bracket back to their original positions and tighten the four screws.

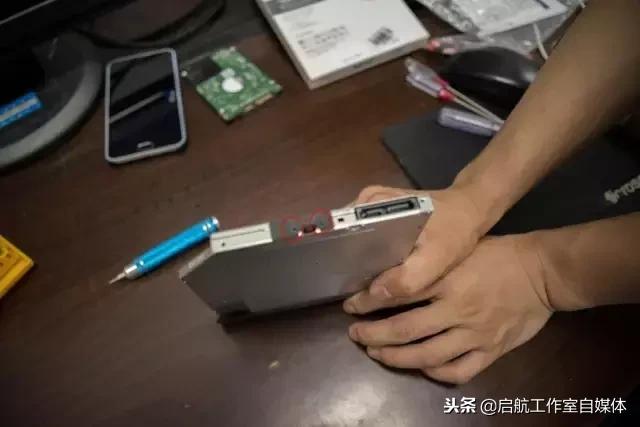
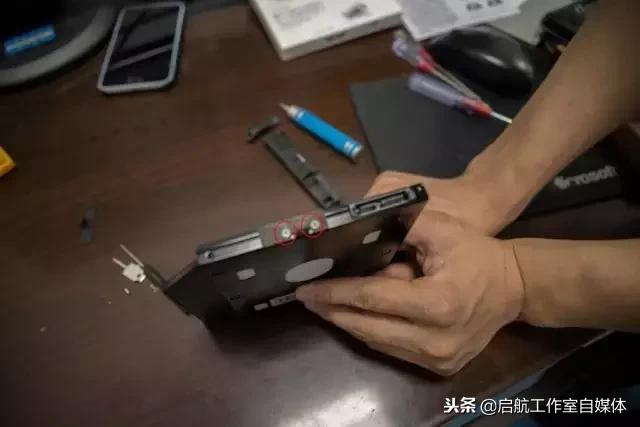
Next we will replace the optical drive, because CDs and DVDs have gradually withdrawn from the stage of history. If the mechanical hard drive we uninstall is not used, the capacity of the solid-state drive alone is definitely not enough, so It is necessary to replace the optical disk with a mechanical hard disk in the optical drive position. First remove the two screws on the back of the original optical drive.
Now use the plastic bracket on the front, both of which will be used on the new optical drive bracket in a while.
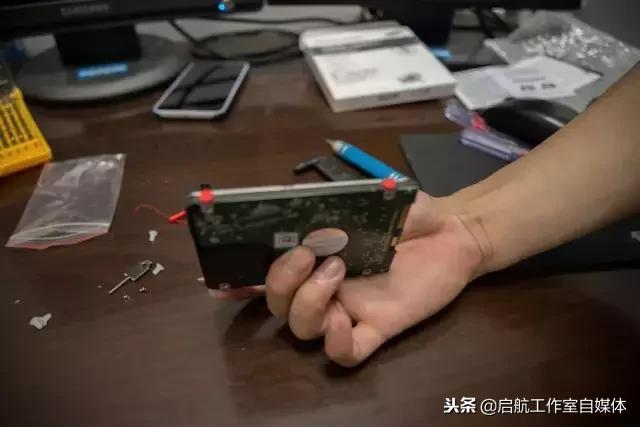
Take out the accessories provided with the optical drive bracket, and you can see that there are quite a few, but here we only need to use four of the red screws, which are soft screws to reduce the mechanical The hard drive is vibrating. The white ones are hard nails, which are used to fix the solid-state drive, because some people also put the solid-state drive in the optical drive position.

Insert the four red screws directly onto the side of the mechanical hard drive.
Align the interface, first insert the mechanical hard drive from the back, and then push the mechanical hard drive forward until the interface is tightly locked.

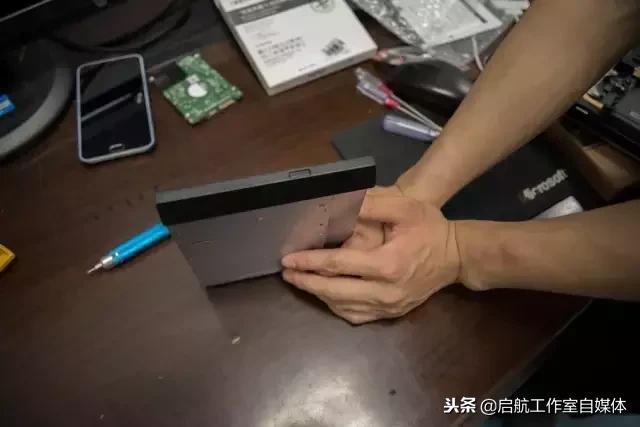
After pushing it, put the soft pad on the optical drive position into it, so that the mechanical hard drive can be completely locked so that it will not move too much when running.

Attach the front panel and back panel just mentioned to form the finished product.

After installing the screws of the optical drive position, our replacement is complete, and the next step is to install the screws.
Close the cover and power supply, tighten the screws, and connect the power.
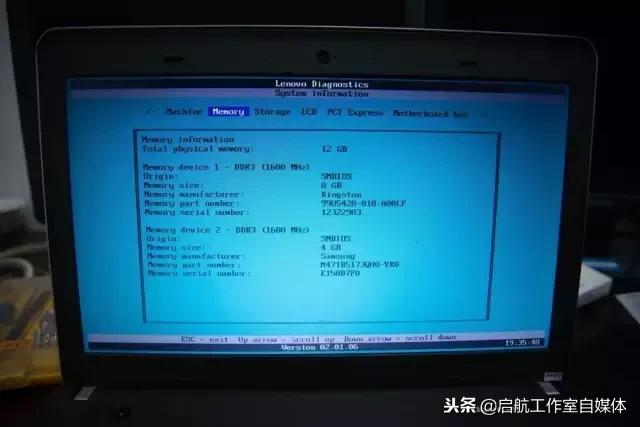
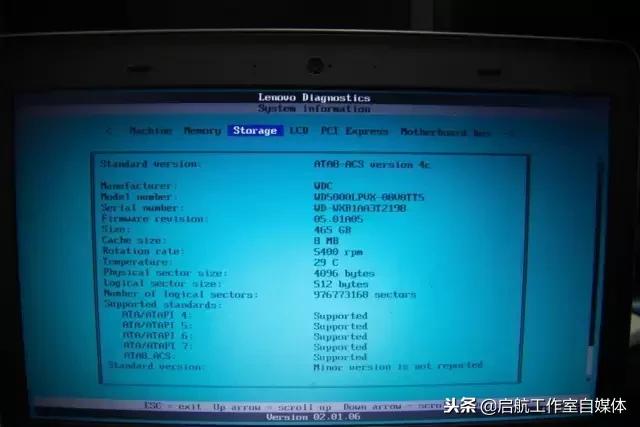
After booting into the BIOS, you can see the information about the two memory modules.
Switch different tabs to see SSD and HDD information.

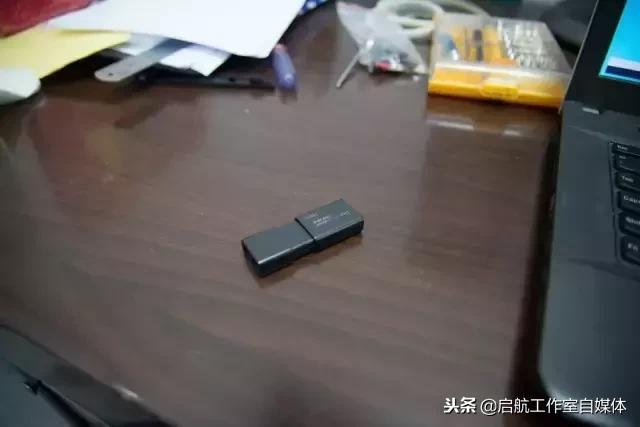
Prepare an installation USB disk (I won’t go into the production process, just check it online)
Insert the USB flash drive and turn on the computer. Lenovo needs to press Enter to interrupt the normal boot. Different brands are different, but most of them need to be adjusted in the BIOS. Note that if it is booted from UEFI, it cannot be set to Legacy mode.
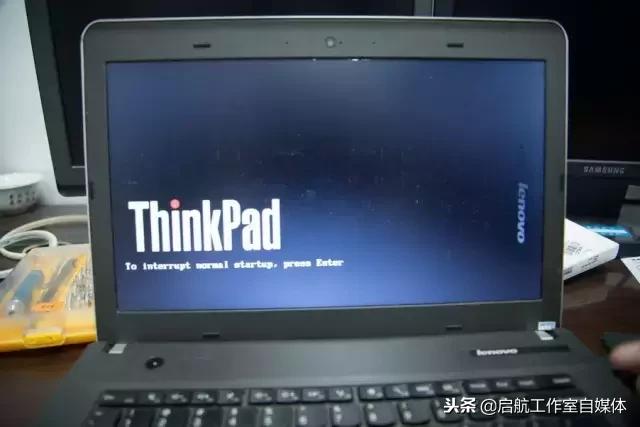
Press F12 as prompted

Select our U disk to boot

You will be able to enter the installation interface after a while. It is still more humane here I will talk about it in specific places.
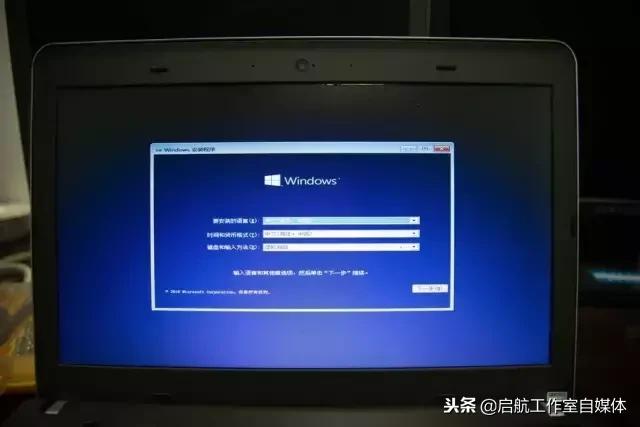
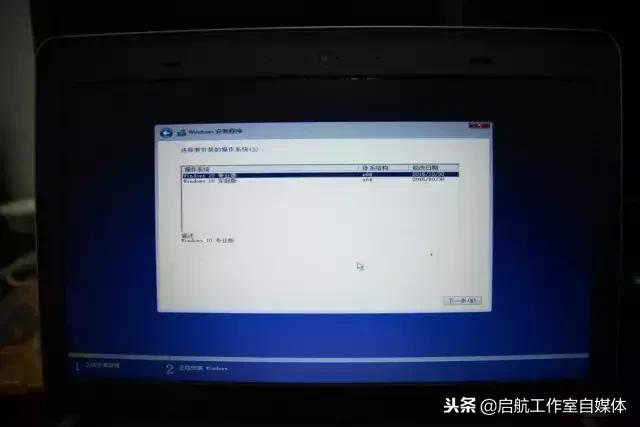
Choose to install Windows 10 Professional Edition
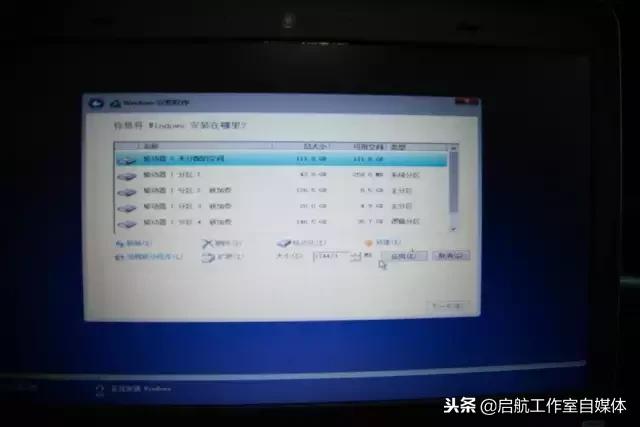
Choose Customize here

Go to this interface to see our solid-state drive and previous machinery The hard drive is out. We are going to install the system on a fixed hard drive, so select drive 0 and click New.

The biggest difference between solid-state drives and mechanical hard drives is that they do not require partitioning, because solid-state drives are only used for the installation of systems and large software, not for storing data. , click Apply directly.
Select OK
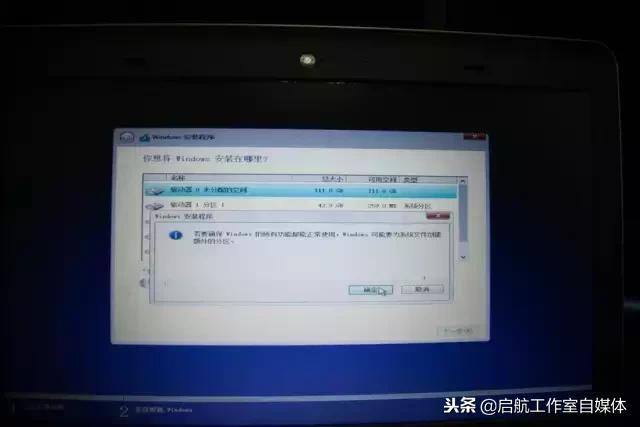
You can see that Windows 10 automatically separates the reserved partition and the system partition on the solid-state drive. This is included in EFI, ESP partition and MSR partition. .
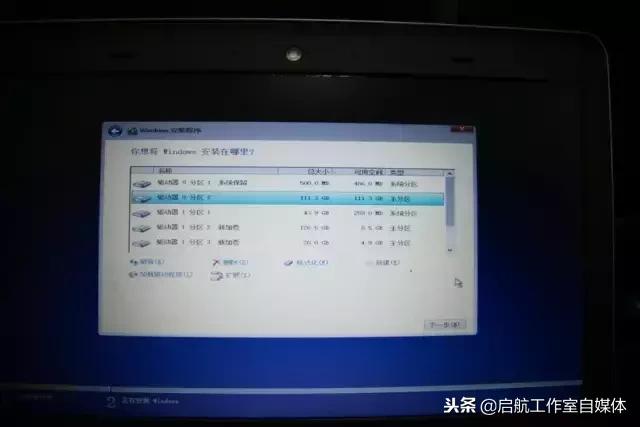
Click Next and the installation will begin. The installation will be completed very quickly with the speed of the solid state drive. Next is some simple graphical interface settings, and then you can enter the desktop.
 Summary
It is very necessary to increase the memory capacity in the current laptop computer. The average laptop computer has 4G memory. Basically, the memory usage will reach 40% when the system is opened, so add more The memory capacity is definitely affordable.
As for replacing the solid-state drive, this is a matter of improving work efficiency. I believe everyone wants to experience the boot time of less than ten seconds, and the solid-state drive has excellent advantages in opening large software. As for replacement As for the optical drive position, it depends on personal preference. If you really need an optical drive, you don't need to replace it.
Warm reminder: If your personal skills are not good, it is not recommended to replace it by yourself, please find a professional to handle it! ! !
The above is the detailed content of Lenovo e431windows error. For more information, please follow other related articles on the PHP Chinese website!

Hot AI Tools

Undresser.AI Undress
AI-powered app for creating realistic nude photos

AI Clothes Remover
Online AI tool for removing clothes from photos.

Undress AI Tool
Undress images for free

Clothoff.io
AI clothes remover

Video Face Swap
Swap faces in any video effortlessly with our completely free AI face swap tool!

Hot Article
Hot Tools

Notepad++7.3.1
Easy-to-use and free code editor

SublimeText3 Chinese version
Chinese version, very easy to use

Zend Studio 13.0.1
Powerful PHP integrated development environment

Dreamweaver CS6
Visual web development tools

SublimeText3 Mac version
God-level code editing software (SublimeText3)
Hot Topics
 1669
1669
 14
1428
52
1329
25
1273
29
1256
24
14
1428
52
1329
25
1273
29
1256
24

 How to install WinNTSetup into Win11 system_How to install WinNTSetup into Win11 system
May 08, 2024 am 11:19 AM
How to install WinNTSetup into Win11 system_How to install WinNTSetup into Win11 system
May 08, 2024 am 11:19 AM
First download the latest Win11 system ISO image, and then in Win10 system, you can directly right-click on the downloaded ISO image file and select [Load]; if it is under WinPE, WinXP, or Win7 system, you need to use the virtual optical drive tool to load the ISO Image; or you can directly decompress the ISO image file without using a virtual optical drive. Then run WinNTSetup. The software interface is as shown in the figure: First locate the location of the install.wim file. You can find the install.wim file in the sources directory of the Win11 ISO image loaded or decompressed by the virtual optical drive. Then set the location of the boot disk and installation disk. Generally, you are going to put W
 How to enter bios after assembling a computer? How to enter bios when assembling a computer?
May 07, 2024 am 09:13 AM
How to enter bios after assembling a computer? How to enter bios when assembling a computer?
May 07, 2024 am 09:13 AM
How to enter bios after assembling a computer? Before entering the BIOS, you need to make sure that the computer is completely shut down and powered off. Here are several common ways to enter the BIOS: 1. Use shortcut keys: Most computer manufacturers will display a prompt message at startup telling you which key to press to enter the BIOS settings. Usually the F2, F10, F12 or Delete key. After pressing the appropriate keys, you should be able to see a screen with information about your computer's hardware and BIOS settings. 2. Use the button on the motherboard: Some computer motherboards have a dedicated button for entering BIOS settings. This button is usually labeled "BIOS" or "UEFI". After pressing the button you should be able to see
 How to upgrade Win11 system on old computers_Tutorial on upgrading Win11 system on old computers
May 07, 2024 pm 08:07 PM
How to upgrade Win11 system on old computers_Tutorial on upgrading Win11 system on old computers
May 07, 2024 pm 08:07 PM
1. First we need to download the win11 image file. 2. Put the downloaded win11 image into another disk. 3. Then we find the win11 image file among the searched image files. 4. Then when we come to this interface, we select install.wim to proceed to the next step. 5. Then select the Windows 11 system and click OK to restore the image file. 6. Then we wait for pe to download and install. Wait patiently. After the download is completed, click restart according to the prompts. 7. Then come to this interface, we select the second xiaobaiPE. After selecting, the win11 system will be automatically installed for us. After the installation is completed, click to restart the computer immediately according to the prompts. 8. Finally, the system installation is completed, and we come to
 What you need to know when reinstalling the system from a USB flash drive: How to set up the BIOS correctly
May 06, 2024 pm 03:00 PM
What you need to know when reinstalling the system from a USB flash drive: How to set up the BIOS correctly
May 06, 2024 pm 03:00 PM
Reinstalling the system is a problem that many computer users often encounter. Whether it is due to system crash, poisoning or wanting to upgrade the system, reinstalling the system is a good choice. However, many people encounter various problems when reinstalling the system, such as not knowing how to set up the BIOS, not knowing how to choose a suitable installation disk, etc. Today, we will talk about some things you must know when reinstalling the system from a USB flash drive, and teach you how to set up the BIOS correctly and successfully complete the system reinstallation. Tool materials: System version: Windows1020H2 Brand model: Lenovo Xiaoxin Air14 Software version: Pocket machine One-click reinstallation of system software v1.0 1. Preparation 1. Prepare a U disk with a capacity of no less than 8GB, preferably USB3. 0, so the speed will be faster
 Does the newly assembled computer keyboard light not light up?
May 07, 2024 pm 04:40 PM
Does the newly assembled computer keyboard light not light up?
May 07, 2024 pm 04:40 PM
Does the newly assembled computer keyboard light not light up? The motherboard model should be UEFIbios. First find a keyboard with PS2 port, enter bios, turn off UEFI boot, and change to Legacy mode. If there is fast boot, turn off options like FastBoot, UEFI boot, turn on fast boot, and enter the system. USB interface detection may be turned off before, and USB devices can be used to assemble the computer after entering the system. The mouse and keyboard lights do not light up when the computer is turned on? If the keyboard light does not come on, there is a high possibility of memory failure, or it may be caused by static electricity on the motherboard or the motherboard is faulty. Use an eraser to wipe the gold finger of the memory graphics card, and remove and insert the memory several times. The problem remains. There are dual memory sticks and a single memory stick is used for testing. The problem persists. Re-plug the various cables inside and outside the chassis, and then unplug the connector on the motherboard.
 The impact of the AI wave is obvious. TrendForce has revised up its forecast for DRAM memory and NAND flash memory contract price increases this quarter.
May 07, 2024 pm 09:58 PM
The impact of the AI wave is obvious. TrendForce has revised up its forecast for DRAM memory and NAND flash memory contract price increases this quarter.
May 07, 2024 pm 09:58 PM
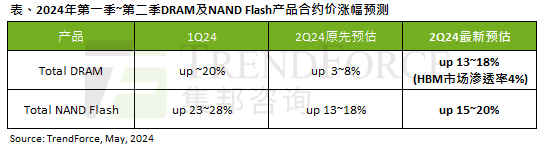
According to a TrendForce survey report, the AI wave has a significant impact on the DRAM memory and NAND flash memory markets. In this site’s news on May 7, TrendForce said in its latest research report today that the agency has increased the contract price increases for two types of storage products this quarter. Specifically, TrendForce originally estimated that the DRAM memory contract price in the second quarter of 2024 will increase by 3~8%, and now estimates it at 13~18%; in terms of NAND flash memory, the original estimate will increase by 13~18%, and the new estimate is 15%. ~20%, only eMMC/UFS has a lower increase of 10%. ▲Image source TrendForce TrendForce stated that the agency originally expected to continue to
 How to assemble an acer desktop computer?
May 08, 2024 pm 08:25 PM
How to assemble an acer desktop computer?
May 08, 2024 pm 08:25 PM
How to assemble an acer desktop computer? The assembly method of Acer desktop computer is as follows: open the case, install the power supply into the case, and tighten the screws. Install the CPU onto the motherboard, making sure the pins on the CPU are aligned with the slots on the motherboard, and tighten the screws on the CPU heat sink. Install the memory module onto the motherboard, making sure that the bumps on the memory module are aligned with the slots on the motherboard. Press down hard until you hear a "pop" sound to complete the installation. Install graphics cards, sound cards, network cards and other boards onto the motherboard, making sure the screws on the boards are tightened. Install storage devices such as hard drives and optical drives into the chassis, making sure the screws are tightened. Connect the motherboard to the chassis, including power cables, hard drive cables, optical drive cables, etc. Finally, close the chassis cover and tighten the screws to complete the assembly. exist
 How to fine-tune deepseek locally
Feb 19, 2025 pm 05:21 PM
How to fine-tune deepseek locally
Feb 19, 2025 pm 05:21 PM
Local fine-tuning of DeepSeek class models faces the challenge of insufficient computing resources and expertise. To address these challenges, the following strategies can be adopted: Model quantization: convert model parameters into low-precision integers, reducing memory footprint. Use smaller models: Select a pretrained model with smaller parameters for easier local fine-tuning. Data selection and preprocessing: Select high-quality data and perform appropriate preprocessing to avoid poor data quality affecting model effectiveness. Batch training: For large data sets, load data in batches for training to avoid memory overflow. Acceleration with GPU: Use independent graphics cards to accelerate the training process and shorten the training time.
