

Win10 computer keeps entering bios

php Editor Strawberry found that some users encountered a problem when using Win10 computers, that is, the computers kept entering the BIOS interface. This problem may cause users to be unable to start the system normally, causing inconvenience to work and life. What exactly causes this problem? How to solve? Let’s discuss it together below.

php Editor Strawberry found that some users encountered a problem when using Win10 computers, that is, the computers kept entering the BIOS interface. This problem may cause users to be unable to start the system normally, causing inconvenience to work and life. What exactly causes this problem? How to solve? Let’s discuss it together below.
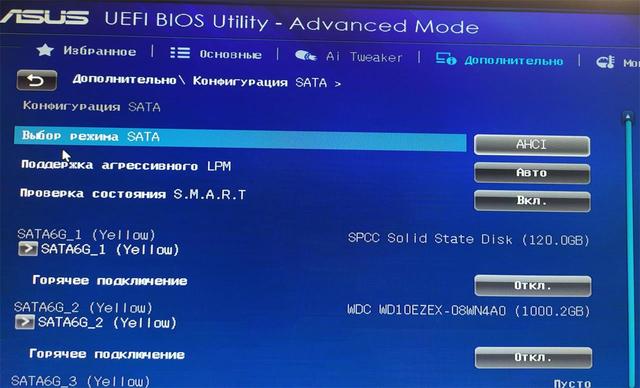
UEFI BIOS is the first piece of software in Windows 10 that controls how your hardware operates and provides the ability to access and configure computer accessory settings. Most users may not use these operations very often, but sometimes you need to know how to enter the BIOS. Whether it's a desktop, laptop, or tablet, here's how to enter the Windows 10 BIOS.
php Editor Strawberry found that some users encountered a problem when using Win10 computers, that is, the computers kept entering the BIOS interface. This problem may cause users to be unable to start the system normally, causing inconvenience to work and life. What exactly causes this problem? How to solve? Let’s discuss it together below.
php Editor Strawberry found that some users encountered a problem when using Win10 computers, that is, the computers kept entering the BIOS interface. This problem may cause users to be unable to start the system normally, causing inconvenience to work and life. What exactly causes this problem? How to solve? Let’s discuss it together below.
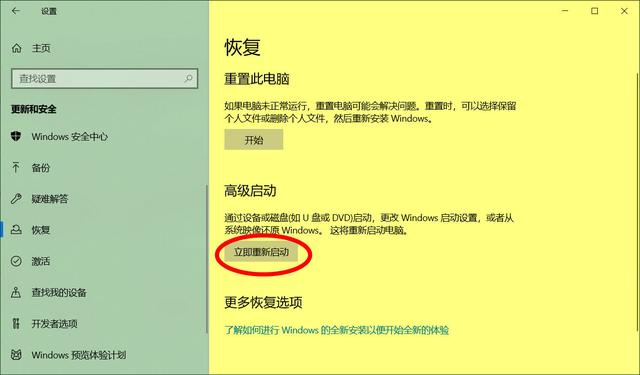
1. Enter the UEFI BIOS through the "Settings" application in Windows 10In Windows 10, you can access the BIOS through the "Settings" application.
On your computer, open "Settings", click "Update & Security" and find the "Recovery" option. In the "Advanced startup" section on the right, click the "Restart now" button. Make sure to save and close any files you are working on so you don't lose them. Then click the "Restart Now" button.
php Editor Strawberry found that some users encountered a problem when using Win10 computers, that is, the computers kept entering the BIOS interface. This problem may cause users to be unable to start the system normally, causing inconvenience to work and life. What exactly causes this problem? How to solve? Let’s discuss it together below.
When Windows 10 restarts, an advanced startup screen may be displayed instead of the standard login screen. You may not be able to use the mouse at this time. If this happens, use the arrow keys to navigate and press Enter to access the options you want.
Go to "Troubleshooting" > "Advanced Options" > "UEFI Firmware Settings".

php Editor Strawberry found that some users encountered a problem when using Win10 computers, that is, the computers kept entering the BIOS interface. This problem may cause users to be unable to start the system normally, causing inconvenience to work and life. What exactly causes this problem? How to solve? Let’s discuss it together below.
To change UEFI firmware settings, Windows 10 must be restarted, click the Restart button, the system will restart and load the BIOS.
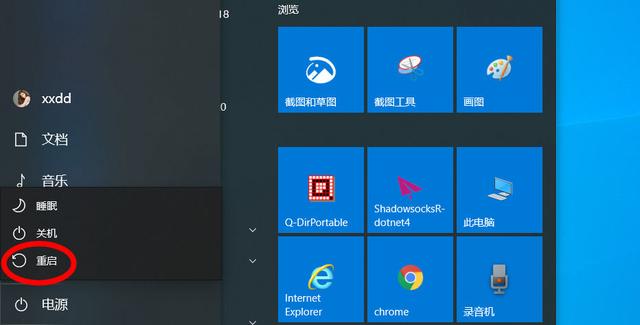
2. Use the Shift restart command to enter the UEFI BIOS in Windows 10If the above method is too complicated, or you want to access the BIOS without logging in to your Windows 10 account, you can use the shortcut to access it. Hold down the Shift key on your keyboard and click the Restart option from your computer’s power menu.
php Editor Strawberry found that some users encountered a problem when using Win10 computers, that is, the computers kept entering the BIOS interface. This problem may cause users to be unable to start the system normally, causing inconvenience to work and life. What exactly causes this problem? How to solve? Let’s discuss it together below.
After restarting, Windows 10 will display the blue advanced startup menu. Go to Troubleshooting > Advanced Options > UEFI Firmware Settings and press Restart, Windows 10 restarts again and takes you into the BIOS.
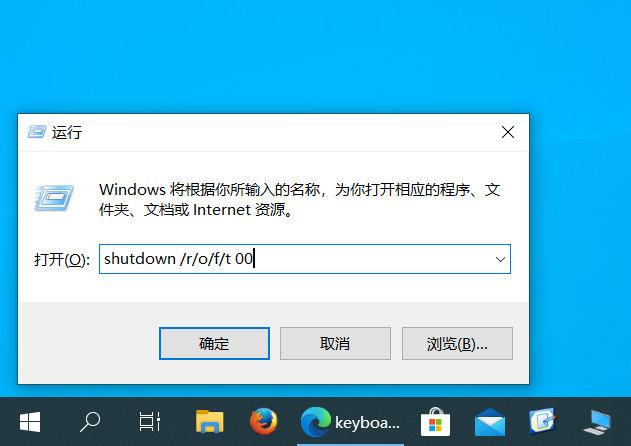
3. Access UEFI BIOS from the "Run" window in Windows 10Press the Windows R shortcut key to open the "Run" dialog box, and enter the following command in the input box:
shutdown /r/ o/f/t 00
and click the OK button.
php Editor Strawberry found that some users encountered a problem when using Win10 computers, that is, the computers kept entering the BIOS interface. This problem may cause users to be unable to start the system normally, causing inconvenience to work and life. What exactly causes this problem? How to solve? Let’s discuss it together below.
If the above command is too long to remember, enter shutdown.exe /r/o in the Run window.
This time, Windows 10 will display a notification letting you know that you are about to log out of your computer, please wait a moment or use the few seconds you gained before restarting to save any open work files.
After restarting, you will enter the blue advanced boot menu. Go to Troubleshooting > Advanced Options > UEFI Firmware Settings and press Restart. Windows 10 will load the UEFI BIOS after restarting again.
4. Access UEFI BIOS from the command prompt in Windows 10Click the search button in the taskbar, enter cmd, and then click to open the command prompt window.
Enter the following command:
shutdown /r/o/f/t 00
Then press the Enter key to restart the computer in the "Advanced" boot menu.
You can also enter the shutdown.exe /r/o command in the command prompt and press Enter.
Windows 10 displays a brief notification to let you know you are about to log out. Before your computer restarts, take a moment to close any unsaved files.
Windows10 restarts in the blue Advanced Boot Menu, go to Troubleshooting > Advanced Options > UEFI Firmware Settings and press Restart Computer to enter UEFI BIOS.
5. Quickly enter UEFI BIOS on Surface Pro or Surface BookIf you are using Surface Pro or Surface Book, there is an easy way to access UEFI BIOS.
First, make sure your Surface device is turned off. Look on its side to find the Volume Up ( ) button and hold it.
Then, press and release the power button and keep pressing the volume up ( ) button until you see the Microsoft or Surface logo on the screen.
Release the button and the UEFI BIOS now boots on the Surface device.
6. Enter the BIOS using shortcuts on the POST screenOn a desktop computer, when the computer starts, a brief message may appear on the POST screen with instructions on how to access the BIOS, depending on the motherboard's manufacturer and model, this message varies, follow the instructions displayed on the POST screen.
The above is the detailed content of Win10 computer keeps entering bios. For more information, please follow other related articles on the PHP Chinese website!

Hot AI Tools

Undresser.AI Undress
AI-powered app for creating realistic nude photos

AI Clothes Remover
Online AI tool for removing clothes from photos.

Undress AI Tool
Undress images for free

Clothoff.io
AI clothes remover

Video Face Swap
Swap faces in any video effortlessly with our completely free AI face swap tool!

Hot Article
Hot Tools

Notepad++7.3.1
Easy-to-use and free code editor

SublimeText3 Chinese version
Chinese version, very easy to use

Zend Studio 13.0.1
Powerful PHP integrated development environment

Dreamweaver CS6
Visual web development tools

SublimeText3 Mac version
God-level code editing software (SublimeText3)
Hot Topics


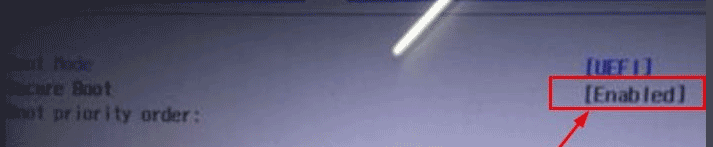
 Ventoy secure boot settingsSecure Boot
Jun 18, 2024 pm 09:00 PM
Ventoy secure boot settingsSecure Boot
Jun 18, 2024 pm 09:00 PM
Ventoy is a USB boot tool that can directly boot ISO/WIM/IMG/VHD(x)/EFI and other types of files in the USB flash drive. It is very easy to use. Laptops have secure boot turned on by default. If they are not turned off or cannot be turned off, they cannot be booted from a USB device. Ventoy also supports secure boot. The principle is to inject a GRUB installation certificate into the current computer. As long as your computer After being injected once, any USB disk PE booted based on grub can pass. The official description of Ventoy is a GIF image. The playback speed is too fast and you may not be able to remember it. The editor has divided the GIF image to make it easier to understand. Ventoy secure boot has EnrollKey and Enro
 Acer laptop disables secure boot and removes password in Bios
Jun 19, 2024 am 06:49 AM
Acer laptop disables secure boot and removes password in Bios
Jun 19, 2024 am 06:49 AM
I repaired an Acer laptop and had to turn off secure boot when entering PE. I recorded how to turn off secure boot and remove the password from Bios. Turn on the computer and when the screen is not on, keep pressing the F2 key to enter the BIOS. On Acer laptops, turn off Secure Boot and press the arrow keys to switch to Boot. If SecureBoot is gray and unclickable, switch to the Security page, select SetSupervisorPassword and press Enter to set the password. Then switch to Boot, SecureBoot can be selected as Disabled, and press F10 to save. Modify and clear the BIOS password on your Acer notebook. Switch to the Security menu and select SetSupervisorPasswo.
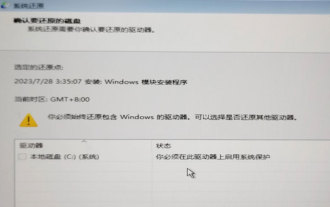 System Restore prompts that you must enable system protection on this drive
Jun 19, 2024 pm 12:23 PM
System Restore prompts that you must enable system protection on this drive
Jun 19, 2024 pm 12:23 PM
The computer has a restore point, and when the system is restored, it prompts "You must enable system protection on this drive." This usually means that the system protection function is not turned on. System protection is a feature provided by the Windows operating system that can create system restore points to back up system files and settings. That way, if something goes wrong, you can revert to a previous state. When the system fails and you cannot enter the desktop to start it, you can only try the following method: Troubleshooting-Advanced Options-Command Prompt Command 1 netstartvssrstrui.exe/offline:C:\windows=active Command 2 cd%windir%\system32 \configrenSYSTEMsy
 What should I do if win10 does not switch users? Win10 login interface does not have the option to switch users. Solution
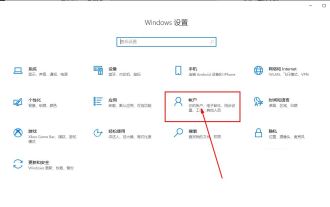
Jun 25, 2024 pm 05:21 PM
What should I do if win10 does not switch users? Win10 login interface does not have the option to switch users. Solution
Jun 25, 2024 pm 05:21 PM
A problem that Windows 10 users may encounter is that they cannot find the switch user option on the login interface. So what should I do if there is no switch user option on the win10 login interface? Let this site give users a detailed explanation of the problem of not switching user options in the win10 login interface. Detailed solution to the problem of switching user options on the Win10 login interface: Check user account settings: First, make sure you have multiple user accounts on your computer and that these accounts are enabled. You can check and enable the account by following these steps: a. Press Win+I keys to open Settings and select "Accounts". b. Select "Family & Others" or &ld in the left navigation bar
 How to permanently turn off real-time protection in win10? How to disable real-time protection function in win10 computer 0
Jun 05, 2024 pm 09:46 PM
How to permanently turn off real-time protection in win10? How to disable real-time protection function in win10 computer 0
Jun 05, 2024 pm 09:46 PM
Although the comprehensive anti-virus software that comes with Windows 10 system can continuously protect the security of your personal computer, sometimes it may also affect certain downloaded files. For some users, it may be more appropriate to temporarily turn off the real-time protection function. But many users don’t know how to permanently turn off the real-time protection feature on win10 system. 1. First, press the "Win+R" keys to open the run window, enter the "gpedit.msc" command to open the local Group Policy Editor interface; 2. Then, in the opened interface, click "Computer Configuration/Administrative Templates/ Windows Components/MicrosoftDef
 How to restore the default wallpaper in win10? One trick to quickly restore the default wallpaper in Windows 10 system
Jun 02, 2024 pm 02:07 PM
How to restore the default wallpaper in win10? One trick to quickly restore the default wallpaper in Windows 10 system
Jun 02, 2024 pm 02:07 PM
In Windows 10 system, if you want to return to the system default wallpaper, you can follow the following steps: 1. Right-click a blank space on the desktop and select Personalize in the pop-up menu. 2. This will open the Personalization window in Settings. In the left menu, click Background. 3. Under the "Background" settings, find and click the drop-down menu next to "Choosepicture", and then select Windows Default (Windows Default) or directly select a picture that looks like the default wallpaper in the picture preview below ( if there are multiple options). 4. If your system has multiple versions
 The system has posted in safe mode ASUS motherboard
Jun 19, 2024 am 07:35 AM
The system has posted in safe mode ASUS motherboard
Jun 19, 2024 am 07:35 AM
After the computer is turned on, it prompts The system has posted in safe mode. You can set it in the BIOS to ignore the F1 error. Although it does not prompt, it directly enters the BIOS when it is turned on. Sometimes F1 is useless every time it is turned on. Then you need to restart the BIOS, and then exit the BIOS to enter the system. . thesystemhaspostedinsafemode=The system is in safe mode. This problem is relatively common on ASUS motherboards. As long as you turn off the XMP of the memory and adjust the memory frequency back to normal, you can boot normally without the thesystemhaspostedinsafemode error. Updating the latest motherboard BIOS should be OK.
 Windows cannot start the Windows Audio service Error 0x80070005
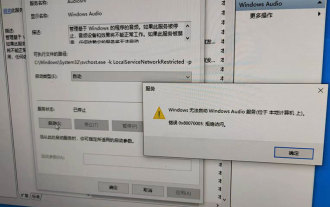
Jun 19, 2024 pm 01:08 PM
Windows cannot start the Windows Audio service Error 0x80070005
Jun 19, 2024 pm 01:08 PM
The guy's computer appears: Windows cannot start the WindowsAudio service (located on the local computer). Error 0x8007005: Access denied. This situation is usually caused by user permissions. You can try the following methods to fix it. Method 1: Modify the registry to add permissions through batch processing, create a new text document on the desktop, save it as .bat, and right-click the administrator to go far. Echo==========================EchoProcessingRegistryPermission.Pleasewait...Echo================== ========subinacl/subkey
