

How to connect your computer to a wireless network

Most of the friends who are new to computers don’t know how to connect to computer wifi, but you don’t have to worry. The following is a computer wifi connection method for you all. Come and take a look and learn it.
How to connect to computer wifi:
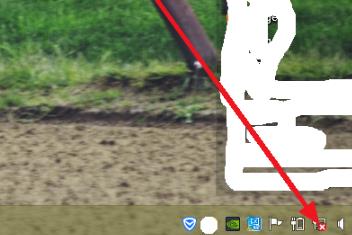
1. Click the network icon in the lower right corner and open the "Network and Sharing Center".
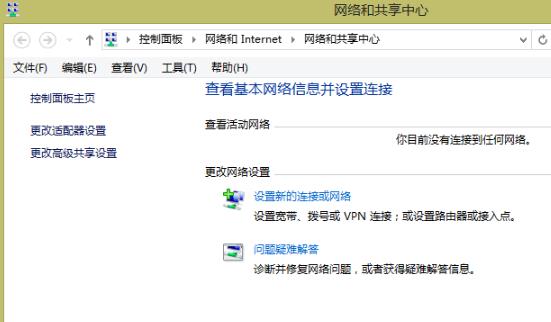
2. After entering, you can see the relevant settings.
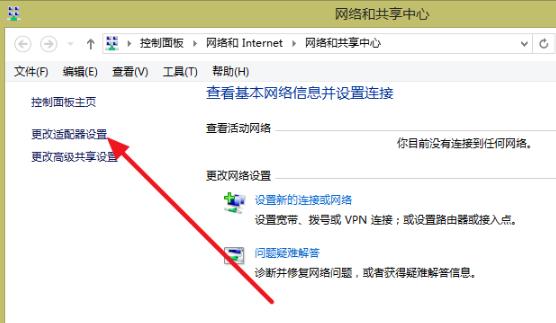
3. Click "Change Adapter Settings".
4. Then right-click "Ethernet" and click "Disable".
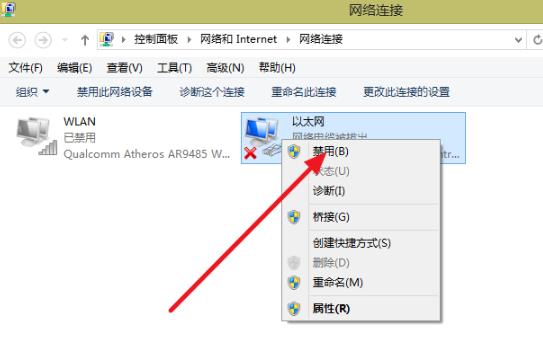
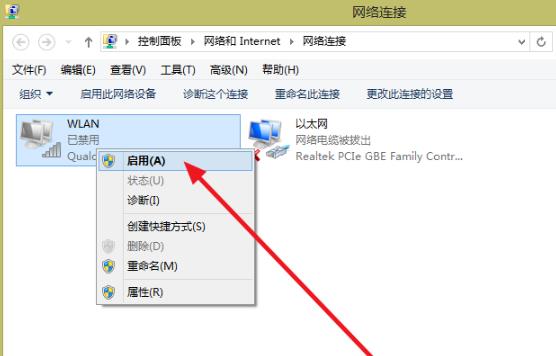
5. Right-click your WLAN and click "Enable" to complete the settings.
6. Finally find your wifi and connect.

The above is the detailed content of How to connect your computer to a wireless network. For more information, please follow other related articles on the PHP Chinese website!

Hot AI Tools

Undresser.AI Undress
AI-powered app for creating realistic nude photos

AI Clothes Remover
Online AI tool for removing clothes from photos.

Undress AI Tool
Undress images for free

Clothoff.io
AI clothes remover

Video Face Swap
Swap faces in any video effortlessly with our completely free AI face swap tool!

Hot Article
Hot Tools

Notepad++7.3.1
Easy-to-use and free code editor

SublimeText3 Chinese version
Chinese version, very easy to use

Zend Studio 13.0.1
Powerful PHP integrated development environment

Dreamweaver CS6
Visual web development tools

SublimeText3 Mac version
God-level code editing software (SublimeText3)
Hot Topics


 How to Troubleshoot WiFi Issues in Win11 Network and Internet Settings
Dec 22, 2023 pm 12:33 PM
How to Troubleshoot WiFi Issues in Win11 Network and Internet Settings
Dec 22, 2023 pm 12:33 PM
In the previous system, we could find and connect to the wifi network in the network and internet settings, but after updating the system, we found that there was no wifi in the win11 network and internet settings. This may be due to a device or driver problem. There is no wifi in win11 network and internet settings: 1. Device 1. First, make sure you have a wireless network card. 2. Laptops basically come with it, but many desktop computers don’t. 3. We can right-click "This Computer" and open "Management" 4. Then enter "Device Manager" on the left 5. Then right-click "Network Adapter" and click "Scan for hardware changes" 6. After the scan is completed, expand the network adapter , check if there is a "WLAN" setting below.
 What should I do if my wifi shows no IP allocation?
Aug 30, 2023 am 11:58 AM
What should I do if my wifi shows no IP allocation?
Aug 30, 2023 am 11:58 AM
Solution to wifi showing no IP allocation: 1. Restart the device and router, turn off the Wi-Fi connection on the device, turn off the device, turn off the router, wait a few minutes, then reopen the router to connect to wifi; 2. Check the router settings and restart DHCP, make sure the DHCP function is enabled; 3. Reset network settings, which will delete all saved WiFi networks and passwords. Please make sure they are backed up before performing this operation; 4. Update the router firmware, log in to the router management interface, and find the firmware Update options and follow the prompts.
 How to reset win7 network settings
Dec 26, 2023 pm 06:51 PM
How to reset win7 network settings
Dec 26, 2023 pm 06:51 PM
The win7 system is a very excellent high-performance system. Recently, many friends of the win7 system are looking for how to initialize the network settings in win7. Today, the editor will bring you the details of win7 computer network initialization. Let’s take a look at the tutorial. Detailed tutorial on how to initialize network settings in win7: Graphical steps: 1. Click the "Start" menu, find and open the "Control Panel", and then click "Network and Sharing Center". 2. Then find and click "Change Adapter Device". 3. Next, in the window that opens, right-click "Local Area Connection" and then click "Properties". 4. After opening it, find "Internet Protocol Version (TCP/IPv4)" and double
 Why can't my phone connect to wifi?
Aug 14, 2023 pm 02:43 PM
Why can't my phone connect to wifi?
Aug 14, 2023 pm 02:43 PM
The reason why the mobile phone cannot connect to the wifi is due to incorrect password input, long distance to the signal, router failure, Wi-Fi switch off, IP address conflict, mobile phone system problems, Wi-Fi password saving problems and router setting problems. The solution: 1. Enter the password incorrectly, re-enter the correct password and try to connect; 2. The signal is far away, try to get closer to the router, and then try to connect again; 3. The router is faulty, try to connect other devices to the same router to see if There is a connection problem; 4. The Wi-Fi switch is turned off, etc.
 Why can't I access the Internet even though I'm connected to wifi?
Aug 25, 2023 am 11:26 AM
Why can't I access the Internet even though I'm connected to wifi?
Aug 25, 2023 am 11:26 AM
Reasons for being unable to access the Internet when connected to wifi: 1. The broadband is in arrears or has expired; 2. The network cable is loose; 3. The device has been used for a long time; 4. There is a problem with the WiFi itself; 5. There is a problem with the router; 6. The router has turned on the timer Dial up; 7. The modem power is turned off; 8. The broadband DNS server cannot provide domain name resolution services for some reason; 9. The IP address obtained by the mobile phone is in an IP segment that prohibits access to the Internet.
 Finding the MAC address location of Win11
Jan 11, 2024 pm 01:36 PM
Finding the MAC address location of Win11
Jan 11, 2024 pm 01:36 PM
If we want to check the mac address of win11, we need to find Ethernet in the internet option in the settings, and then we can scroll down to check the mac address of this computer, which is very convenient. Where is the win11mac address: 1. First, we find the start button, then right-click and select "Settings". 2. Then find "Network and Internet" on the left. 3. Then click to enter "Ethernet". 4. Finally, you can check the address. Extended reading: What to do if you can’t log in
 How to set up and connect the network on Kirin OS?
Aug 06, 2023 pm 03:06 PM
How to set up and connect the network on Kirin OS?
Aug 06, 2023 pm 03:06 PM
How to set up and connect the network on Kirin OS? Abstract: Kirin operating system is a domestic operating system based on Linux and is widely used in Chinese government agencies, enterprises and institutions. Network connection is one of the basic functions of Kirin operating system. This article will introduce how to set up and connect the network in Kirin operating system, with code examples. 1. Network settings In Kirin operating system, network settings can be performed through the graphical interface or the command line. The following is a detailed introduction in command line mode. Open the terminal in Kirin OS, we can
 Guide to optimizing Win7 network settings
Dec 28, 2023 pm 12:09 PM
Guide to optimizing Win7 network settings
Dec 28, 2023 pm 12:09 PM
When we use win7 system, we may encounter poor network conditions and insufficient network speed. At this time, we can alleviate this problem by optimizing network settings. You only need to make relevant edits in the registry. Let’s take a look below. Win7 network settings optimization tutorial 1. First, we use "win+r" to open the run, enter "regedit" and press Enter to confirm. 2. Go to this path location: "HKEY_LOCAL_MACHINE\SYSTEM\CurrentControlSet\services\Tcpip\Parameters" and double-click to open the "DefaultTTL" file on the right. 3. Change its value to "80
