

How to take a screenshot or screen record on Mac

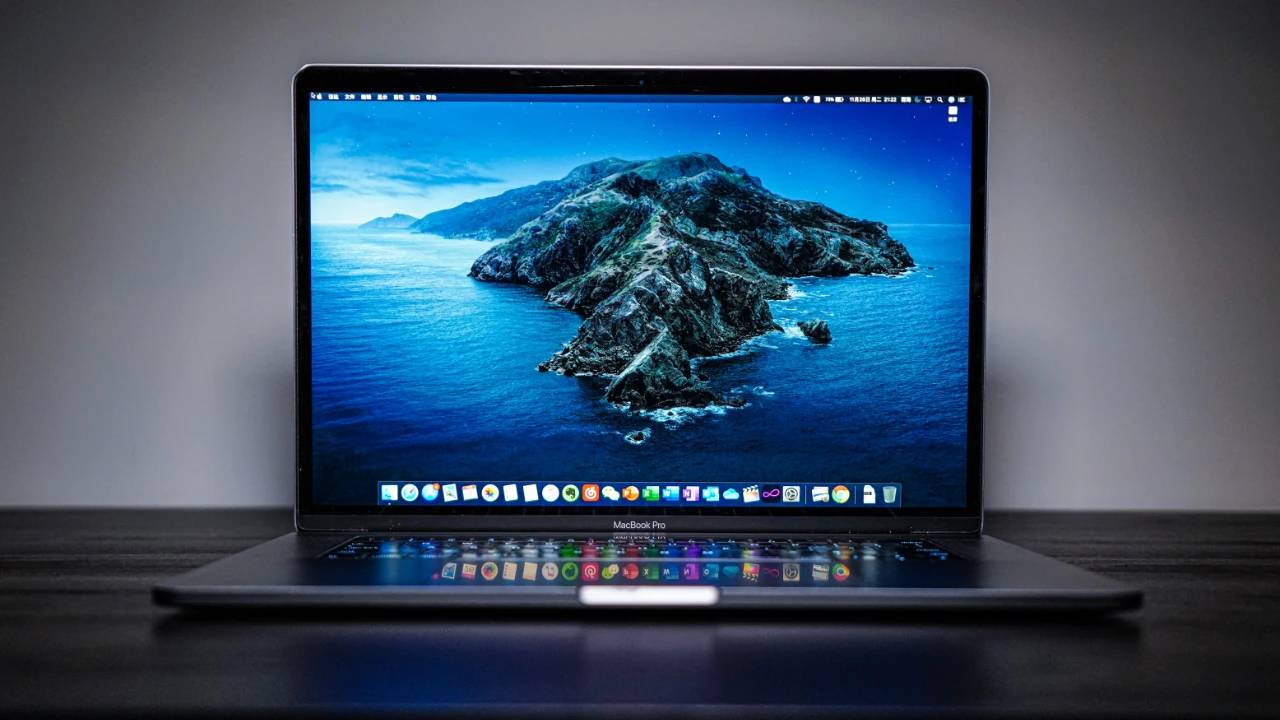
#In the digital age, screenshots and screen recordings have become essential tools for demonstrating tasks, solving problems, and preserving important moments. Whether you're a student sharing notes, a professional providing instructions, or a creative capturing your screen for editing purposes, it's important to know how to effectively capture your Mac's display.
Screenshot
Apple's built-in screenshot tool provides a simple and versatile way to capture your Mac's screen. It offers various options to suit your needs, from capturing the entire screen to selecting a specific area or window.
1. Capture the entire screen
Pressing the Shift Command 3 shortcut key at the same time will capture the entire contents of your Mac screen. The captured screenshot will be saved to the desktop as a PNG file with the capture date and time.
2. Capture a specific area
To capture only a portion of the screen, hold down the Shift Command 4 shortcut key. Your cursor will change to a crosshair pointer. Click and drag the crosshair to select the desired area and the screenshot will be captured and automatically saved to your desktop.
3. Capture Window
To capture a specific window without the surrounding desktop, hold down the Alt Shift Command 3 shortcut key. The window you are currently focused on will be captured and saved to your desktop.
4. Edit Screenshot
After taking the screenshot, it will open in the preview app for editing. You can use the preview's various tools to crop, resize, add annotations, and even convert the screenshot to a different format.
Screen Recording
Recording your Mac screen is especially useful for demonstrating workflows, capturing presentations, or creating tutorials. Apple's built-in screen recording tool provides a simple and effective way to capture screen activity.
1. Start screen recording
Press the Shift Command 5 shortcut to open the screenshot tool. Click the Record button and a red recording indicator will appear. You can use the crosshair pointer to control the recording area, similar to taking a screenshot.
2. Customize recording options
Before starting recording, please click the "Options" button to customize the recording settings. You can adjust the recording quality, enable audio capture from the microphone or system audio, and set a start delay in case you need it.
3. Stop screen recording
After capturing the required footage, click the red recording indicator or press the Escape key to stop recording. The screen recording will be saved to your desktop as a QuickTime movie file.
Other Tips
Screenshot Delay: For particularly complex tasks or presentations, you can set a start delay to prepare before recording begins.
Full screen recording: To capture the entire application window, press the Option key while recording.
Capture a selection: To capture a specific area in the window, frame the desired selection and press the space bar while recording.
Capture the mouse pointer: To include the mouse pointer in the recording, hold down the Command key while recording.
Getting proficient in using screenshots and screen recordings on your Mac is more than just a technical skill; it's an art that can greatly improve your efficiency and ability to communicate effectively. In a fast-paced digital world, where visuals often speak louder than words, these tools have become indispensable. As a student, they can change the way you compile and share educational materials, making learning courses more interactive and collaborative. For professionals, the ability to quickly capture and disseminate information in these ways can streamline workflows and enhance presentations, allowing complex ideas to be communicated more clearly. Creative people also find great value in these tools, as they provide a versatile medium for capturing artistic processes or presenting portfolios in dynamic formats.
Mastering screenshots and screen recordings has utility beyond basic functionality. It involves developing a keen eye for what to capture and how to present it. This involves understanding the nuances of timing, framing, and highlighting key information. By delving into the step-by-step instructions provided and trying out a variety of tips and tricks, you can refine your technique and develop a more nuanced approach. This will allow you to capture your screen in a way that not only records information, but also conveys it in an engaging and informative way.
In summary, by mastering the art of screenshots and screen recording on Mac, you can equip yourself with a versatile set of skills to improve your productivity and communication skills. These features are more than functional; they are transformative, allowing you to communicate your thoughts, ideas, and experiences in a more impactful way. As you explore and use these tools, you'll find yourself well-prepared to capture and share the contents of your Mac display for a variety of purposes, from educational and professional tasks to creative work.
The above is the detailed content of How to take a screenshot or screen record on Mac. For more information, please follow other related articles on the PHP Chinese website!

Hot AI Tools

Undresser.AI Undress
AI-powered app for creating realistic nude photos

AI Clothes Remover
Online AI tool for removing clothes from photos.

Undress AI Tool
Undress images for free

Clothoff.io
AI clothes remover

Video Face Swap
Swap faces in any video effortlessly with our completely free AI face swap tool!

Hot Article
Hot Tools

Notepad++7.3.1
Easy-to-use and free code editor

SublimeText3 Chinese version
Chinese version, very easy to use

Zend Studio 13.0.1
Powerful PHP integrated development environment

Dreamweaver CS6
Visual web development tools

SublimeText3 Mac version
God-level code editing software (SublimeText3)
Hot Topics
 1666
1666
 14
1425
52
1327
25
1273
29
1252
24
14
1425
52
1327
25
1273
29
1252
24

 How to record streaming audio on Ubuntu Linux distribution
Feb 25, 2024 pm 03:46 PM
How to record streaming audio on Ubuntu Linux distribution
Feb 25, 2024 pm 03:46 PM
How to record audio in Ubuntu and other Linux distributions? If you want to record a voiceover through your computer's microphone, you can use GNOME Voice Recorder or Audacity. Using GNOME Recorder is simple and easy to understand, but its functions are relatively limited. As for Audacity, it may feel a bit difficult at first contact, but it has many advanced recording functions. However, we won't go into this in depth in this tutorial. GNOME Voice Recorder can be used with a microphone. Additionally, there is a tool called Voice Recorder that not only uses the microphone input but also records streaming music. In this tutorial, we will show you the following steps on how to record sound with GNOME Voice Recorder, using AudioR
 Teach you how to turn off the automatic screen lock function in win10
Jan 08, 2024 am 11:49 AM
Teach you how to turn off the automatic screen lock function in win10
Jan 08, 2024 am 11:49 AM
Many friends need to turn off the screen to protect the screen when they leave the computer, but they don’t want to lock the screen because they turn off the screen. When they come back, they have to enter a password to enter the system. In fact, we can complete this step through settings. Let’s take a look at it together. Bar. Tutorial on turning off the screen without locking the screen in win10 1. First enter settings and select "Personalization" 2. Click "Lock Screen" on the left 3. Select "Screen Saver Settings" below 4. Uncheck "Show login on recovery" Screen" 5. Then click "Change Power Settings" 6. Select the icon settings on the left. 7. Set a time to turn off the monitor, and then change the sleep status to "Never" 8. Then return to the power settings just now and select the sleep time below. 9. Use the same as above
 iPhone screenshots not working: How to fix it
May 03, 2024 pm 09:16 PM
iPhone screenshots not working: How to fix it
May 03, 2024 pm 09:16 PM
Screenshot feature not working on your iPhone? Taking a screenshot is very easy as you just need to hold down the Volume Up button and the Power button at the same time to grab your phone screen. However, there are other ways to capture frames on the device. Fix 1 – Using Assistive Touch Take a screenshot using the Assistive Touch feature. Step 1 – Go to your phone settings. Step 2 – Next, tap to open Accessibility settings. Step 3 – Open Touch settings. Step 4 – Next, open the Assistive Touch settings. Step 5 – Turn on Assistive Touch on your phone. Step 6 – Open “Customize Top Menu” to access it. Step 7 – Now you just need to link any of these functions to your screen capture. So click on the first
 Does miniled screen hurt eyes?
Feb 07, 2024 pm 03:48 PM
Does miniled screen hurt eyes?
Feb 07, 2024 pm 03:48 PM
What many users are most concerned about is whether the miniLED screen will hurt the eyes. In fact, although the brightness of this screen can reach extremely high, it will not hurt the eyes and can still be used normally. Does the miniled screen hurt your eyes? Answer: It does not hurt your eyes. Although the brightness of the miniLED screen will be higher, it will not continue to maintain this brightness during daily use. It will only be displayed when the brightness needs to be increased, so it will not always maintain high brightness and hurt the eyes. This peak brightness is also for better Good presentation and expression. MiniLED screen introduction 1. MiniLED backlight display technology uses backlight, so the biggest difference from LCD is the backlight layer 2. Compared with LCD screen, the performance of miniLED will be higher.
 Don't think your phone screen is too big! The 3-inch really small screen mobile phone is here. I'm afraid you won't be able to hold it.
Feb 05, 2024 am 09:10 AM
Don't think your phone screen is too big! The 3-inch really small screen mobile phone is here. I'm afraid you won't be able to hold it.
Feb 05, 2024 am 09:10 AM
Now when we talk about "small screen mobile phones", what do you think of? Is it the iPhone 12/13 mini released by Apple two years ago? Xiaomi 13/14, known as the small-screen flagship? Or is it the medium-sized version of Samsung and Google’s S series and Pixel series? In my opinion, these current mobile phones, which are called small screens by everyone, are not actually very small in size. For example, if you put the iPhone 13 mini and the early iPhone 3G together, it will be clear at a glance which one is the "big screen phone". You must know that when the iPhone 3G was launched, everyone was praising its "3.5-inch large screen" and did not think it was a "small screen" at all.
 Apple reveals iPhone 16 may have a larger display
Mar 22, 2024 pm 06:41 PM
Apple reveals iPhone 16 may have a larger display
Mar 22, 2024 pm 06:41 PM
Although it will be a long time before the release of the iPhone 16 series, there have been constant revelations about the appearance and configuration. According to Korean media SisaJournal, Apple plans to introduce new ultra-narrow bezel technology in the upcoming iPhone 16 series of mobile phones. The technology involves rolling internal copper wires into a more compact structure to reduce the bezel width of the phone's bottom display, allowing for a larger display. This innovative move aims to enhance the user experience, allowing users to enjoy a wider field of view and a more immersive entertainment experience. Apple has always been committed to continuously improving its product design and technology to bring more advanced functions and performance to users. The launch of the iPhone 16 series of mobile phones will further consolidate Apple’s leadership in smart phones. According to @SnapaDigital, Apple’s new
 6000 mAh silicon negative battery! Xiaomi 15Pro upgrade leaked again
Jul 24, 2024 pm 12:45 PM
6000 mAh silicon negative battery! Xiaomi 15Pro upgrade leaked again
Jul 24, 2024 pm 12:45 PM
According to news on July 23, blogger Digital Chat Station broke the news that the battery capacity of Xiaomi 15 Pro has been increased to 6000mAh and supports 90W wired flash charging. This will be the Pro model with the largest battery in Xiaomi’s digital series. Digital Chat Station previously revealed that the battery of Xiaomi 15Pro has ultra-high energy density and the silicon content is much higher than that of competing products. After silicon-based batteries are tested on a large scale in 2023, second-generation silicon anode batteries have been identified as the future development direction of the industry. This year will usher in the peak of direct competition. 1. The theoretical gram capacity of silicon can reach 4200mAh/g, which is more than 10 times the gram capacity of graphite (the theoretical gram capacity of graphite is 372mAh/g). For the negative electrode, the capacity when the lithium ion insertion amount reaches the maximum is the theoretical gram capacity, which means that under the same weight
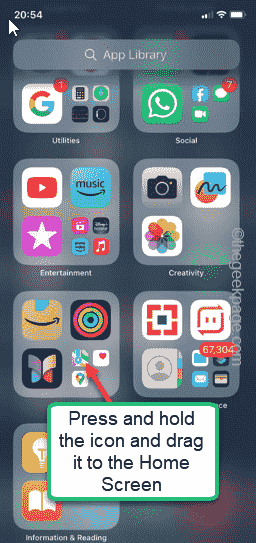 How to Undo Delete from Home Screen in iPhone
Apr 17, 2024 pm 07:37 PM
How to Undo Delete from Home Screen in iPhone
Apr 17, 2024 pm 07:37 PM
Deleted something important from your home screen and trying to get it back? You can put app icons back on the screen in a variety of ways. We have discussed all the methods you can follow and put the app icon back on the home screen. How to Undo Remove from Home Screen in iPhone As we mentioned before, there are several ways to restore this change on iPhone. Method 1 – Replace App Icon in App Library You can place an app icon on your home screen directly from the App Library. Step 1 – Swipe sideways to find all apps in the app library. Step 2 – Find the app icon you deleted earlier. Step 3 – Simply drag the app icon from the main library to the correct location on the home screen. This is the application diagram