

MySql常用命令--优化参数以及日常管理_MySQL

显示插入查询的优化参数:
<code class="hljs asciidoc">show variables like "concurrent_insert";
+-------------------+-------+
| Variable_name     | Value |
+-------------------+-------+
| concurrent_insert | AUTO  |
+-------------------+-------+

set GLOBAL concurrent_insert=2;</code>
插入数据时MySQL会对插入的记录进行唯一性校验<br />
这种校验也会降低插入记录的速度。可以在插入记录之前禁用唯一性检查。等到记录插入完毕后再开启。禁用唯一性检查的语句如下:
<code class="hljs asciidoc"><code class="hljs sql">SET UNIQUE_CHECKS=0;</code></code>
<code class="hljs sql">重新开启唯一性检查的语句如下:
<code class="hljs asciidoc"><code class="hljs sql"><code class="hljs sql">SET UNIQUE_CHECKS=1;</code></code></code>
<code class="hljs asciidoc"><code class="hljs sql"><code class="hljs sql"><code class="hljs asciidoc">mysql> show variables like "UNIQUE_CHECKS";
+---------------+-------+
| Variable_name | Value |
+---------------+-------+
| unique_checks | ON    |
+---------------+-------+</code></code></code></code>
<code class="hljs sql"><code class="hljs sql"><code class="hljs asciidoc">mysql设置最大连接数量
<code class="hljs asciidoc"><code class="hljs sql"><code class="hljs sql"><code class="hljs asciidoc"><code class="hljs lasso">mysql> set GLOBAL max_connections = 1000;
Query OK, 0 rows affected (0.00 sec)</code></code></code></code></code>
<code class="hljs sql"><code class="hljs sql"><code class="hljs asciidoc"><code class="hljs lasso">之前配置了mysql的主从备份<br />
结果发现日志很多,占据了很多的磁盘空间,需要进行额外的磁盘管理<br />
进入mysql的存储区域,查看一下数据部分的空间大小
<code class="hljs asciidoc"><code class="hljs sql"><code class="hljs sql"><code class="hljs asciidoc"><code class="hljs lasso"><code class="hljs lasso">/mnt/ssd/data$ ls
auto.cnf          mysql-bin.000139  mysql-bin.000149  mysql-bin.000159  mysql-bin.000169  mysql-bin.000179  mysql-bin.000189  mysql-bin.000199  mysql-bin.000209  mysql-bin.index
db_user_msg       mysql-bin.000140  mysql-bin.000150  mysql-bin.000160  mysql-bin.000170  mysql-bin.000180  mysql-bin.000190  mysql-bin.000200  mysql-bin.000210  performance_schema
ibdata1           mysql-bin.000141  mysql-bin.000151  mysql-bin.000161  mysql-bin.000171  mysql-bin.000181  mysql-bin.000191  mysql-bin.000201  mysql-bin.000211  StockData
ib_logfile0       mysql-bin.000142  mysql-bin.000152  mysql-bin.000162  mysql-bin.000172  mysql-bin.000182  mysql-bin.000192  mysql-bin.000202  mysql-bin.000212
ib_logfile1       mysql-bin.000143  mysql-bin.000153  mysql-bin.000163  mysql-bin.000173  mysql-bin.000183  mysql-bin.000193  mysql-bin.000203  mysql-bin.000213
mysql             mysql-bin.000144  mysql-bin.000154  mysql-bin.000164  mysql-bin.000174  mysql-bin.000184  mysql-bin.000194  mysql-bin.000204  mysql-bin.000214
mysql-bin.000135  mysql-bin.000145  mysql-bin.000155  mysql-bin.000165  mysql-bin.000175  mysql-bin.000185  mysql-bin.000195  mysql-bin.000205  mysql-bin.000215
mysql-bin.000136  mysql-bin.000146  mysql-bin.000156  mysql-bin.000166  mysql-bin.000176  mysql-bin.000186  mysql-bin.000196  mysql-bin.000206  mysql-bin.000216
mysql-bin.000137  mysql-bin.000147  mysql-bin.000157  mysql-bin.000167  mysql-bin.000177  mysql-bin.000187  mysql-bin.000197  mysql-bin.000207  mysql-bin.000217
mysql-bin.000138  mysql-bin.000148  mysql-bin.000158  mysql-bin.000168  mysql-bin.000178  mysql-bin.000188  mysql-bin.000198  mysql-bin.000208  mysql-bin.000218</code></code></code></code></code></code>
<code class="hljs sql"><code class="hljs sql"><code class="hljs asciidoc"><code class="hljs lasso"><code class="hljs lasso">显示mysql中数据部分和基本的配置部分所占用的磁盘空间
<code class="hljs asciidoc"><code class="hljs sql"><code class="hljs sql"><code class="hljs asciidoc"><code class="hljs lasso"><code class="hljs lasso"><code class="hljs lasso">/mnt/ssd/data$ sudo du -h -d 1
163G    ./StockData
636K    ./performance_schema
1.7M    ./mysql
56K     ./db_user_msg
242G    .</code></code></code></code></code></code></code>
<code class="hljs sql"><code class="hljs sql"><code class="hljs asciidoc"><code class="hljs lasso"><code class="hljs lasso"><code class="hljs lasso">结果发现这其中很多的空间都被mysql-bin*文件所占用了
<code class="hljs asciidoc"><code class="hljs sql"><code class="hljs sql"><code class="hljs asciidoc"><code class="hljs lasso"><code class="hljs lasso"><code class="hljs lasso"><code class="hljs lasso">/mnt/ssd/data$ sudo du -c -h mysql-bin*
1.1G    mysql-bin.000135
......
491M    mysql-bin.000218
4.0K    mysql-bin.index
80G     total
结果显示mysql-bin占用了大约80G的磁盘空间</code></code></code></code></code></code></code></code>
<code class="hljs sql"><code class="hljs sql"><code class="hljs asciidoc"><code class="hljs lasso"><code class="hljs lasso"><code class="hljs lasso"><code class="hljs lasso">现在我们要将这些日志清理掉
<code class="hljs asciidoc"><code class="hljs sql"><code class="hljs sql"><code class="hljs asciidoc"><code class="hljs lasso"><code class="hljs lasso"><code class="hljs lasso"><code class="hljs lasso"><code class="hljs asciidoc">mysql> show master logs;
+------------------+------------+
| Log_name         | File_size  |
+------------------+------------+
| mysql-bin.000135 | 1073742116 |
| mysql-bin.000136 | 1073742153 |
......
| mysql-bin.000216 | 1073747783 |
| mysql-bin.000217 | 1073742128 |
| mysql-bin.000218 |  514734902 |
+------------------+------------+
84 rows in set (0.01 sec)
这应该是主从备份一周以内的日志文件

查看一下目前正在起作用的日志文件是哪一个
mysql> show master status;
+------------------+-----------+--------------+------------------+-------------------+
| File             | Position  | Binlog_Do_DB | Binlog_Ignore_DB | Executed_Gtid_Set |
+------------------+-----------+--------------+------------------+-------------------+
| mysql-bin.000218 | 514734902 |              |                  |                   |
+------------------+-----------+--------------+------------------+-------------------+
1 row in set (0.00 sec)</code></code></code></code></code></code></code></code></code>
<code class="hljs sql"><code class="hljs sql"><code class="hljs asciidoc"><code class="hljs lasso"><code class="hljs lasso"><code class="hljs lasso"><code class="hljs lasso"><code class="hljs asciidoc">如何删除多余的日志<br />
日志的删除<br />
对于比较繁忙的OLTP系统,由于每天生产日志量大,这些日志如果长时间不清理,将会对磁盘空间带来很大的浪费,因此,定期删除日志是DBA维护Mysql数据库的一个重要工作内容,下面将介绍几种删除日志的常见方法:
<code class="hljs sql"><code class="hljs sql"><code class="hljs asciidoc"><code class="hljs lasso"><code class="hljs lasso"><code class="hljs lasso"><code class="hljs lasso"><code class="hljs asciidoc">先去获得mysql中数据存储的位置:
<code class="hljs asciidoc"><code class="hljs sql"><code class="hljs sql"><code class="hljs asciidoc"><code class="hljs lasso"><code class="hljs lasso"><code class="hljs lasso"><code class="hljs lasso"><code class="hljs asciidoc"><code class="hljs asciidoc">mysql> show variables like "datadir";
+---------------+-----------------+
| Variable_name | Value           |
+---------------+-----------------+
| datadir       | /var/lib/mysql/ |
+---------------+-----------------+
1 row in set (0.00 sec)
这是mysql中的默认存储位置</code></code></code></code></code></code></code></code></code></code>
<code class="hljs sql"><code class="hljs sql"><code class="hljs asciidoc"><code class="hljs lasso"><code class="hljs lasso"><code class="hljs lasso"><code class="hljs lasso"><code class="hljs asciidoc"><code class="hljs asciidoc">再去查看master中日志的存储位置:
<code class="hljs asciidoc"><code class="hljs sql"><code class="hljs sql"><code class="hljs asciidoc"><code class="hljs lasso"><code class="hljs lasso"><code class="hljs lasso"><code class="hljs lasso"><code class="hljs asciidoc"><code class="hljs asciidoc"><code class="hljs smalltalk">mysql> show variables like "log%";
+----------------------------------------+-------------------------------+
| Variable_name                          | Value                         |
+----------------------------------------+-------------------------------+
| log_bin                                | ON                            |
| log_bin_basename                       | /mnt/ssd/data/mysql-bin       |
| log_bin_index                          | /mnt/ssd/data/mysql-bin.index |
| log_bin_trust_function_creators        | OFF                           |
| log_bin_use_v1_row_events              | OFF                           |
| log_error                              | /var/log/mysql/error.log      |
| log_output                             | FILE                          |
| log_queries_not_using_indexes          | OFF                           |
| log_slave_updates                      | OFF                           |
| log_slow_admin_statements              | OFF                           |
| log_slow_slave_statements              | OFF                           |
| log_throttle_queries_not_using_indexes | 0                             |
| log_warnings                           | 1                             |
+----------------------------------------+-------------------------------+
13 rows in set (0.00 sec)</code></code></code></code></code></code></code></code></code></code></code>
<code class="hljs sql"><code class="hljs sql"><code class="hljs asciidoc"><code class="hljs lasso"><code class="hljs lasso"><code class="hljs lasso"><code class="hljs lasso"><code class="hljs asciidoc"><code class="hljs asciidoc"><code class="hljs smalltalk">查询slave节点的更新状态:
<code class="hljs asciidoc"><code class="hljs sql"><code class="hljs sql"><code class="hljs asciidoc"><code class="hljs lasso"><code class="hljs lasso"><code class="hljs lasso"><code class="hljs lasso"><code class="hljs asciidoc"><code class="hljs asciidoc"><code class="hljs smalltalk"><code class="hljs lasso">mysql> show slave status \G
*************************** 1. row ***************************
               Slave_IO_State: Waiting for master to send event
                  Master_Host: 25.25.2.6
                  Master_User: gpx_sync
                  Master_Port: 3306
                Connect_Retry: 10
              Master_Log_File: mysql-bin.000218
          Read_Master_Log_Pos: 514734902
               Relay_Log_File: mysqld-relay-bin.000669
                Relay_Log_Pos: 236
        Relay_Master_Log_File: mysql-bin.000218
             Slave_IO_Running: Yes
            Slave_SQL_Running: Yes
              Replicate_Do_DB:
          Replicate_Ignore_DB:
           Replicate_Do_Table: StockData.t_day_stock
       Replicate_Ignore_Table:
      Replicate_Wild_Do_Table:
  Replicate_Wild_Ignore_Table:
                   Last_Errno: 0
                   Last_Error:
                 Skip_Counter: 0
          Exec_Master_Log_Pos: 514734902
              Relay_Log_Space: 132818854
              Until_Condition: None
               Until_Log_File:
                Until_Log_Pos: 0
           Master_SSL_Allowed: No
           Master_SSL_CA_File:
           Master_SSL_CA_Path:
              Master_SSL_Cert:
            Master_SSL_Cipher:
               Master_SSL_Key:
        Seconds_Behind_Master: 0
Master_SSL_Verify_Server_Cert: No
                Last_IO_Errno: 0
                Last_IO_Error:
               Last_SQL_Errno: 0
               Last_SQL_Error:
  Replicate_Ignore_Server_Ids:
             Master_Server_Id: 1
                  Master_UUID: e61e54d8-1e08-11e5-9160-44a842112d25
             Master_Info_File: /var/lib/mysql/master.info
                    SQL_Delay: 0
          SQL_Remaining_Delay: NULL
      Slave_SQL_Running_State: Slave has read all relay log; waiting for the slave I/O thread to update it
           Master_Retry_Count: 86400
                  Master_Bind:
      Last_IO_Error_Timestamp:
     Last_SQL_Error_Timestamp:
               Master_SSL_Crl:
           Master_SSL_Crlpath:
           Retrieved_Gtid_Set:
            Executed_Gtid_Set:
                Auto_Position: 0
1 row in set (0.00 sec)

这里面我们获得的有用的信息是:
              Master_Log_File: mysql-bin.000218
          Read_Master_Log_Pos: 514734902
               Relay_Log_File: mysqld-relay-bin.000669
                Relay_Log_Pos: 236
        Relay_Master_Log_File: mysql-bin.000218
             Slave_IO_Running: Yes
            Slave_SQL_Running: Yes
Slave_SQL_Running_State: Slave has read all relay log; waiting for the slave I/O thread to update it</code></code></code></code></code></code></code></code></code></code></code></code><code class="hljs sql"><code class="hljs sql"><code class="hljs asciidoc"><code class="hljs lasso"><code class="hljs lasso"><code class="hljs lasso"><code class="hljs lasso"><code class="hljs asciidoc"><code class="hljs asciidoc"><code class="hljs smalltalk"><code class="hljs lasso">执行“reset master;”命令,该命令将删除所有二进制日志,新日志的编号从“000001” 开始;
<code class="hljs asciidoc"><code class="hljs sql"><code class="hljs sql"><code class="hljs asciidoc"><code class="hljs lasso"><code class="hljs lasso"><code class="hljs lasso"><code class="hljs lasso"><code class="hljs asciidoc"><code class="hljs asciidoc"><code class="hljs smalltalk"><code class="hljs lasso"><code class="hljs perl">Mysql>reset master;</code></code></code></code></code></code></code></code></code></code></code></code></code>
<code class="hljs sql"><code class="hljs sql"><code class="hljs asciidoc"><code class="hljs lasso"><code class="hljs lasso"><code class="hljs lasso"><code class="hljs lasso"><code class="hljs asciidoc"><code class="hljs asciidoc"><code class="hljs smalltalk"><code class="hljs lasso"><code class="hljs perl">执行“Purge master logs to ‘mysql-bin.’” 命令,该命令将删除“” 编号之前的所有日志,下列中删除了“mysql-bin.000001”之前编号的所有日志;
<code class="hljs asciidoc"><code class="hljs sql"><code class="hljs sql"><code class="hljs asciidoc"><code class="hljs lasso"><code class="hljs lasso"><code class="hljs lasso"><code class="hljs lasso"><code class="hljs asciidoc"><code class="hljs asciidoc"><code class="hljs smalltalk"><code class="hljs lasso"><code class="hljs perl"><code class="hljs vbnet">Mysql>purge master logs to 'mysql-bin.000215';</code></code></code></code></code></code></code></code></code></code></code></code></code></code>
<code class="hljs sql"><code class="hljs sql"><code class="hljs asciidoc"><code class="hljs lasso"><code class="hljs lasso"><code class="hljs lasso"><code class="hljs lasso"><code class="hljs asciidoc"><code class="hljs asciidoc"><code class="hljs smalltalk"><code class="hljs lasso"><code class="hljs perl"><code class="hljs vbnet">执行“purge master logs before ‘yyyy-mm-dd hh24:min:ss’”命令,该命令将删除日期为“yyyy-mm-dd hh24:mi:ss”之前产生的所有日志,下列中删除了日期在“2010-05-22 01:00:00”之前的所有日志
<code class="hljs asciidoc"><code class="hljs sql"><code class="hljs sql"><code class="hljs asciidoc"><code class="hljs lasso"><code class="hljs lasso"><code class="hljs lasso"><code class="hljs lasso"><code class="hljs asciidoc"><code class="hljs asciidoc"><code class="hljs smalltalk"><code class="hljs lasso"><code class="hljs perl"><code class="hljs vbnet"><code class="hljs css">Mysql>purge master logs before ‘2010-05-22 01:00:00’;</code></code></code></code></code></code></code></code></code></code></code></code></code></code></code>
<code class="hljs sql"><code class="hljs sql"><code class="hljs asciidoc"><code class="hljs lasso"><code class="hljs lasso"><code class="hljs lasso"><code class="hljs lasso"><code class="hljs asciidoc"><code class="hljs asciidoc"><code class="hljs smalltalk"><code class="hljs lasso"><code class="hljs perl"><code class="hljs vbnet"><code class="hljs css">设置参数 –expire_logs_days=#(days),此参数的含义是设置日志的过期天数,过来指定的天数后日志将会被自动删除,这样将有利于减少DBA管理日志的工作量。
<code class="hljs asciidoc"><code class="hljs sql"><code class="hljs sql"><code class="hljs asciidoc"><code class="hljs lasso"><code class="hljs lasso"><code class="hljs lasso"><code class="hljs lasso"><code class="hljs asciidoc"><code class="hljs asciidoc"><code class="hljs smalltalk"><code class="hljs lasso"><code class="hljs perl"><code class="hljs vbnet"><code class="hljs css"><code class="hljs asciidoc">gpx@dell:~$ sudo vim /etc/mysql/my.cnf
[mysqld]
expire_logs_days = 3
这样,3天前的日志都会被删除,系统自动删除

查看系统中对于二进制日志自动删除的过期时间
mysql> show variables like "expire%";
+------------------+-------+
| Variable_name    | Value |
+------------------+-------+
| expire_logs_days | 3     |
+------------------+-------+
1 row in set (0.00 sec)</code></code></code></code></code></code></code></code></code></code></code></code></code></code></code></code>

Hot AI Tools

Undresser.AI Undress
AI-powered app for creating realistic nude photos

AI Clothes Remover
Online AI tool for removing clothes from photos.

Undress AI Tool
Undress images for free

Clothoff.io
AI clothes remover

Video Face Swap
Swap faces in any video effortlessly with our completely free AI face swap tool!

Hot Article
Hot Tools

Notepad++7.3.1
Easy-to-use and free code editor

SublimeText3 Chinese version
Chinese version, very easy to use

Zend Studio 13.0.1
Powerful PHP integrated development environment

Dreamweaver CS6
Visual web development tools

SublimeText3 Mac version
God-level code editing software (SublimeText3)
Hot Topics
 1664
1664
 14
1421
52
1315
25
1266
29
1239
24
14
1421
52
1315
25
1266
29
1239
24

 How to run SUDO commands in Windows 11/10
Mar 09, 2024 am 09:50 AM
How to run SUDO commands in Windows 11/10
Mar 09, 2024 am 09:50 AM
The sudo command allows users to run commands in elevated privilege mode without switching to superuser mode. This article will introduce how to simulate functions similar to sudo commands in Windows systems. What is the Shudao Command? Sudo (short for "superuser do") is a command-line tool that allows users of Unix-based operating systems such as Linux and MacOS to execute commands with elevated privileges typically held by administrators. Running SUDO commands in Windows 11/10 However, with the launch of the latest Windows 11 Insider preview version, Windows users can now experience this feature. This new feature enables users to
 How to check the MAC address of the network card in Win11? How to use the command to obtain the MAC address of the network card in Win11
Feb 29, 2024 pm 04:34 PM
How to check the MAC address of the network card in Win11? How to use the command to obtain the MAC address of the network card in Win11
Feb 29, 2024 pm 04:34 PM
This article will introduce readers to how to use the command prompt (CommandPrompt) to find the physical address (MAC address) of the network adapter in Win11 system. A MAC address is a unique identifier for a network interface card (NIC), which plays an important role in network communications. Through the command prompt, users can easily obtain the MAC address information of all network adapters on the current computer, which is very helpful for network troubleshooting, configuring network settings and other tasks. Method 1: Use "Command Prompt" 1. Press the [Win+X] key combination, or [right-click] click the [Windows logo] on the taskbar, and in the menu item that opens, select [Run]; 2. Run the window , enter the [cmd] command, and then
 Super practical! Sar commands that will make you a Linux master
Mar 01, 2024 am 08:01 AM
Super practical! Sar commands that will make you a Linux master
Mar 01, 2024 am 08:01 AM
1. Overview The sar command displays system usage reports through data collected from system activities. These reports are made up of different sections, each containing the type of data and when the data was collected. The default mode of the sar command displays the CPU usage at different time increments for various resources accessing the CPU (such as users, systems, I/O schedulers, etc.). Additionally, it displays the percentage of idle CPU for a given time period. The average value for each data point is listed at the bottom of the report. sar reports collected data every 10 minutes by default, but you can use various options to filter and adjust these reports. Similar to the uptime command, the sar command can also help you monitor the CPU load. Through sar, you can understand the occurrence of excessive load
 Where is hyperv enhanced session mode? Tips for enabling or disabling Hyper-V enhanced session mode using commands in Win11
Feb 29, 2024 pm 05:52 PM
Where is hyperv enhanced session mode? Tips for enabling or disabling Hyper-V enhanced session mode using commands in Win11
Feb 29, 2024 pm 05:52 PM
In Win11 system, you can enable or disable Hyper-V enhanced session mode through commands. This article will introduce how to use commands to operate and help users better manage and control Hyper-V functions in the system. Hyper-V is a virtualization technology provided by Microsoft. It is built into Windows Server and Windows 10 and 11 (except Home Edition), allowing users to run virtual operating systems in Windows systems. Although virtual machines are isolated from the host operating system, they can still use the host's resources, such as sound cards and storage devices, through settings. One of the key settings is to enable Enhanced Session Mode. Enhanced session mode is Hyper
 How to delete win11 widgets? One command to uninstall Windows 11 widgets function tips
Apr 11, 2024 pm 05:19 PM
How to delete win11 widgets? One command to uninstall Windows 11 widgets function tips
Apr 11, 2024 pm 05:19 PM
Widgets are a new feature of the Win11 system. They are turned on by default. However, it is inevitable that some users do not use widgets very much and want to disable them because they take up space. So how should they do this? The editor below will teach you how to operate it, and you can try it out. What are widgets? Widgets are small cards that display dynamic content from your favorite apps and services on your Windows desktop. They appear on the widget board, where you can discover, pin, unpin, arrange, resize, and customize widgets to reflect your interests. The widget board is optimized to display relevant widgets and personalized content based on usage. Open the widget panel from the left corner of the taskbar, where you can see live weather
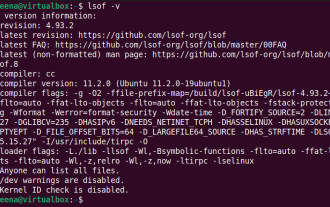 How to use LSOF to monitor ports in real time
Mar 20, 2024 pm 02:07 PM
How to use LSOF to monitor ports in real time
Mar 20, 2024 pm 02:07 PM
LSOF (ListOpenFiles) is a command line tool mainly used to monitor system resources similar to Linux/Unix operating systems. Through the LSOF command, users can get detailed information about the active files in the system and the processes that are accessing these files. LSOF can help users identify the processes currently occupying file resources, thereby better managing system resources and troubleshooting possible problems. LSOF is powerful and flexible, and can help system administrators quickly locate file-related problems, such as file leaks, unclosed file descriptors, etc. Via LSOF Command The LSOF command line tool allows system administrators and developers to: Determine which processes are currently using a specific file or port, in the event of a port conflict
 Detailed explanation of Linux ldconfig command
Mar 14, 2024 pm 12:18 PM
Detailed explanation of Linux ldconfig command
Mar 14, 2024 pm 12:18 PM
Detailed explanation of the Linuxldconfig command 1. Overview In the Linux system, ldconfig is a command used to configure shared libraries. It is used to update the links and cache of shared libraries and enable the system to load dynamically linked shared libraries correctly. The main function of ldconfig is to find dynamic link libraries and create symbolic links for program use. This article will delve into the usage and working principle of the ldconfig command, and use specific code examples to help readers better understand the functions of ldconfig
 What is the correct way to restart a service in Linux?
Mar 15, 2024 am 09:09 AM
What is the correct way to restart a service in Linux?
Mar 15, 2024 am 09:09 AM
What is the correct way to restart a service in Linux? When using a Linux system, we often encounter situations where we need to restart a certain service, but sometimes we may encounter some problems when restarting the service, such as the service not actually stopping or starting. Therefore, it is very important to master the correct way to restart services. In Linux, you can usually use the systemctl command to manage system services. The systemctl command is part of the systemd system manager
