

创建自定义RSS馈送汇集器_PHP

丰富站点摘要馈送,它的缩写RSS更有名,它是XML如何对信息消费的方式产生主要影响的伟大范例。这种 XML术语是用于总结信息的一种流行格式,这种信息即:典型地、但不是专门面向新闻的数据,它包括标题、摘要、作者和发布日期。建立和分配RSS馈送变得日益流行,主要有几个原因:
·竞争:随着为客源竞争的Web站点数的持续增长,使他们的信息到达消费者的选择性方案也总是在考虑之中。
·信息超载:很明显,消费者发现他们越来越依赖于日益增长的Web 站点。那就是说,从一个站点到另一个站点的线性导航方式一点也没有削减他们的依赖性。浏览站点摘要而且不用常常转移图表、广告和附加的外来资料,是一个投资时间最少、迅速筛选所需信息的重要方法。
·普遍性: 基于XML的格式清楚的划分了数据和表达式,从而易于转换以广泛适应不同媒体分布出口(标准的Web浏览器、信元电话、纸张、电子邮件等等)的不同需求。
尽管RSS馈送的使用曾经归入精英之手,但这些日子他们似乎到处出现。Yahoo!,Christian Science Monitor、CNET News.com、和 The BBC 只是近来提供RSS馈送给他们的读者的Web站点中的几个而已。
注意:那些对RSS完全陌生的读者,请用一分钟时间装载Yahoo的技术馈送(http://rss.news.yahoo.com/rss/tech)到你的浏览器上。你可以迅速的认出组织良好的数据格式,它将自己借给了表达式的转换,这是XML术语的典型之处。对于这个论题的完整论述来说,就是在你喜爱的搜索引擎上实现快速搜索;你会找到的指南比你键盘操作得到的指南更多。
目录
Magpie RSS
RSS馈送
MySQL数据库
PHP 脚本
结论
在本文中,我将阐述如何使用PHP、MySQL 数据库服务器和 Magpie RSS parser来提供可自定义的RSS馈送服务给你的Web站点用户。尽管我希望你至少有使用PHP和MySQL 的基本经验,但对于初学者来说例子应该非常容易,以便于理解。因为你们中的大部分人可能不熟悉Magpie RSS Parser,我会就这个重要的工具提供一些额外的信息。
Magpie RSS
Magpie RSS Parser是在2002年晚期由Kellan Elliott-McCrea创建的,以确保他感知到的东西没有真正的基于PHP的RSS 汇集解决方案。结果就出现了一个极佳的可行工具,它可提供一群有用特征,其中包括:
·面向对象的设计:面向对象的、模块化的代码允许你毫不费力的将汇集特征集成到以前的应用上。
·极高的可配置性:Magpie的汇集和缓存行为很容易通过一个良好贯穿的配置策略来修改。
·馈送缓存:这个非常酷的特征可以本地缓存RSS馈送(到服务器上),从而保存带宽并且增强应用的性能
因为它是在GPL license下发布的,所以你不用掏钱,只要你愿意,并且遵守许可证的条款和条件,就可以自由使用这个软件。它只需要使用XML(expat) 支持编译的PHP (4.0+)的新版本。.
RSS馈送
让我们从应用的内容开始讨论。你喜欢提供哪种类型的RSS馈送给你的用户?找到RSS馈送就好像细读你喜爱的搜索引擎一样容易:只要输入"RSS" 和一些其他的选择主题如"technology," "science,"或者"sports."等等。对于一个偷懒的人来说(编程行业中没有不好的特性),通过Web. Feedster (http://www.feedster.com/)上弹出的许多RSS汇集器浏览也是我个人喜好之一。为了这篇指南,我将使用下列馈送:
·Yahoo! Top Stories (http://rss.news.yahoo.com/rss/topstories)
·MSDN, Recent Technical Articles (http://msdn.microsoft.com/rss.xml)
·Infoworld Latest News (http://www.infoworld.com/rss/news.rdf)
·PCWorld Latest News (http://rss.pcworld.com/rss/latestnews.rss)
·eWeek Technology News (http://rssnewsapps.ziffdavis.com/tech.xml)
你应该记住:有些RSS发布商需要许可后才允许你将它们的馈送用于商业用途。因此,在安装之前你永远要多看几遍任何使用条款。
请记下馈送位置、标题、和URL,你愿意的话还可以记录描述。在下一部分,我们将创建收藏这些信息的数据库表格。
MySQL数据库
为了实现我们的自定义RSS服务,只需要三个数据库表格。这部分,我将介绍这三个表格。
rssfeed
第一个表格rssfeed,将存储RSS馈送信息。为例子的简单起见,我们只存储三项:唯一的ID、标题和URL。在更为复杂的应用中,你可能存储其它细节,如描述、馈送添加到汇集器的日期、连续两次馈送检索之间的等待秒数、和其它相关信息。
mysql>CREATE TABLE rssfeed (
>rowID tinyint unsigned not null auto_increment,
>title varchar(150) not null,
>url varchar(150) not null,
>primary key(rowID)
>);
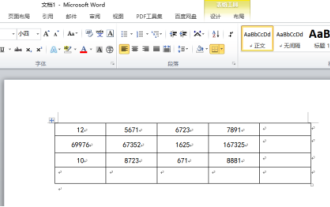
Table 1-1显示了添加所选择的RSS馈送之后的表格内容:
user
第二个表格user 存储关于使用该RSS汇集器的用户的信息。每一个用户只能有一个唯一标志,这样我们才能提供自定义服务;如果这样,每个用户可用一个简单的整数值来标记。在用户管理他自己首选的馈送并且浏览馈送之前需要登录,这样他的电子邮件和密码也会保存下来。为了安全起见,密码可作为一个由32个字符组成的不可取消的散列表保存。另外,就像rss 表格一样,在真实的应用中,该用户表格可变得更加复杂;但是,实现我们汇集机制的必要部分仍可在我们的表格中找到。
mysql>CREATE TABLE user (
>rowID smallint unsigned not null auto_increment,
>email varchar(55) not null,
>pswd varchar(32) not null,
>primary key(rowID)
>);
为了例子的简单起见,Table 1-2展示了存储在该表格内的用户信息示例:
Table 1-2: 用户信息示例
user_to_rss_feed
第三个表格user_to_rss_feed,将用户和他们选择的RSS馈送联系在一起。这个表格有两列组成:userid 和rssid。userid 标记用户;rssid标记RSS 馈送。
mysql>CREATE TABLE user_to_rss_feed (
>userid smallint unsigned not null auto_increment,
>rssid tinyint unsigned not null
>);
Table 1-3在我们的用户选择了他们喜爱的馈送之后提供了该表格内容的模拟。
Table 1-3: User/RSS 馈送映射
PHP 脚本
最后一个任务就是创建显示用户所选的RSS馈送的脚本。这个脚本的标题为myrss.php,他不可思议的简单,只包含两个主要组件:
·Login: 用户需要登录才能浏览他的自定义的馈送。这可以通过使用一个简单的表格和一些确认提供的电子邮件地址与密码的逻辑就可以完成了。
·RSS Aggregation and Delivery: 如果出现有效登录(或者有效会话;见下一段),我们将使用Magpie RSS Parser 来显示用户所选的RSS馈送。
要避免用户抱怨每次需要RSS "fix,"时都要重复登录,我使用了PHP的会话期处理特征。一旦成功的登录,用户的唯一标志符就作为会话期变量存储起来,以便于以后的检索。记住,存储期限完全取决于你如何配置你的PHP安装的会话期功能。
Listings 1-1 和1-2为两个组件都提供了注释码。两个组件都装配好并可用于浏览,浏览功能可通过在Listing 1-2结尾部分设置链接来实现。
Listing 1-1:登录组件
// Start or continue a session
session_start();
// Has the user
if (! isset($_SESSION['userid']))
{
if (! isset($_POST['email']))
{
echo "
} else {
mysql_connect("localhost","aggregator","secret");
mysql_select_db("rssfeeds");
$email = $_POST['email'];
$pswd = md5($_POST['pswd']);
$query = "SELECT rowID, email, pswd FROM user
WHERE email='$email' AND '$pswd'";
$result = mysql_query($query);
if (mysql_numrows($result) != 1)
{
echo "
Could not login!
";} else {
list($rowID, $email, $pswd) = mysql_fetch_row($result);
$_SESSION['userid'] = $rowID;
}
mysql_close();
} // end isset[email]
}
Listing 1-2. RSS汇集和呈送组件
if (isset($_SESSION['userid'])) {
require_once("rss_fetch.inc");
mysql_connect("localhost","aggregator","secret");
mysql_select_db("rssfeeds");
$userID = $_SESSION['userid'];
$query = "SELECT rss.title, rss.url
FROM rssfeed AS rss, user_to_rss_feed as userrss
WHERE userrss.userid='$userID'
AND rss.rowID=userrss.rssid";
$result = mysql_query($query);
while(list($title,$url) = mysql_fetch_row($result))
{
$url = "$url";
$rss = fetch_rss( $url );
echo "" . $rss->channel['title'] . "
";
echo "
- ";
- $title ";
foreach ($rss->items as $item)
{
$href = $item['link'];
$title = $item['title'];
echo "
}
echo "
}
mysql_close();
}
View the complete script here
Figure 1-1 显示了登录表格。
Figure 1-2 描述了请求的RSS馈送的一个典型显示。
结论
欢迎提问和评论!电子邮件可发至: jason@wjgilmore

Hot AI Tools

Undresser.AI Undress
AI-powered app for creating realistic nude photos

AI Clothes Remover
Online AI tool for removing clothes from photos.

Undress AI Tool
Undress images for free

Clothoff.io
AI clothes remover

Video Face Swap
Swap faces in any video effortlessly with our completely free AI face swap tool!

Hot Article
Hot Tools

Notepad++7.3.1
Easy-to-use and free code editor

SublimeText3 Chinese version
Chinese version, very easy to use

Zend Studio 13.0.1
Powerful PHP integrated development environment

Dreamweaver CS6
Visual web development tools

SublimeText3 Mac version
God-level code editing software (SublimeText3)
Hot Topics


 How to use Xiaohongshu account to find users? Can I find my mobile phone number?
Mar 22, 2024 am 08:40 AM
How to use Xiaohongshu account to find users? Can I find my mobile phone number?
Mar 22, 2024 am 08:40 AM
With the rapid development of social media, Xiaohongshu has become one of the most popular social platforms. Users can create a Xiaohongshu account to show their personal identity and communicate and interact with other users. If you need to find a user’s Xiaohongshu number, you can follow these simple steps. 1. How to use Xiaohongshu account to find users? 1. Open the Xiaohongshu APP, click the "Discover" button in the lower right corner, and then select the "Notes" option. 2. In the note list, find the note posted by the user you want to find. Click to enter the note details page. 3. On the note details page, click the "Follow" button below the user's avatar to enter the user's personal homepage. 4. In the upper right corner of the user's personal homepage, click the three-dot button and select "Personal Information"
 Steps to adjust the format of pictures inserted in PPT tables
Mar 26, 2024 pm 04:16 PM
Steps to adjust the format of pictures inserted in PPT tables
Mar 26, 2024 pm 04:16 PM
1. Create a new PPT file and name it [PPT Tips] as an example. 2. Double-click [PPT Tips] to open the PPT file. 3. Insert a table with two rows and two columns as an example. 4. Double-click on the border of the table, and the [Design] option will appear on the upper toolbar. 5. Click the [Shading] option and click [Picture]. 6. Click [Picture] to pop up the fill options dialog box with the picture as the background. 7. Find the tray you want to insert in the directory and click OK to insert the picture. 8. Right-click on the table box to bring up the settings dialog box. 9. Click [Format Cells] and check [Tile images as shading]. 10. Set [Center], [Mirror] and other functions you need, and click OK. Note: The default is for pictures to be filled in the table
 Log in to Ubuntu as superuser
Mar 20, 2024 am 10:55 AM
Log in to Ubuntu as superuser
Mar 20, 2024 am 10:55 AM
In Ubuntu systems, the root user is usually disabled. To activate the root user, you can use the passwd command to set a password and then use the su- command to log in as root. The root user is a user with unrestricted system administrative rights. He has permissions to access and modify files, user management, software installation and removal, and system configuration changes. There are obvious differences between the root user and ordinary users. The root user has the highest authority and broader control rights in the system. The root user can execute important system commands and edit system files, which ordinary users cannot do. In this guide, I'll explore the Ubuntu root user, how to log in as root, and how it differs from a normal user. Notice
 How to set WPS value to automatically change color according to conditions_Steps to set WPS table value to automatically change color according to condition
Mar 27, 2024 pm 07:30 PM
How to set WPS value to automatically change color according to conditions_Steps to set WPS table value to automatically change color according to condition
Mar 27, 2024 pm 07:30 PM
1. Open the worksheet and find the [Start]-[Conditional Formatting] button. 2. Click Column Selection and select the column to which conditional formatting will be added. 3. Click the [Conditional Formatting] button to bring up the option menu. 4. Select [Highlight conditional rules]-[Between]. 5. Fill in the rules: 20, 24, dark green text with dark fill color. 6. After confirmation, the data in the selected column will be colored with corresponding numbers, text, and cell boxes according to the settings. 7. Conditional rules without conflicts can be added repeatedly, but for conflicting rules WPS will replace the previously established conditional rules with the last added rule. 8. Repeatedly add the cell columns after [Between] rules 20-24 and [Less than] 20. 9. If you need to change the rules, you can just clear the rules and then reset the rules.
 How to make a table for sales forecast
Mar 20, 2024 pm 03:06 PM
How to make a table for sales forecast
Mar 20, 2024 pm 03:06 PM
Being able to skillfully make forms is not only a necessary skill for accounting, human resources, and finance. For many sales staff, learning to make forms is also very important. Because the data related to sales is very large and complex, and it cannot be simply recorded in a document to explain the problem. In order to enable more sales staff to be proficient in using Excel to make tables, the editor will introduce the table making issues about sales forecasting. Friends in need should not miss it! 1. Open [Sales Forecast and Target Setting], xlsm, to analyze the data stored in each table. 2. Create a new [Blank Worksheet], select [Cell], and enter [Label Information]. [Drag] downward and [Fill] the month. Enter [Other] data and click [
 How to create a folder on Realme Phone?
Mar 23, 2024 pm 02:30 PM
How to create a folder on Realme Phone?
Mar 23, 2024 pm 02:30 PM
Title: Realme Phone Beginner’s Guide: How to Create Folders on Realme Phone? In today's society, mobile phones have become an indispensable tool in people's lives. As a popular smartphone brand, Realme Phone is loved by users for its simple and practical operating system. In the process of using Realme phones, many people may encounter situations where they need to organize files and applications on their phones, and creating folders is an effective way. This article will introduce how to create folders on Realme phones to help users better manage their phone content. No.
 Do you know how to sum a Word table?
Mar 21, 2024 pm 01:10 PM
Do you know how to sum a Word table?
Mar 21, 2024 pm 01:10 PM
Sometimes, we often encounter counting problems in Word tables. Generally, when encountering such problems, most students will copy the Word table to Excel for calculation; some students will silently pick up the calculator. Calculate. Is there a quick way to calculate it? Of course there is, in fact the sum can also be calculated in Word. So, do you know how to do it? Today, let’s take a look together! Without further ado, friends in need should quickly collect it! Step details: 1. First, we open the Word software on the computer and open the document that needs to be processed. (As shown in the picture) 2. Next, we position the cursor on the cell where the summed value is located (as shown in the picture); then, we click [Menu Bar
 How to create a family with Gree+
Mar 01, 2024 pm 12:40 PM
How to create a family with Gree+
Mar 01, 2024 pm 12:40 PM
Many friends expressed that they want to know how to create a family in Gree+ software. Here is the operation method for you. Friends who want to know more, come and take a look with me. First, open the Gree+ software on your mobile phone and log in. Then, in the options bar at the bottom of the page, click the "My" option on the far right to enter the personal account page. 2. After coming to my page, there is a "Create Family" option under "Family". After finding it, click on it to enter. 3. Next jump to the page to create a family, enter the family name to be set in the input box according to the prompts, and click the "Save" button in the upper right corner after entering it. 4. Finally, a "save successfully" prompt will pop up at the bottom of the page, indicating that the family has been successfully created.
