

Customize the theme: adjust color scheme settings and controls

The Theme Customizer is a great tool that gives your users more freedom to adjust their themes without having to edit code. But if you want users to change the colors of their site, things can get complicated. Adding a control for every element they can change will make things cumbersome, and users may end up with a website that looks garish and cluttered.
Instead of adding tons of controls for all the elements you want users to be able to change, you can simply create a color scheme that allows users to choose a few colors and then apply them to a range of elements in your theme.
In this tutorial, I'll take you through the first part of the process, setting up the theme customizer controls. In the next section, I'll show you how to link these controls to your theme so that when the user selects a color, they are brought into the theme.
starting point
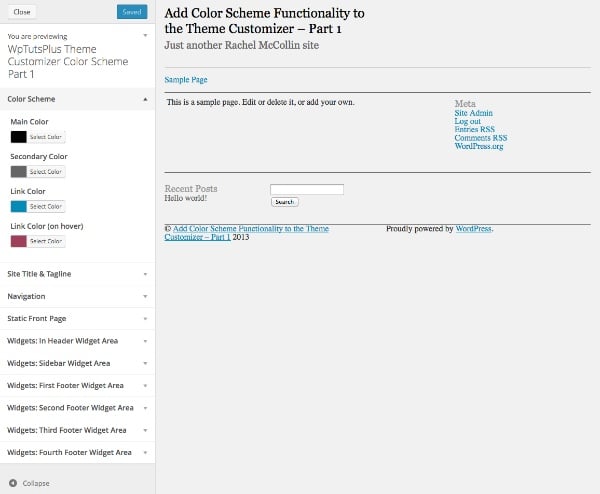
First install the launcher theme and activate it. The theme customizer will look like this:
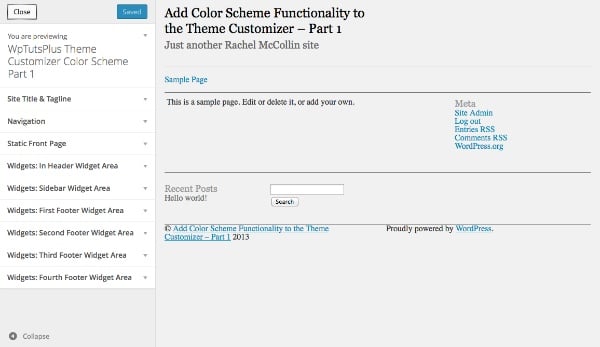
After completing this tutorial, your customization tool will have two additional sections.
Set up theme customizer
The first step is to create a file in your theme to hold the customizer functionality. I'll be using a basic starter theme based on the theme I created in the Creating WordPress Themes from Static HTML series. I modified it a bit so that it works with the color scheme feature, so if you want to complete this tutorial I recommend downloading the starter theme.
In your theme's main folder, create a folder named inc and create a file inside it named customizer.php.
Open the functions.php file and add the following content, which will contain the new file you just created:
include_once( 'inc/customizer.php' );
Now in your customizer.php file, add the following function:
function wptutsplus_customize_register( $wp_customize ) {

}
add_action( 'customize_register', 'wptutsplus_customize_register' );
This will create a function that contains all the settings and controls and hook it into the customize_register action hook. Your theme is ready!
Create color scheme settings and controls
The first step is to add the settings and controls for the color scheme. You'll add controls for four color pickers: a primary color, a secondary color, and two link colors.
Add new section
In the function you just created, add the following:
/*******************************************
Color scheme
********************************************/

// add the section to contain the settings
$wp_customize->add_section( 'textcolors' , array(
    'title' =>  'Color Scheme',
) );
This will create a blank section for your color scheme control.
Define color parameters
Add immediately below:
// main color ( site title, h1, h2, h4. h6, widget headings, nav links, footer headings )
$txtcolors[] = array(
	'slug'=>'color_scheme_1',
	'default' => '#000',
	'label' => 'Main Color'
);

// secondary color ( site description, sidebar headings, h3, h5, nav links on hover )
$txtcolors[] = array(
	'slug'=>'color_scheme_2',
	'default' => '#666',
	'label' => 'Secondary Color'
);

// link color
$txtcolors[] = array(
	'slug'=>'link_color',
	'default' => '#008AB7',
	'label' => 'Link Color'
);

// link color ( hover, active )
$txtcolors[] = array(
	'slug'=>'hover_link_color',
	'default' => '#9e4059',
	'label' => 'Link Color (on hover)'
);
This will add a new section called "Color Scheme" to the theme customizer. It then sets parameters for the four colors you'll use: slug, default, and label. The default value is the color used in the theme, so you may need to change it to the color in the theme.
Create color settings
Next, you need to create a color setup using the parameters you just defined. Below the last code block, type:
// add the settings and controls for each color
foreach( $txtcolors as $txtcolor ) {

    // SETTINGS
	$wp_customize->add_setting(
		$txtcolor['slug'], array(
			'default' => $txtcolor['default'],
			'type' => 'option',
			'capability' =>	'edit_theme_options'
		)
	);

}
This uses a foreach statement to process each color you just defined and create a setting for each color using the parameters you defined. But you still need to add controls so users can interact with these settings using the theme customizer.
Add controls
Inside the foreach braces and below the add_setting() function you just added, insert the following:
// CONTROLS
$wp_customize->add_control(
    new WP_Customize_Color_Control(
		$wp_customize,
		$txtcolor['slug'],
		array('label' => $txtcolor['label'],
		'section' => 'textcolors',
		'settings' => $txtcolor['slug'])
	)
);
This adds a color picker for each color using the WP_Customize_Color_Control() function, which creates the color picker for the theme customizer.
The entire foreach statement will now look like this:
// add the settings and controls for each color
foreach( $txtcolors as $txtcolor ) {

    // SETTINGS
	$wp_customize->add_setting(
		$txtcolor['slug'], array(
			'default' => $txtcolor['default'],
			'type' => 'option',
			'capability' =>
			'edit_theme_options'
		)
	);
	// CONTROLS
	$wp_customize->add_control(
		new WP_Customize_Color_Control(
			$wp_customize,
			$txtcolor['slug'],
			array('label' => $txtcolor['label'],
			'section' => 'textcolors',
			'settings' => $txtcolor['slug'])
		)
	);
}
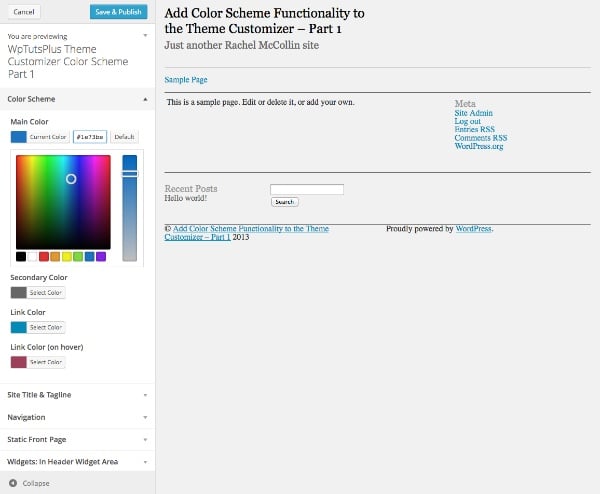
Now when you open the theme customizer and activate the theme, you will be able to see the new section:

When you expand one of the controls, you will be able to see the color picker:
Currently, anything you do with the color picker won't actually be reflected in your theme because you haven't added any CSS to make it work - we'll do that in this article This is discussed in Part 2 of the series. Now we'll add another section to give users more control over their color scheme.
Create solid color background settings and controls
The next section will not allow users to choose a color, but instead give them the option to add a solid color background to the header and/or footer of their site. If they select this option, the background and text colors of these elements will change.
在您刚刚添加的代码下方,但仍在 wptutsplus_customize_register() 函数内,添加以下内容:
/**************************************
Solid background colors
***************************************/
// add the section to contain the settings
$wp_customize->add_section( 'background' , array(
    'title' =>  'Solid Backgrounds',
) );


// add the setting for the header background
$wp_customize->add_setting( 'header-background' );

// add the control for the header background
$wp_customize->add_control( 'header-background', array(
	'label'      => 'Add a solid background to the header?',
	'section'    => 'background',
	'settings'   => 'header-background',
	'type'       => 'radio',
	'choices'    => array(
		'header-background-off'   => 'no',
		'header-background-on'  => 'yes',
) ) );


// add the setting for the footer background
$wp_customize->add_setting( 'footer-background' );

// add the control for the footer background
$wp_customize->add_control( 'footer-background', array(
	'label'      => 'Add a solid background to the footer?',
	'section'    => 'background',
	'settings'   => 'footer-background',
	'type'       => 'radio',
	'choices'    => array(
		'footer-background-off'   => 'no',
		'footer-background-on'  => 'yes',
		)
	)
);
这将添加第二个名为“纯色背景”的新部分,然后向其中添加两个控件,这两个控件都是单选框。在每种情况下都有两种选择:是和否。在本系列的第二部分中,我将向您展示如何根据这些选择定义变量并使用它们来更改主题中的 CSS。
您现在可以在主题定制器中看到新部分:
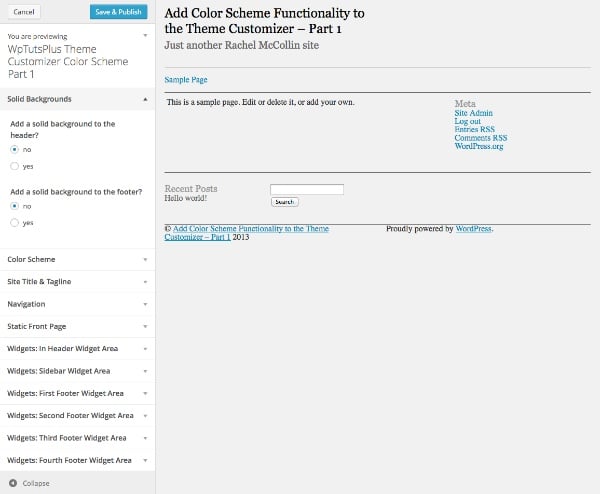
同样,如果您选择其中一个单选框,则不会发生任何事情,因为您尚未将其链接到主题的 CSS ,但这终将到来。
摘要
在第一部分中,您添加了为您的配色方案创建主题定制器界面所需的设置和控件。
在下一部分中,我将向您展示如何根据用户在主题定制器中所做的选择来定义变量,然后使用这些变量来设置 CSS。
The above is the detailed content of Customize the theme: adjust color scheme settings and controls. For more information, please follow other related articles on the PHP Chinese website!

Hot AI Tools

Undresser.AI Undress
AI-powered app for creating realistic nude photos

AI Clothes Remover
Online AI tool for removing clothes from photos.

Undress AI Tool
Undress images for free

Clothoff.io
AI clothes remover

Video Face Swap
Swap faces in any video effortlessly with our completely free AI face swap tool!

Hot Article
Hot Tools

Notepad++7.3.1
Easy-to-use and free code editor

SublimeText3 Chinese version
Chinese version, very easy to use

Zend Studio 13.0.1
Powerful PHP integrated development environment

Dreamweaver CS6
Visual web development tools

SublimeText3 Mac version
God-level code editing software (SublimeText3)
Hot Topics
 1655
1655
 14
1414
52
1307
25
1254
29
1228
24
14
1414
52
1307
25
1254
29
1228
24

 How To Begin A WordPress Blog: A Step-By-Step Guide For Beginners
Apr 17, 2025 am 08:25 AM
How To Begin A WordPress Blog: A Step-By-Step Guide For Beginners
Apr 17, 2025 am 08:25 AM
Blogs are the ideal platform for people to express their opinions, opinions and opinions online. Many newbies are eager to build their own website but are hesitant to worry about technical barriers or cost issues. However, as the platform continues to evolve to meet the capabilities and needs of beginners, it is now starting to become easier than ever. This article will guide you step by step how to build a WordPress blog, from theme selection to using plugins to improve security and performance, helping you create your own website easily. Choose a blog topic and direction Before purchasing a domain name or registering a host, it is best to identify the topics you plan to cover. Personal websites can revolve around travel, cooking, product reviews, music or any hobby that sparks your interests. Focusing on areas you are truly interested in can encourage continuous writing
 How to adjust the wordpress article list
Apr 20, 2025 am 10:48 AM
How to adjust the wordpress article list
Apr 20, 2025 am 10:48 AM
There are four ways to adjust the WordPress article list: use theme options, use plugins (such as Post Types Order, WP Post List, Boxy Stuff), use code (add settings in the functions.php file), or modify the WordPress database directly.
 How to get logged in user information in WordPress for personalized results
Apr 19, 2025 pm 11:57 PM
How to get logged in user information in WordPress for personalized results
Apr 19, 2025 pm 11:57 PM
Recently, we showed you how to create a personalized experience for users by allowing users to save their favorite posts in a personalized library. You can take personalized results to another level by using their names in some places (i.e., welcome screens). Fortunately, WordPress makes it very easy to get information about logged in users. In this article, we will show you how to retrieve information related to the currently logged in user. We will use the get_currentuserinfo(); function. This can be used anywhere in the theme (header, footer, sidebar, page template, etc.). In order for it to work, the user must be logged in. So we need to use
 How to display child categories on archive page of parent categories
Apr 19, 2025 pm 11:54 PM
How to display child categories on archive page of parent categories
Apr 19, 2025 pm 11:54 PM
Do you want to know how to display child categories on the parent category archive page? When you customize a classification archive page, you may need to do this to make it more useful to your visitors. In this article, we will show you how to easily display child categories on the parent category archive page. Why do subcategories appear on parent category archive page? By displaying all child categories on the parent category archive page, you can make them less generic and more useful to visitors. For example, if you run a WordPress blog about books and have a taxonomy called "Theme", you can add sub-taxonomy such as "novel", "non-fiction" so that your readers can
 How to sort posts by post expiration date in WordPress
Apr 19, 2025 pm 11:48 PM
How to sort posts by post expiration date in WordPress
Apr 19, 2025 pm 11:48 PM
In the past, we have shared how to use the PostExpirator plugin to expire posts in WordPress. Well, when creating the activity list website, we found this plugin to be very useful. We can easily delete expired activity lists. Secondly, thanks to this plugin, it is also very easy to sort posts by post expiration date. In this article, we will show you how to sort posts by post expiration date in WordPress. Updated code to reflect changes in the plugin to change the custom field name. Thanks Tajim for letting us know in the comments. In our specific project, we use events as custom post types. Now
 How to Automate WordPress and Social Media with IFTTT (and more)
Apr 18, 2025 am 11:27 AM
How to Automate WordPress and Social Media with IFTTT (and more)
Apr 18, 2025 am 11:27 AM
Are you looking for ways to automate your WordPress website and social media accounts? With automation, you will be able to automatically share your WordPress blog posts or updates on Facebook, Twitter, LinkedIn, Instagram and more. In this article, we will show you how to easily automate WordPress and social media using IFTTT, Zapier, and Uncanny Automator. Why Automate WordPress and Social Media? Automate your WordPre
 How to display query count and page loading time in WordPress
Apr 19, 2025 pm 11:51 PM
How to display query count and page loading time in WordPress
Apr 19, 2025 pm 11:51 PM
One of our users asked other websites how to display the number of queries and page loading time in the footer. You often see this in the footer of your website, and it may display something like: "64 queries in 1.248 seconds". In this article, we will show you how to display the number of queries and page loading time in WordPress. Just paste the following code anywhere you like in the theme file (e.g. footer.php). queriesin
 How to build a website for wordpress host
Apr 20, 2025 am 11:12 AM
How to build a website for wordpress host
Apr 20, 2025 am 11:12 AM
To build a website using WordPress hosting, you need to: select a reliable hosting provider. Buy a domain name. Set up a WordPress hosting account. Select a topic. Add pages and articles. Install the plug-in. Customize your website. Publish your website.
