

Create stunning WordPress forms with the FormCraft plugin

In this article, we will review the FormCraft WordPress plugin that allows you to create stunning forms with drag and drop. It is one of the most popular and useful form builders on the market today.
Forms are one of the most important parts of your website, they allow you to collect various types of information from your visitors. Whether it’s a simple contact, feedback or a full questionnaire, it’s always handy to have a plugin that allows you to build it easily. As a WordPress website builder, you want a plugin that allows you to dynamically create professional forms and collect form submissions on different endpoints.
A number of extensions and form builder scripts are available for creating forms on your WordPress site. In addition to free plugins, you can also find commercial options that offer ready-to-use advanced features and extended support. With the commercial option, you can also expect high-quality code, bug fixes, and regular feature enhancements.
In this article, we will discuss the FormCraft WordPress plugin, which you can buy at CodeCanyon at a very reasonable price considering the number of features it offers. It is one of the most powerful drag-and-drop form builders and comes with dozens of features and several built-in templates. This or a similar tool is a must-have for website builders looking for a professional form builder script.
Let’s take a look at the features this plugin brings:
- Drag and Drop Form Builder
- Support multiple templates
- Responsive and scalable
- Conditional logic for showing/hiding fields
- Form Views and Submission Analysis
- Built-in GDPR support
- Multi-site support via additional plugins
- there are more
FormCraft WordPress plugin offers tons of useful features that come in handy and make it easy to create rich-looking forms on your WordPress website.
What we will build: Questionnaire
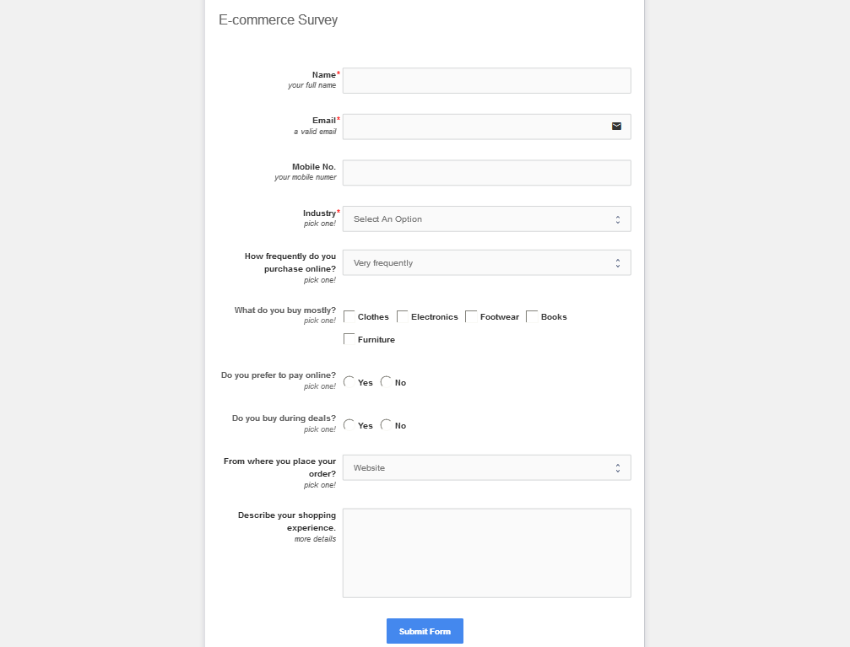
In this article, we will build a survey form that allows you to collect different types of information from users. We mainly ask users some questions about their online shopping choices and habits, as well as their basic personal information.
To achieve this, we will create a form that asks some basic questions about their personal information, and we will also ask specific questions about the survey.
The overall form is as follows:
That’s the agenda for this tutorial. In the next section we will learn how to download and install this plugin.
Install and purchase code registration
In this section, we will learn how to install and configure the FormCraft WordPress plugin after purchasing and downloading it from CodeCanyon. For this post, I’m using WordPress 5.2.3, FormCraft WordPress plugin version 3. If you want to continue reading this article, I recommend you install it.
After purchasing this plugin, you can download the zip file. This is the WordPress plugin file itself, which you can use to install this plugin from the WordPress admin. Continue following the standard WordPress plugin installation process and you’re almost done.
Next, we need to register the purchase code of the plug-in. First, you need to retrieve your purchase code from the CodeCanyon download section. Click the Download > License Certificate link and you will get a text file containing the product purchase code.
Once you have the purchase code, click FormCraft in the left sidebar of the admin side, this will display the plugin dashboard page. On this page, click the Click here to register your copy of FormCraft link and enter and register your code. In this way, you have unlocked the full power of FormCraft.
We are now ready to explore the plugin in depth. In the next section we will cover the different configuration sections provided by the plugin.
Quick Browse FormCraft Configuration Section
In this section, we will briefly discuss the backend configuration part provided by the plugin. Once you install the FormCraft plugin, it will add a link in the left sidebar. Let's take a brief look at each section.
sheet
This is a form list page that lists all forms created so far. You can also create a new form by clicking the New Form link.
In addition to this, you can also see the Form Analysis section, which displays statistics about different aspects of the form.
entry
This is an entry list page that lists all form submission entries in all forms. You can use the search interface to filter specific records, and there's an Export button that lets you export entries.
There is also Entry View, which shows you a detailed view of the form submission entries.
opinion
Form Insights is a new feature added in FormCraft 3.3 that makes FormCraft a powerful survey and polling tool. FormCraft can analyze certain fields to generate insights, such as dropdowns, ratings, checkboxes, dates, sliders, and more.
Upload
This page lists all files uploaded through different forms.
license
Finally, this section displays your license information. It also shows the number of days left to renew the license.
The above is a brief introduction to the functions provided by this plug-in. In the next section, we will build a survey form following the previous discussion.
How to build a survey form
In this section, we will build a survey form that will allow us to collect user feedback about their online shopping experience.
Go to the admin and access the FormCraft > Forms section. Click the New Form button to create a new form. This should give you a few options, as shown in the screenshot below.
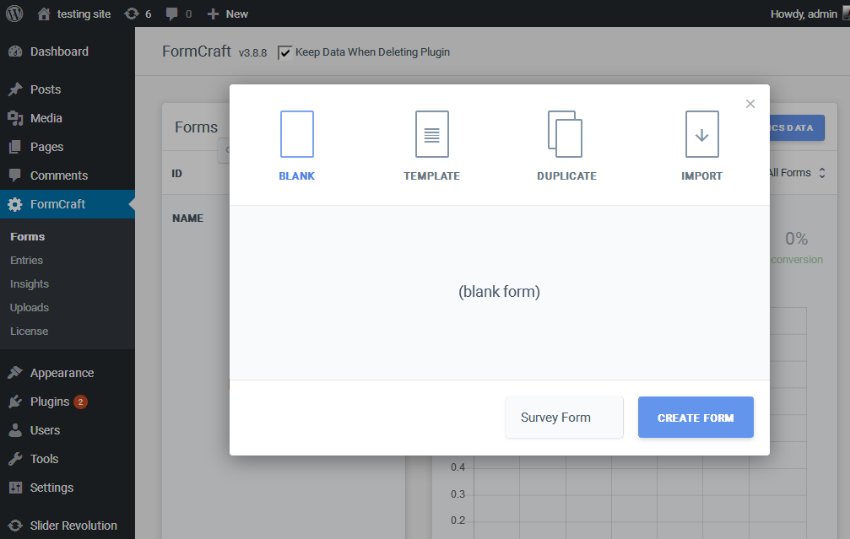
As you can see, when building a new form, you can choose from existing templates or even copy an existing form. However, in our example we will use the Blank option since we are building the form from scratch. Click on the Blank option, this will give you a nice form building user interface as shown in the screenshot below.
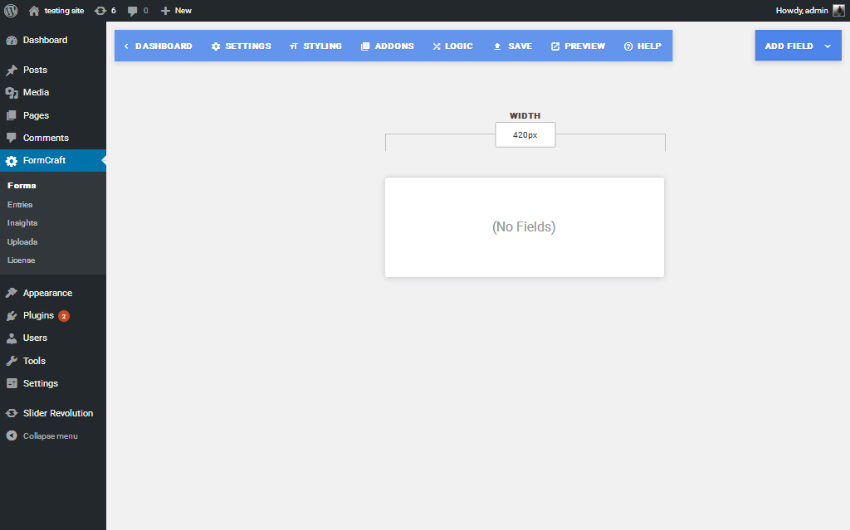
There are two main navigation sections; one allows you to configure the global settings of the form, and the other allows you to add fields to the form. We'll explore the different parts as we set up the form.
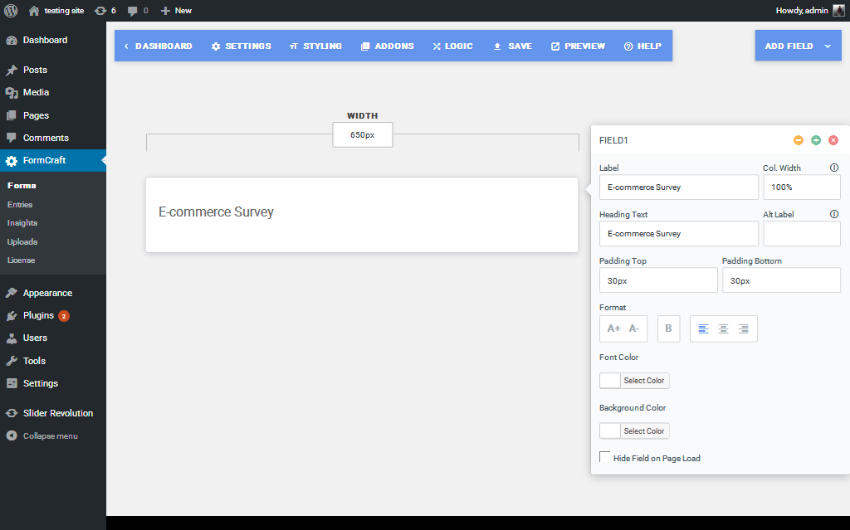
First, let's add a title to the form. Click Add Field>Title. This should add a Title field to the form which will allow you to configure it when you click on the field box as shown in the following screenshot. Enter Ecommerce Survey in the title field label. Additionally, you can adjust other field-specific settings as needed!
Next, we will add a text field to the form. Click Add Field>Single Line Input and it will add a text field as shown in the screenshot below.
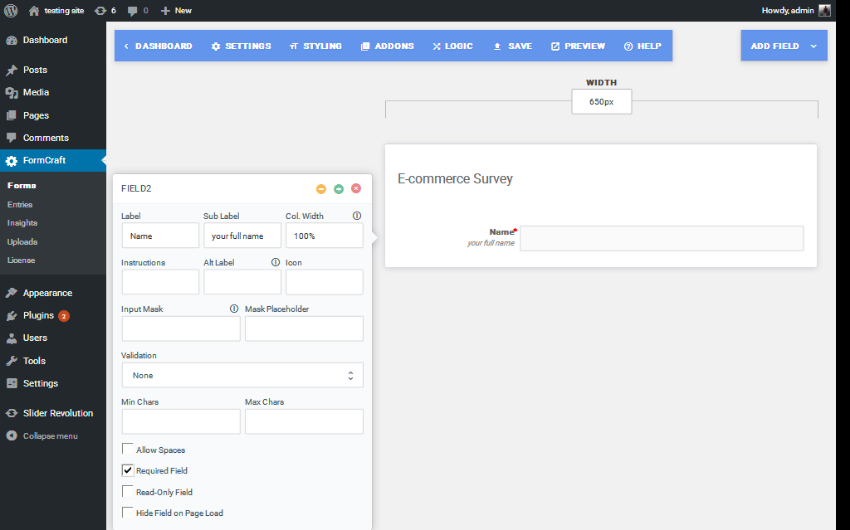
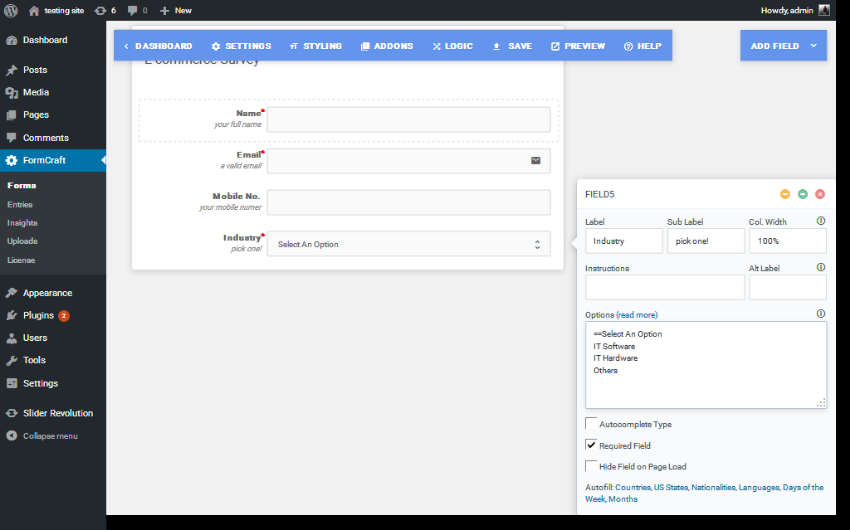
I have made this a required field because we need the user to provide it. In the same manner, continue adding the Email and Mobile Number text fields. Next, we will add a drop-down field for the Industry selection by clicking the Add Field>Dropdown link. You can configure it as shown below.
In the same way, I added another dropdown menu asking the user how often they shop online. I added very often, often, occasionally and rarely as options.
Next, I added the checkbox field by clicking the Add Field > Checkbox link. In my case, I asked the user what category they mainly purchased, and the options included clothes, electronics, shoes,>Books and furniture.
Taking it a step further, I added a few radio-select fields by clicking the Add Field > Dropdown link. It’s worth noting that we also selected the Dropdown option to add radio buttons. When you want to render radio buttons instead of checkboxes, just uncheck the Allow multiple selection option in the field configuration.
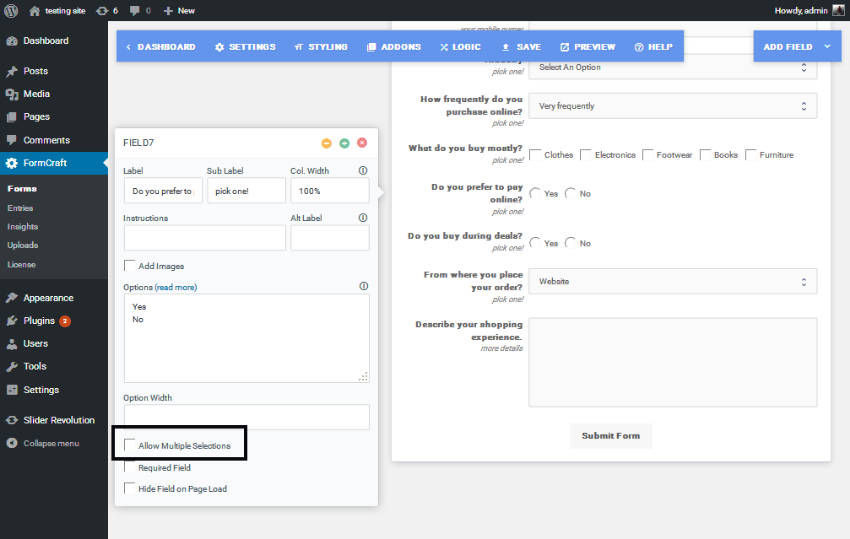
Finally, we ask for their device preferences via a drop-down box. We also provide a text area field in case they want to describe their overall experience. Putting all the bits and pieces together, it should look like the image below if you click the Preview button.
Make sure to save the form settings by clicking the Save button in the top navigation.
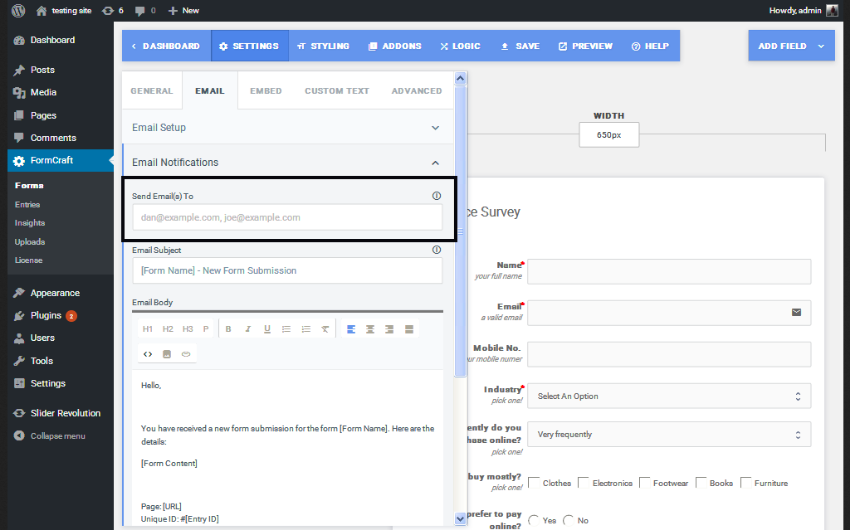
Now we have the form built and ready to publish and collect user input from the front end. While we can see user submissions from the backend, it would be nice to receive an email when there is a new user submission. You can configure the email address to which you want to receive emails in the Settings > Email > Email Notifications section.
Now everything is ready, we can publish the form. As usual, you just need to get the shortcode for your form, which you can then place where you want your form to appear. You can get the embed code for your form from the Settings > Embed section.
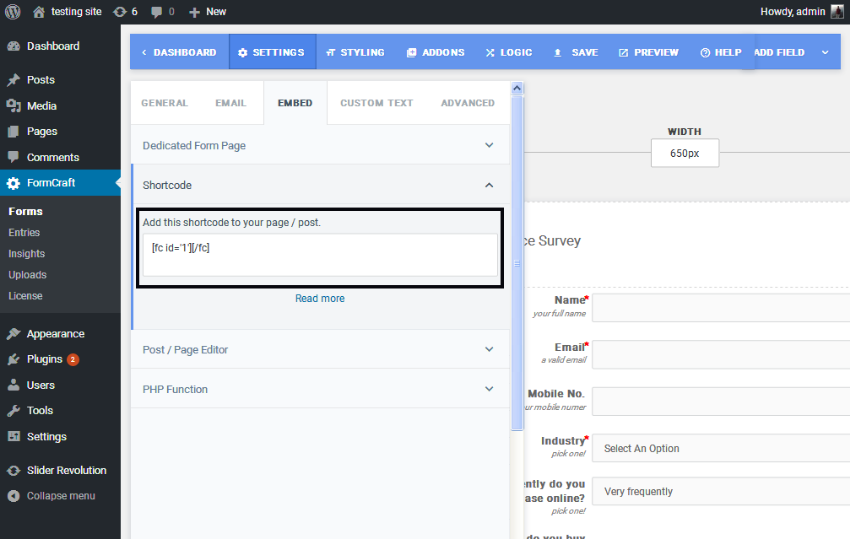
Copy it and place it on a page or post to display your form. You can view form submission status in FormCraft > Entry.

Other possible use cases
While we built a simple survey form, the FormCraft plugin is also capable of creating advanced and complex forms using the configuration options it provides. You can create anything from a simple contact form to complex, condition-based dynamic forms, such as:
- SMS Form
- feedback form
- Reservation form
- Complaint form
- Quotation
So it allows you to create various types of forms!
in conclusion
Today we review the FormCraft WordPress plugin available on CodeCanyon. It is a form builder plugin that allows you to create different types of forms using a drag-and-drop interface. Although it is a commercial plugin, I believe its price is reasonable considering the numerous features it offers.
If you have any suggestions or comments, feel free to use the feed below and I'd love to have a conversation!
The above is the detailed content of Create stunning WordPress forms with the FormCraft plugin. For more information, please follow other related articles on the PHP Chinese website!

Hot AI Tools

Undresser.AI Undress
AI-powered app for creating realistic nude photos

AI Clothes Remover
Online AI tool for removing clothes from photos.

Undress AI Tool
Undress images for free

Clothoff.io
AI clothes remover

Video Face Swap
Swap faces in any video effortlessly with our completely free AI face swap tool!

Hot Article
Hot Tools

Notepad++7.3.1
Easy-to-use and free code editor

SublimeText3 Chinese version
Chinese version, very easy to use

Zend Studio 13.0.1
Powerful PHP integrated development environment

Dreamweaver CS6
Visual web development tools

SublimeText3 Mac version
God-level code editing software (SublimeText3)
Hot Topics
 1664
1664
 14
1423
52
1317
25
1268
29
1242
24
14
1423
52
1317
25
1268
29
1242
24

 How to adjust the wordpress article list
Apr 20, 2025 am 10:48 AM
How to adjust the wordpress article list
Apr 20, 2025 am 10:48 AM
There are four ways to adjust the WordPress article list: use theme options, use plugins (such as Post Types Order, WP Post List, Boxy Stuff), use code (add settings in the functions.php file), or modify the WordPress database directly.
 How To Begin A WordPress Blog: A Step-By-Step Guide For Beginners
Apr 17, 2025 am 08:25 AM
How To Begin A WordPress Blog: A Step-By-Step Guide For Beginners
Apr 17, 2025 am 08:25 AM
Blogs are the ideal platform for people to express their opinions, opinions and opinions online. Many newbies are eager to build their own website but are hesitant to worry about technical barriers or cost issues. However, as the platform continues to evolve to meet the capabilities and needs of beginners, it is now starting to become easier than ever. This article will guide you step by step how to build a WordPress blog, from theme selection to using plugins to improve security and performance, helping you create your own website easily. Choose a blog topic and direction Before purchasing a domain name or registering a host, it is best to identify the topics you plan to cover. Personal websites can revolve around travel, cooking, product reviews, music or any hobby that sparks your interests. Focusing on areas you are truly interested in can encourage continuous writing
 How to get logged in user information in WordPress for personalized results
Apr 19, 2025 pm 11:57 PM
How to get logged in user information in WordPress for personalized results
Apr 19, 2025 pm 11:57 PM
Recently, we showed you how to create a personalized experience for users by allowing users to save their favorite posts in a personalized library. You can take personalized results to another level by using their names in some places (i.e., welcome screens). Fortunately, WordPress makes it very easy to get information about logged in users. In this article, we will show you how to retrieve information related to the currently logged in user. We will use the get_currentuserinfo(); function. This can be used anywhere in the theme (header, footer, sidebar, page template, etc.). In order for it to work, the user must be logged in. So we need to use
 How to display child categories on archive page of parent categories
Apr 19, 2025 pm 11:54 PM
How to display child categories on archive page of parent categories
Apr 19, 2025 pm 11:54 PM
Do you want to know how to display child categories on the parent category archive page? When you customize a classification archive page, you may need to do this to make it more useful to your visitors. In this article, we will show you how to easily display child categories on the parent category archive page. Why do subcategories appear on parent category archive page? By displaying all child categories on the parent category archive page, you can make them less generic and more useful to visitors. For example, if you run a WordPress blog about books and have a taxonomy called "Theme", you can add sub-taxonomy such as "novel", "non-fiction" so that your readers can
 How to sort posts by post expiration date in WordPress
Apr 19, 2025 pm 11:48 PM
How to sort posts by post expiration date in WordPress
Apr 19, 2025 pm 11:48 PM
In the past, we have shared how to use the PostExpirator plugin to expire posts in WordPress. Well, when creating the activity list website, we found this plugin to be very useful. We can easily delete expired activity lists. Secondly, thanks to this plugin, it is also very easy to sort posts by post expiration date. In this article, we will show you how to sort posts by post expiration date in WordPress. Updated code to reflect changes in the plugin to change the custom field name. Thanks Tajim for letting us know in the comments. In our specific project, we use events as custom post types. Now
 How to build a website for wordpress host
Apr 20, 2025 am 11:12 AM
How to build a website for wordpress host
Apr 20, 2025 am 11:12 AM
To build a website using WordPress hosting, you need to: select a reliable hosting provider. Buy a domain name. Set up a WordPress hosting account. Select a topic. Add pages and articles. Install the plug-in. Customize your website. Publish your website.
 How to Automate WordPress and Social Media with IFTTT (and more)
Apr 18, 2025 am 11:27 AM
How to Automate WordPress and Social Media with IFTTT (and more)
Apr 18, 2025 am 11:27 AM
Are you looking for ways to automate your WordPress website and social media accounts? With automation, you will be able to automatically share your WordPress blog posts or updates on Facebook, Twitter, LinkedIn, Instagram and more. In this article, we will show you how to easily automate WordPress and social media using IFTTT, Zapier, and Uncanny Automator. Why Automate WordPress and Social Media? Automate your WordPre
 How to display query count and page loading time in WordPress
Apr 19, 2025 pm 11:51 PM
How to display query count and page loading time in WordPress
Apr 19, 2025 pm 11:51 PM
One of our users asked other websites how to display the number of queries and page loading time in the footer. You often see this in the footer of your website, and it may display something like: "64 queries in 1.248 seconds". In this article, we will show you how to display the number of queries and page loading time in WordPress. Just paste the following code anywhere you like in the theme file (e.g. footer.php). queriesin
