

Polymer Composition Sharing: Part 1

In my last tutorial on the Polymer library, I explained how to take advantage of this great new tool to create reusable web components. The focus of this tutorial and using components is to help us develop by:
- Encapsulates most complex codes and structures
- Allow developers to use simple and easy-to-use tag style naming convention
- Provides a set of predefined UI elements for utilization and extension
I'm still fascinated by it and want to explore this further by checking out the new templates released by the Polymer team that make deployment and reuse even easier.
Canonical path
One of the quirks of the Polymer development process that I didn't mention is the disconnect between developing a component and actually making it reusable by others. Let’s look at a snippet from my previous tutorial:
<link rel="import" href="../bower_components/polymer/polymer.html">
The purpose of this code is to include Polymer core, which is the main API that allows you to define custom elements. For local development and testing this actually works very well, but unfortunately the path specified actually prevents you from sharing this component. The reason for this is that if other users try to install your element using Bower (which is the preferred installation method), it will end up in their bower_components folder as a sibling of Polymer.
The problem is that the component will be looking for ../bower_components/polymer/polymer.html which will be an invalid path. Components must always assume that their dependencies are siblings, so it should actually look for ../polymer/polymer.html. This is the "canonical path".
In chatting with Rob Dodson from the Polymer team, he said the only way to solve this problem is to develop using the approach I initially outlined, and once I'm ready to share my components, switch all the paths I'm looking for when I'm ready Ok when publishing my element I move bower_components to ../.
This is obviously not ideal, I could probably create some type of Grunt task to parse my component files for these updates. Thankfully, the Polymer team has been looking into this problem and came up with a creative solution they call untitled-element.
untitled-element Template
When I mention untitled-element, I'm referring to a new boilerplate that gives you a foundation to work with, making creating reusable and deployable components much easier easy. It helps eliminate the problem I mentioned above:
- Provides guidance on correct directory structure
- Incorporate an add-on for logging your API
- Allows you to easily demo your components during development and when sharing
The biggest benefit of doing this is being able to develop your components without having to go through the hassle of making a lot of path changes that are not only cumbersome but can break your elements if you miss something.
Currently, the project is part of PolymerLabs as it has been put through its paces, but it does look pretty solid:
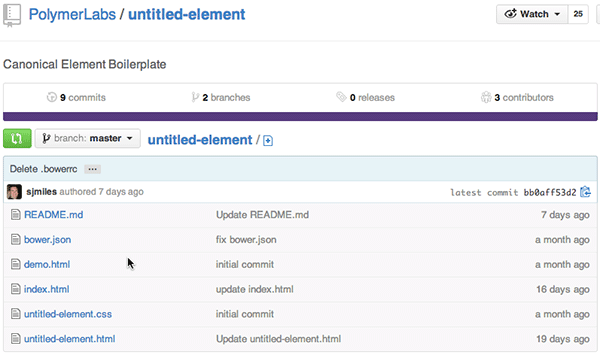
The first thing you need to do now is create a development directory that will house your new component and all the Bower components you will install. I call mine polymerdev. From there, you need to go to the untitled-element Github repository and download it into your new development folder. This is an important step as you need to extract the contents into this folder to avoid the sibling directory issue I mentioned earlier.
Extracting the .zip file will create a new folder called untitled-element-master which contains the boilerplate files needed to create the new component. You need to rename something based on the name of the component. This includes:
untitled-element-masterFolderuntitled-element.htmluntitled-element.css
I'm going to recreate the Reddit element I created in the previous tutorial, so the changes are as follows:
-
untitled-element-master->reddit-element -
untitled-element.html->reddit-element.html -
untitled-element.css->reddit-element.css
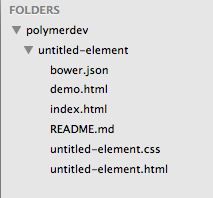
This is what the directory looked like before:
This is what it looks like after the update:

要理解的关键是,在创建组件时,您将在 reddit-element 文件夹中工作,并且在后续步骤中,当我们使用 Bower 安装 Polymer 组件时,该目录将是直接新安装的目录的同级。我知道我确实在强调这一点,但理解这一点很重要,因为它会影响您共享组件的能力。
要完成此操作,您需要更新以下文件中对组件名称的引用:
bower.jsondemo.htmlreddit-element.html
每个文件都在代码中包含对 untitled-element 的引用,需要更新。请记住,任何对 untitled-element 的引用都应更改为 reddit-element。如果您想绝对确定,请使用编辑器进行全局搜索和替换。
获取 Bower 设置
由于 Bower 是安装 Polymer 和共享组件的首选方法,因此让我们完成几个步骤以确保正确设置 Reddit 组件的 Bower 配置。
默认情况下,样板文件包含 bower.json 文件。该文件用于列出一些内容,包括组件的名称以及需要安装才能使用它的任何依赖项。它看起来像这样:
{
  "name": "reddit-element",
  "private": true,
  "dependencies": {
    "polymer": "Polymer/polymer#master"
  }
}
首先,我将删除 private 属性,因为它会阻止该组件在 Bower 注册表中列出。因为它应该是可共享的,所以我希望将其列出。另外,Reddit 组件需要进行 Ajax 调用,因此我包含了对 Polymer core-elements 组件集的依赖,其中包括我需要的 Ajax 功能。最后,我将添加一个版本号来跟踪后续情况。最终结果如下:
{
  "name": "reddit-element",
  "version": "0.0.1",
  "dependencies": {
    "polymer": "Polymer/polymer#~0.2.3",
    "core-elements": "Polymer/core-elements#~0.2.3",
  }
}
需要完成的 Bower 配置的最后一点是在 reddit-element 文件夹中创建一个名为 .bowerrc 的文件,该文件定义了组件依赖项的自定义安装位置。它被定义为简单的 JSON 数据,如下所示:
{
   "directory": "../"
}
这本质上是告诉 Bower 将所有依赖项安装到上一级,以便它们成为 reddit-element 文件夹的同级文件夹。这很重要的原因是,当有人使用 Bower 安装我们的组件时,它将被放置到 bower_components 文件夹中,作为其中其他所有内容(包括 Polymer)的同级文件夹。以这种方式构建事物,可以确保我们以最终共享的相同方式进行开发。它还允许我们使用上面提到的规范路径,确保在代码中引用其他组件的方式一致。
让我们回顾一下差异。如果我没有创建 .bowerrc 文件并运行 bower install 命令,我的目录结构将如下所示:
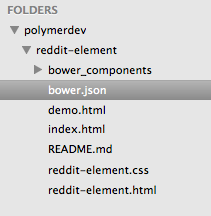
这会将 bower_components 文件夹直接安装到组件的目录中,这不是我想要的。我希望 reddit-element 文件夹成为它所需的所有依赖项的同级文件夹:
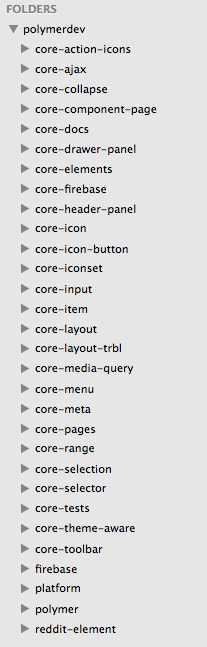
此方法确保当用户使用 Bower 安装此组件时,该组件和依赖项将正确安装到 bower_components 文件夹中。
将 .bowerrc 文件添加到组件的文件夹中,并使用正确的依赖项设置 bower.json 后,下一步是运行 bower install,让 Bower 拉下相应的组件并添加它们到项目。
接下来
在本教程中,我想确保为如何使用新的聚合物样板以及团队做出的设计选择背后的一些基本原理奠定了坚实的基础。
在本系列的下一部分中,我将介绍样板文件中包含的新文档组件,以及它将如何使组件的共享和演示变得更加容易。我还将向您展示如何设置要通过 Bower 注册表共享的组件。
The above is the detailed content of Polymer Composition Sharing: Part 1. For more information, please follow other related articles on the PHP Chinese website!

Hot AI Tools

Undresser.AI Undress
AI-powered app for creating realistic nude photos

AI Clothes Remover
Online AI tool for removing clothes from photos.

Undress AI Tool
Undress images for free

Clothoff.io
AI clothes remover

Video Face Swap
Swap faces in any video effortlessly with our completely free AI face swap tool!

Hot Article
Hot Tools

Notepad++7.3.1
Easy-to-use and free code editor

SublimeText3 Chinese version
Chinese version, very easy to use

Zend Studio 13.0.1
Powerful PHP integrated development environment

Dreamweaver CS6
Visual web development tools

SublimeText3 Mac version
God-level code editing software (SublimeText3)
Hot Topics
 1657
1657
 14
1415
52
1309
25
1257
29
1229
24
14
1415
52
1309
25
1257
29
1229
24

 How To Begin A WordPress Blog: A Step-By-Step Guide For Beginners
Apr 17, 2025 am 08:25 AM
How To Begin A WordPress Blog: A Step-By-Step Guide For Beginners
Apr 17, 2025 am 08:25 AM
Blogs are the ideal platform for people to express their opinions, opinions and opinions online. Many newbies are eager to build their own website but are hesitant to worry about technical barriers or cost issues. However, as the platform continues to evolve to meet the capabilities and needs of beginners, it is now starting to become easier than ever. This article will guide you step by step how to build a WordPress blog, from theme selection to using plugins to improve security and performance, helping you create your own website easily. Choose a blog topic and direction Before purchasing a domain name or registering a host, it is best to identify the topics you plan to cover. Personal websites can revolve around travel, cooking, product reviews, music or any hobby that sparks your interests. Focusing on areas you are truly interested in can encourage continuous writing
 How to adjust the wordpress article list
Apr 20, 2025 am 10:48 AM
How to adjust the wordpress article list
Apr 20, 2025 am 10:48 AM
There are four ways to adjust the WordPress article list: use theme options, use plugins (such as Post Types Order, WP Post List, Boxy Stuff), use code (add settings in the functions.php file), or modify the WordPress database directly.
 How to get logged in user information in WordPress for personalized results
Apr 19, 2025 pm 11:57 PM
How to get logged in user information in WordPress for personalized results
Apr 19, 2025 pm 11:57 PM
Recently, we showed you how to create a personalized experience for users by allowing users to save their favorite posts in a personalized library. You can take personalized results to another level by using their names in some places (i.e., welcome screens). Fortunately, WordPress makes it very easy to get information about logged in users. In this article, we will show you how to retrieve information related to the currently logged in user. We will use the get_currentuserinfo(); function. This can be used anywhere in the theme (header, footer, sidebar, page template, etc.). In order for it to work, the user must be logged in. So we need to use
 How to display child categories on archive page of parent categories
Apr 19, 2025 pm 11:54 PM
How to display child categories on archive page of parent categories
Apr 19, 2025 pm 11:54 PM
Do you want to know how to display child categories on the parent category archive page? When you customize a classification archive page, you may need to do this to make it more useful to your visitors. In this article, we will show you how to easily display child categories on the parent category archive page. Why do subcategories appear on parent category archive page? By displaying all child categories on the parent category archive page, you can make them less generic and more useful to visitors. For example, if you run a WordPress blog about books and have a taxonomy called "Theme", you can add sub-taxonomy such as "novel", "non-fiction" so that your readers can
 How to sort posts by post expiration date in WordPress
Apr 19, 2025 pm 11:48 PM
How to sort posts by post expiration date in WordPress
Apr 19, 2025 pm 11:48 PM
In the past, we have shared how to use the PostExpirator plugin to expire posts in WordPress. Well, when creating the activity list website, we found this plugin to be very useful. We can easily delete expired activity lists. Secondly, thanks to this plugin, it is also very easy to sort posts by post expiration date. In this article, we will show you how to sort posts by post expiration date in WordPress. Updated code to reflect changes in the plugin to change the custom field name. Thanks Tajim for letting us know in the comments. In our specific project, we use events as custom post types. Now
 How to Automate WordPress and Social Media with IFTTT (and more)
Apr 18, 2025 am 11:27 AM
How to Automate WordPress and Social Media with IFTTT (and more)
Apr 18, 2025 am 11:27 AM
Are you looking for ways to automate your WordPress website and social media accounts? With automation, you will be able to automatically share your WordPress blog posts or updates on Facebook, Twitter, LinkedIn, Instagram and more. In this article, we will show you how to easily automate WordPress and social media using IFTTT, Zapier, and Uncanny Automator. Why Automate WordPress and Social Media? Automate your WordPre
 How to display query count and page loading time in WordPress
Apr 19, 2025 pm 11:51 PM
How to display query count and page loading time in WordPress
Apr 19, 2025 pm 11:51 PM
One of our users asked other websites how to display the number of queries and page loading time in the footer. You often see this in the footer of your website, and it may display something like: "64 queries in 1.248 seconds". In this article, we will show you how to display the number of queries and page loading time in WordPress. Just paste the following code anywhere you like in the theme file (e.g. footer.php). queriesin
 How to build a website for wordpress host
Apr 20, 2025 am 11:12 AM
How to build a website for wordpress host
Apr 20, 2025 am 11:12 AM
To build a website using WordPress hosting, you need to: select a reliable hosting provider. Buy a domain name. Set up a WordPress hosting account. Select a topic. Add pages and articles. Install the plug-in. Customize your website. Publish your website.
