

Explore the WordPress HTTP API: wp_remote_post Overview

In this first series of the WordPress HTTP API, we learned about wp_remote_get. Specifically, we looked at the following aspects of the API:
- Function Overview
- A practical example
- How to handle the response
- And understand the parameters of the function
We will continue our series of articles about the WordPress HTTP API, but we will turn our attention to the second method of the API: wp_remote_post.
In the next set of articles we will survey this function to understand what this function provides and why it is useful, practical examples of how to implement it into our work, and how to understand and come from this function the response to.
With that said, let’s begin our investigation of this function.
Remote request: refresh
If you haven't followed along so far, I highly recommend checking out the first article in this series to at least understand the basics of how GET requests work.
Honestly, POST requests are not that different. Just as a GET request is typically used to retrieve information from a server, a POST request is typically used to send a message to a server.
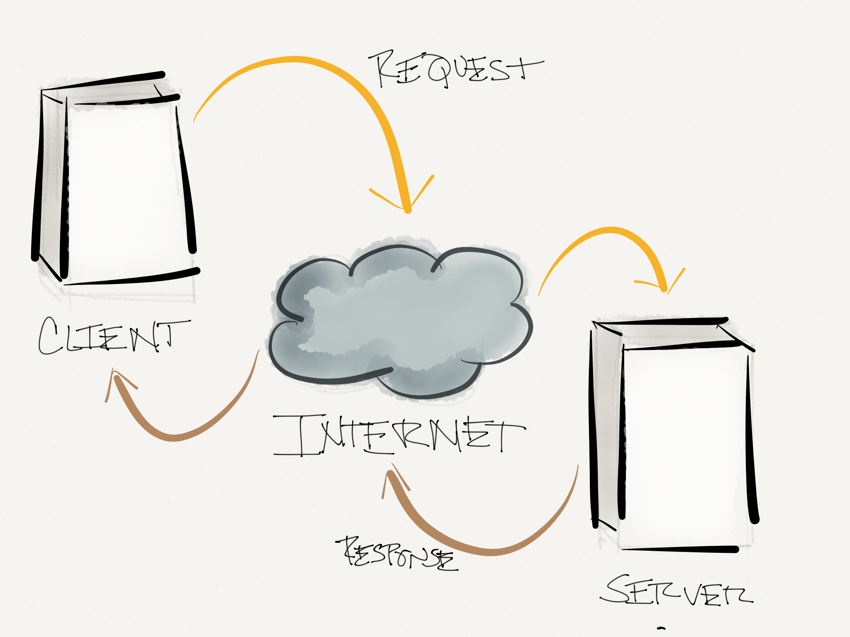
But here's the thing: both protocols are capable of sending and receiving data, but here's a general rule of thumb on how I typically handle GET and POST requests.
-
GETThe request is typically used to retrieve information from the server and therefore requires a response -
The
POSTrequest is typically used to send information to the server , and although a response may not be received, it is always good to know if the response was received and processed correctly by the server
In the remaining articles in this part of the series, we will see how to handle both situations - that is, how to handle the situation where no response is given and how to handle the situation where a response is given.
Summary of how to make a request
Now, as far as server-level requests are concerned (especially in PHP), they are usually issued based on the following two functions (unless you are using a third-party library that is beyond the scope of this series).
While we covered these in more detail in our first article, I'll summarize them here.
-
file_get_contentsAccepts a URL as a parameter and will return the requested data or false on failure. This is a relatively common way to retrieve data for remote requests. -
cURLis a complete library (rather than a function) that provides developers with complete configuration options to adjust to suit their needs. There is a lot to learn about this library. If you are an advanced developer, definitely check out cURL.
In most cases, it's easy to figure out how to make the request, but the extent to which you adjust how the request is made depends entirely on the options you choose to use - that is, file_get_contents or cURL.
Of course, this is more of the PHP way of doing requests, and while we may implement this in some jobs depending on the nature of the project, this doesn't necessarily cover the WordPress way.
In fact, the above content is a brief review based on the previous content. Nonetheless, it is important to understand where we come from, what we can do, and where we are going.
How to make a POST request in WordPress
As mentioned above, the above comments are more relevant to PHP, so let's look at the POST request in the context of WordPress.
So, just like we looked at the WordPress Coding Standards to review best practices for writing WordPress-based code, we will now look at the APIs available for writing
POST requests using best practices.
wp_remote_post.
- The URL to which the request will be made
- Array of parameters that help customize requests to the server.
-
methodrefers to which method is requested. Given the nature of our API methods, we're obviously usingPOST. -
timeoutis how long you are willing to wait for a request to be processed before giving up. The default value is five seconds, but this value can be reduced or increased depending on the nature of the application. -
redirectionSounds like the URL you will be redirected to after the request completes, right? Instead, it is the unit of time (in seconds) to wait for a redirect before giving up the request. -
user-agentAllows us to control the user agent sent with the request. Typically, this is WordPress and the version number, but it's obviously customizable. -
blockingIn short, if set to true then the script will continue executing until the server returns something; otherwise, the script will continue running without blocking the rest of the application. Of course, this comes at the cost of possibly never getting a response, but depending on the conditions you're building in, this might be fine. -
compresswas introduced in WordPress 2.6 and allows you to send the request body in a compressed format. This will be beyond the scope of our future articles. -
decompressSimilar to compress, except on our side - if compressed data is received, this will allow us to decompress the content before doing any further work or processing on it. -
sslverifywas introduced in WordPress 2.8 and is useful for scenarios where you need to check whether an SSL certificate is valid. If not, the request is denied; otherwise, you're good to go. This option is also outside the scope of this set of articles.
Obviously, there is a lot available. Over the next few articles I hope to look at some of this in more detail, but first let's look at a very simple, practical example using API functions.
Make POST Request
Things should be clear by now, right? Using wp_remote_post should be just as easy as using wp_remote_get, so starting with the next post, we'll do that.
Before that, please make sure you have read all the articles so far, and please leave any comments and/or questions about this specific post in the comments.
Next, let’s get to work!
The above is the detailed content of Explore the WordPress HTTP API: wp_remote_post Overview. For more information, please follow other related articles on the PHP Chinese website!

Hot AI Tools

Undresser.AI Undress
AI-powered app for creating realistic nude photos

AI Clothes Remover
Online AI tool for removing clothes from photos.

Undress AI Tool
Undress images for free

Clothoff.io
AI clothes remover

Video Face Swap
Swap faces in any video effortlessly with our completely free AI face swap tool!

Hot Article
Hot Tools

Notepad++7.3.1
Easy-to-use and free code editor

SublimeText3 Chinese version
Chinese version, very easy to use

Zend Studio 13.0.1
Powerful PHP integrated development environment

Dreamweaver CS6
Visual web development tools

SublimeText3 Mac version
God-level code editing software (SublimeText3)
Hot Topics


 Alipay PHP SDK transfer error: How to solve the problem of 'Cannot declare class SignData'?
Apr 01, 2025 am 07:21 AM
Alipay PHP SDK transfer error: How to solve the problem of 'Cannot declare class SignData'?
Apr 01, 2025 am 07:21 AM
Alipay PHP...
 Explain JSON Web Tokens (JWT) and their use case in PHP APIs.
Apr 05, 2025 am 12:04 AM
Explain JSON Web Tokens (JWT) and their use case in PHP APIs.
Apr 05, 2025 am 12:04 AM
JWT is an open standard based on JSON, used to securely transmit information between parties, mainly for identity authentication and information exchange. 1. JWT consists of three parts: Header, Payload and Signature. 2. The working principle of JWT includes three steps: generating JWT, verifying JWT and parsing Payload. 3. When using JWT for authentication in PHP, JWT can be generated and verified, and user role and permission information can be included in advanced usage. 4. Common errors include signature verification failure, token expiration, and payload oversized. Debugging skills include using debugging tools and logging. 5. Performance optimization and best practices include using appropriate signature algorithms, setting validity periods reasonably,
 How does session hijacking work and how can you mitigate it in PHP?
Apr 06, 2025 am 12:02 AM
How does session hijacking work and how can you mitigate it in PHP?
Apr 06, 2025 am 12:02 AM
Session hijacking can be achieved through the following steps: 1. Obtain the session ID, 2. Use the session ID, 3. Keep the session active. The methods to prevent session hijacking in PHP include: 1. Use the session_regenerate_id() function to regenerate the session ID, 2. Store session data through the database, 3. Ensure that all session data is transmitted through HTTPS.
 Describe the SOLID principles and how they apply to PHP development.
Apr 03, 2025 am 12:04 AM
Describe the SOLID principles and how they apply to PHP development.
Apr 03, 2025 am 12:04 AM
The application of SOLID principle in PHP development includes: 1. Single responsibility principle (SRP): Each class is responsible for only one function. 2. Open and close principle (OCP): Changes are achieved through extension rather than modification. 3. Lisch's Substitution Principle (LSP): Subclasses can replace base classes without affecting program accuracy. 4. Interface isolation principle (ISP): Use fine-grained interfaces to avoid dependencies and unused methods. 5. Dependency inversion principle (DIP): High and low-level modules rely on abstraction and are implemented through dependency injection.
 How to debug CLI mode in PHPStorm?
Apr 01, 2025 pm 02:57 PM
How to debug CLI mode in PHPStorm?
Apr 01, 2025 pm 02:57 PM
How to debug CLI mode in PHPStorm? When developing with PHPStorm, sometimes we need to debug PHP in command line interface (CLI) mode...
 How to automatically set permissions of unixsocket after system restart?
Mar 31, 2025 pm 11:54 PM
How to automatically set permissions of unixsocket after system restart?
Mar 31, 2025 pm 11:54 PM
How to automatically set the permissions of unixsocket after the system restarts. Every time the system restarts, we need to execute the following command to modify the permissions of unixsocket: sudo...
 Explain late static binding in PHP (static::).
Apr 03, 2025 am 12:04 AM
Explain late static binding in PHP (static::).
Apr 03, 2025 am 12:04 AM
Static binding (static::) implements late static binding (LSB) in PHP, allowing calling classes to be referenced in static contexts rather than defining classes. 1) The parsing process is performed at runtime, 2) Look up the call class in the inheritance relationship, 3) It may bring performance overhead.
 Framework Security Features: Protecting against vulnerabilities.
Mar 28, 2025 pm 05:11 PM
Framework Security Features: Protecting against vulnerabilities.
Mar 28, 2025 pm 05:11 PM
Article discusses essential security features in frameworks to protect against vulnerabilities, including input validation, authentication, and regular updates.
