

Discuss in detail how to connect to wifi on win7 computer

Many friends have used the Windows 7 system, but there are still many friends who don’t know much about its settings, such as connecting a Windows 7 computer to WiFi. For your reference, I have shared with you the detailed steps for connecting to WiFi, which are applicable to Windows 7 computers.
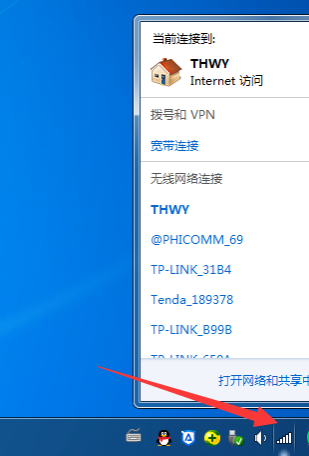
1. If it is a laptop, click the WiFi icon in the lower right corner to select the wireless connection you want to connect to, and enter the password to connect directly.
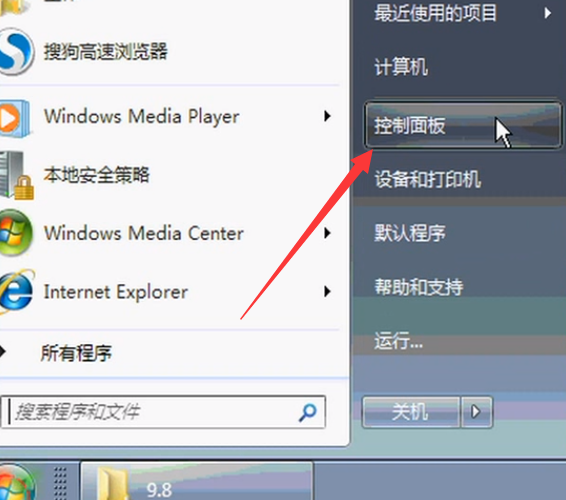
#2. If a desktop computer is connected to WiFi, you need to install the wireless network card and driver, and then set it up to connect to WiFi. Let’s take a closer look at how to set it up: Open the Control Panel.
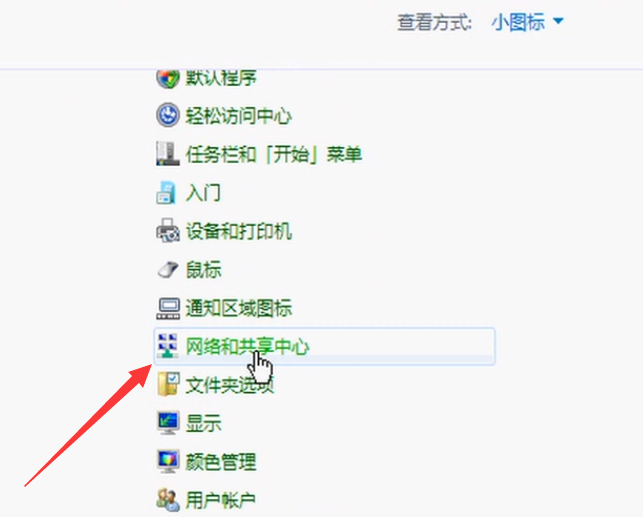
#3. Change the viewing mode to small icons and select Network and Sharing Center.
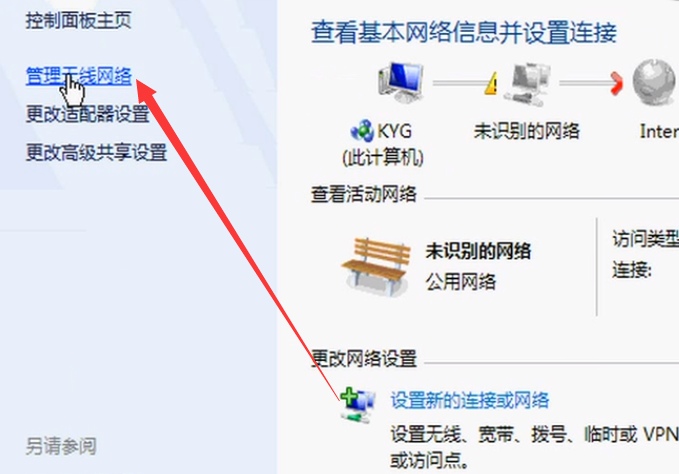
#4. Click Manage Wireless Network on the left.
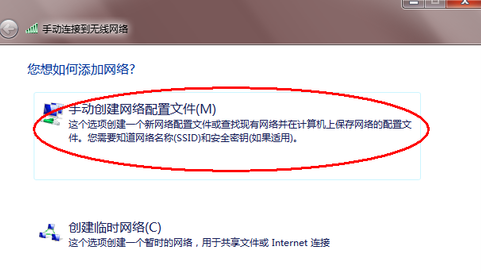
#5. Click Add, a window for manually connecting to a wireless network will pop up, and select the first one to create manually.
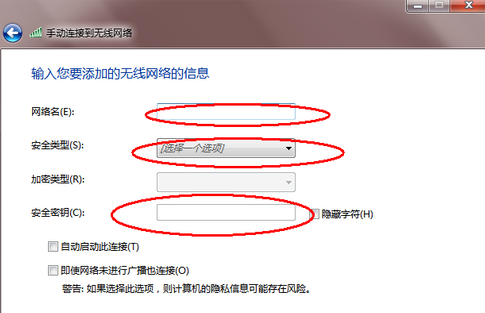
#6. Just enter the wireless you want to add.
#The above is how to connect a win7 computer to wifi. I hope this article will be helpful to everyone.
The above is the detailed content of Discuss in detail how to connect to wifi on win7 computer. For more information, please follow other related articles on the PHP Chinese website!

Hot AI Tools

Undresser.AI Undress
AI-powered app for creating realistic nude photos

AI Clothes Remover
Online AI tool for removing clothes from photos.

Undress AI Tool
Undress images for free

Clothoff.io
AI clothes remover

Video Face Swap
Swap faces in any video effortlessly with our completely free AI face swap tool!

Hot Article
Hot Tools

Notepad++7.3.1
Easy-to-use and free code editor

SublimeText3 Chinese version
Chinese version, very easy to use

Zend Studio 13.0.1
Powerful PHP integrated development environment

Dreamweaver CS6
Visual web development tools

SublimeText3 Mac version
God-level code editing software (SublimeText3)
Hot Topics


 Solution to the problem that Win11 system cannot install Chinese language pack
Mar 09, 2024 am 09:48 AM
Solution to the problem that Win11 system cannot install Chinese language pack
Mar 09, 2024 am 09:48 AM
Solution to the problem that Win11 system cannot install Chinese language pack With the launch of Windows 11 system, many users began to upgrade their operating system to experience new functions and interfaces. However, some users found that they were unable to install the Chinese language pack after upgrading, which troubled their experience. In this article, we will discuss the reasons why Win11 system cannot install the Chinese language pack and provide some solutions to help users solve this problem. Cause Analysis First, let us analyze the inability of Win11 system to
 Solution for Win11 unable to install Chinese language pack
Mar 09, 2024 am 09:15 AM
Solution for Win11 unable to install Chinese language pack
Mar 09, 2024 am 09:15 AM
Win11 is the latest operating system launched by Microsoft. Compared with previous versions, Win11 has greatly improved the interface design and user experience. However, some users reported that they encountered the problem of being unable to install the Chinese language pack after installing Win11, which caused trouble for them to use Chinese in the system. This article will provide some solutions to the problem that Win11 cannot install the Chinese language pack to help users use Chinese smoothly. First, we need to understand why the Chinese language pack cannot be installed. Generally speaking, Win11
 Strategies to solve Win11's inability to install the Chinese language pack
Mar 08, 2024 am 11:51 AM
Strategies to solve Win11's inability to install the Chinese language pack
Mar 08, 2024 am 11:51 AM
Strategies to deal with Win11’s inability to install the Chinese language pack. With the launch of Windows 11, many users can’t wait to upgrade to this new operating system. However, some users have encountered difficulties when trying to install the Chinese language pack, preventing them from using the Chinese interface properly. In this article, we will discuss the problem that Win11 cannot install the Chinese language pack and propose some countermeasures. First, let’s explore why there are problems installing Chinese language packs on Win11. This may be due to the system's
 What to do if the HP printer cannot connect to wifi - What to do if the HP printer cannot connect to wifi
Mar 06, 2024 pm 01:00 PM
What to do if the HP printer cannot connect to wifi - What to do if the HP printer cannot connect to wifi
Mar 06, 2024 pm 01:00 PM
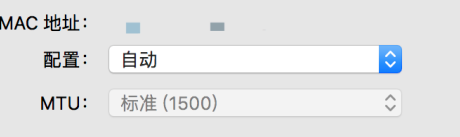
When many users use HP printers, they are not familiar with what to do if the HP printer cannot connect to wifi. Below, the editor will bring you solutions to the problem of HP printers not connecting to wifi. Let us take a look below. Set the mac address of the HP printer to automatically select and automatically join the network. Check to change the network configuration. Use dhcp to enter the password to connect to the HP printer. It shows that it is connected to wifi.
 How to connect keep body fat scale
Mar 07, 2024 pm 04:50 PM
How to connect keep body fat scale
Mar 07, 2024 pm 04:50 PM
How to connect the keep body fat scale? Keep has a specially designed body fat scale, but most users do not know how to connect the keep body fat scale. Next is the graphic tutorial on the connection method of the keep body fat scale that the editor brings to users. , interested users come and take a look! How to connect the keep body fat scale 1. First open the keep software, go to the main page, click [My] in the lower right corner, and select [Smart Hardware]; 2. Then on the My Smart Devices page, click the [Add Device] button in the middle; 3 , then select the device you want to add interface, select [Smart Body Fat/Weight Scale]; 4. Then on the device model selection page, click the [keep body fat scale] option; 5. Finally, in the interface shown below, finally [Add Now] at the bottom
 How to use shortcut keys to take screenshots in Win8?
Mar 28, 2024 am 08:33 AM
How to use shortcut keys to take screenshots in Win8?
Mar 28, 2024 am 08:33 AM
How to use shortcut keys to take screenshots in Win8? In our daily use of computers, we often need to take screenshots of the content on the screen. For users of Windows 8 system, taking screenshots through shortcut keys is a convenient and efficient operation method. In this article, we will introduce several commonly used shortcut keys to take screenshots in Windows 8 system to help you take screenshots more quickly. The first method is to use the "Win key + PrintScreen key" key combination to perform full
 Detailed explanation of obtaining administrator rights in Win11
Mar 08, 2024 pm 03:06 PM
Detailed explanation of obtaining administrator rights in Win11
Mar 08, 2024 pm 03:06 PM
Windows operating system is one of the most popular operating systems in the world, and its new version Win11 has attracted much attention. In the Win11 system, obtaining administrator rights is an important operation. Administrator rights allow users to perform more operations and settings on the system. This article will introduce in detail how to obtain administrator permissions in Win11 system and how to effectively manage permissions. In the Win11 system, administrator rights are divided into two types: local administrator and domain administrator. A local administrator has full administrative rights to the local computer
 Three Ways to Fix Edge Your Connection Isn't Private
Mar 13, 2024 pm 01:30 PM
Three Ways to Fix Edge Your Connection Isn't Private
Mar 13, 2024 pm 01:30 PM
When you use the Edge browser to access web pages, have you ever encountered a prompt that your connection is not a dedicated connection, causing web browsing to fail? How is this going? Many friends don’t know how to deal with this problem. You can take a look at the following three solutions. Method 1 (simple and crude): In the edge browser, you can try to solve the problem of the website being inaccessible by entering the settings and turning off the security function, and then blocking location permissions in the website permissions. It is important to note that the effectiveness and duration of this approach may vary, and specific effects cannot be determined. After restarting your browser, you can try visiting the website to see if the issue is resolved. Method 2: Adjust the keyboard to English input