

How to install Win11 using USB flash drive

How to install Win11 using a USB flash drive? With the launch of Win11 system at any time, many users want to install Win11 system on their computers, and there are many ways to install Win11 system. Below, I have prepared a graphic tutorial for installing Win11 on a large U disk. The steps are simple and quick to get started. Friends who need it can try to operate it and see.
U disk installation Win11 graphic tutorial
1. A U disk (try to use a U disk above 8G).
2. Download the U disk boot disk creation tool on this page: System Home U disk reinstallation system.
3. Ghost or ISO system image file ( https://www.xitongzhijia.net/win11 ).
4. A computer that can be used with normal network connection.
U disk Startup Disk make Steps:
Please make sure to back up important files in the USB flash drive because the USB flash drive will be formatted during the production process. If the system needs to be installed on the C drive, do not place important files on the C drive or the desktop.
1. First, close all anti-virus software, and then run the System Home Installation Master software. The software will prompt you. After reading it carefully, click I Got It to enter the tool.
2. After entering the tool, select U disk boot at the top to enter the U disk boot disk creation interface.
3. Keep the default format and partition format without manual changes. Click to start creating.
4. The tool will automatically prompt whether to start production. Please back up important data files in the USB flash drive in advance, because using the creation tool will erase all data in the USB flash drive and cannot be recovered.
5. Wait for the U disk to be created.
6. After the U disk is created, the tool will prompt and display the U disk startup shortcut key for the current computer.
7. After the production is completed, you need to test whether the current USB boot disk is completed. Please click the Simulate Start-BIOS Start button in the lower right corner to check whether the currently created USB boot disk is successful.
8. Wait for a moment, it will be considered successful if this interface is successfully displayed.
9. Then close the software. The user needs to move the downloaded system to the USB flash drive.
U disk installation system:
1. Find the U disk boot disk shortcut key of your computer motherboard.
2. Insert the U disk into the computer, restart the computer and press the shortcut key to select the U disk as the first startup item. Select the second [02] to start Windows10PEx64 (network version) and press the Enter key to enter.
3. After entering the PE interface, click the one-click reinstall system on the desktop.
4. Open the tool and select the system image ISO file downloaded from the USB flash drive. Once selected, the user can again select the partition where the system will be installed, usually Part C. If the software recognizes the error, the user needs to make his own choice.
5. Click Next after completing the selection.
6. Just click on this page to install.
7. The system is being installed, please wait.
8. After the system is installed, the software will automatically prompt that it needs to be restarted and the U disk must be pulled out. Please pull out the U disk and restart the computer.
9. After restarting, the system will automatically enter the system installation interface. At this point, the installation is successful!
The above is the detailed content of How to install Win11 using USB flash drive. For more information, please follow other related articles on the PHP Chinese website!

Hot AI Tools

Undresser.AI Undress
AI-powered app for creating realistic nude photos

AI Clothes Remover
Online AI tool for removing clothes from photos.

Undress AI Tool
Undress images for free

Clothoff.io
AI clothes remover

Video Face Swap
Swap faces in any video effortlessly with our completely free AI face swap tool!

Hot Article
Hot Tools

Notepad++7.3.1
Easy-to-use and free code editor

SublimeText3 Chinese version
Chinese version, very easy to use

Zend Studio 13.0.1
Powerful PHP integrated development environment

Dreamweaver CS6
Visual web development tools

SublimeText3 Mac version
God-level code editing software (SublimeText3)
Hot Topics


 Illustrated installation steps of an electric fan 'A must-see for beginners: How to disassemble and assemble an electric fan'
Feb 06, 2024 pm 08:10 PM
Illustrated installation steps of an electric fan 'A must-see for beginners: How to disassemble and assemble an electric fan'
Feb 06, 2024 pm 08:10 PM
The disassembly and assembly operation of the electric fan can be carried out according to the actual maintenance needs. Let's take the Midea FTS35-M2 electric fan as an example to introduce the disassembly and assembly method of the electric fan. 1. Disassembly of the electric fan grille and fan blades The electric fan grille and fan blades are important components on the top of the electric fan. If you suspect that the fan blades are faulty, you need to remove the grille first and then the fan blades. The grille and blades of an electric fan are usually fixed with screws. When disassembling, find the screws on the grille, unscrew and remove the grille, and further disassemble the fan blades. Remove the electric fan grille and fan blades. The specific operation is as shown in the figure: 2. Removal of the electric fan motor casing. The electric fan motor is fixed in the electric fan casing by fixing screws. When it is suspected that the motor in the electric fan is faulty, The casing of the motor should be disassembled first.
 How to solve the problem of stuck installation of dx9 components in win11
Dec 26, 2023 am 08:37 AM
How to solve the problem of stuck installation of dx9 components in win11
Dec 26, 2023 am 08:37 AM
The dx9 component is a very good program that can help us play games. It can improve the picture quality and smoothness of our various games. However, many users get stuck when installing the dx9 component on the win11 system. In fact, we can install it on win11 Install dx12 on the computer, let’s take a look below. What should I do if the dx9 component is stuck when installing win11? 1. The win11 system supports dx12, not dx9, so we cannot install dx9 normally. 2. Of course, it may also be because there is a problem with our dx9 installation package. You can re-download a dx9 and give it a try. 3. As the latest DirectX program, dx12 has better performance and effects than dx9, and can improve more games.
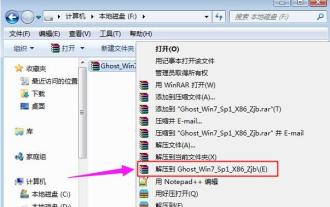 How to use the ghost installer. The editor teaches you the steps to install the ghost system.
Jan 11, 2024 pm 07:39 PM
How to use the ghost installer. The editor teaches you the steps to install the ghost system.
Jan 11, 2024 pm 07:39 PM
The ghost system is a free installation system. The reason why it is popular is that the ghost system will automatically activate after installation and automatically install the corresponding hardware drivers. This not only saves time, but also provides convenience to novice users. However, many people do not If you know how to install the ghost system image, the installation steps are actually very simple. Below, I will share with you the steps to install the ghost system. Installing systems through USB disks is becoming more and more popular. Nowadays, boot disks are very powerful. They can install ghost systems automatically or manually. However, because the manual ghost method is more complicated, many people don’t know how to install it, which makes users depressed. Sorry, below, the editor brings you the steps to install the ghost system. Recently, the editor is in
 Step-by-step tutorial for installing win7 network card driver
Jul 27, 2023 am 10:53 AM
Step-by-step tutorial for installing win7 network card driver
Jul 27, 2023 am 10:53 AM
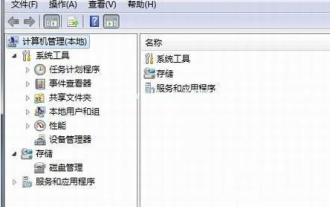
Whether an original win7 system professional version computer can work normally depends on whether our driver is normal. Just like whether our computer can access the Internet normally depends on whether our network card is installed. Then the next step is Let the editor tell you the step-by-step tutorial on installing the win7 network card driver, let’s take a look. 1. Right-click Computer-->Manage-->Device Manager: 2. Click on the network card device, select Properties, and then select the driver, as shown in the figure: 3. Click Update Driver. 4. Browse the computer for driver software and find the CD-ROM network card driver. 5. Install through the driver wizard. Download a driver wizard and open the driver management, it will pop up the driver you need to update or install, select update or
 Detailed explanation of pip installation guide on Ubuntu
Jan 27, 2024 am 09:45 AM
Detailed explanation of pip installation guide on Ubuntu
Jan 27, 2024 am 09:45 AM
Detailed explanation of the pip installation steps on Ubuntu On the Ubuntu operating system, pip is a Python package management tool that can easily help us install, upgrade and manage Python components. This article will detail the steps to install pip on Ubuntu and provide specific code examples. Step 1: Open Terminal First, open Terminal. In Ubuntu, you can open the terminal by clicking the "Applications" icon in the upper left corner and typing "terminal" in the search bar. Step 2:
 Methods and tutorials to solve the problem of Simplified Chinese installation in win11
Dec 22, 2023 am 10:09 AM
Methods and tutorials to solve the problem of Simplified Chinese installation in win11
Dec 22, 2023 am 10:09 AM
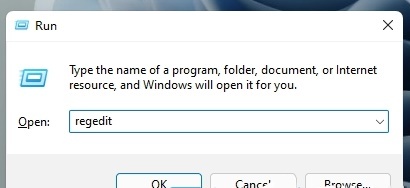
Some users found that the win11 system they installed was not the Chinese version, and did not want to reinstall the system. They wanted to install a simplified Chinese package directly, but found that the installation failed. This may be because when downloading and installing the Simplified Chinese package, it was blocked by the system firewall. You can install it normally by temporarily turning it off. What to do if win11 fails to install Simplified Chinese: 1. First press the "win+r" key combination on the keyboard to call up run, enter "regedit" and press Enter to confirm. 2. Then enter the "Computer\HKEY_LOCAL_MACHINE\SOFTWARE\Policies\Microsoft\WindowsDefender" path. 3. Right-click on the blank space on the right side.
 How to solve the problem that Win11 installation requires TPM2.0
Dec 26, 2023 pm 09:50 PM
How to solve the problem that Win11 installation requires TPM2.0
Dec 26, 2023 pm 09:50 PM
Many users have encountered problems titled "ThePCmustsupportTPM2.0" during the installation process of Windows 11 systems. We can successfully enable the TMP function in the BIOS settings interface or cleverly replace the corresponding files to bypass TPM detection. be resolved effectively! Let’s explore these solutions in depth together! What to do if win11 installation prompts tpm2.0? Method 1: 1. First restart the computer, restart the computer and use shortcut keys (hot keys) to enter the BIOS setting interface. 2. In this BIOS setting, look for TMP or CMOC related options and start them successfully. 2. Replace files 1. If in front of the BIOS setup interface
 Mirror installation and USB disk installation: What is the difference?
Apr 09, 2024 pm 12:34 PM
Mirror installation and USB disk installation: What is the difference?
Apr 09, 2024 pm 12:34 PM
Mirror installation and USB disk installation are two common operating system installation methods. They differ in the installation process, required tools and steps. This article will conduct a comparative analysis of these two installation methods to help readers better choose the installation method that suits them. Tool materials: System version: Windows 10 Brand model: Dell Then start the computer from the USB flash drive or CD to install. 2. This method can avoid the problem of repeatedly downloading the operating system and is suitable for users with slow network speeds or who need to install multiple computers. 3. Operation steps: First download