Home Database Redis How to use redis session sharing with nginx+tomcat

How to use redis session sharing with nginx+tomcat

May 30, 2023 pm 06:40 PM
redis nginx tomcat

Environment preparation

1. Prepare an nginx server ip192.168.1.133 port 81

Installation process:

#首先安装依赖:
yum -y install gcc-c++ 
yum -y install pcre pcre-devel 
yum -y install zlib zlib-devel 
yum -y install openssl openssl—devel
#注意 : 安装nginx必须使用 root 用户安装
#创建一个nginx目录
mkdir /usr/local/src/nginx
#进入到nginx目录
cd /usr/local/src/nginx
#下载或上传安装包
wget http://nginx.org/download/nginx.tar.gz 或 rz上传
#解压安装包
tar -xvf nginx.tar.gz
#进入到解压后的目录
cd nginx
# 下面 才开始正式安装
#把nginx安装到指定用户的目录
mkdir -p /ucenter/soft/nginx
#安装配置 prefix为安装目录 user为用户 group为 组
./configure --prefix=/ucenter/soft/nginx --user=ucenter --group=ucenter
#编译
make 
#安装
make install
#在linux系统中由于非root用户不能占用80端口,所以需要使普通用户以root身份启动nginx。 
cd /ucenter/soft/nginx/sbin
#把soft文件下所有的文件所属者修改为ucener -r 表示递归
chown ucenter:ucenter ./soft/ -r
#修改 ./nginx 的所属为root
chown root nginx
#让普通用户可以使用80端口,可以使用root权限启用nginx
chmod u+s nginx
#修改配置文件 在修改配置文件之前 ,要备份该文件
cd conf/
# 要注意nginx 的工作进程,一般根据cpu的核数去修改
vim nginx.conf
#关闭防火墙,打开80端口
service iptables stop
#启动nginx
./nginx
#重启nginx
./nginx -s reload
#关闭nginx
./nginx -s stop
Copy after login

Prepare a tomcat server, first prepare the java environment, omit the jdk installation steps

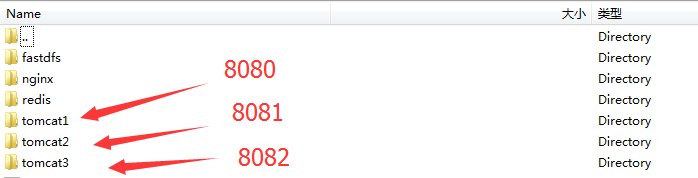
Then install 3 tomcat server ip addresses: 192.168.1.143, tomcat1 8080 port, tomcat2 8081 port, tomcat3 Port 8082.

nginx+tomcat怎么使用redis session共享

apache-tomcat-7.0.64/conf/server.xml configuration file Modify these three places so that the ports will not conflict

<server port="8005" shutdown="shutdown">
<connector port="8080" protocol="http/1.1"
connectiontimeout="20000"
redirectport="8443" />
<connector port="8009" protocol="ajp/1.3" redirectport="8443" />
Copy after login

Modify index.jsp in the tomcat root directory, add the identification of each tomcat, and display the session id on the page

<%--
licensed to the apache software foundation (asf) under one or more
contributor license agreements. see the notice file distributed with
this work for additional information regarding copyright ownership.
the asf licenses this file to you under the apache license, version 2.0
(the "license"); you may not use this file except in compliance with
the license. you may obtain a copy of the license at

 http://www.apache.org/licenses/license-2.0

unless required by applicable law or agreed to in writing, software
distributed under the license is distributed on an "as is" basis,
without warranties or conditions of any kind, either express or implied.
see the license for the specific language governing permissions and
limitations under the license.
--%>
<!doctype html>
<%@ page session="true" %>
<%
java.text.simpledateformat sdf = new java.text.simpledateformat("yyyy");
request.setattribute("year", sdf.format(new java.util.date()));
request.setattribute("tomcaturl", "http://tomcat.apache.org/");
request.setattribute("tomcatdocurl", "/docs/");
request.setattribute("tomcatexamplesurl", "/examples/");
%>
<html>
 <head>
  <title><%=request.getservletcontext().getserverinfo() %></title>
  <link href="favicon.ico" rel="icon" type="image/x-icon" />
  <link href="favicon.ico" rel="shortcut icon" type="image/x-icon" />
  <link href="tomcat.css" rel="stylesheet" type="text/css" />
 </head>

 <body>
  <div id="wrapper">
   <div id="navigation" class="curved container">
    <span id="nav-home"><a href="${tomcaturl}">home--<%=request.getsession().getid() %></a></span>
    <span id="nav-hosts"><a href="${tomcatdocurl}">documentation</a></span>
    <span id="nav-config"><a href="${tomcatdocurl}config/">configuration</a></span>
    <span id="nav-examples"><a href="${tomcatexamplesurl}">examples</a></span>
    <span id="nav-wiki"><a href="http://wiki.apache.org/tomcat/frontpage">wiki</a></span>
    <span id="nav-lists"><a href="${tomcaturl}lists.html">mailing lists</a></span>
    <span id="nav-help"><a href="${tomcaturl}findhelp.html">find help</a></span>
    <br />
   </div>
   <div id="asf-box">
    <h1>${pagecontext.servletcontext.serverinfo}--8080</h1>
   </div>
   <div id="upper" class="curved container">
    <div id="congrats" class="curved container">
     <h2>if you&#39;re seeing this, you&#39;ve successfully installed tomcat. congratulations!</h2>
    </div>
    <div id="notice">
     <img src="tomcat.png" alt="[tomcat logo]" />
     <div id="tasks">
      <h3>recommended reading:</h3>
      <h4><a href="${tomcatdocurl}security-howto.html">security considerations how-to</a></h4>
      <h4><a href="${tomcatdocurl}manager-howto.html">manager application how-to</a></h4>
      <h4><a href="${tomcatdocurl}cluster-howto.html">clustering/session replication how-to</a></h4>
     </div>
    </div>
    <div id="actions">
     <div>
      <a class="container shadow" href="/manager/status"><span>server status</span></a>
     </div>
     <div>
      <a class="container shadow" href="/manager/html"><span>manager app</span></a>
     </div>
     <div>
      <a class="container shadow" href="/host-manager/html"><span>host manager</span></a>
     </div>
    </div>
    <!--
    <br />
    -->
    <br />
   </div>
   <div id="middle" class="curved container">
    <h3>developer quick start</h3>
    <div>
     <div>
      <p><a href="${tomcatdocurl}setup.html">tomcat setup</a></p>
      <p><a href="${tomcatdocurl}appdev/">first web application</a></p>
     </div>
    </div>
    <div>
     <div>
      <p><a href="${tomcatdocurl}realm-howto.html">realms & aaa</a></p>
      <p><a href="${tomcatdocurl}jndi-datasource-examples-howto.html">jdbc datasources</a></p>
     </div>
    </div>
    <div>
     <div>
      <p><a href="${tomcatexamplesurl}">examples</a></p>
     </div>
    </div>
    <div>
     <div>
      <p><a href="http://wiki.apache.org/tomcat/specifications">servlet specifications</a></p>
      <p><a href="http://wiki.apache.org/tomcat/tomcatversions">tomcat versions</a></p>
     </div>
    </div>
    <br />
   </div>
   <div id="lower">
    <div id="low-manage" class="">
     <div class="curved container">
      <h3>managing tomcat</h3>
      <p>for security, access to the <a href="/manager/html">manager webapp</a> is restricted.
      users are defined in:</p>
      <pre class="brush:php;toolbar:false">$catalina_home/conf/tomcat-users.xml

in tomcat 7.0 access to the manager application is split between different users. read more...


release notes

changelog

migration guide

security notices

documentation

tomcat 7.0 documentation

tomcat 7.0 configuration

tomcat wiki

find additional important configuration information in:

$catalina_home/running.txt

developers may be interested in:

getting help

faq and mailing lists

the following mailing lists are available:


copyright ©1999-${year} apache software foundation. all rights reserved

Copy after login

nginx+tomcat怎么使用redis session共享

Modify the nginx configuration at this time File nginx.conf, add the IP addresses and port numbers of three tomcats, use nginx as a proxy

#user nobody;
worker_processes 1;

#error_log logs/error.log;
#error_log logs/error.log notice;
#error_log logs/error.log info;

#pid  logs/nginx.pid;


events {
 worker_connections 1024;
}


http {
 include  mime.types;
 default_type application/octet-stream;

 #log_format main &#39;$remote_addr - $remote_user [$time_local] "$request" &#39;
 #     &#39;$status $body_bytes_sent "$http_referer" &#39;
 #     &#39;"$http_user_agent" "$http_x_forwarded_for"&#39;;

 #access_log logs/access.log main;

 sendfile  on;
 #tcp_nopush  on;

 #keepalive_timeout 0;
 keepalive_timeout 65;

 #gzip on;

 upstream localhost1 { 
  
   #ip_hash; 
   server 192.168.1.143:8080; 
   server 192.168.1.143:8081; 
   server 192.168.1.143:8082; 
 } 

 server {
  listen  81;
  server_name localhost;

  #charset koi8-r;

  #access_log logs/host.access.log main;

  location / {
    proxy_connect_timeout 3; 
    proxy_send_timeout  30; 
    proxy_read_timeout  30; 
    proxy_pass http://localhost1; 
  }

  #error_page 404    /404.html;

  # redirect server error pages to the static page /50x.html
  #
  error_page 500 502 503 504 /50x.html;
  location = /50x.html {
   root html;
  }

  # proxy the php scripts to apache listening on 127.0.0.1:80
  #
  #location ~ \.php$ {
  # proxy_pass http://127.0.0.1;
  #}

  # pass the php scripts to fastcgi server listening on 127.0.0.1:9000
  #
  #location ~ \.php$ {
  # root   html;
  # fastcgi_pass 127.0.0.1:9000;
  # fastcgi_index index.php;
  # fastcgi_param script_filename /scripts$fastcgi_script_name;
  # include  fastcgi_params;
  #}

  # deny access to .htaccess files, if apache&#39;s document root
  # concurs with nginx&#39;s one
  #
  #location ~ /\.ht {
  # deny all;
  #}
 }


 # another virtual host using mix of ip-, name-, and port-based configuration
 #
 #server {
 # listen  8000;
 # listen  somename:8080;
 # server_name somename alias another.alias;

 # location / {
 #  root html;
 #  index index.html index.htm;
 # }
 #}


 # https server
 #
 #server {
 # listen  443;
 # server_name localhost;

 # ssl     on;
 # ssl_certificate  cert.pem;
 # ssl_certificate_key cert.key;

 # ssl_session_timeout 5m;

 # ssl_protocols sslv2 sslv3 tlsv1;
 # ssl_ciphers high:!anull:!md5;
 # ssl_prefer_server_ciphers on;

 # location / {
 #  root html;
 #  index index.html index.htm;
 # }
 #}

}
Copy after login

At this time, start three tomcats and nginx respectively, access, and refresh each time Pages will randomly access 8080 or 8081 or 8082, and the session ids that appear on the page are also different. How should we make these three tomcats share sessions? We use redis to do it.

At this time, install redis on the server 192.168.1.143 that has three tomcats. The installation steps are as follows:

$ wget http://download.redis.io/releases/redis-3.2.3.tar.gz
$ tar xzf redis-3.2.3.tar.gz
$ cd redis-3.2.3
$ make malloc=libc
#启动redis src前面是安装的路径
$ src/redis-server &

#关闭redis
src/redis-cli shutdown
#使用redis 放入键值对 key value
$ src/redis-cli
127.0.0.1:6379> set foo bar
ok
127.0.0.1:6379> get foo
"bar"
$
Copy after login

After installing redis, install the three tomcat libs Upload the five dependent jars in the folder respectively, which are

commons-pool2-2.0.jar

jedis-2.5.2.jar

tomcat-redis -session-manager1.2.jar

tomcat-juli.jar

tomcat-juli-adapters.jar

All jars are here,

Then repair three tomcat context.xml files and add the following configuration

<?xml version=&#39;1.0&#39; encoding=&#39;utf-8&#39;?>

<context>

 <!-- default set of monitored resources -->
 <watchedresource>web-inf/web.xml</watchedresource>

 
 <!-- 这里增加redis session共享的配置 6379是redis的端口-->
 <valve classname="com.orangefunction.tomcat.redissessions.redissessionhandlervalve" /> 
 <manager classname="com.orangefunction.tomcat.redissessions.redissessionmanager" 
 host="127.0.0.1" 
 port="6379" 
 database="0" 
 maxinactiveinterval="60" /> 
</context>
Copy after login

At this time, restart the three tomcats and nginx respectively. After checking the tomcat log, we found that there are no abnormal errors, which means we succeeded. , then start testing.

We access the nginx server address:

What we get is tomcat1 of port 8080, and the session id is 1a0625767f27ba95ef4d5f061fe0568d

nginx+tomcat怎么使用redis session共享

At this time Press f5 to refresh the page. What you get is tomcat2 of port 8081. The session id is still 1a0625767f27ba95ef4d5f061fe0568d

nginx+tomcat怎么使用redis session共享

. Refresh the page again. What you get is tomcat3 of port 8082. The session id is Still 1a0625767f27ba95ef4d5f061fe0568d. ,

nginx+tomcat怎么使用redis session共享

#At this time, it means that we have successfully set up tomcat nginx load balancing redis session synchronization!

nginx helps distribute our requests evenly to three tomcats --》tomcat1, tomcat2 and tomcat3

redis helps us synchronize sessions, so that our server performance will improve Many, if any tomcat fails, there will be no impact on the overall service.

The above is the detailed content of How to use redis session sharing with nginx+tomcat. For more information, please follow other related articles on the PHP Chinese website!

Statement of this Website
The content of this article is voluntarily contributed by netizens, and the copyright belongs to the original author. This site does not assume corresponding legal responsibility. If you find any content suspected of plagiarism or infringement, please contact admin@php.cn

Hot AI Tools

Undresser.AI Undress

Undresser.AI Undress

AI-powered app for creating realistic nude photos

AI Clothes Remover

AI Clothes Remover

Online AI tool for removing clothes from photos.

Undress AI Tool

Undress AI Tool

Undress images for free

Clothoff.io

Clothoff.io

AI clothes remover

Video Face Swap

Video Face Swap

Swap faces in any video effortlessly with our completely free AI face swap tool!

Hot Tools

Notepad++7.3.1

Notepad++7.3.1

Easy-to-use and free code editor

SublimeText3 Chinese version

SublimeText3 Chinese version

Chinese version, very easy to use

Zend Studio 13.0.1

Zend Studio 13.0.1

Powerful PHP integrated development environment

Dreamweaver CS6

Dreamweaver CS6

Visual web development tools

SublimeText3 Mac version

SublimeText3 Mac version

God-level code editing software (SublimeText3)

How to check the name of the docker container How to check the name of the docker container Apr 15, 2025 pm 12:21 PM

You can query the Docker container name by following the steps: List all containers (docker ps). Filter the container list (using the grep command). Gets the container name (located in the "NAMES" column).

How to configure nginx in Windows How to configure nginx in Windows Apr 14, 2025 pm 12:57 PM

How to configure Nginx in Windows? Install Nginx and create a virtual host configuration. Modify the main configuration file and include the virtual host configuration. Start or reload Nginx. Test the configuration and view the website. Selectively enable SSL and configure SSL certificates. Selectively set the firewall to allow port 80 and 443 traffic.

How to configure Lua script execution time in centos redis How to configure Lua script execution time in centos redis Apr 14, 2025 pm 02:12 PM

On CentOS systems, you can limit the execution time of Lua scripts by modifying Redis configuration files or using Redis commands to prevent malicious scripts from consuming too much resources. Method 1: Modify the Redis configuration file and locate the Redis configuration file: The Redis configuration file is usually located in /etc/redis/redis.conf. Edit configuration file: Open the configuration file using a text editor (such as vi or nano): sudovi/etc/redis/redis.conf Set the Lua script execution time limit: Add or modify the following lines in the configuration file to set the maximum execution time of the Lua script (unit: milliseconds)

How to check whether nginx is started How to check whether nginx is started Apr 14, 2025 pm 01:03 PM

How to confirm whether Nginx is started: 1. Use the command line: systemctl status nginx (Linux/Unix), netstat -ano | findstr 80 (Windows); 2. Check whether port 80 is open; 3. Check the Nginx startup message in the system log; 4. Use third-party tools, such as Nagios, Zabbix, and Icinga.

How to create containers for docker How to create containers for docker Apr 15, 2025 pm 12:18 PM

Create a container in Docker: 1. Pull the image: docker pull [mirror name] 2. Create a container: docker run [Options] [mirror name] [Command] 3. Start the container: docker start [Container name]

How to start containers by docker How to start containers by docker Apr 15, 2025 pm 12:27 PM

Docker container startup steps: Pull the container image: Run "docker pull [mirror name]". Create a container: Use "docker create [options] [mirror name] [commands and parameters]". Start the container: Execute "docker start [Container name or ID]". Check container status: Verify that the container is running with "docker ps".

How to start nginx How to start nginx Apr 14, 2025 pm 01:06 PM

Question: How to start Nginx? Answer: Install Nginx Startup Nginx Verification Nginx Is Nginx Started Explore other startup options Automatically start Nginx

How to install redis in centos7 How to install redis in centos7 Apr 14, 2025 pm 08:21 PM

See all articles