

Springboot cache redis integration method

The default is to use ConcurrentMapCache of ConcurrentMapCacheManager as the cache component.
When using ConcurrentMap, the data is saved in ConcurrentMap<object></object>.
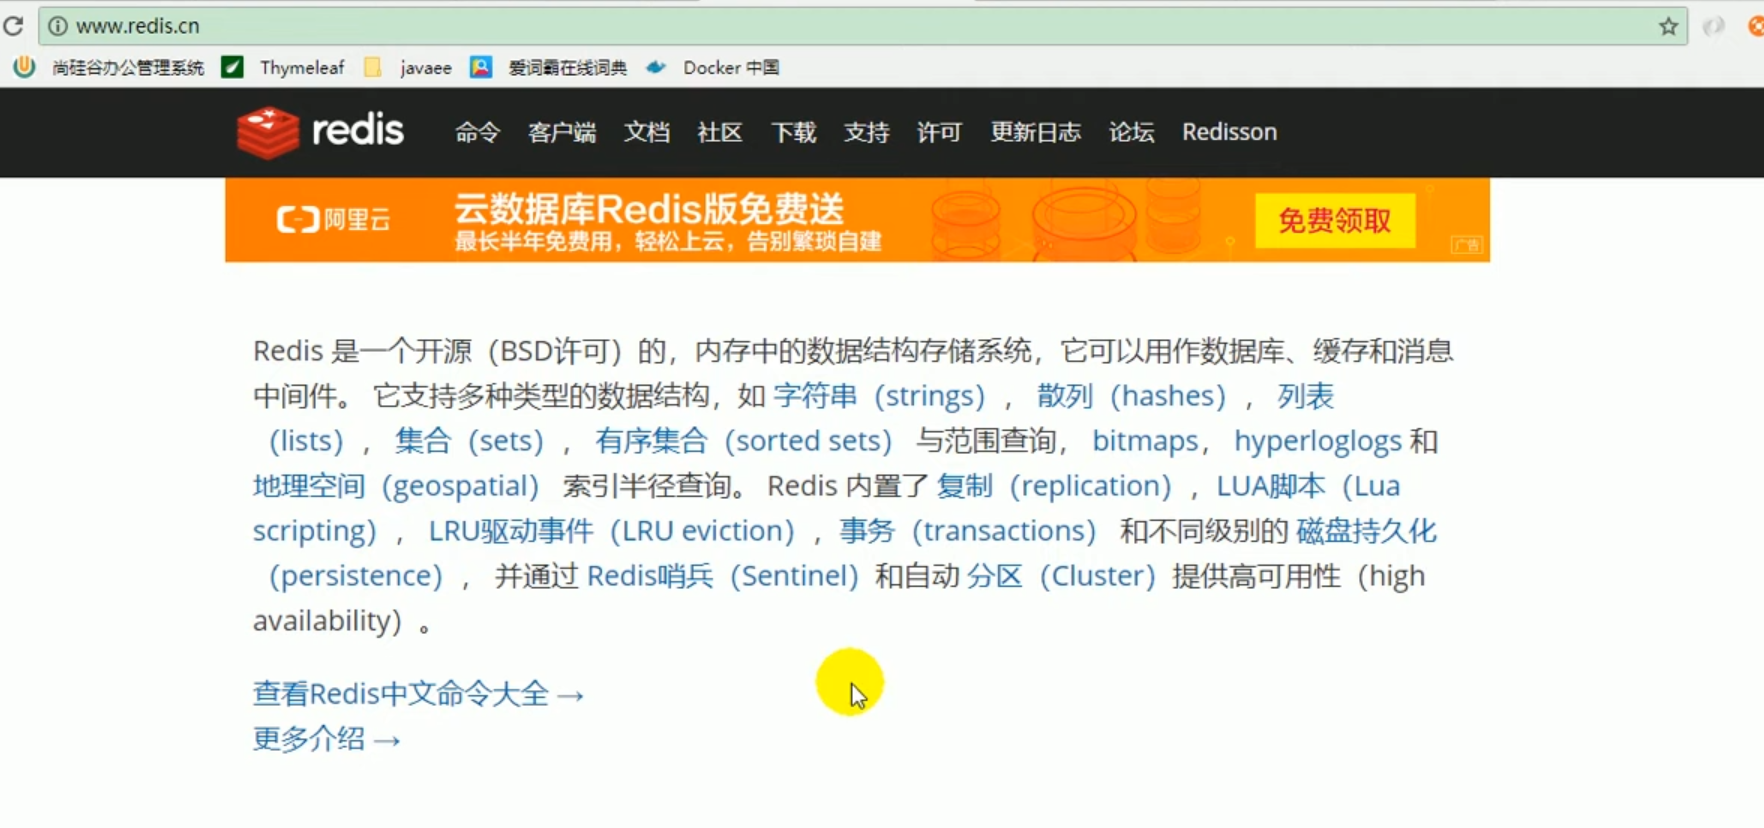
In fact, during the development process, we often use some caching middleware.
For example, we often use redis, memcache, including the ehcache we use, etc. We all use some caching middleware.
When we explained the principle before, we also discovered that springboot supports many cache configurations:
As shown in the figure below:
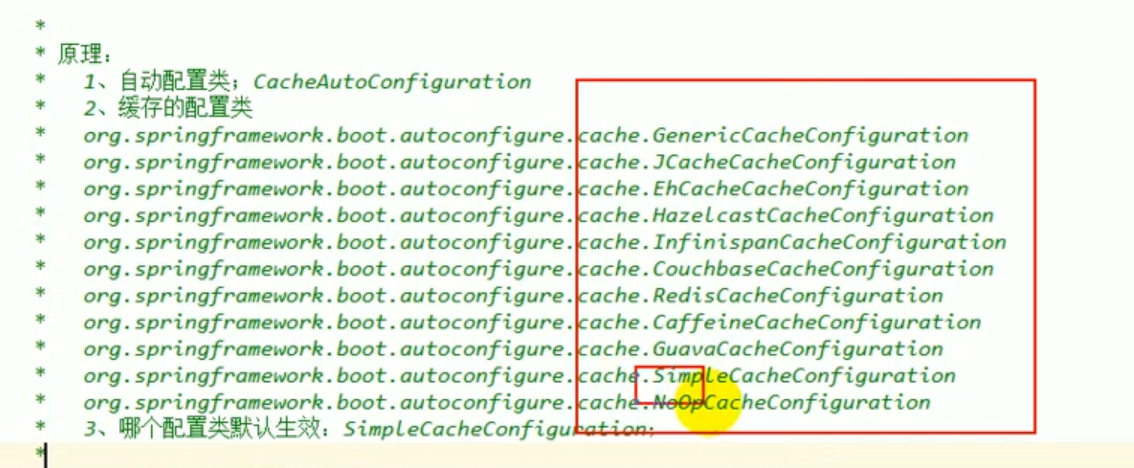
The default starting configuration is: SimpleCacheConfiguration.
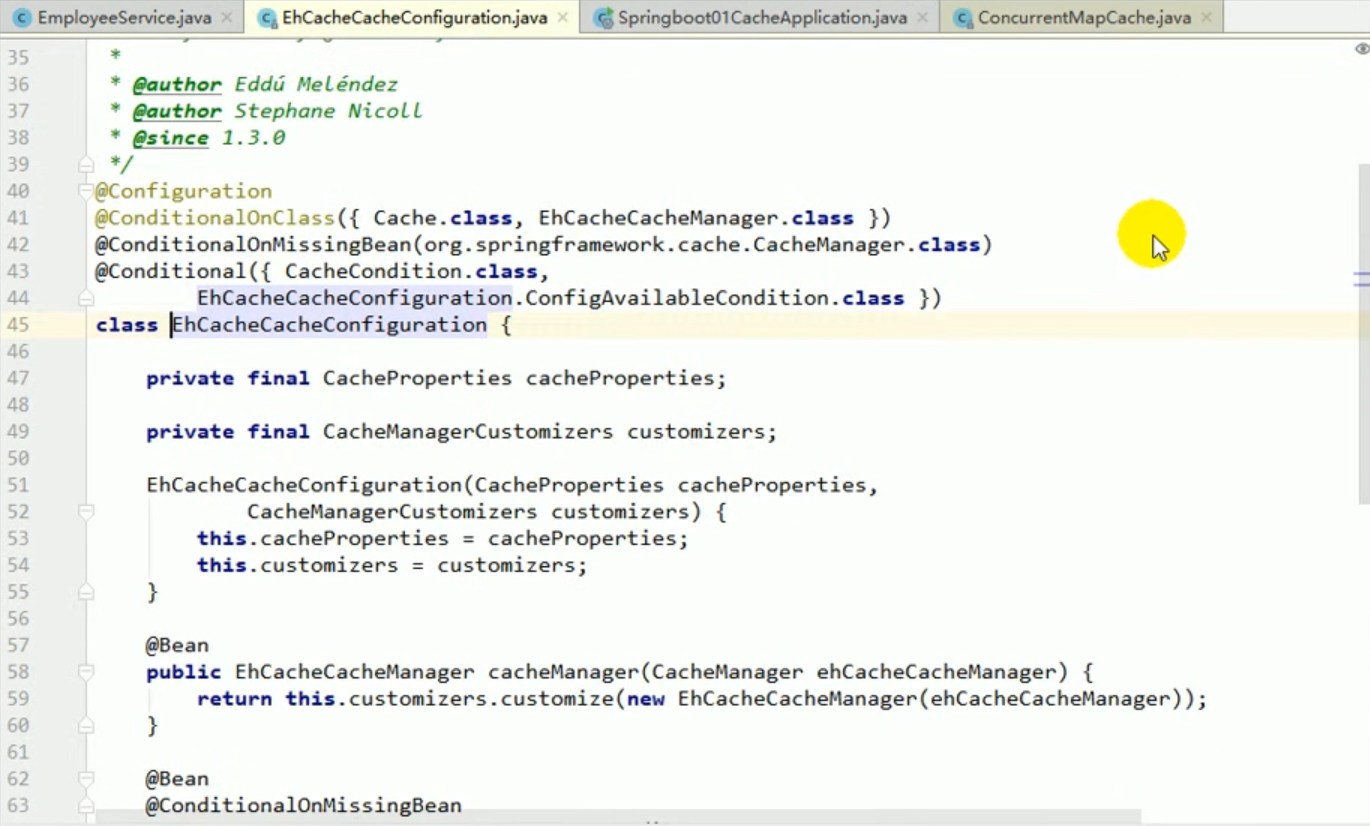
When are other caches enabled?
We can search for these configuration classes with ctrl n, and then go in and see their conditional conditions:
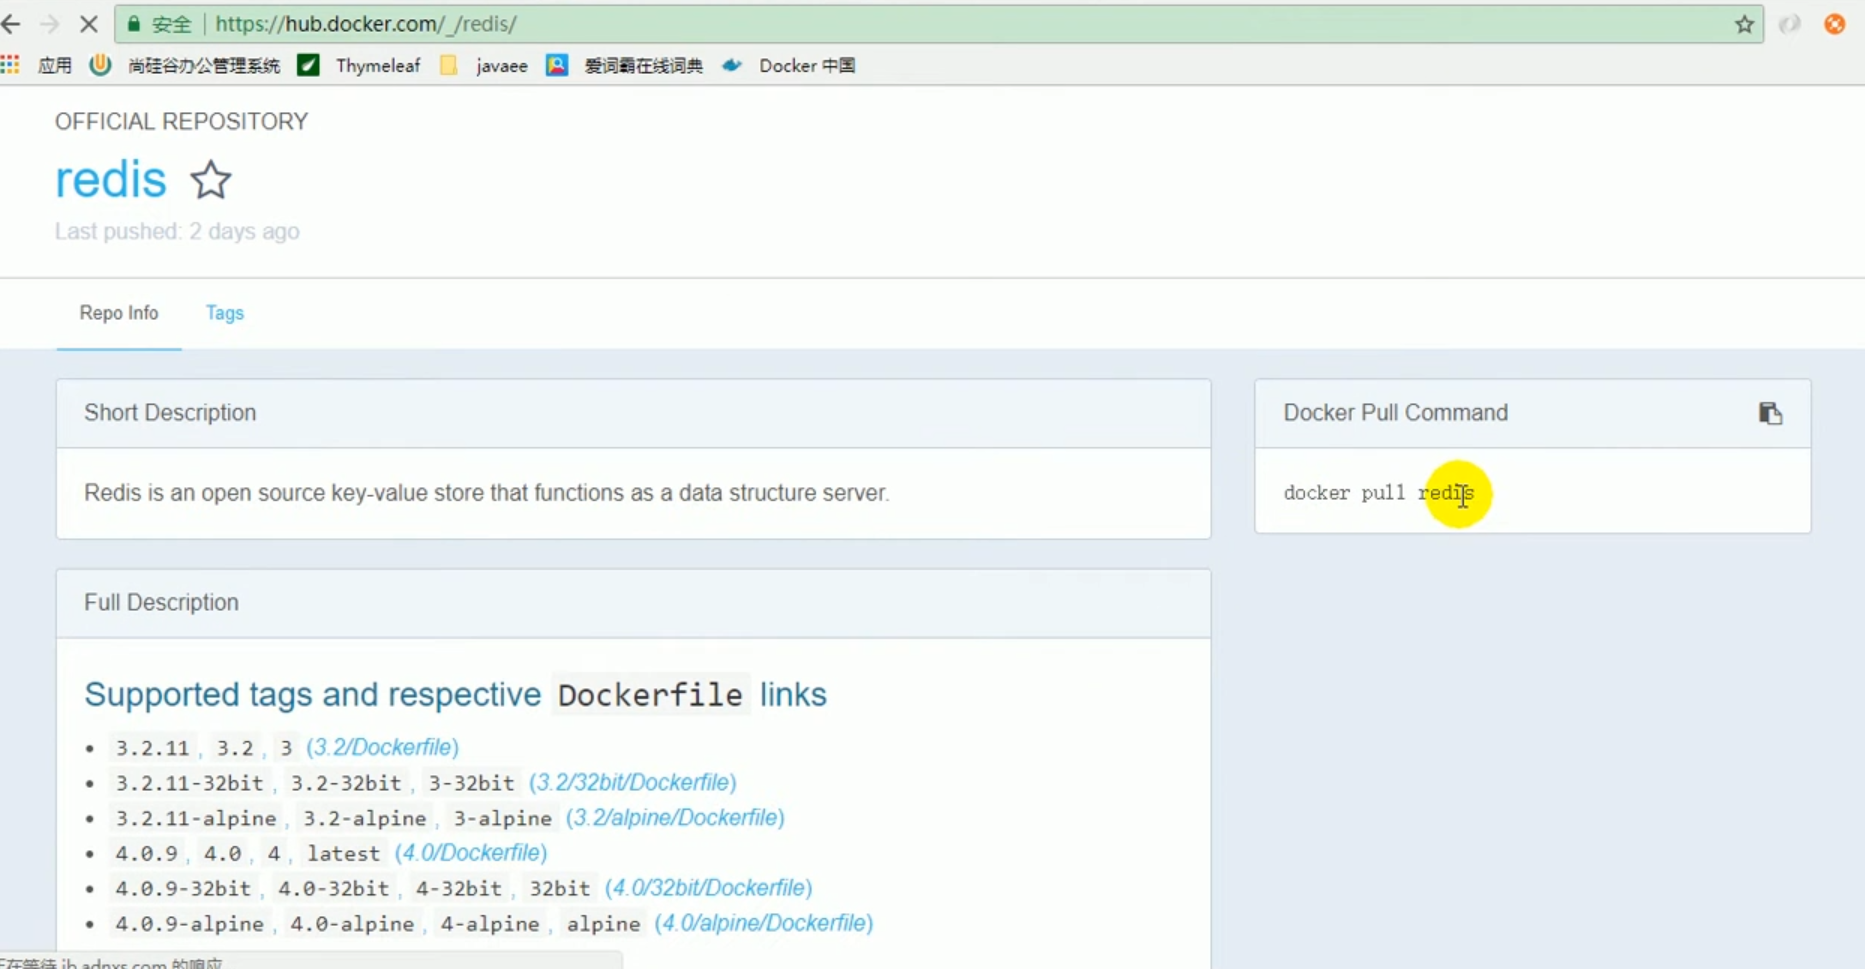
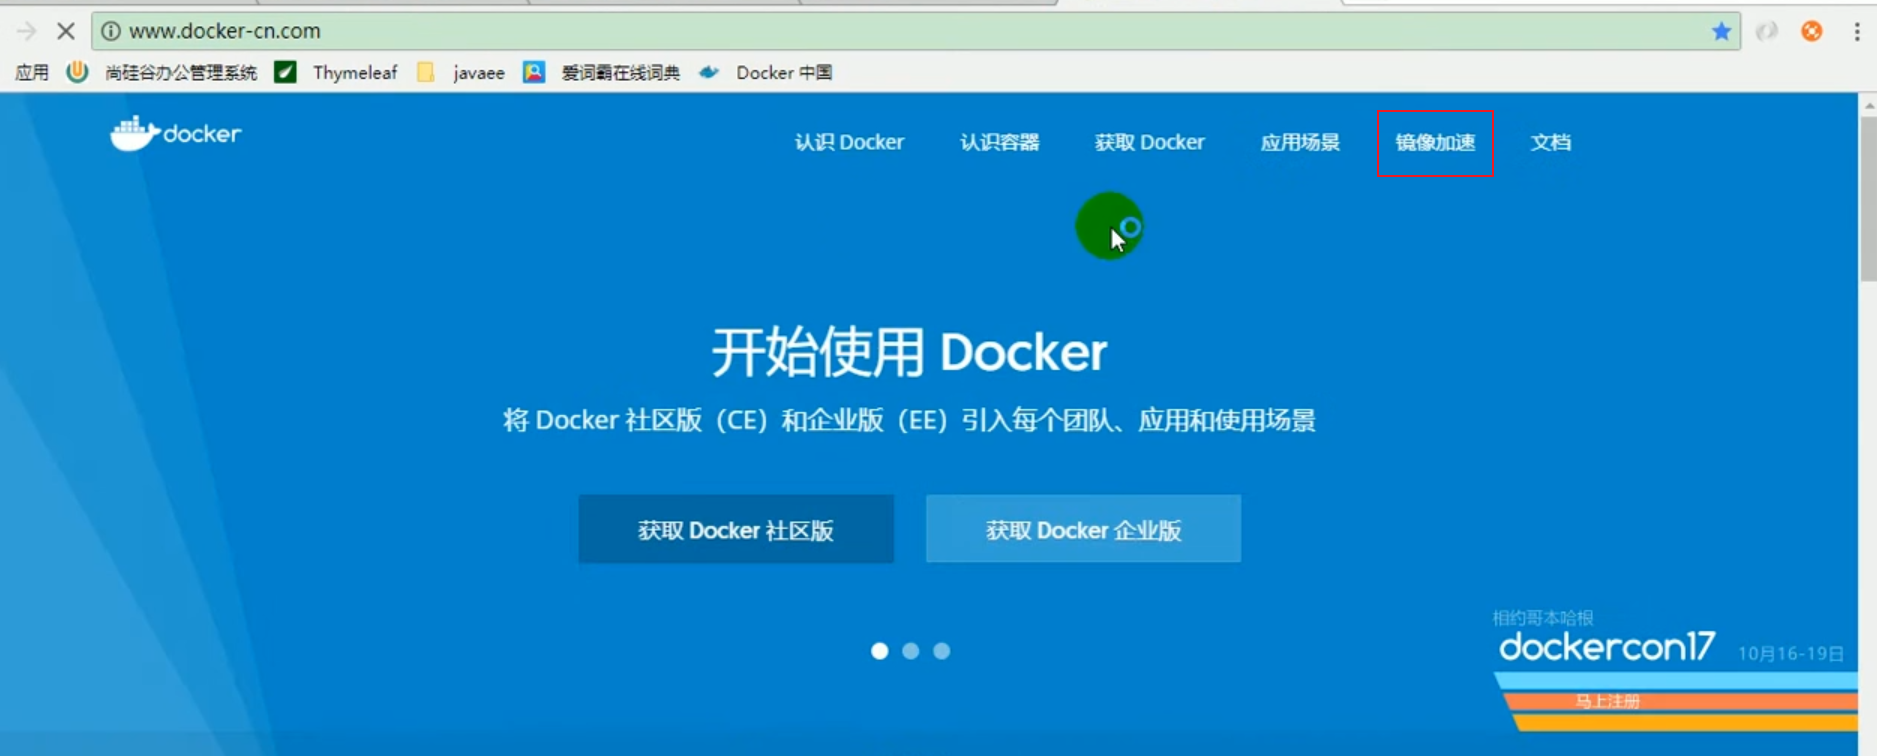
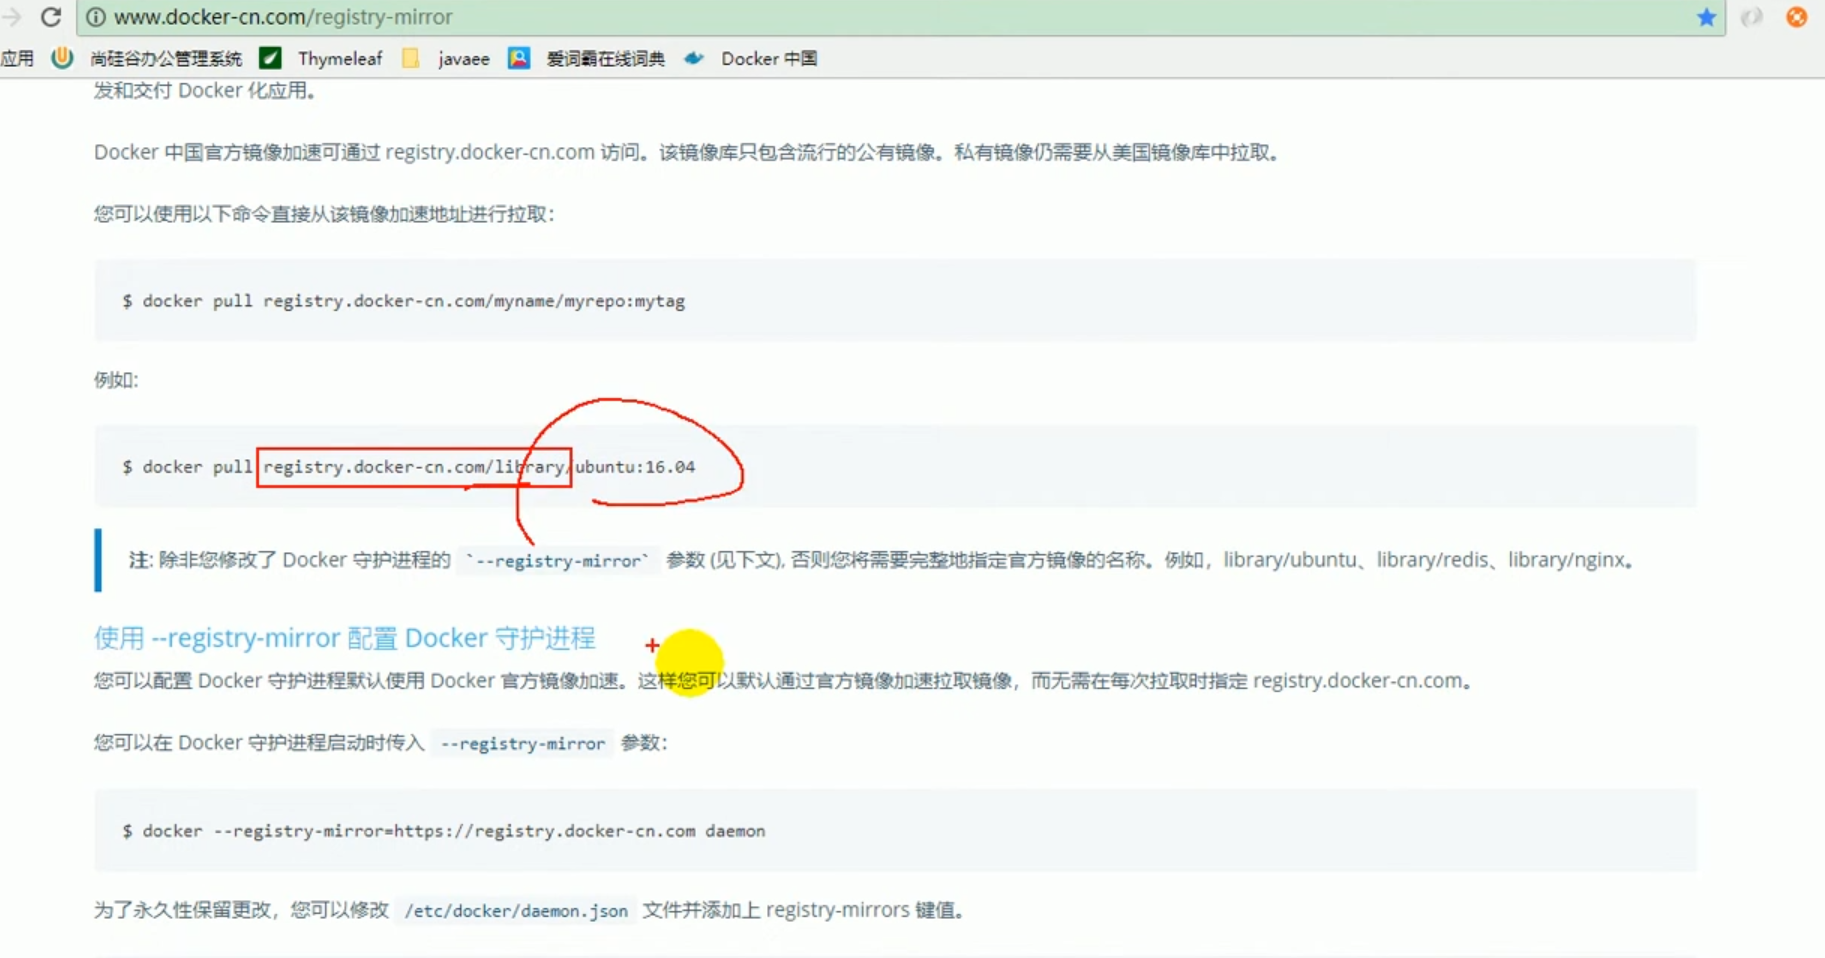

 Start the redis image
docker run -d -p 6379:6379 --name myredis [REPOSITORY]
docker ps
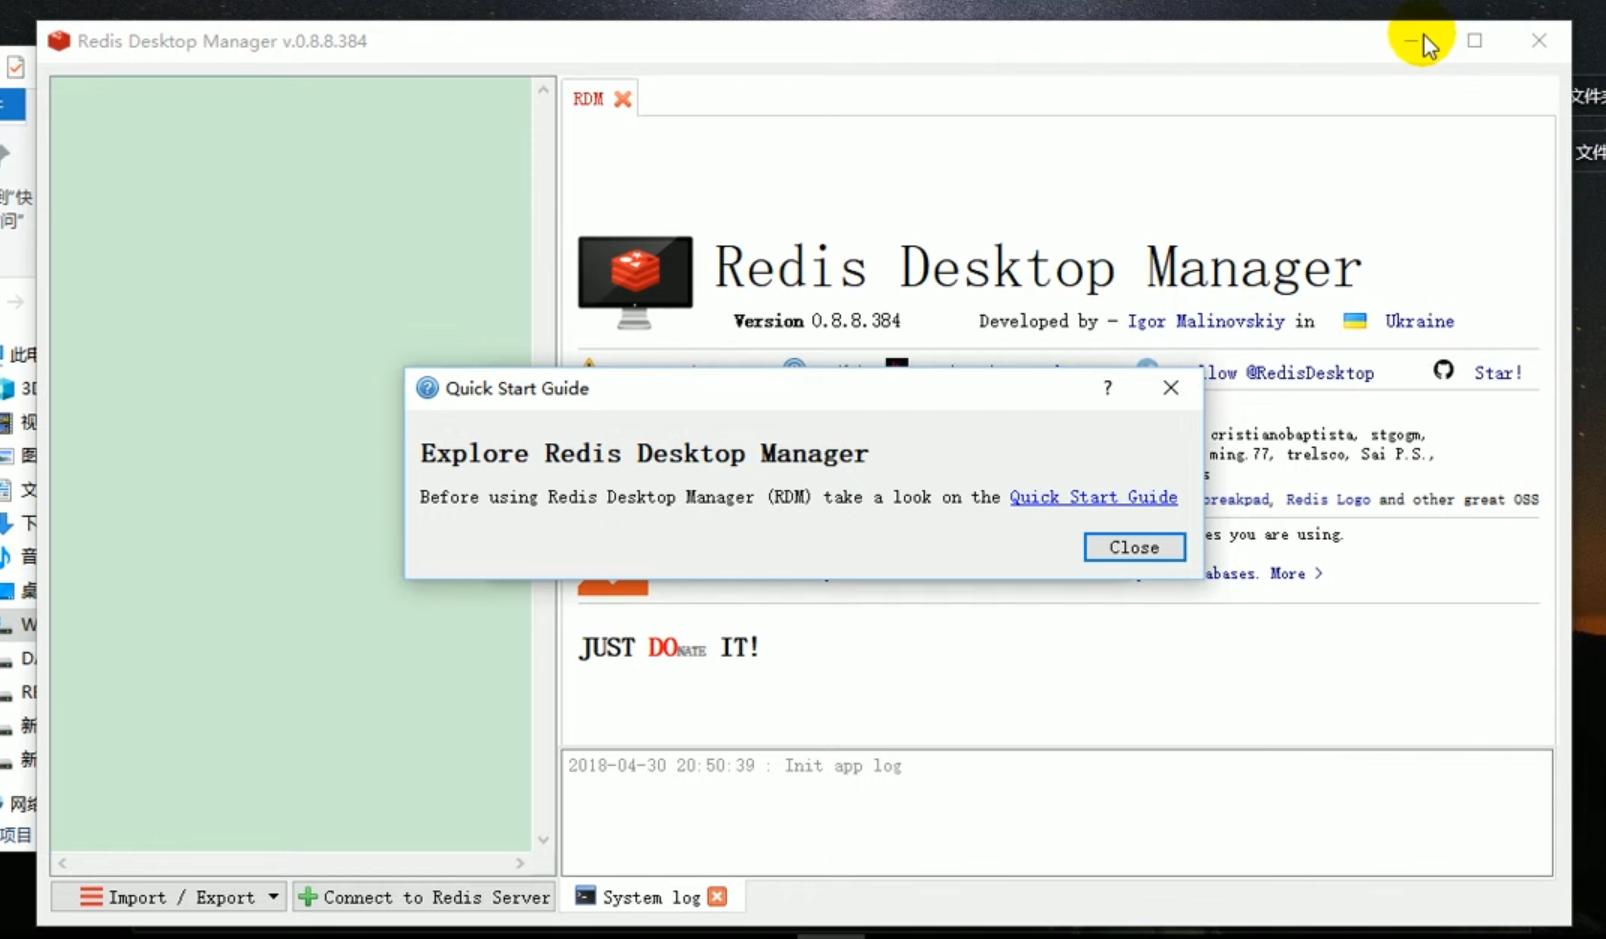
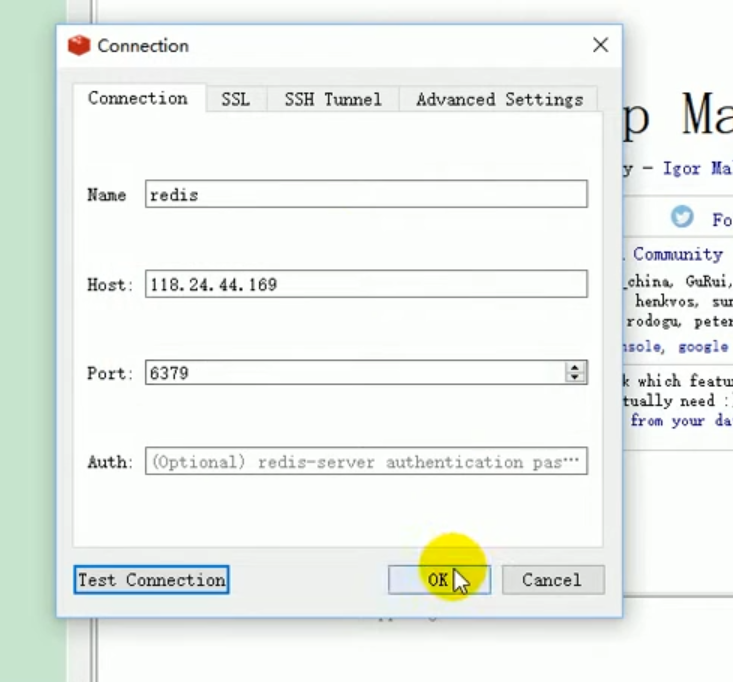
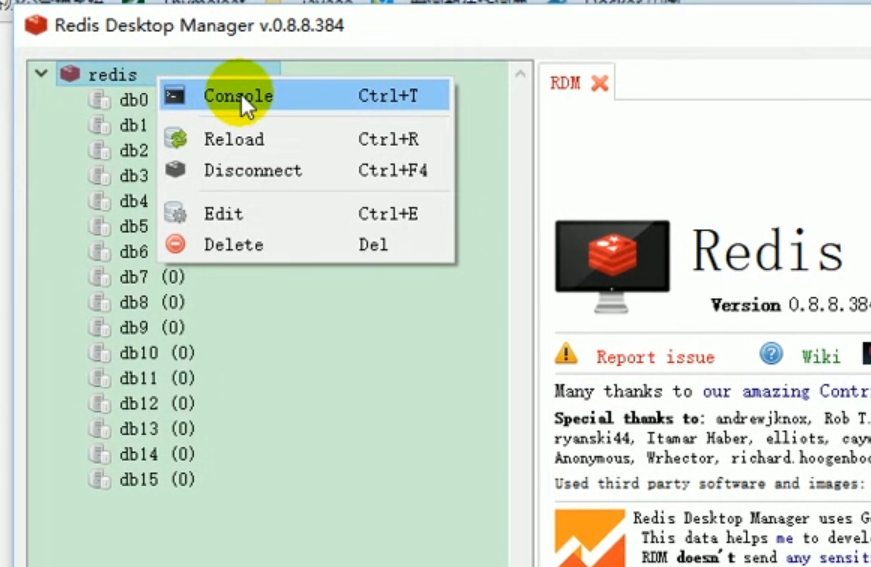
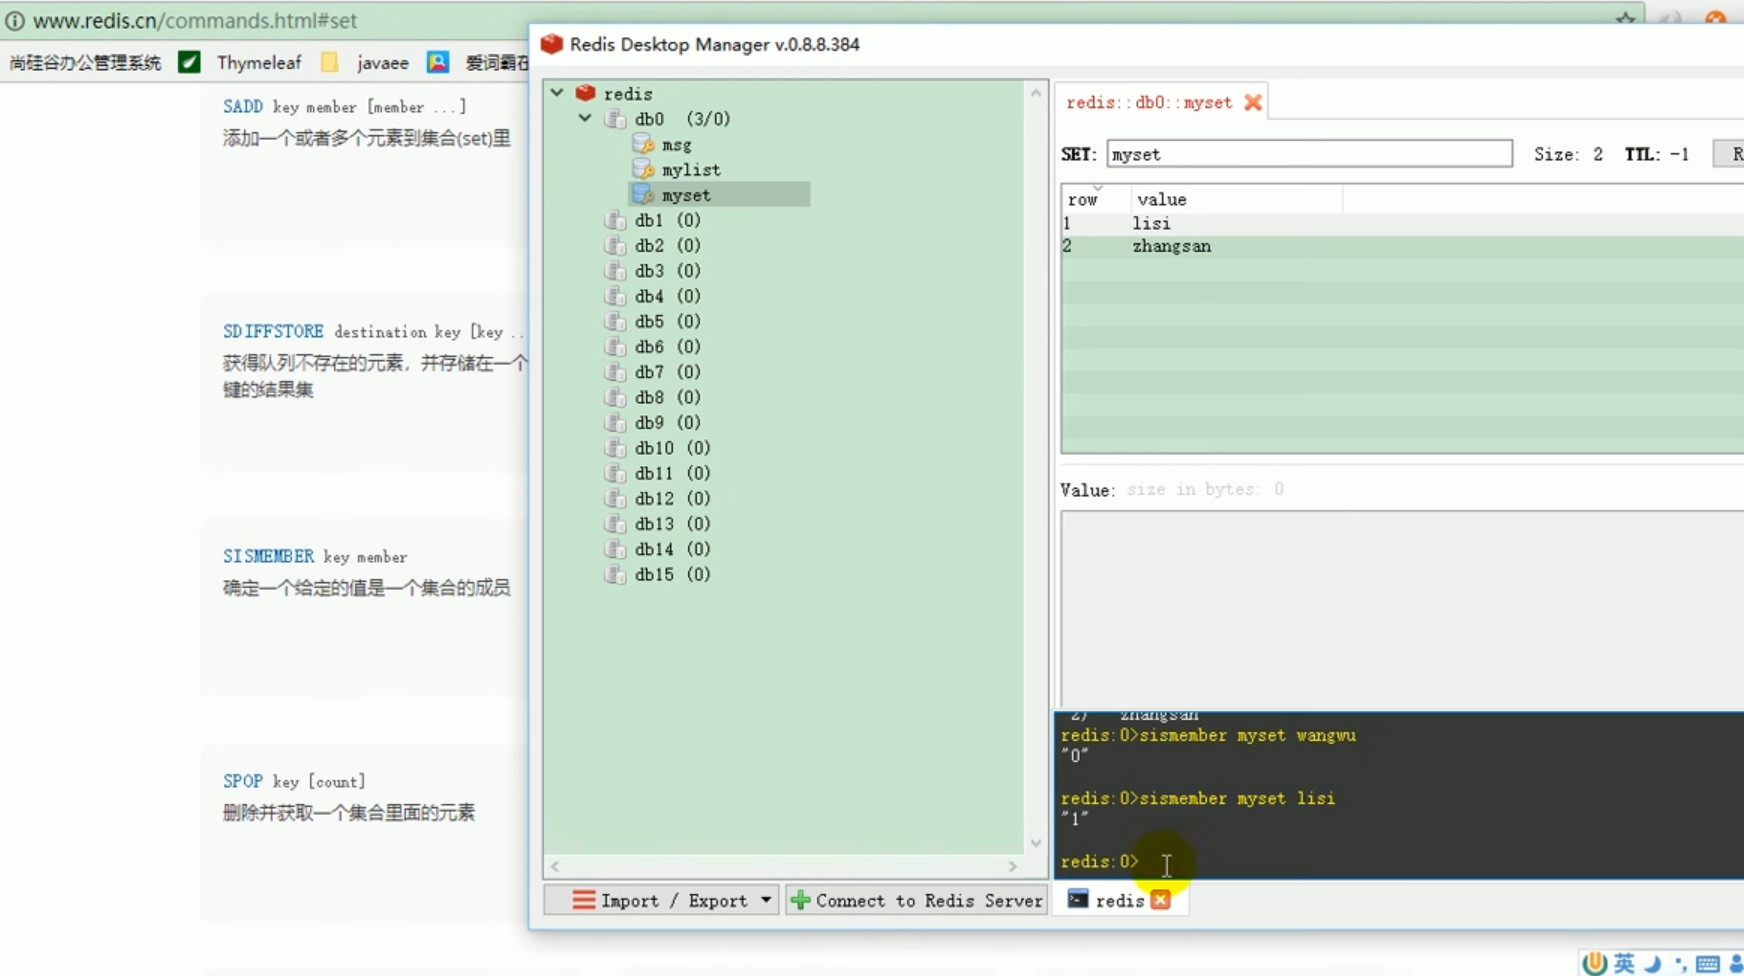
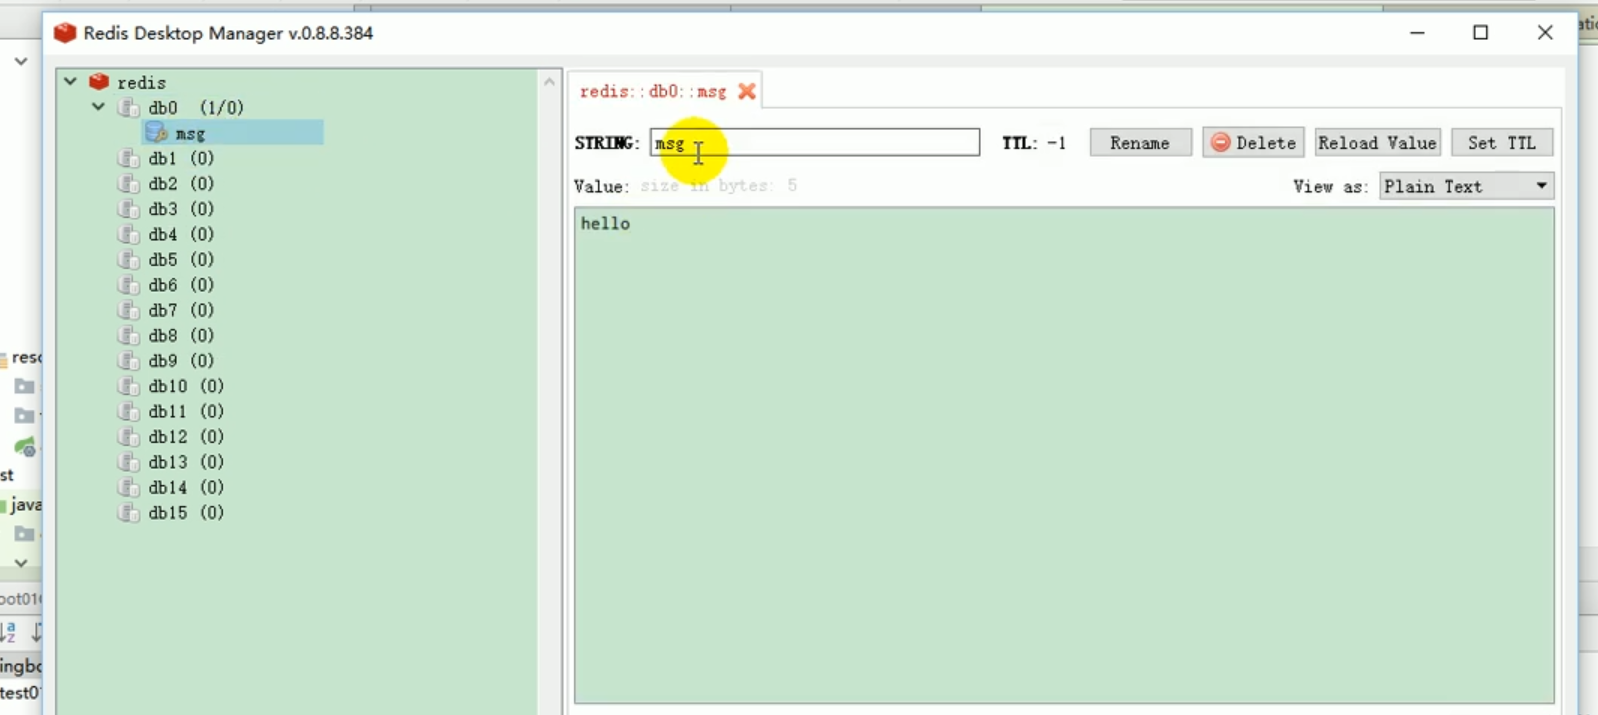
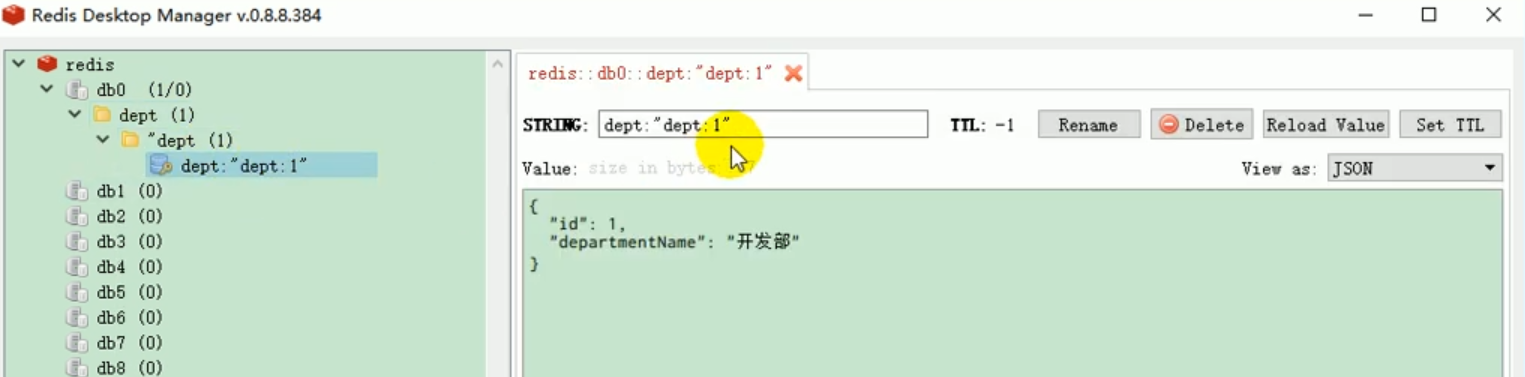
For testing, open the redis connection tool.
redis desktop manager
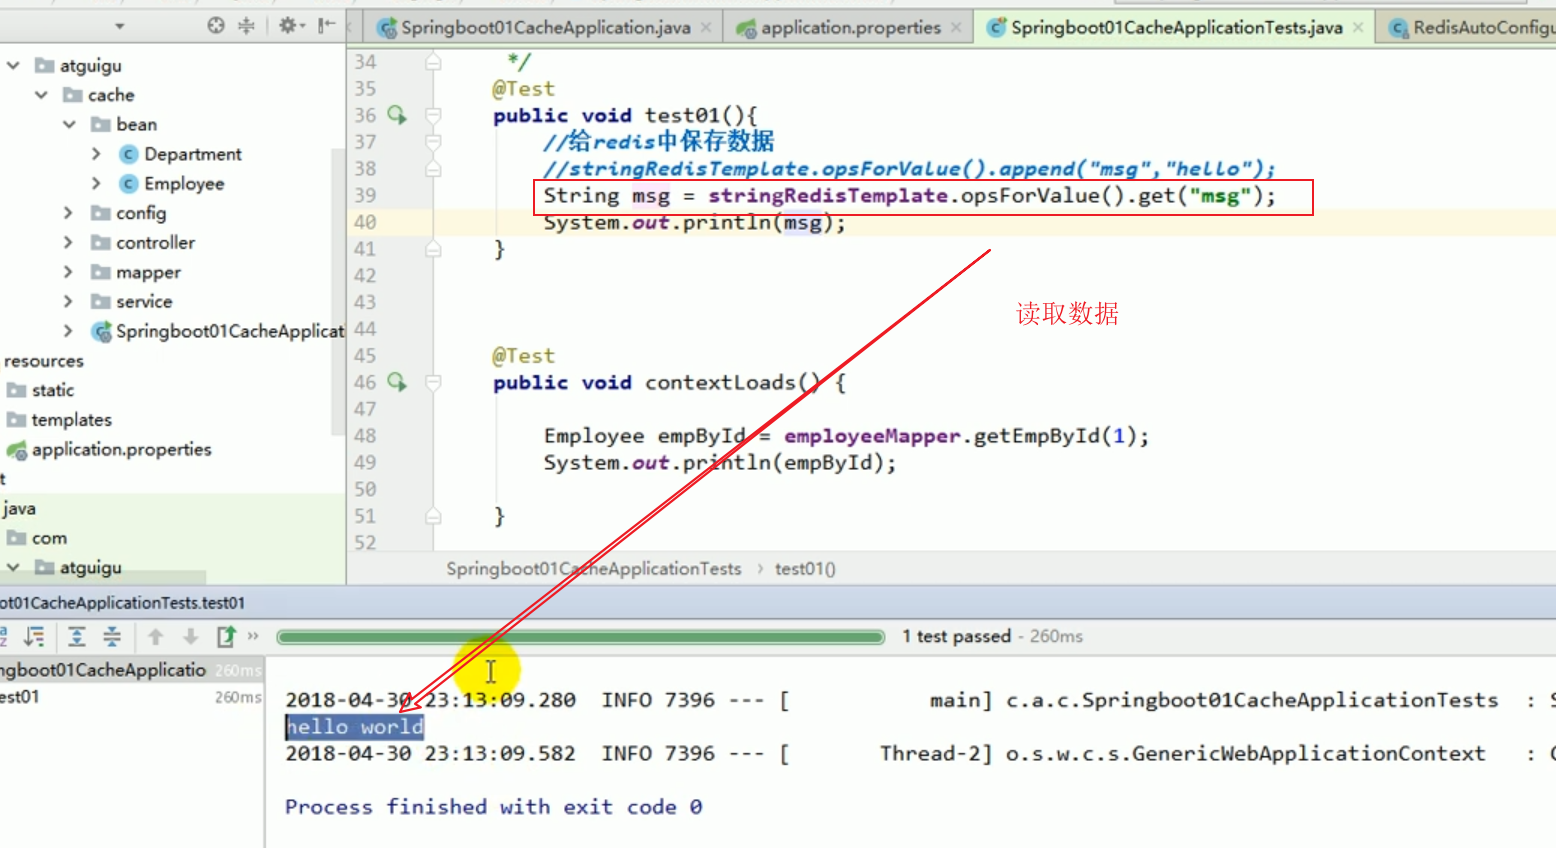
##Test redis common data operations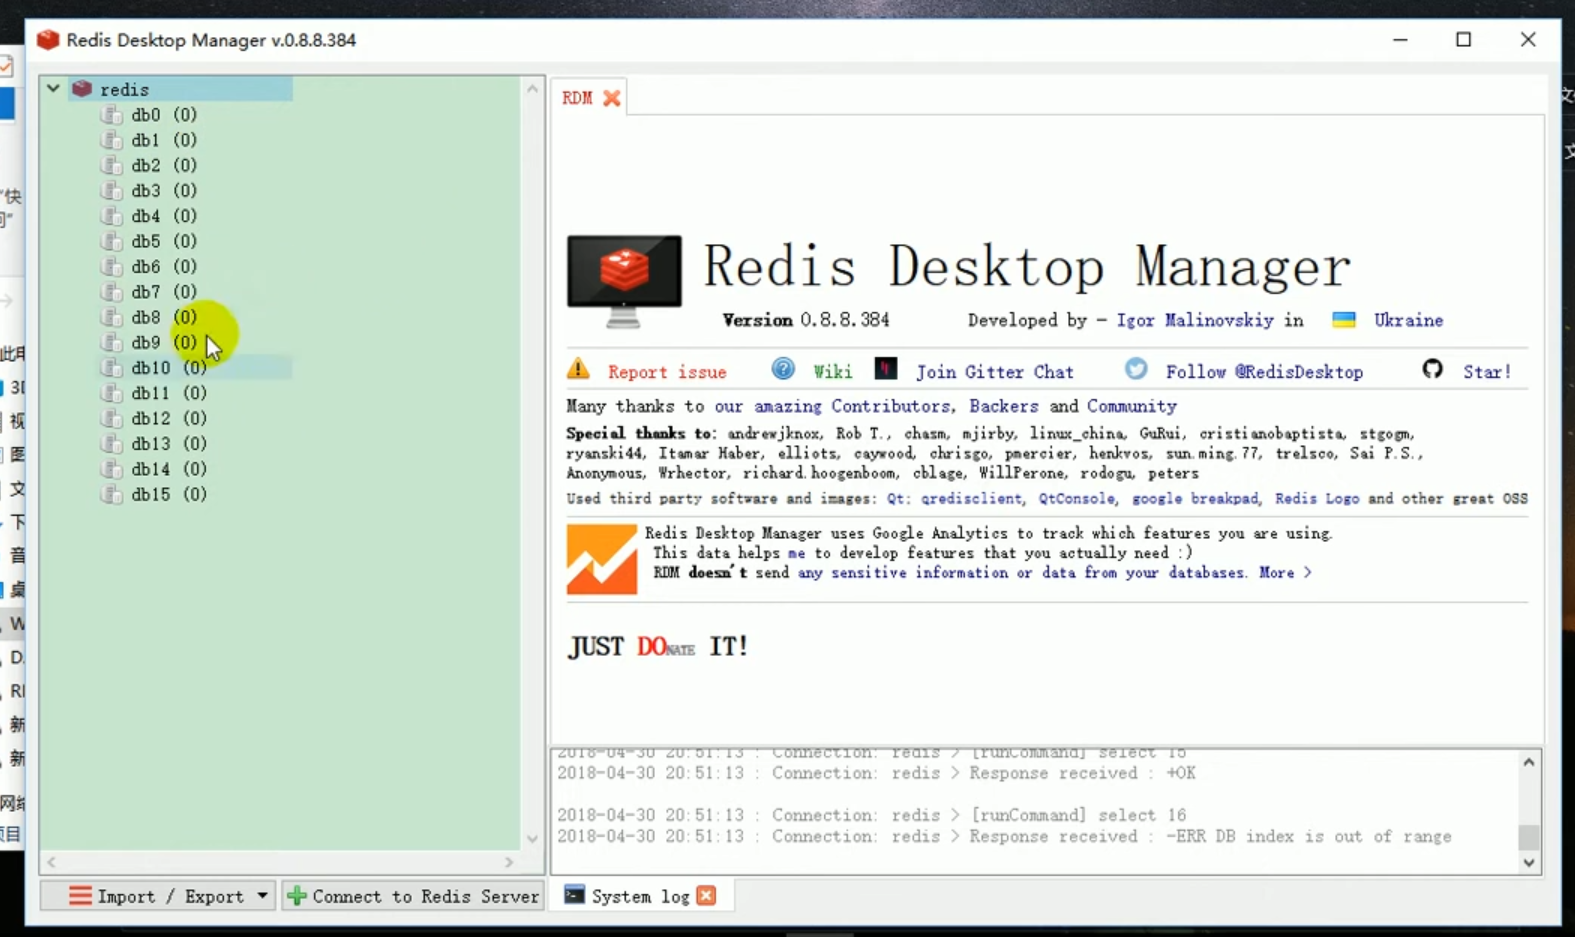
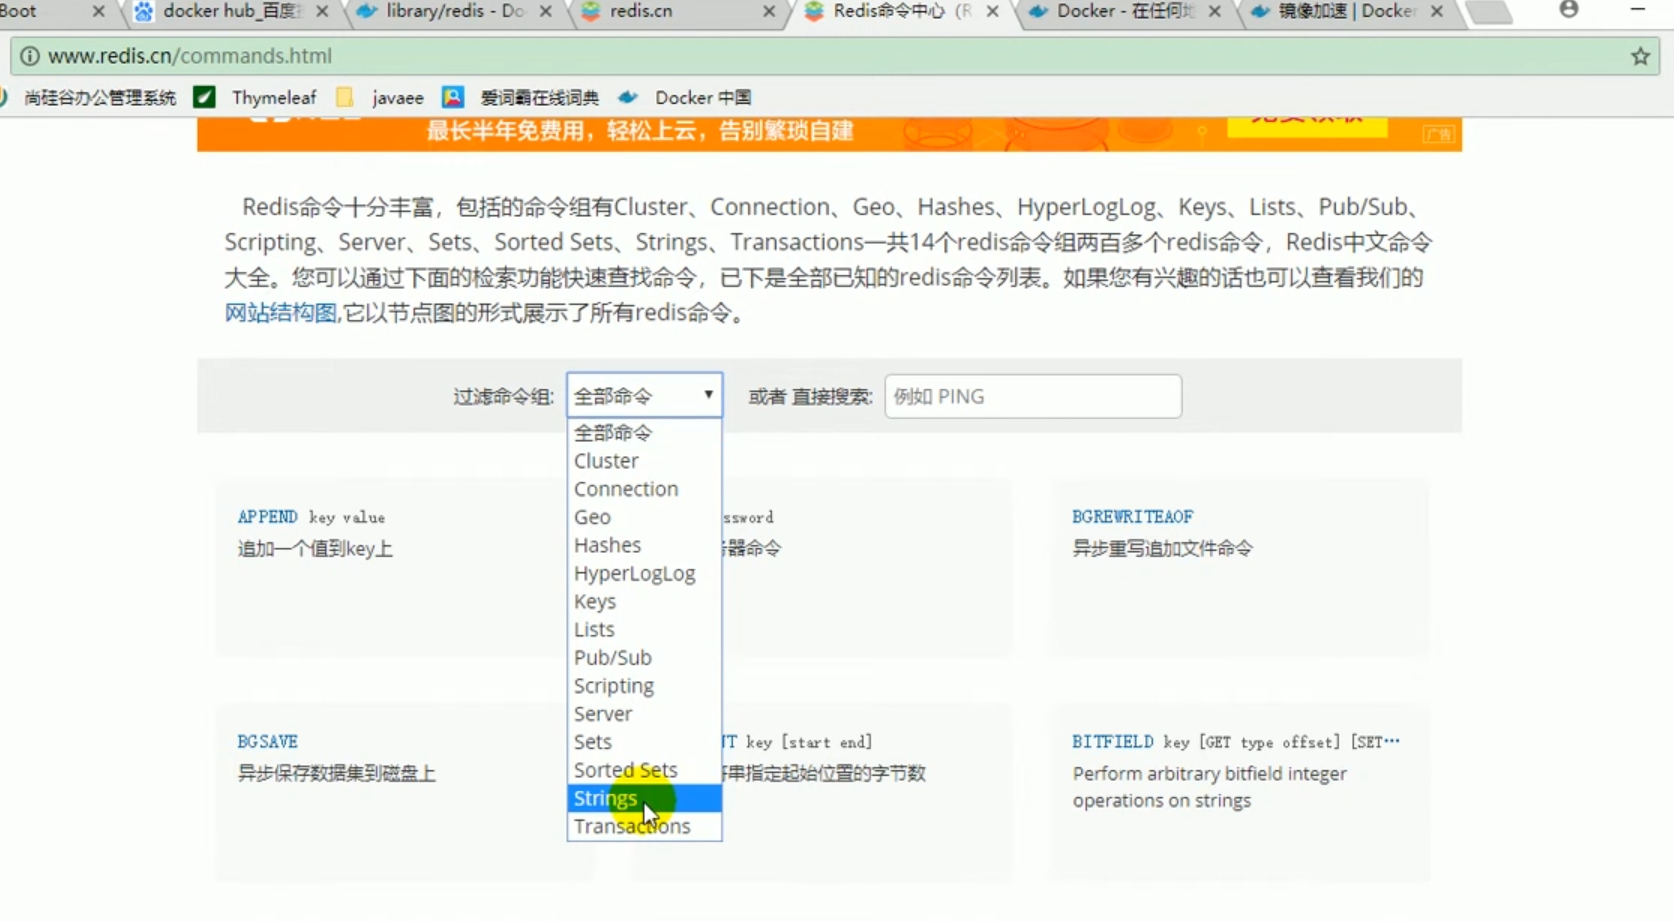
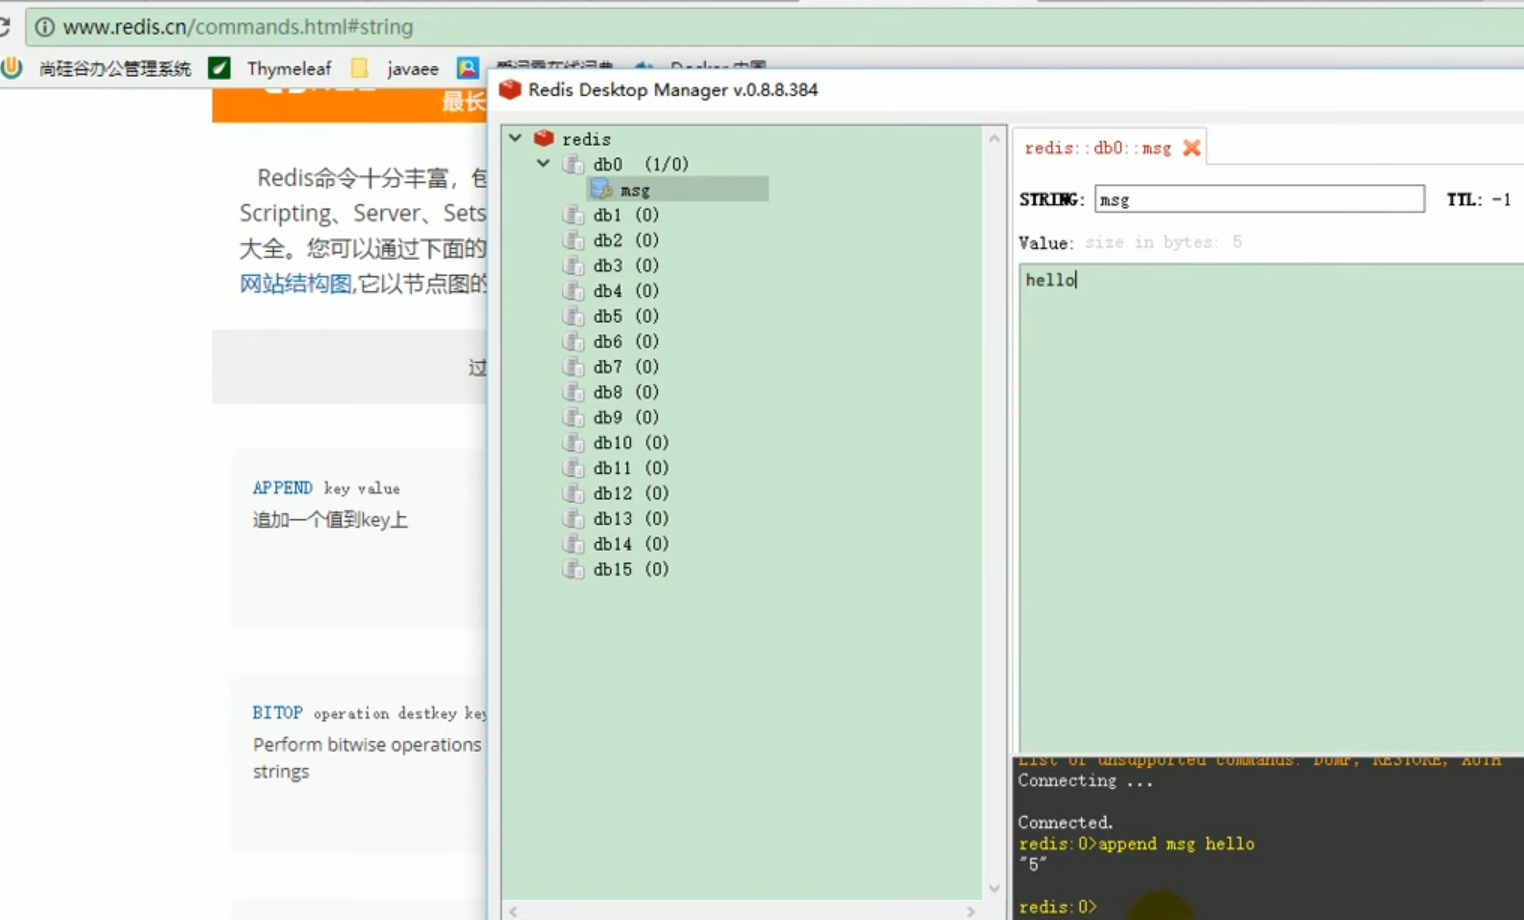
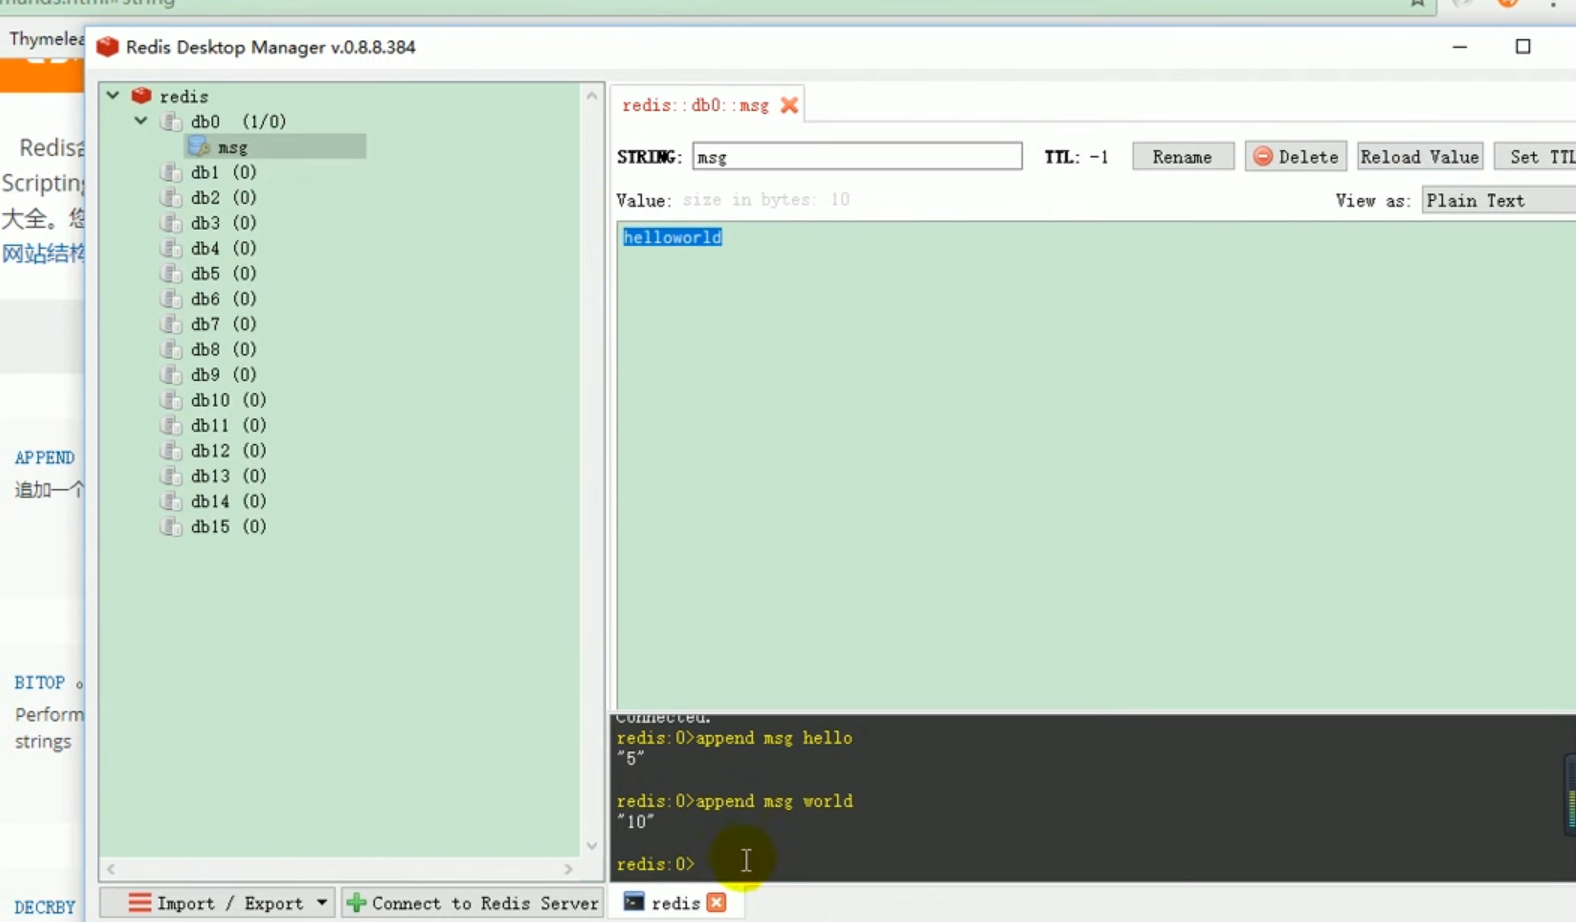
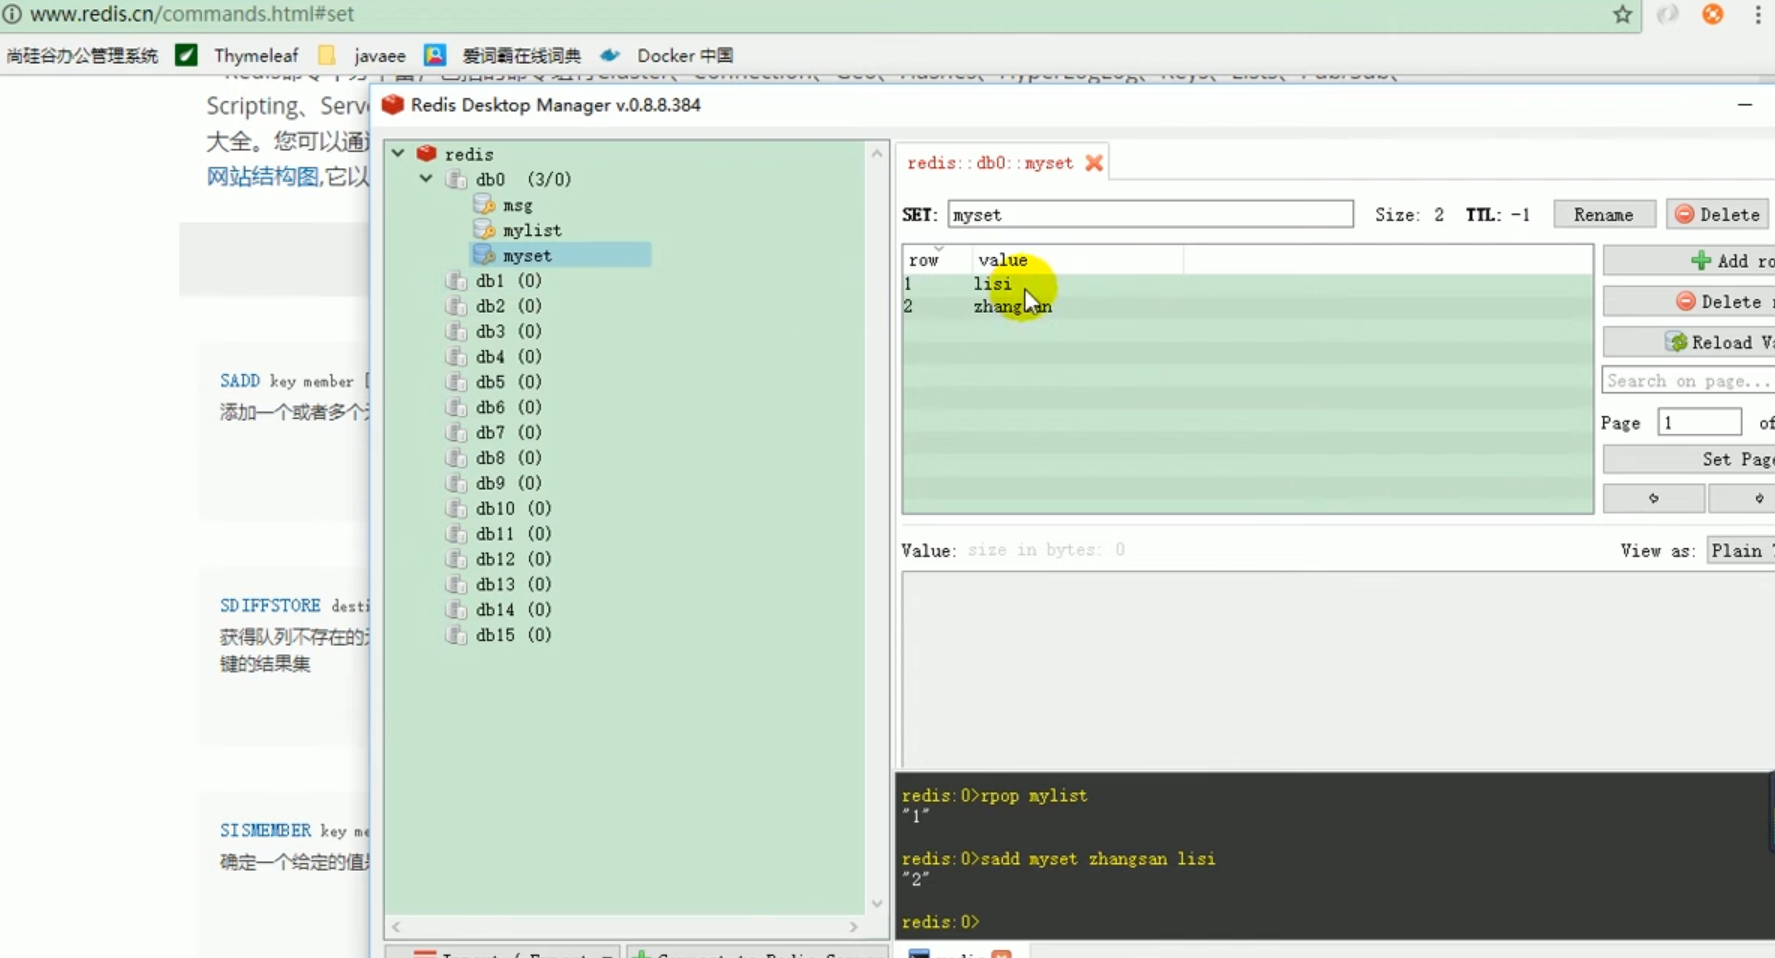
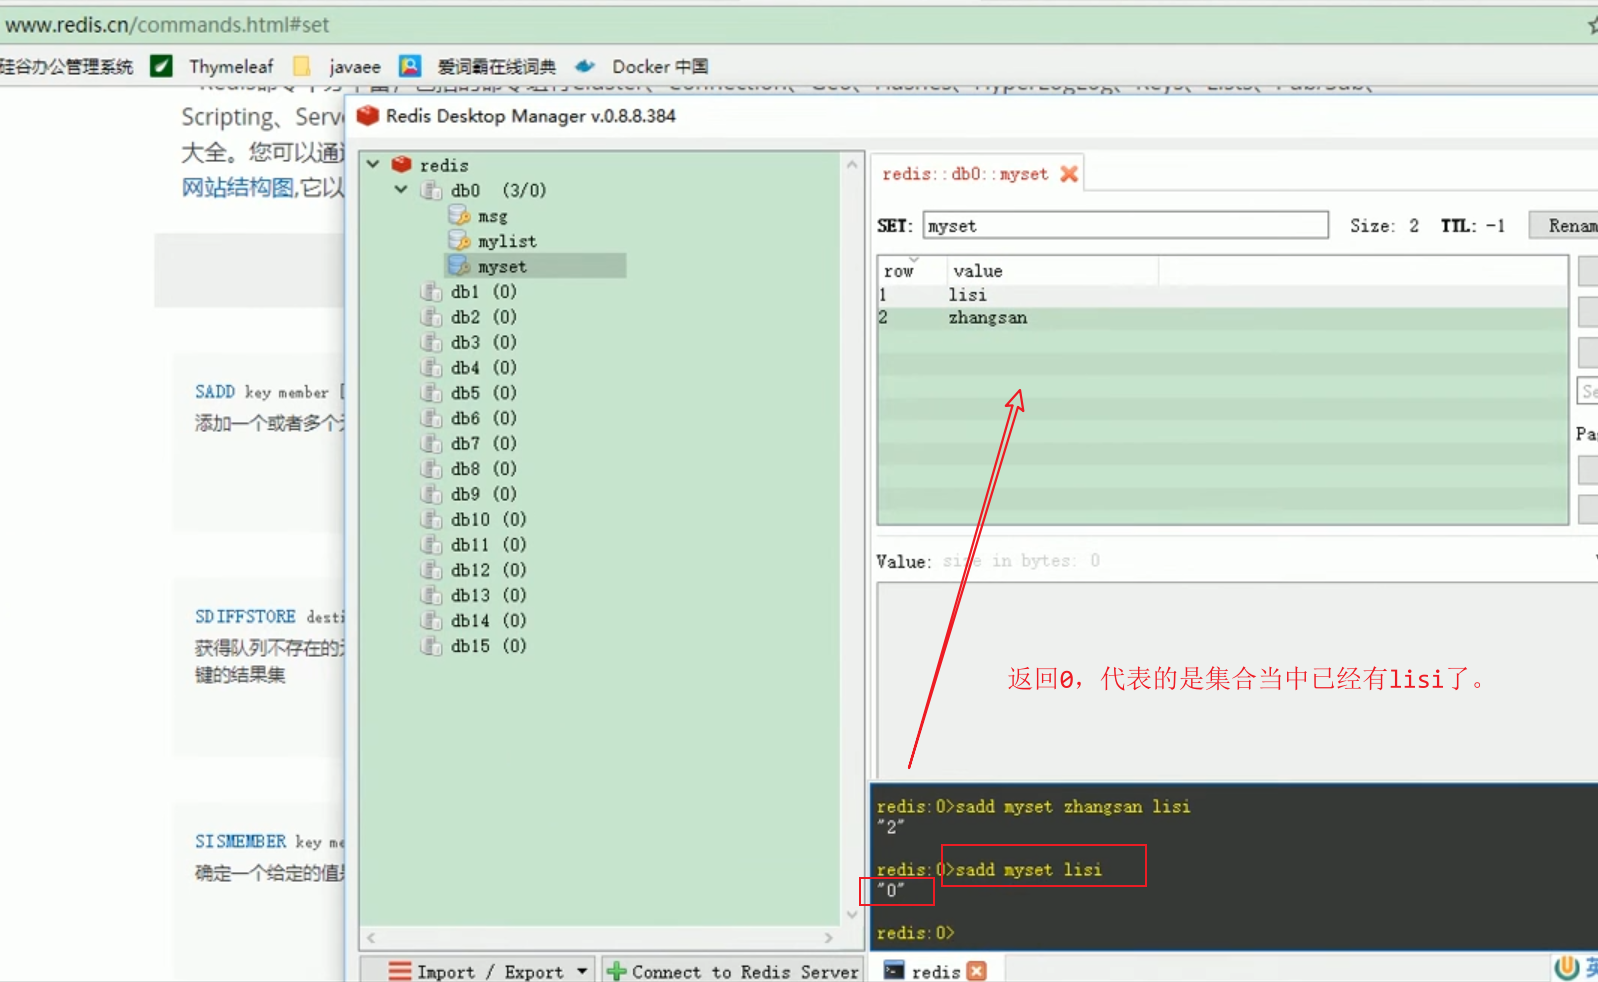
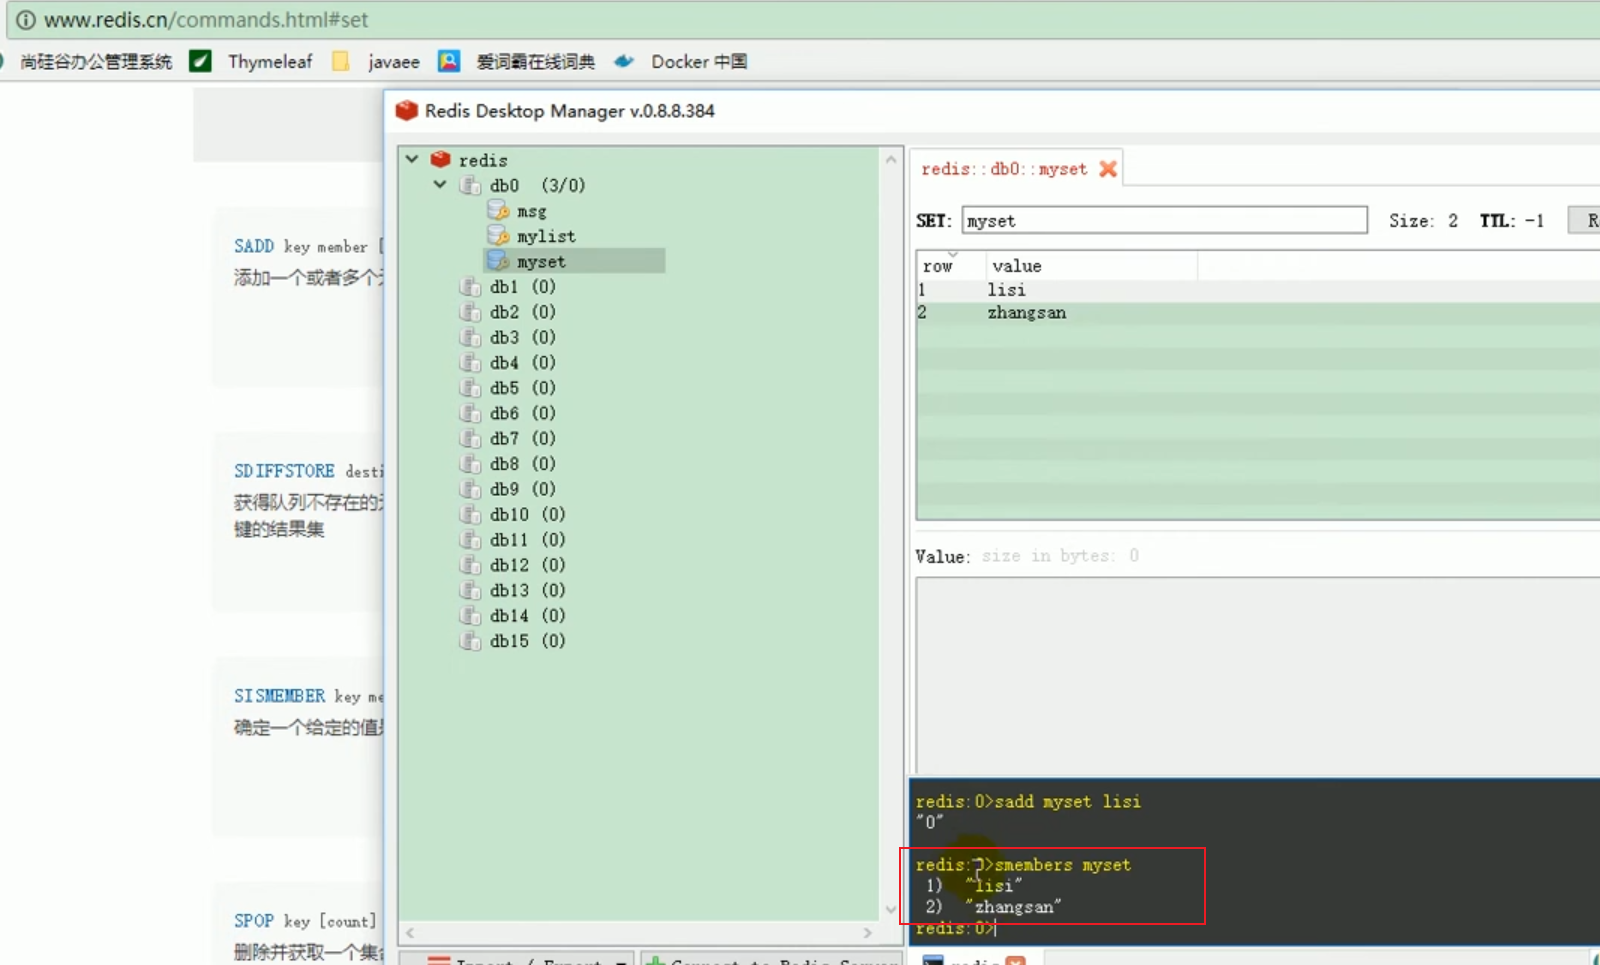
 ##set operation of redis
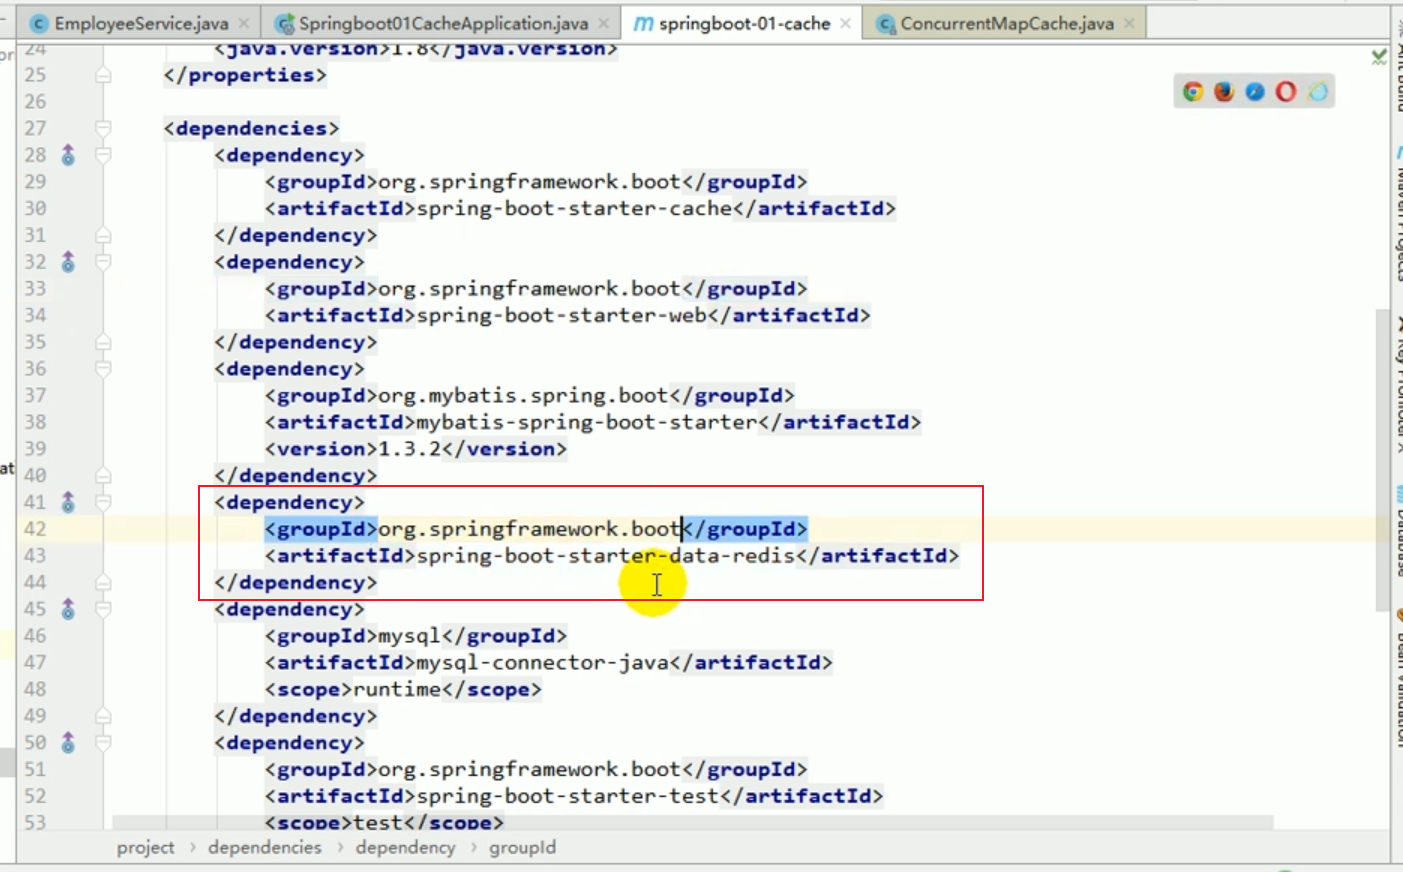
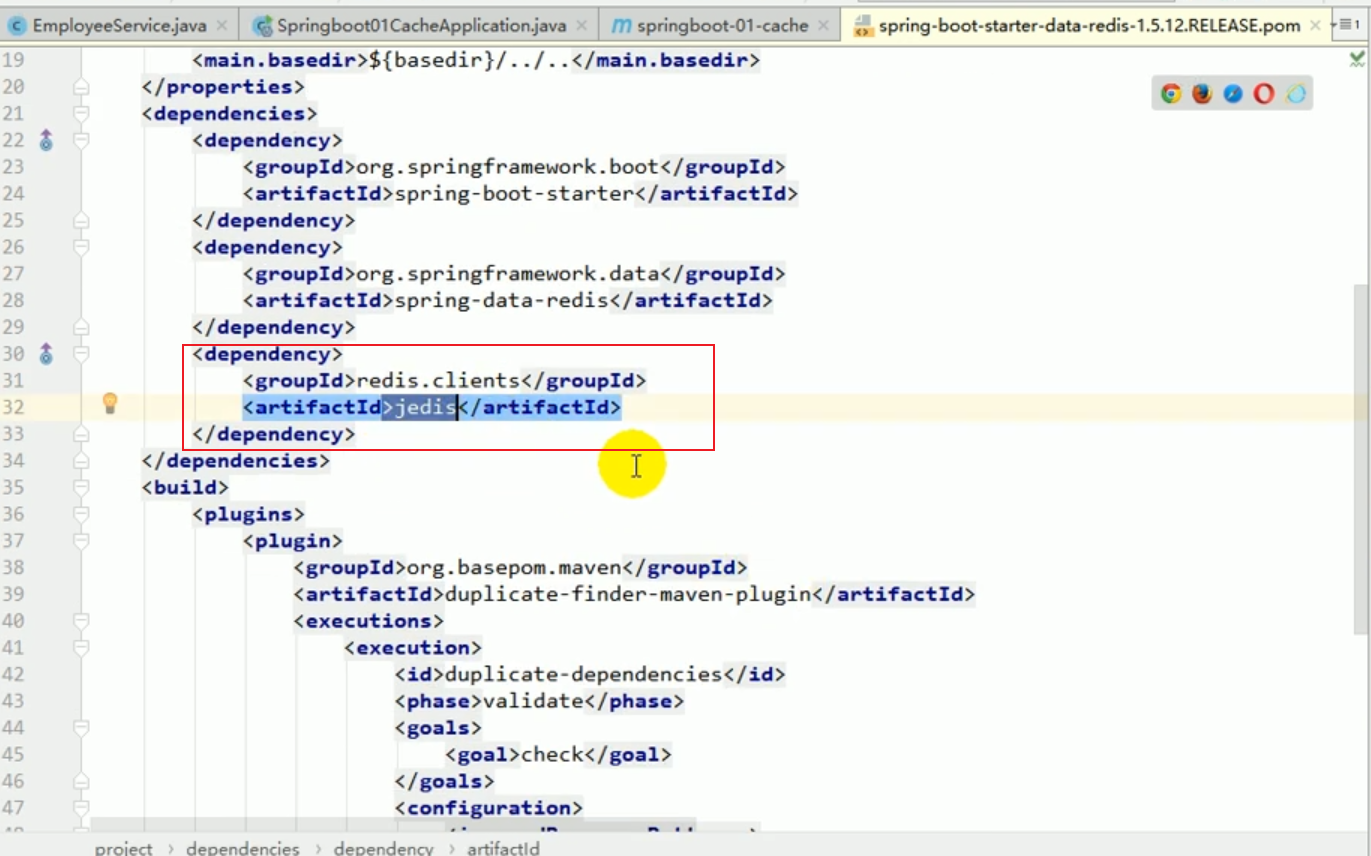
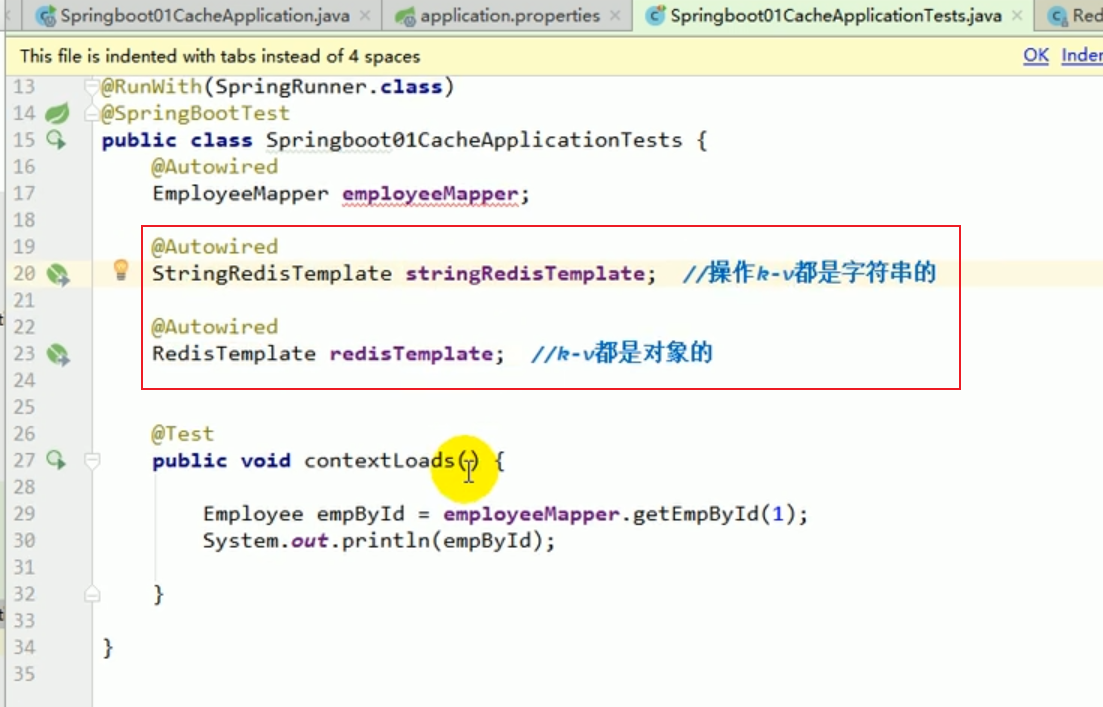
 Introducing the redis starter
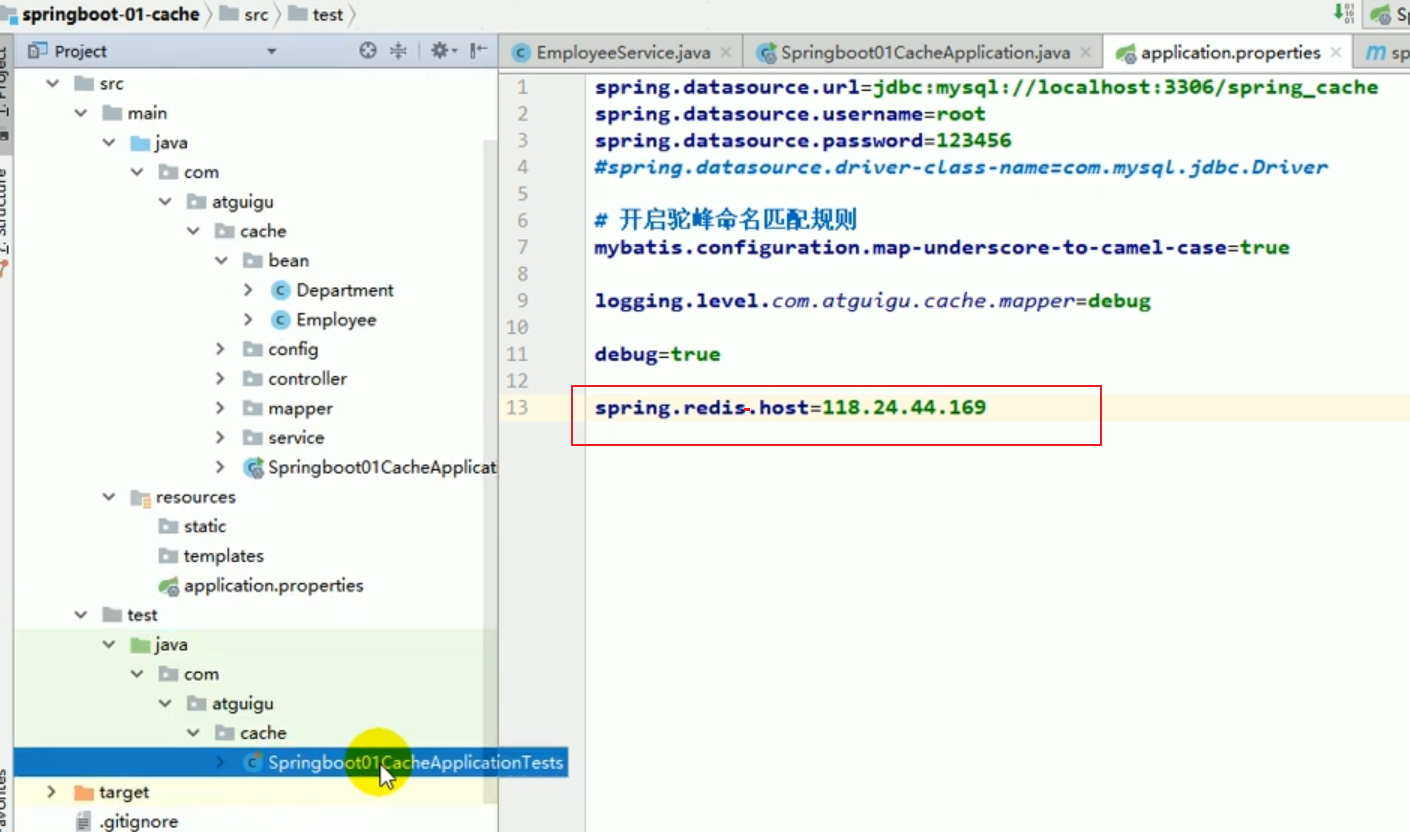
Configuring redis
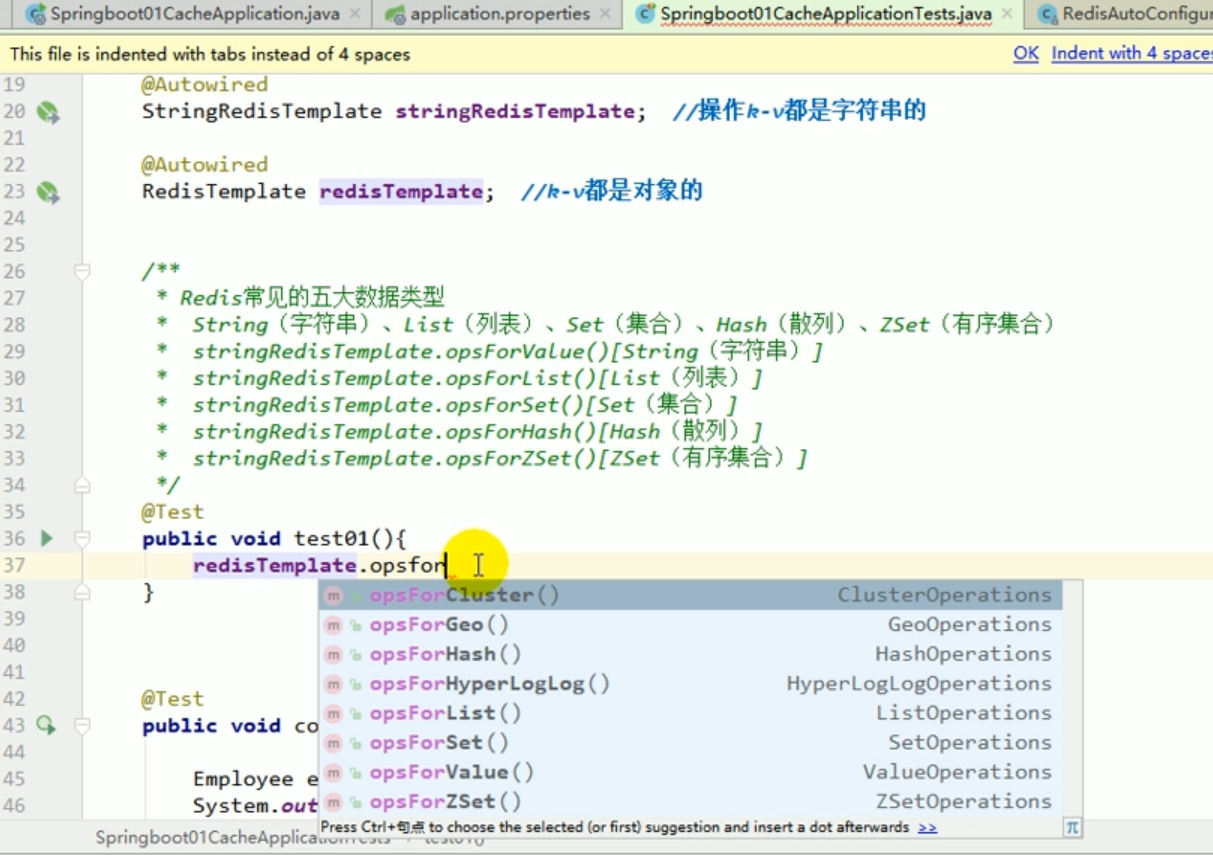

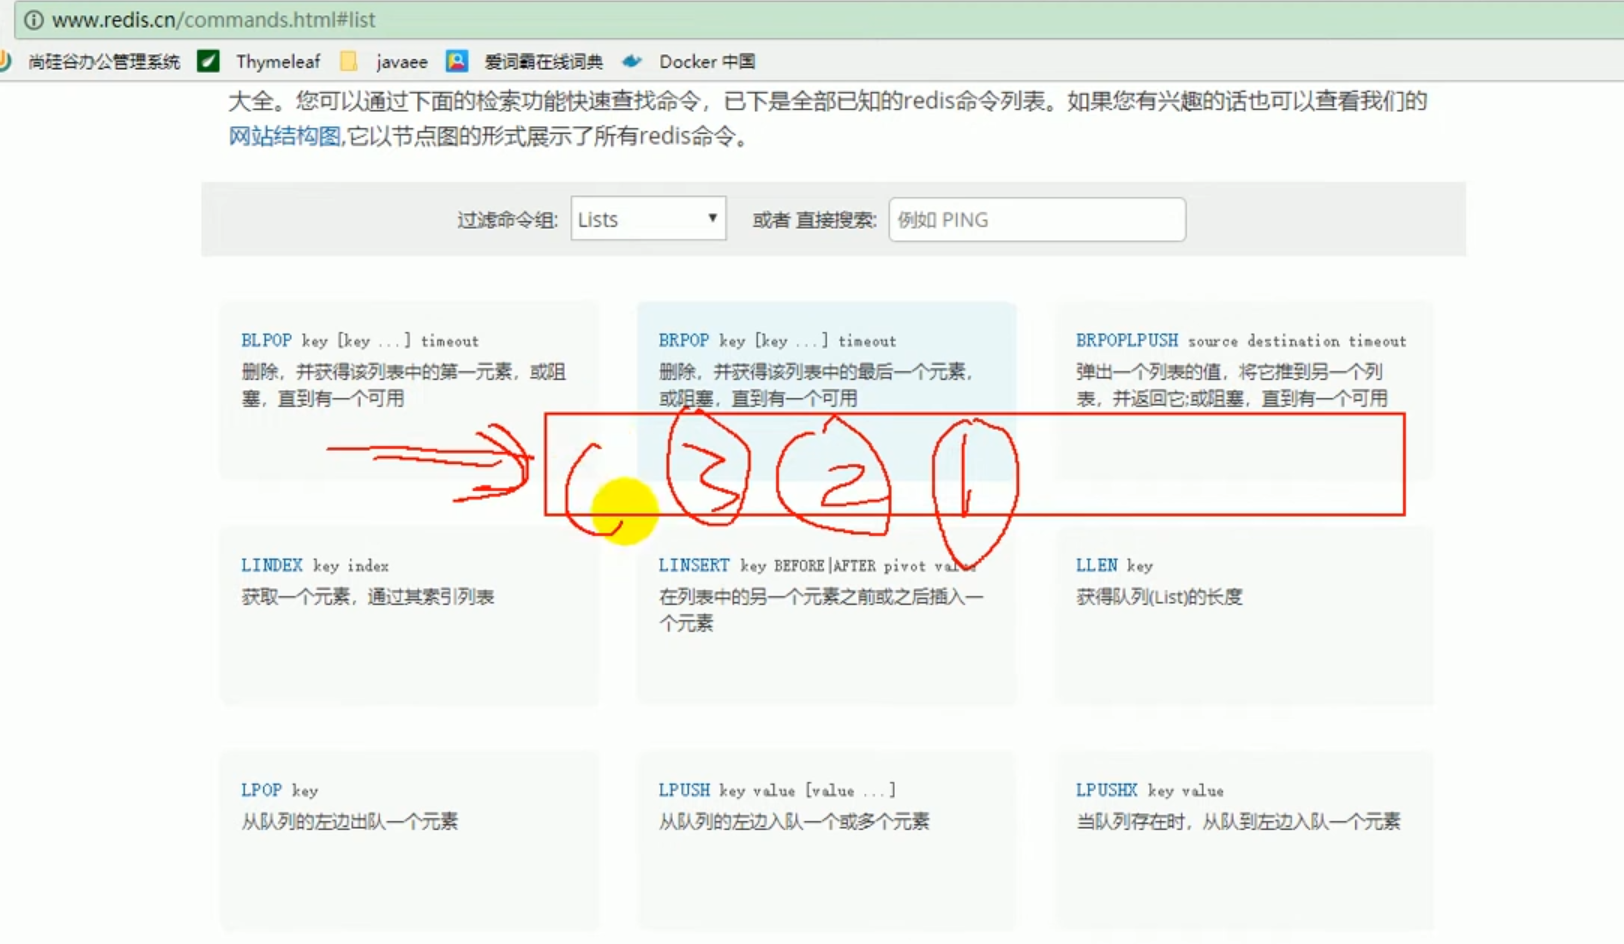
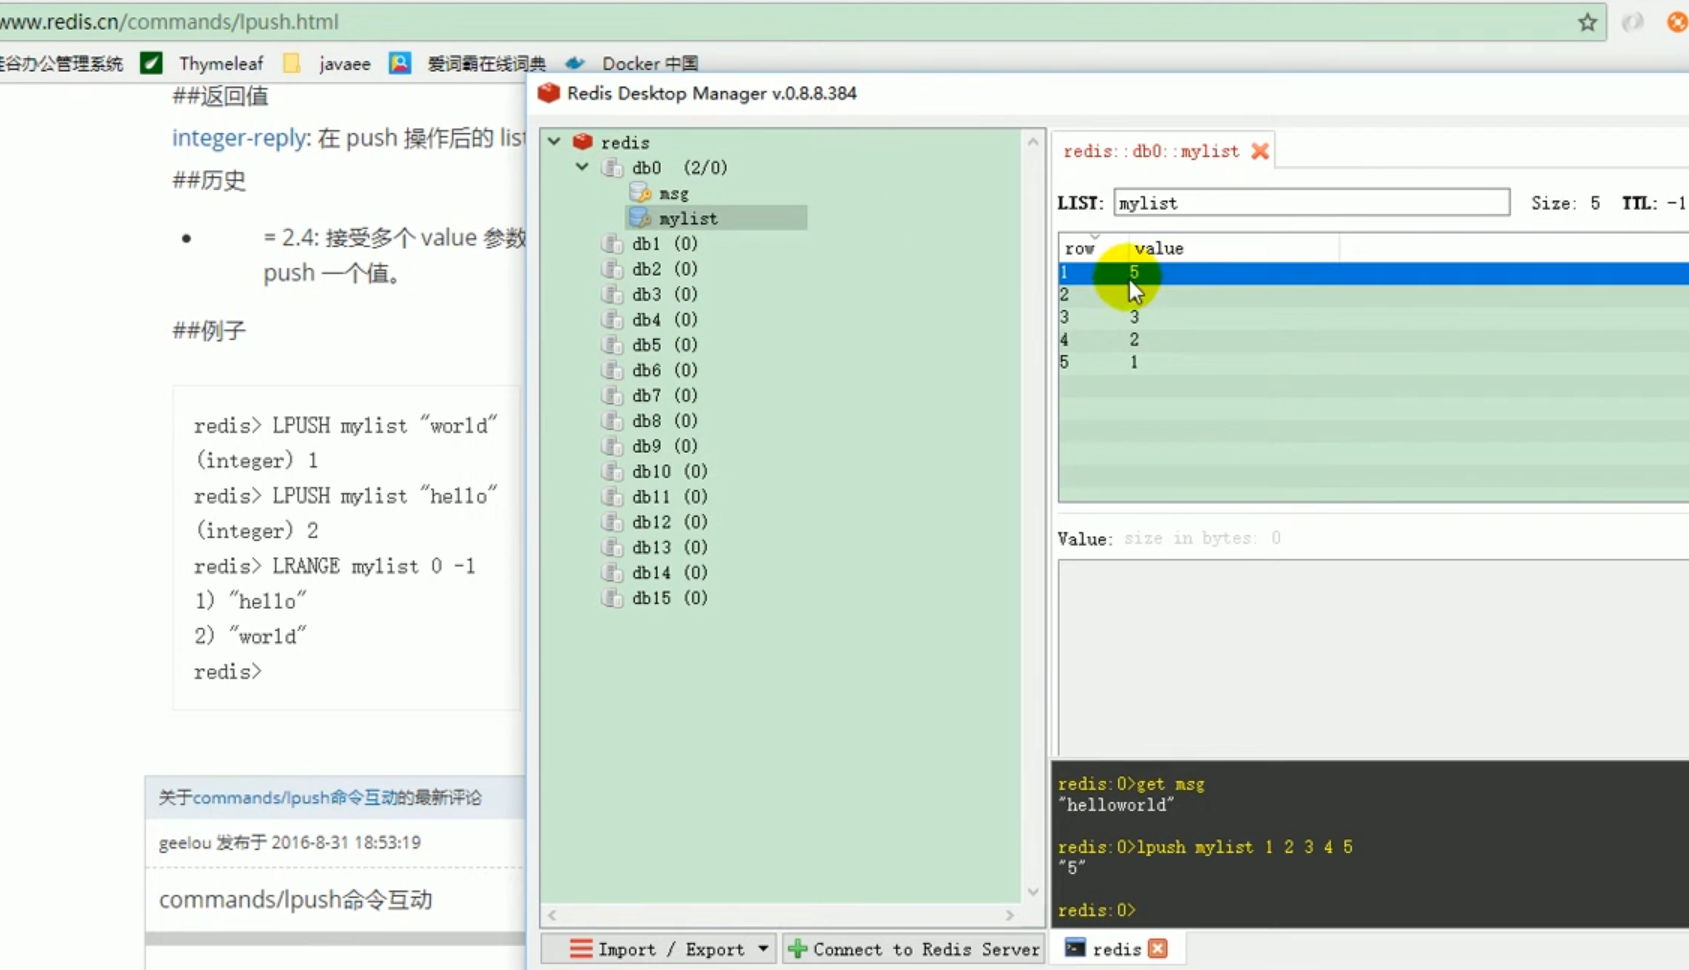
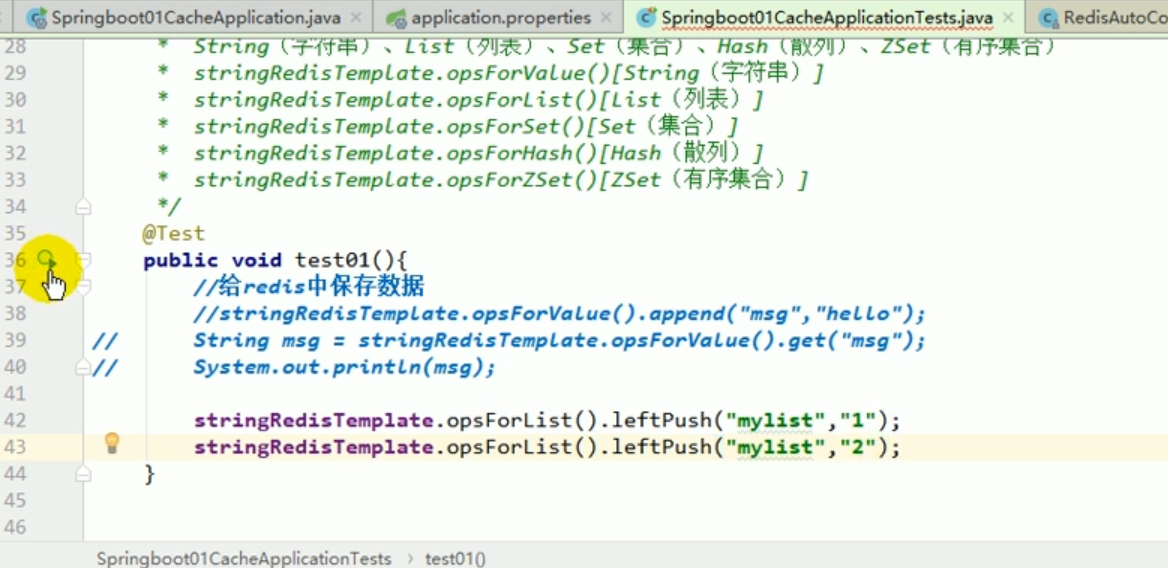
 ##redis operation list:
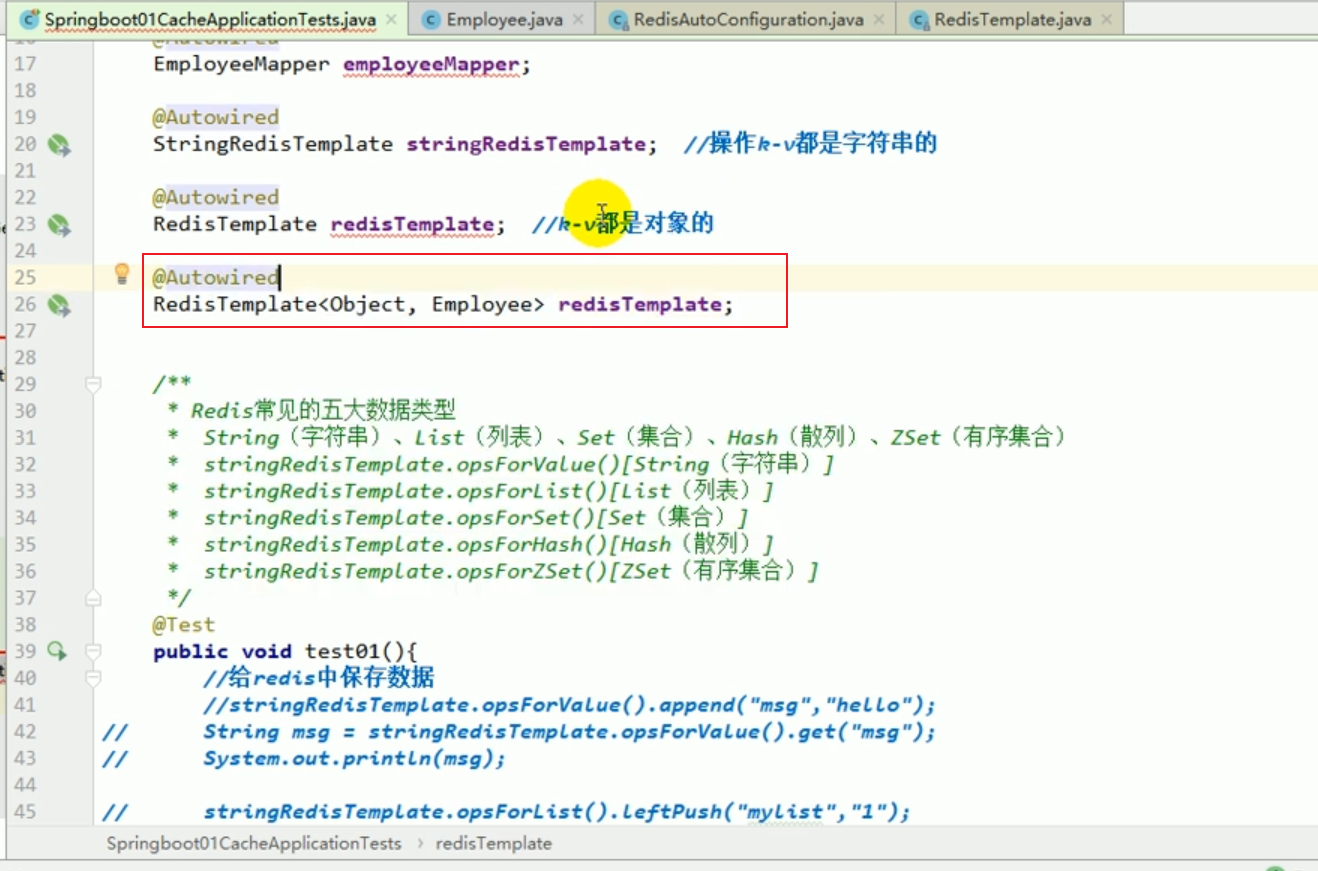
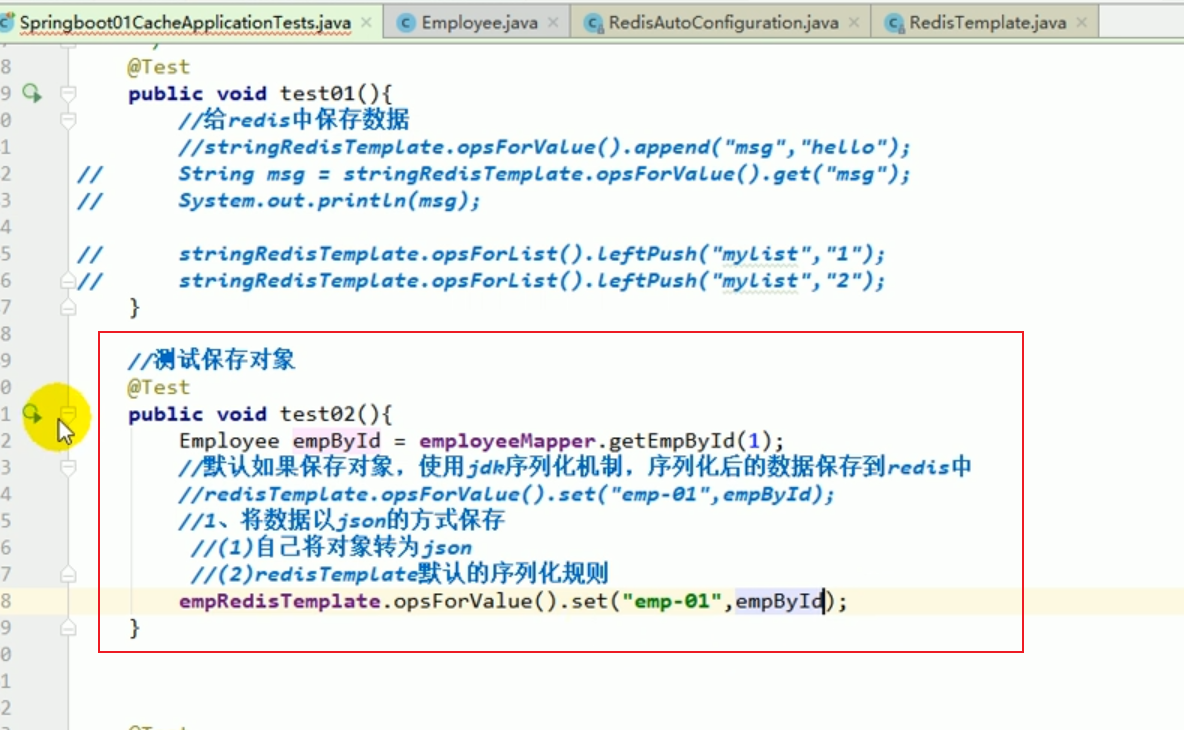
##redis test save object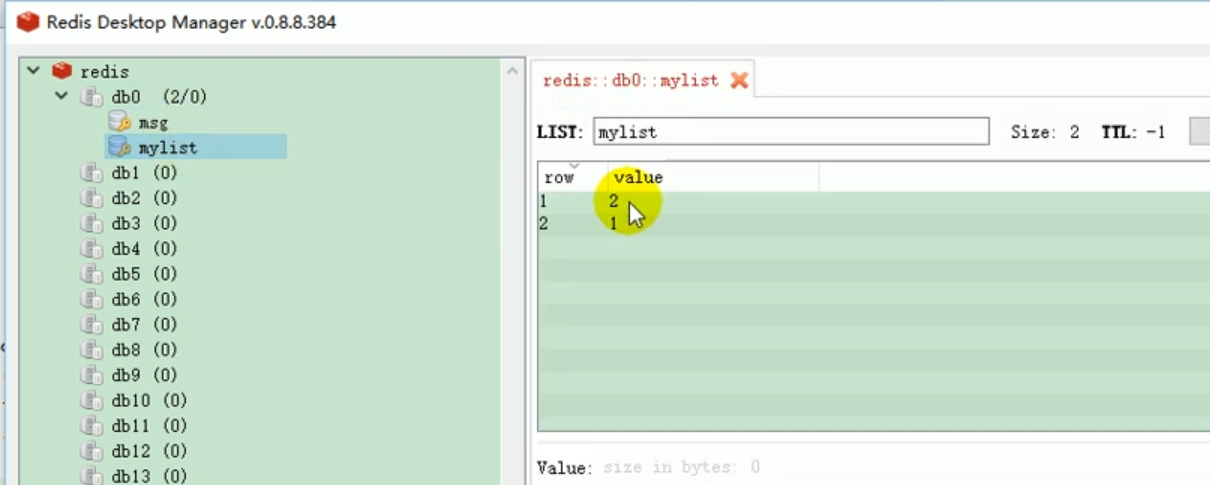
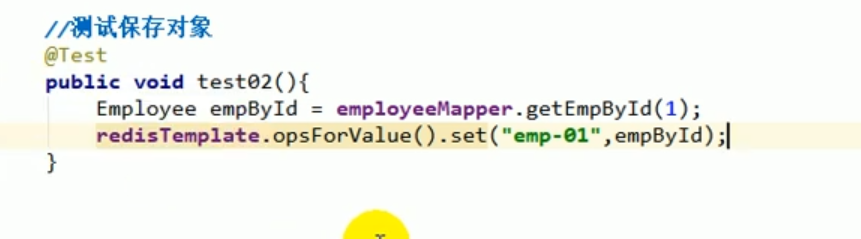
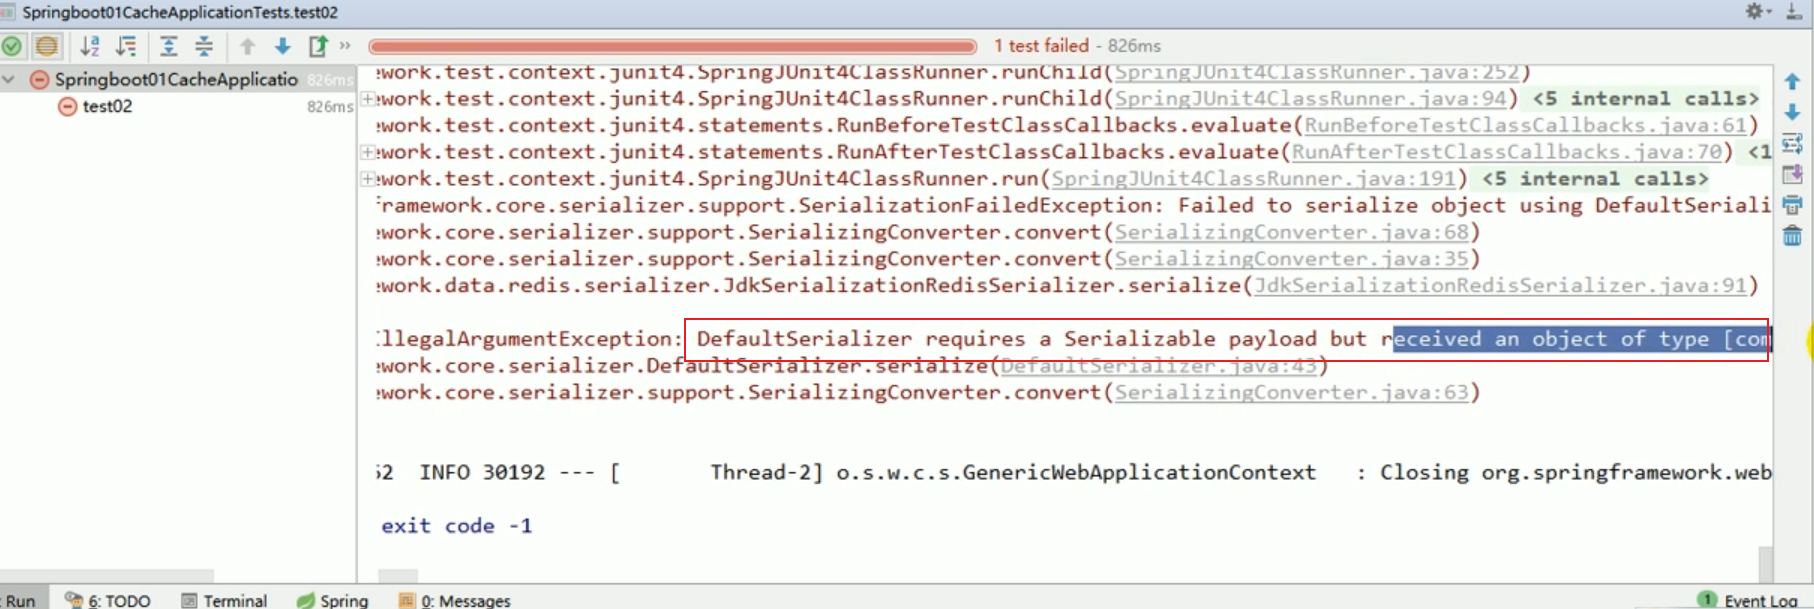
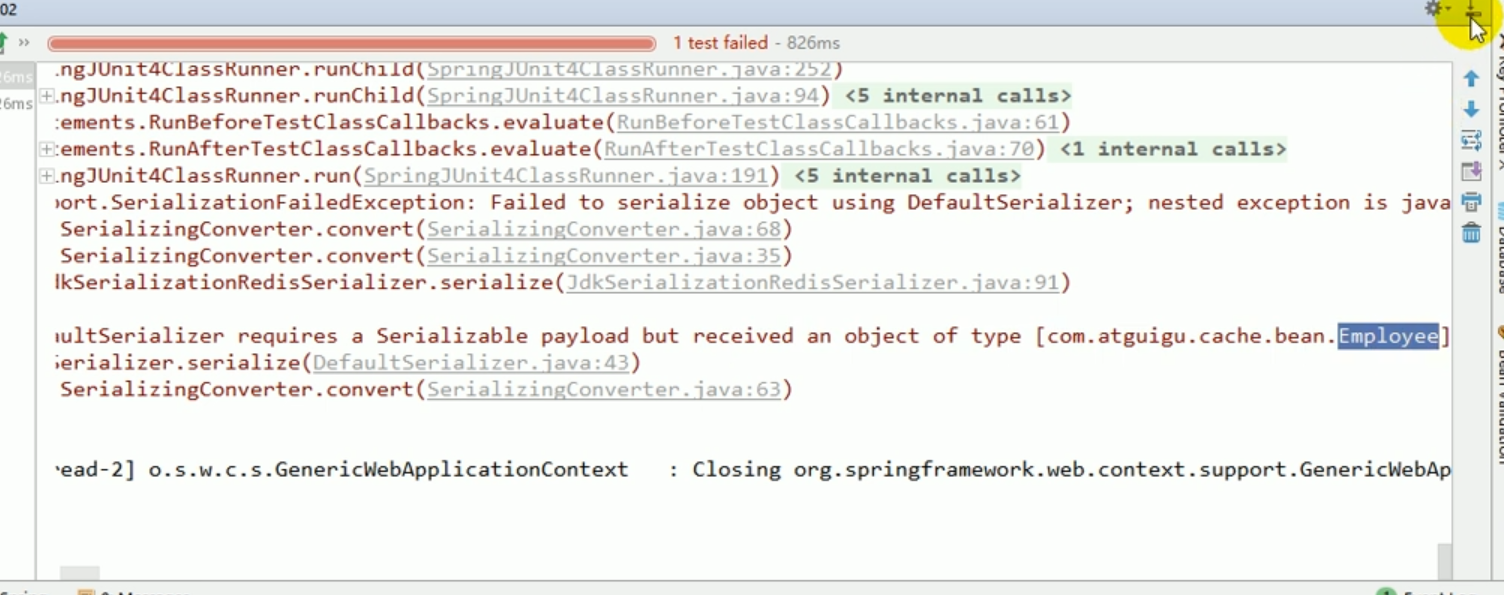
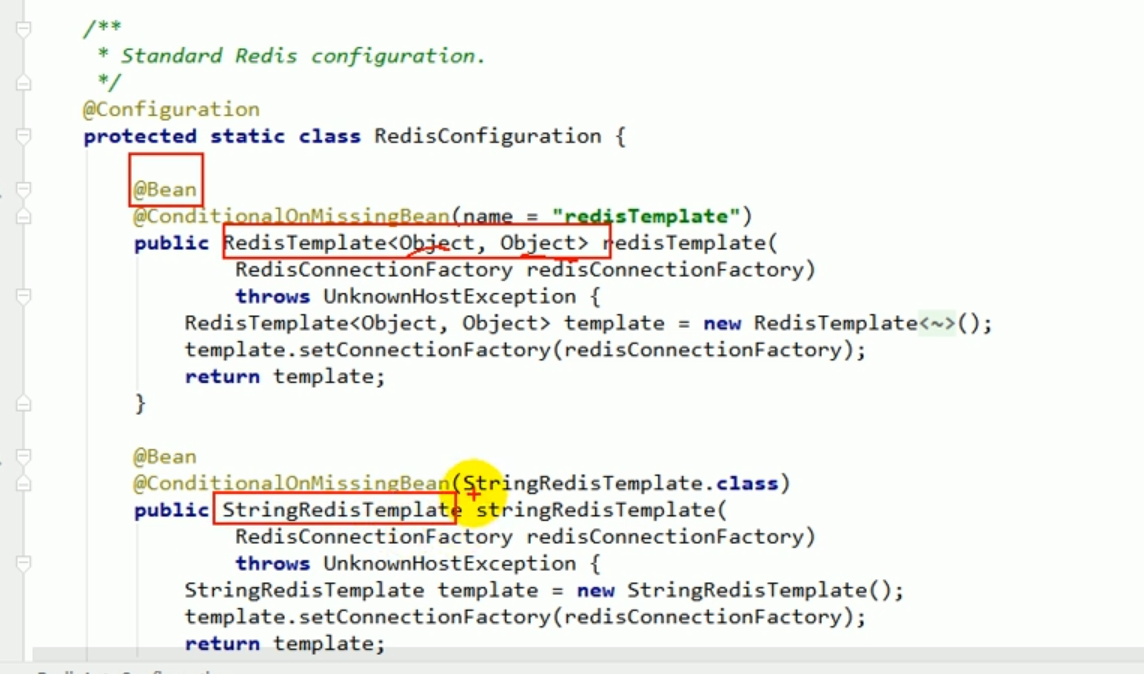
 redisTemplate default serialization rules
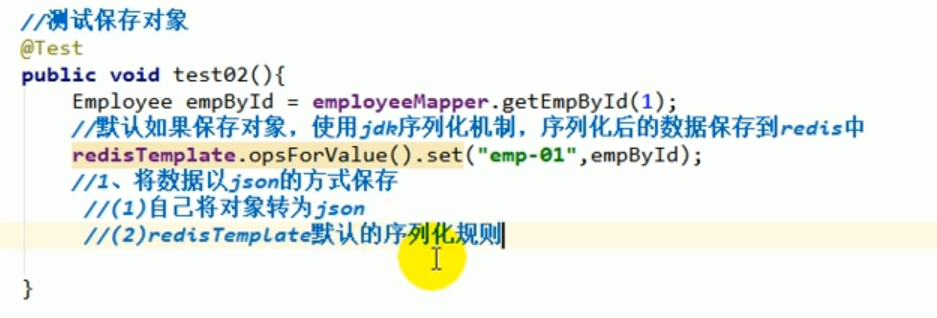
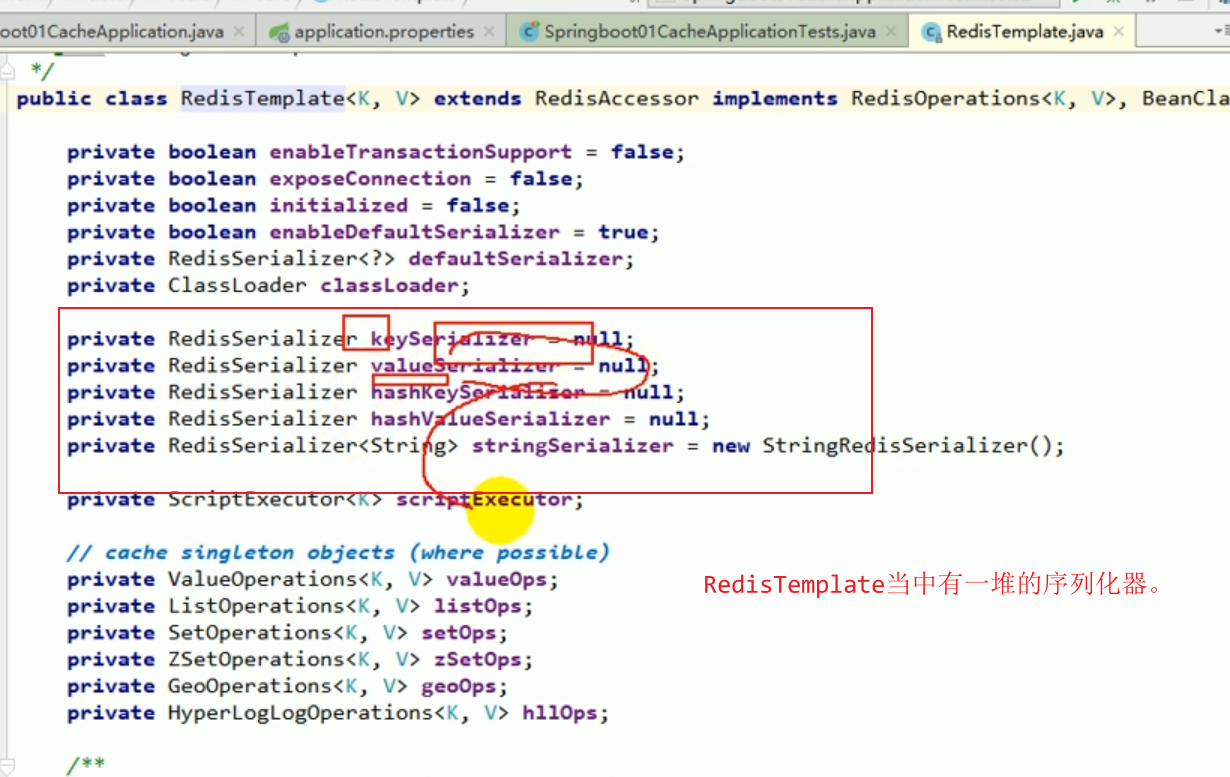
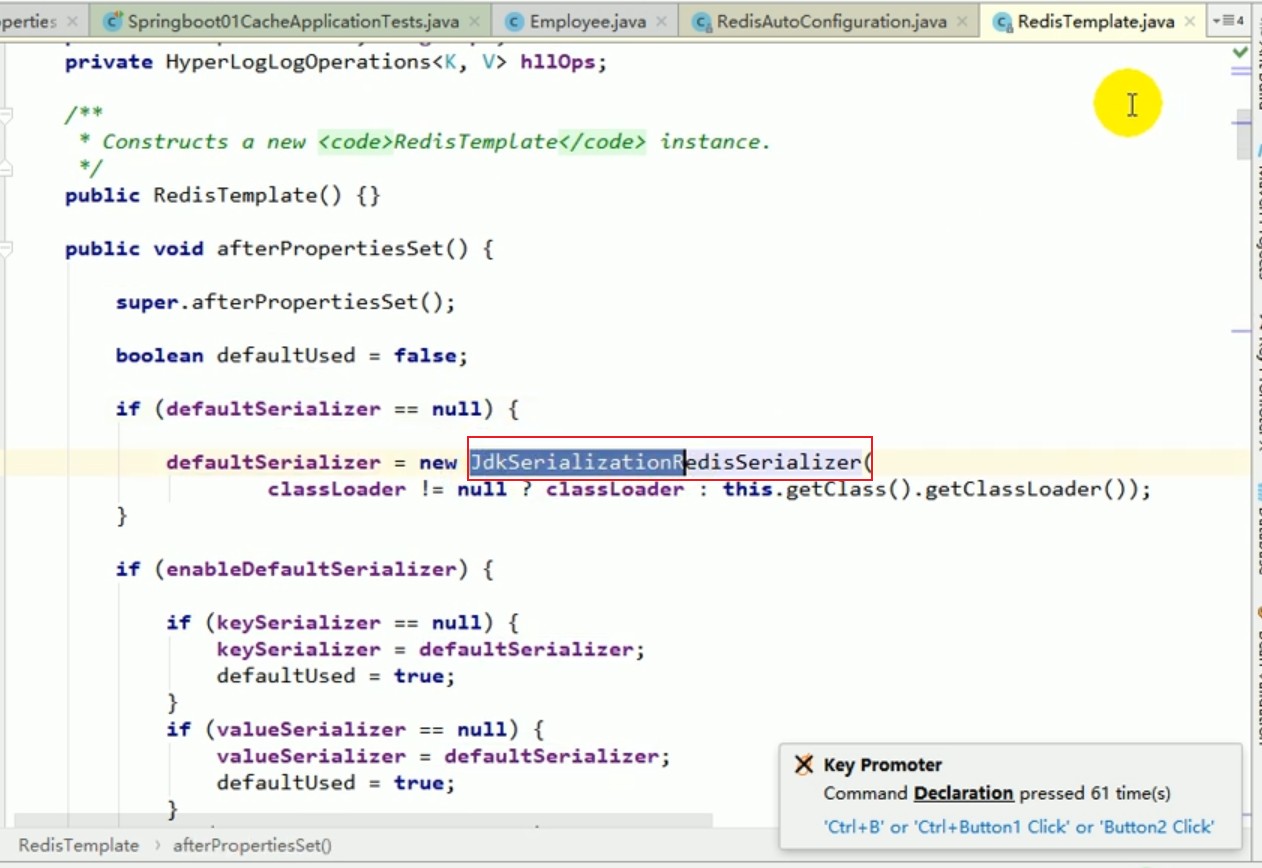 The default serializer is the JDK serializer used.
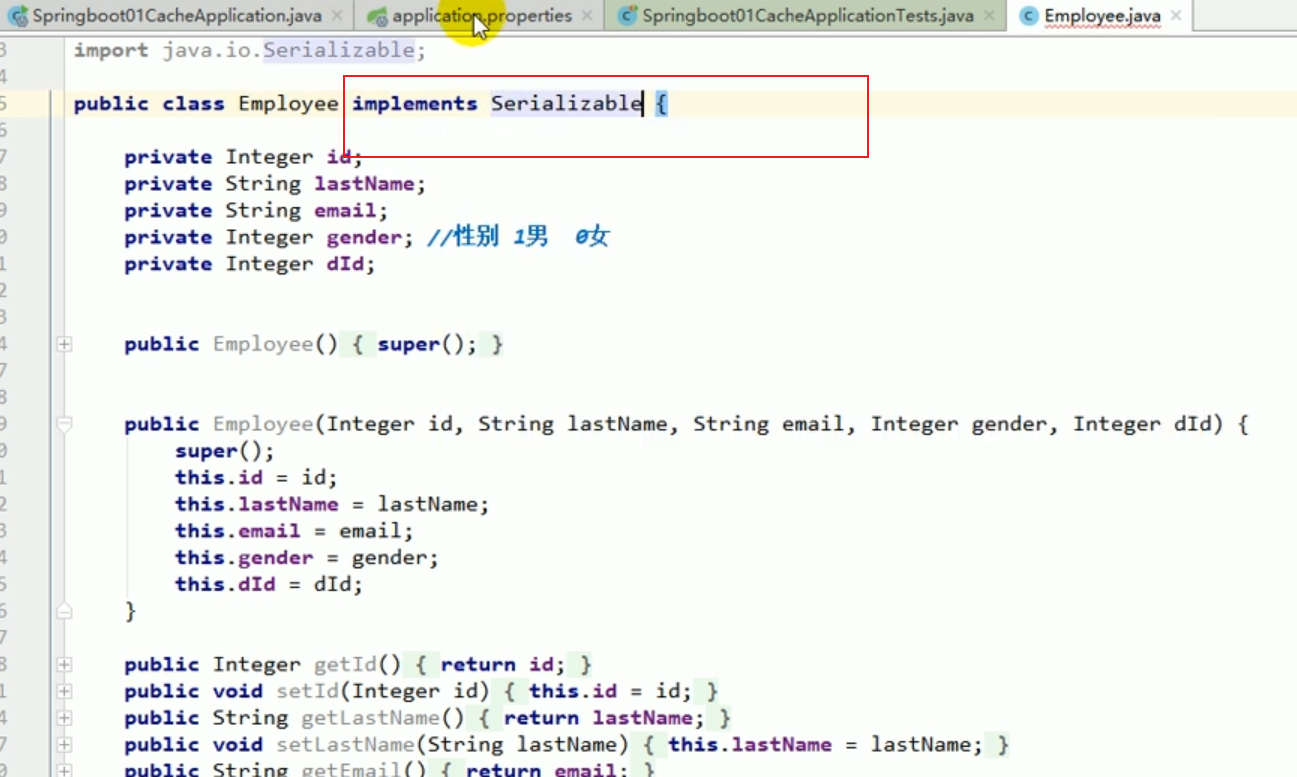
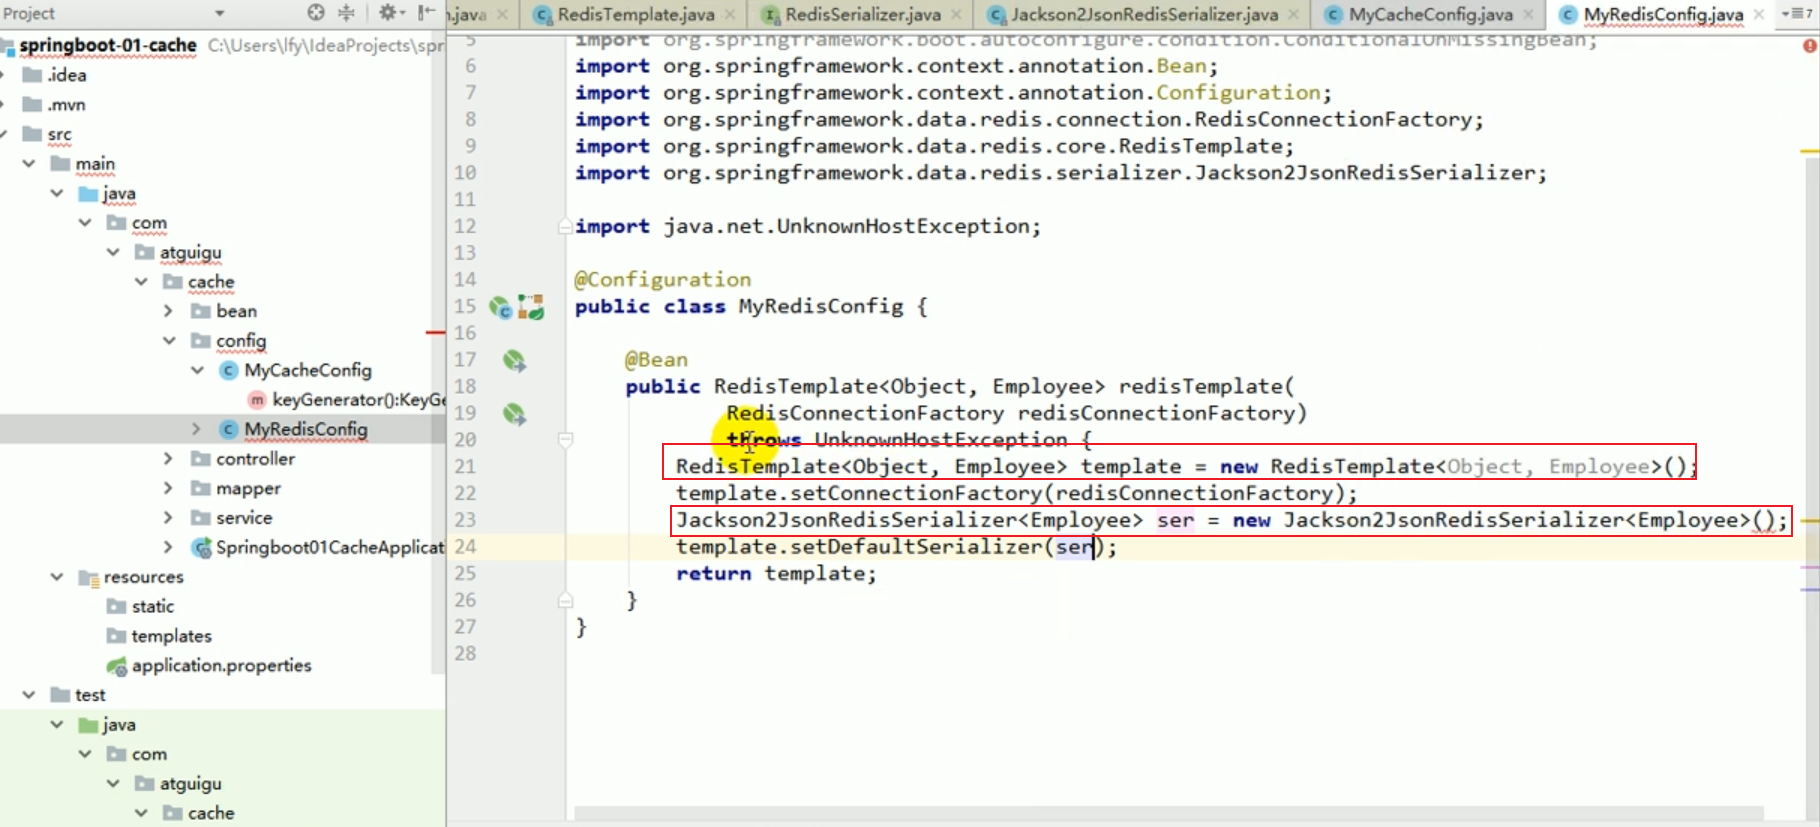
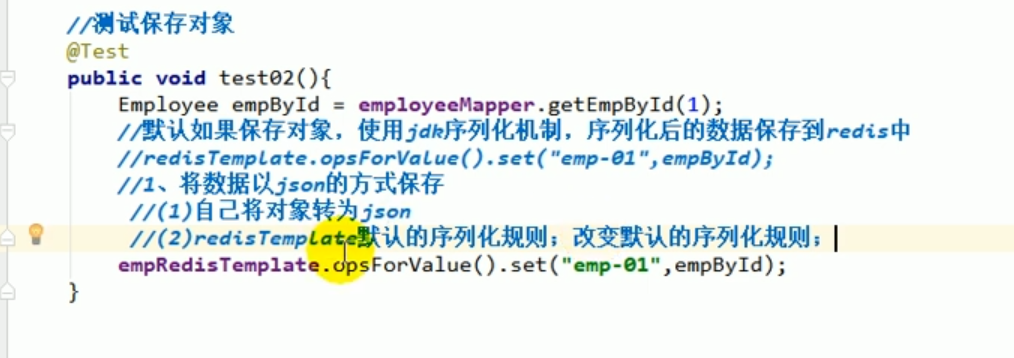
Let’s switch to the json serializer and that’s it.
redis configuration

 This makes it clear that if we want to save the object later, we often need to modify the serializer.
We used ConCurrentMap's cache manager before.
This cache manager helps us create cache components.
The cache component actually performs CRUD work in the cache.
Now that we have introduced redis, what will happen?
We still set debug=true in application.properties so that the automatic configuration report can be turned on.
At this time, we restart our program and search in the console.
See which automatic configuration class is effective?
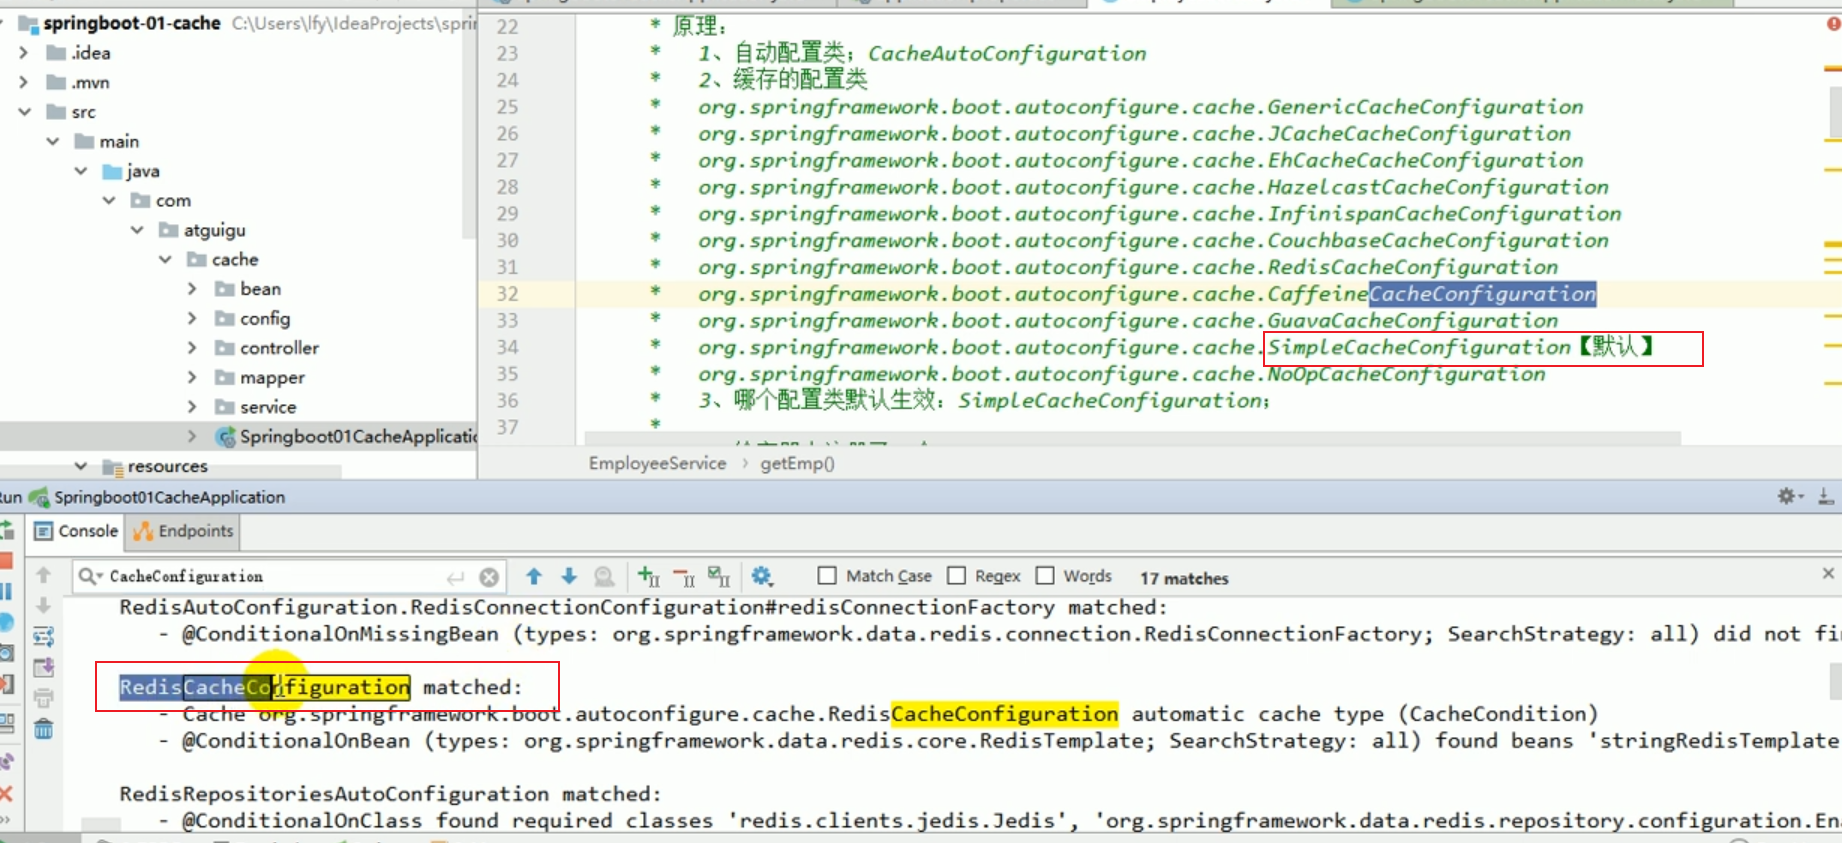
The original default enabled is: SimpleCacheConfiguration.
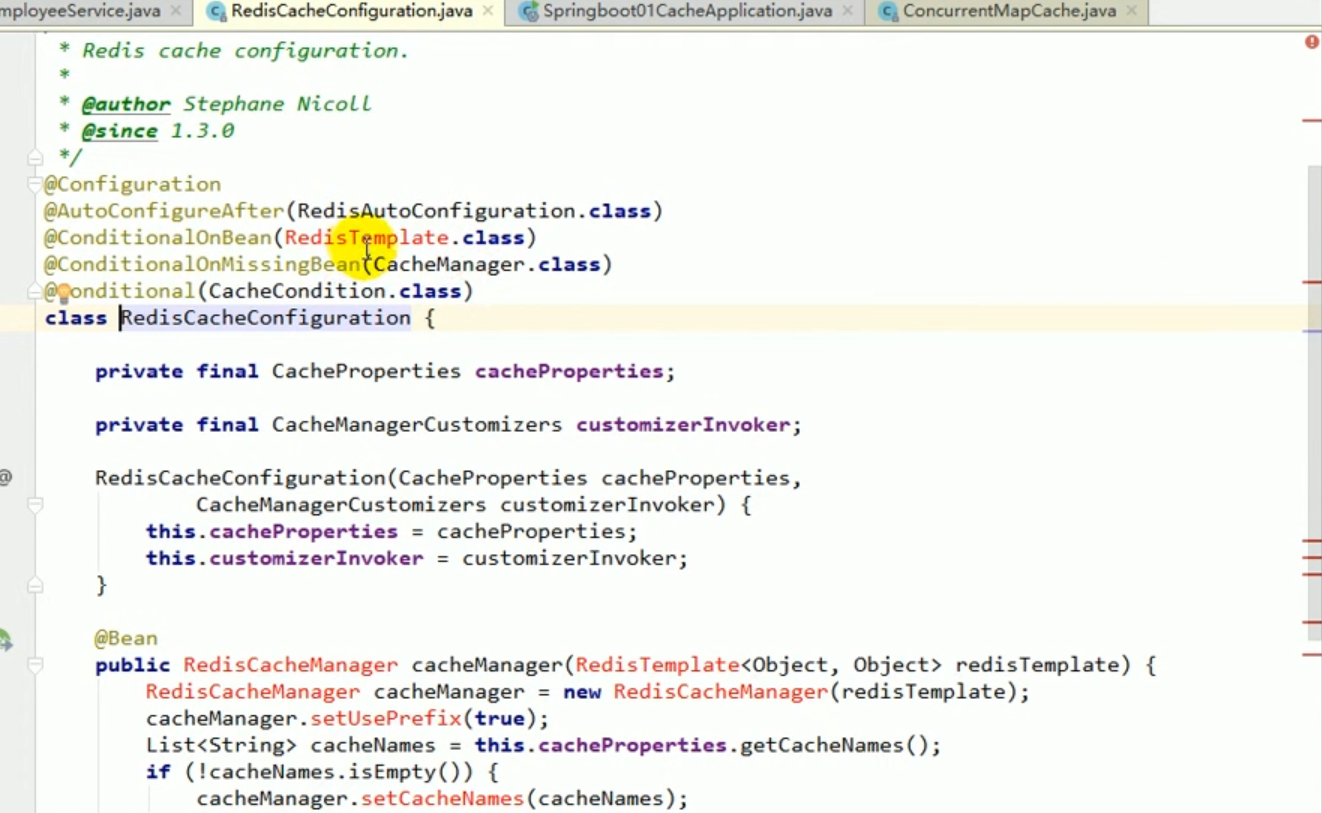
Now that we have introduced redis-related starters, the program starts RedisCacheConfiguration by default.

Just start the program and test it directly.
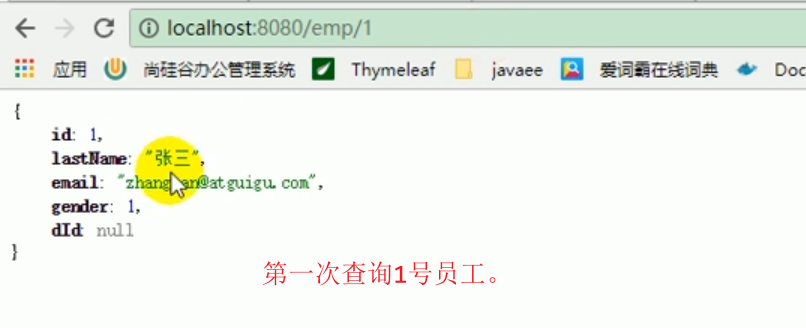

It means that when you query for the first time, you query the database.
When querying for the second time, there was no output from the console, indicating that the cache was queried.
The cache is only enabled by redis by default.
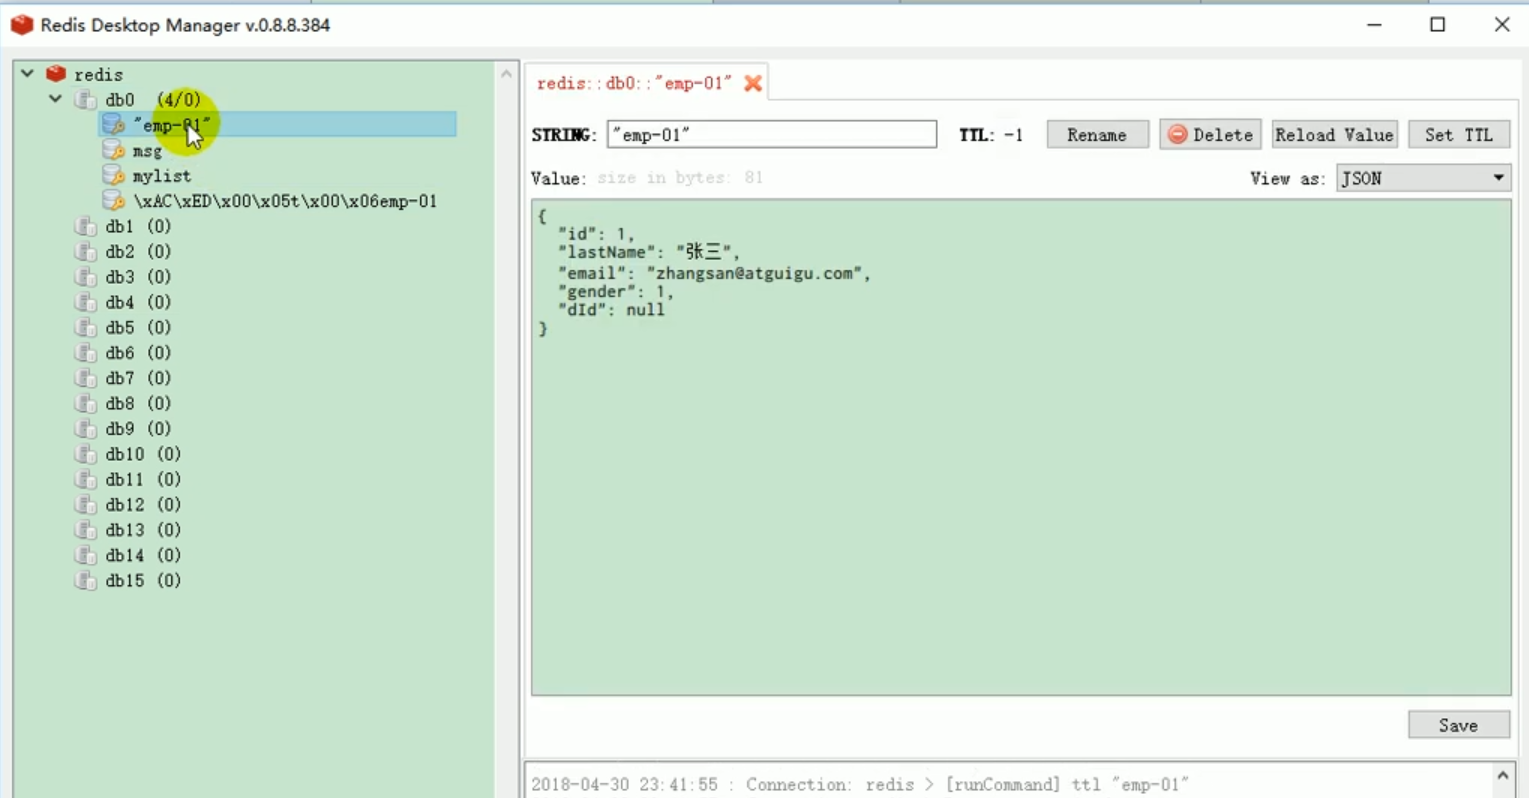
Then it must be in redis.
We can check it out:
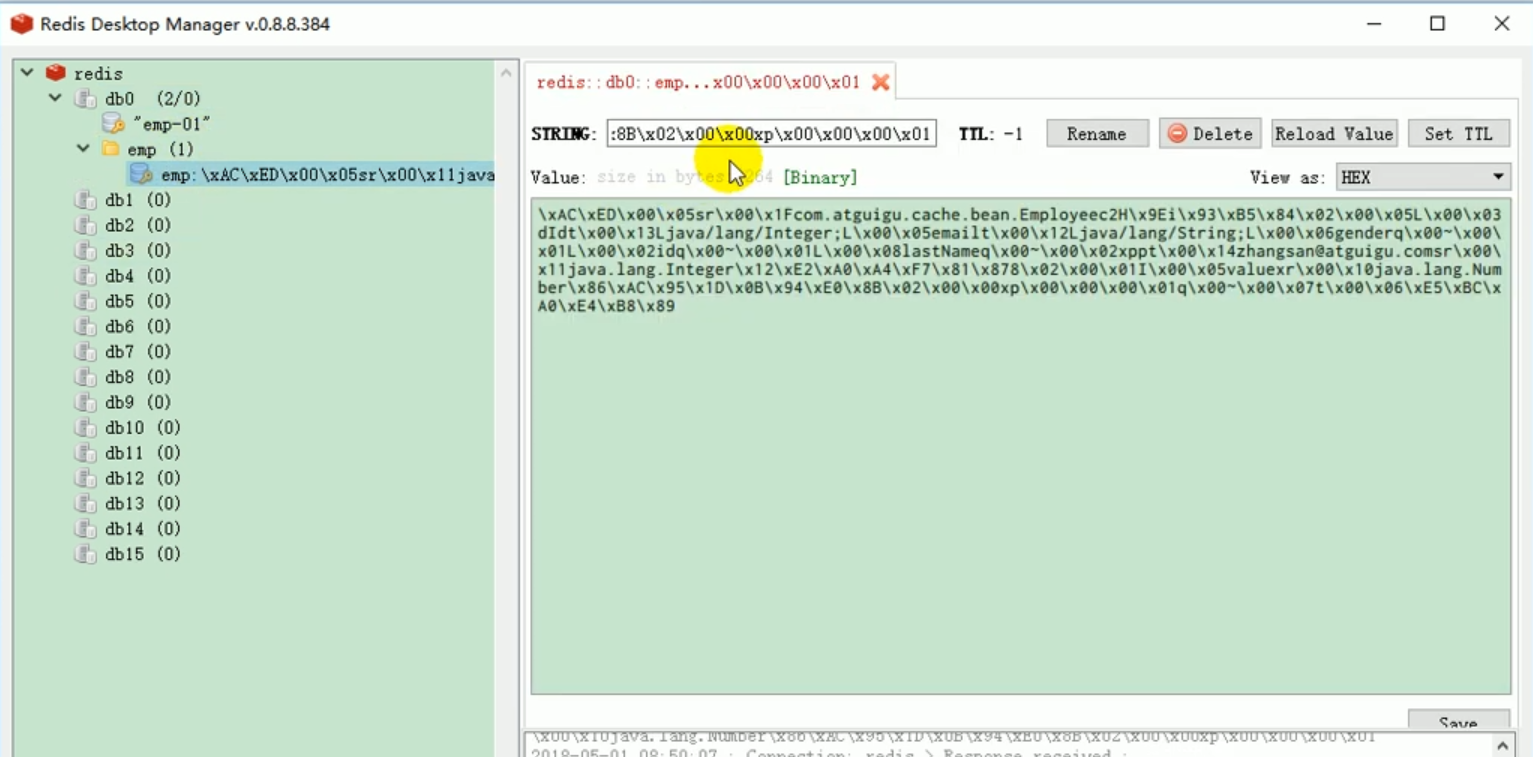
This illustrates a problem. When k and v are both objects, serialization is used to save the object by default. To save. We want redis to automatically save it as json.
What should we do?
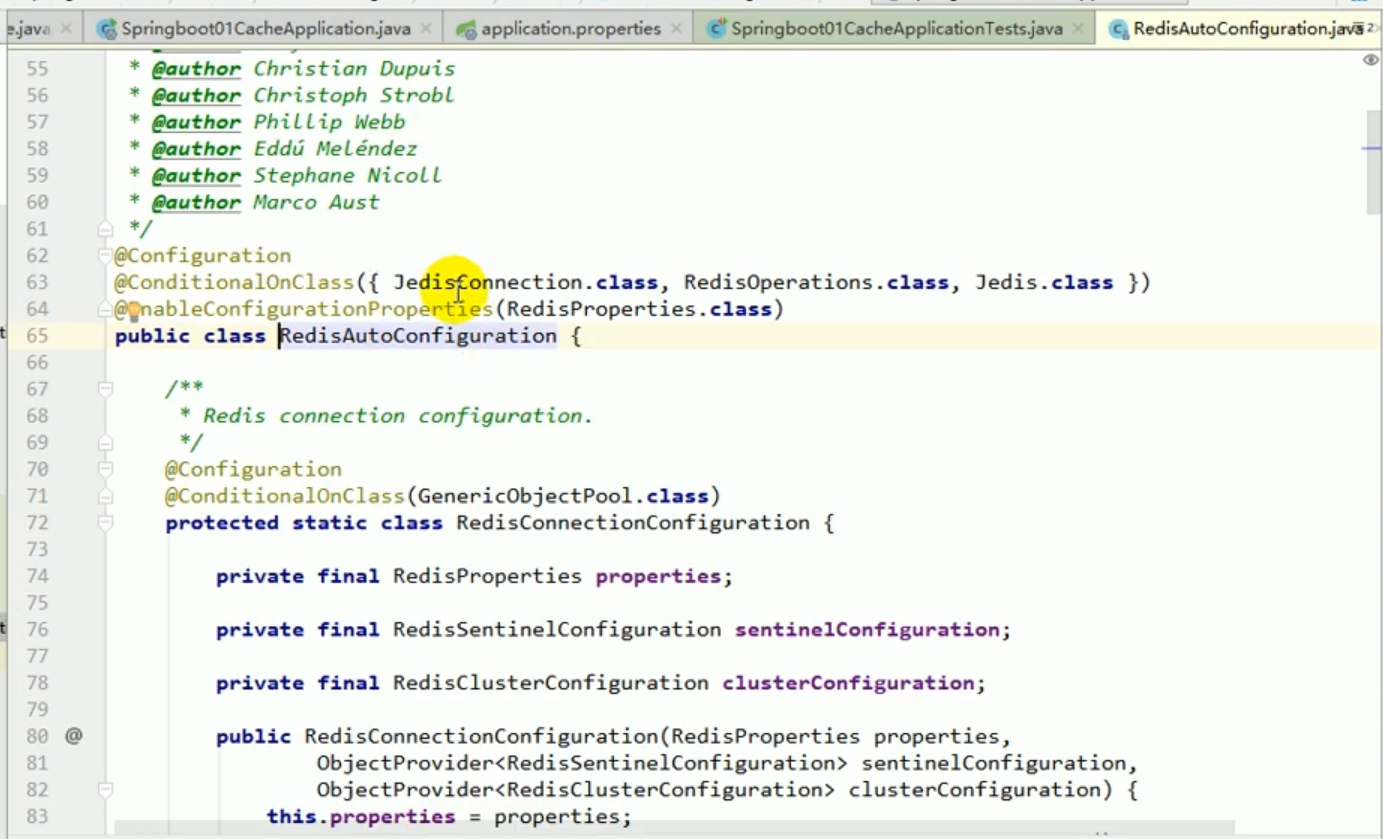
Let’s first analyze the principles of these processes.
1. We have introduced the starter of redis, so our cachemanager has become rediscachemanager.
2. The rediscachemanager created by default passes in a redistemplate when operating our data. s things.

#3. This redistemplate was created for us by redisautoconfiguration. The default serialization mechanism used by this redistemplate is jdkserializationredisserializer. This is equivalent to the fact that the redisCacheManager that redis prevents us by default does not quite meet our requirements.
What should we do?
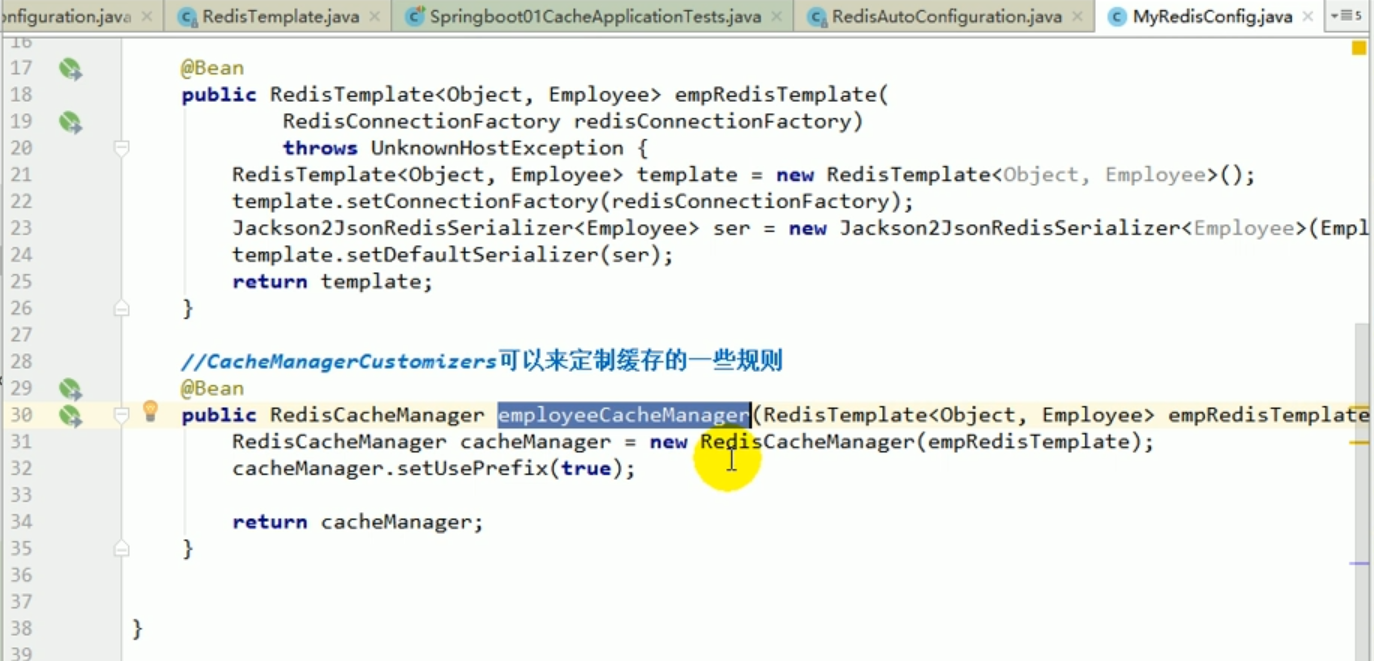
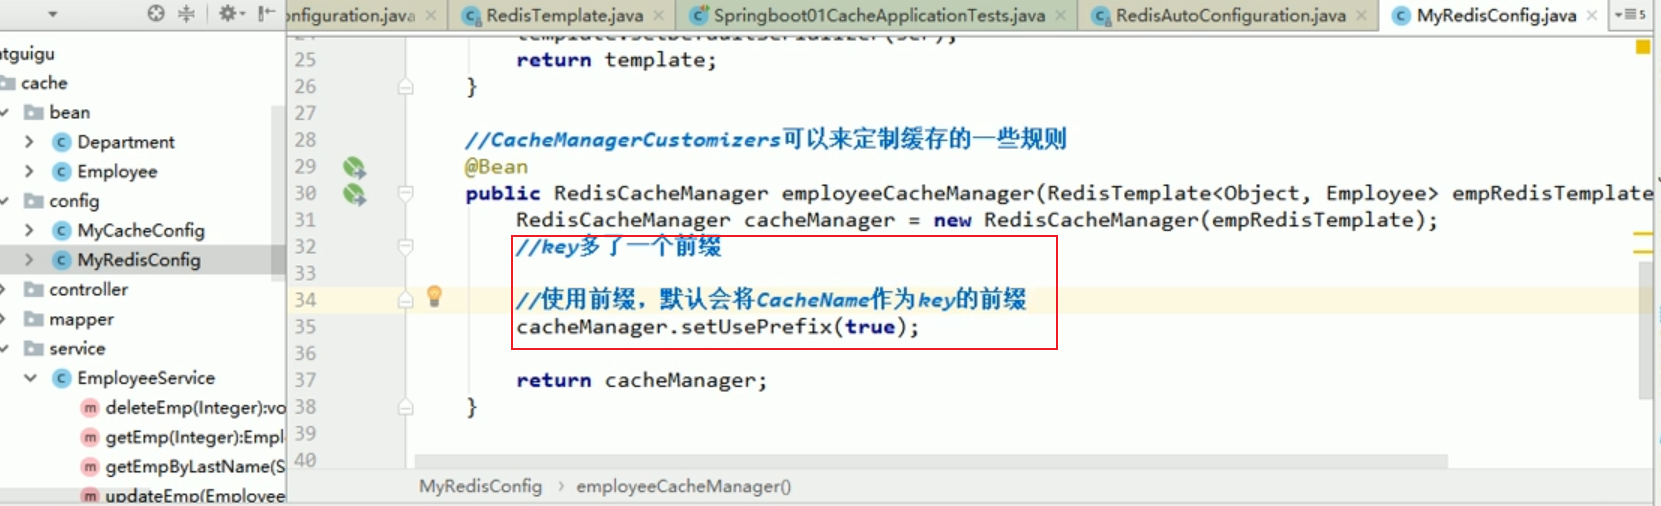
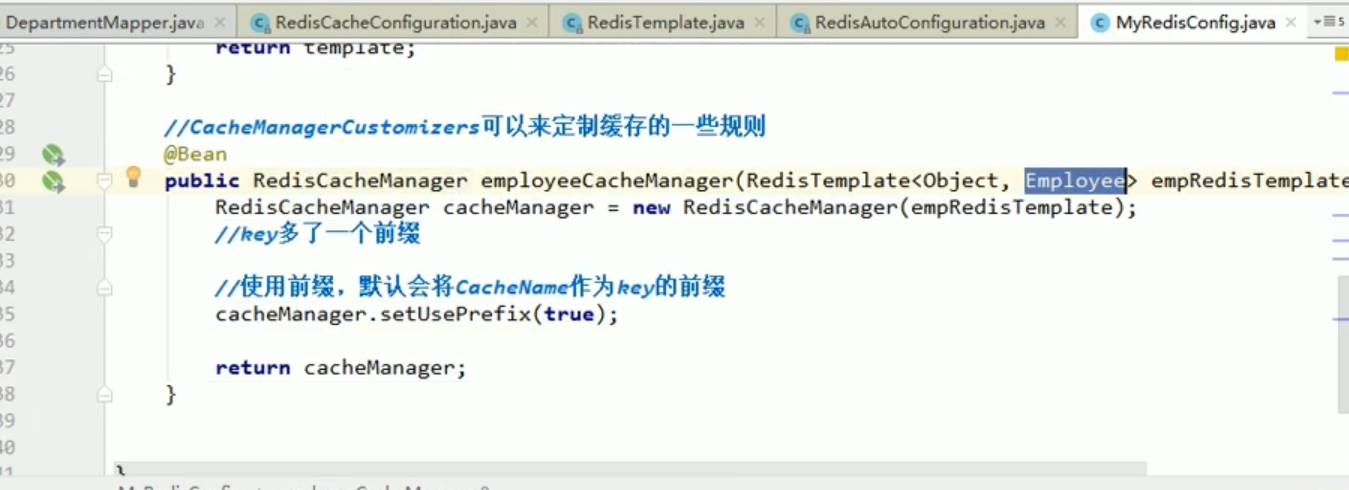
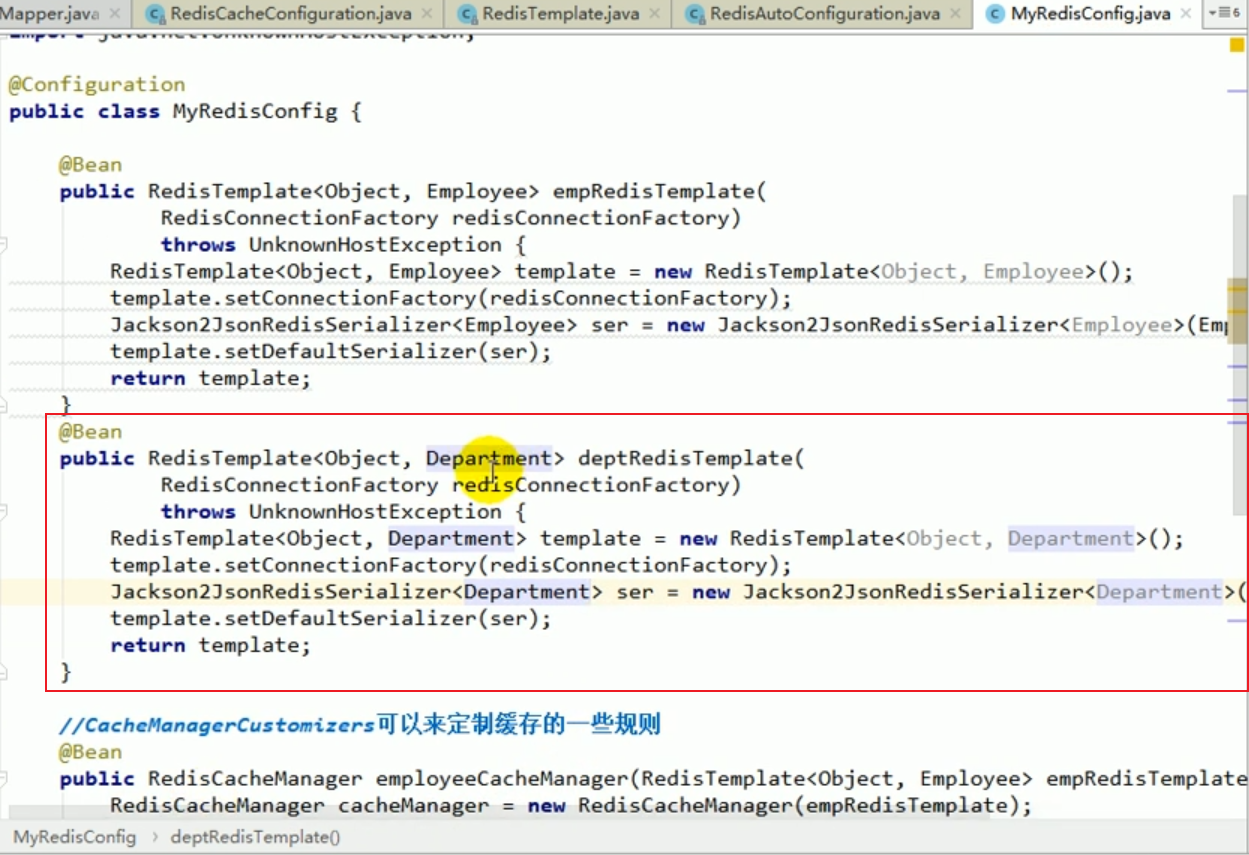
We should customize CacheManager.
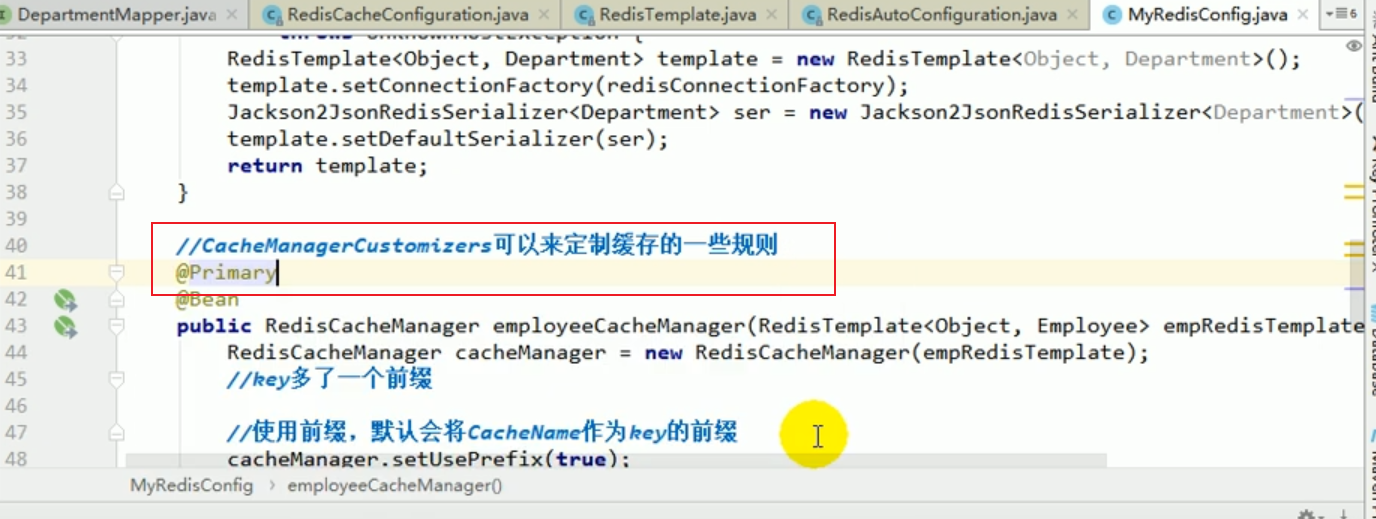
Customized redisCacheManager
At this time, we start the project again to test. At this time, we can see the results in redis, which is We wanted it.

During Yunqiu’s next interview, she can ask those who want to come to the software park, do you know that when redis starter saves objects, redisTemplate What are the default serialization rules?
If we want to modify the default serialization rules when using redis, what should we do?
We can customize redisCacheManager, then customize redisTemplate, and pass in the json-related serializer in redisTemplate.
Small remaining problems
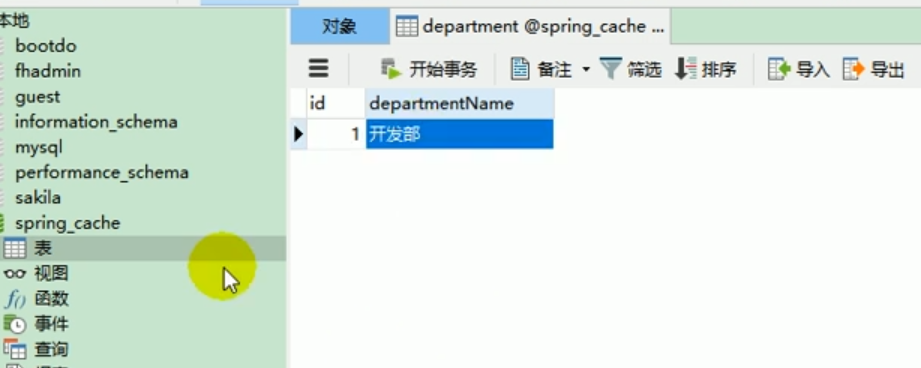
Database
We put a piece of data in the department table in the database:
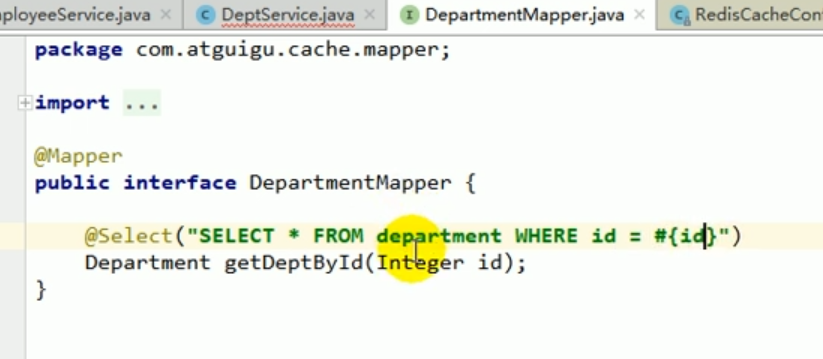
mapper
We write a mapper corresponding to the department operation.
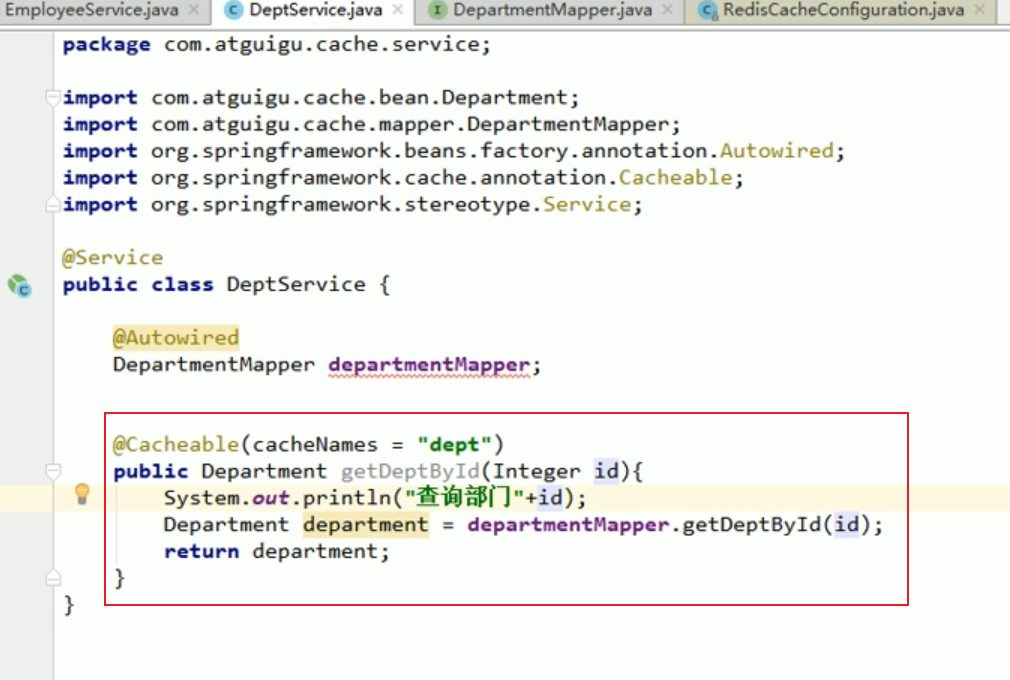
service
Let’s write a corresponding service
controller

Start the project test
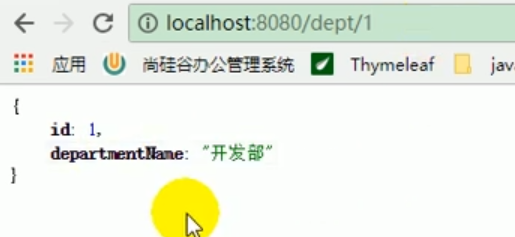
Then let’s see if there is data in redis?
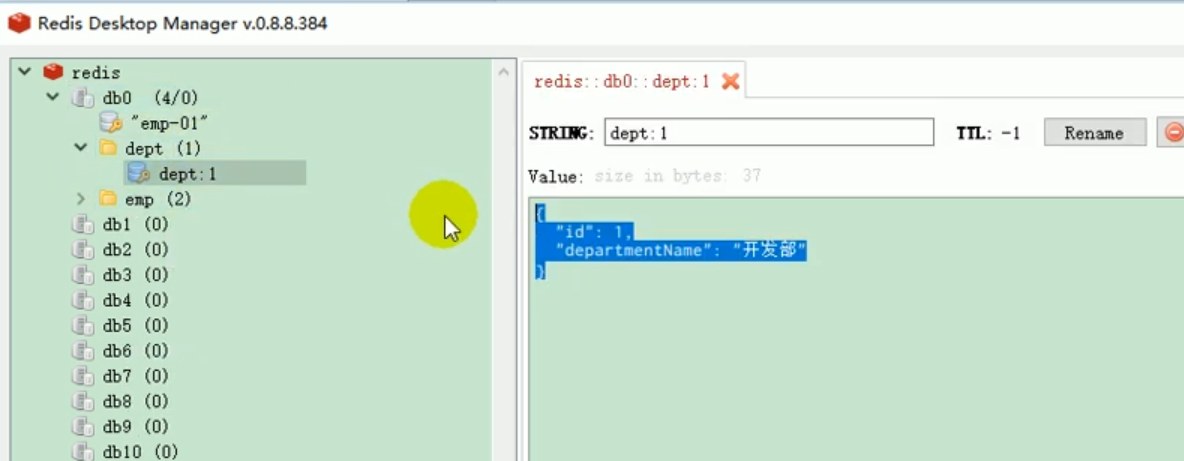
We have seen that there is dept-related data in redis.
When we query dept for the second time, we should cache redis.
But when we checked for the second time, the following error occurred.
Error
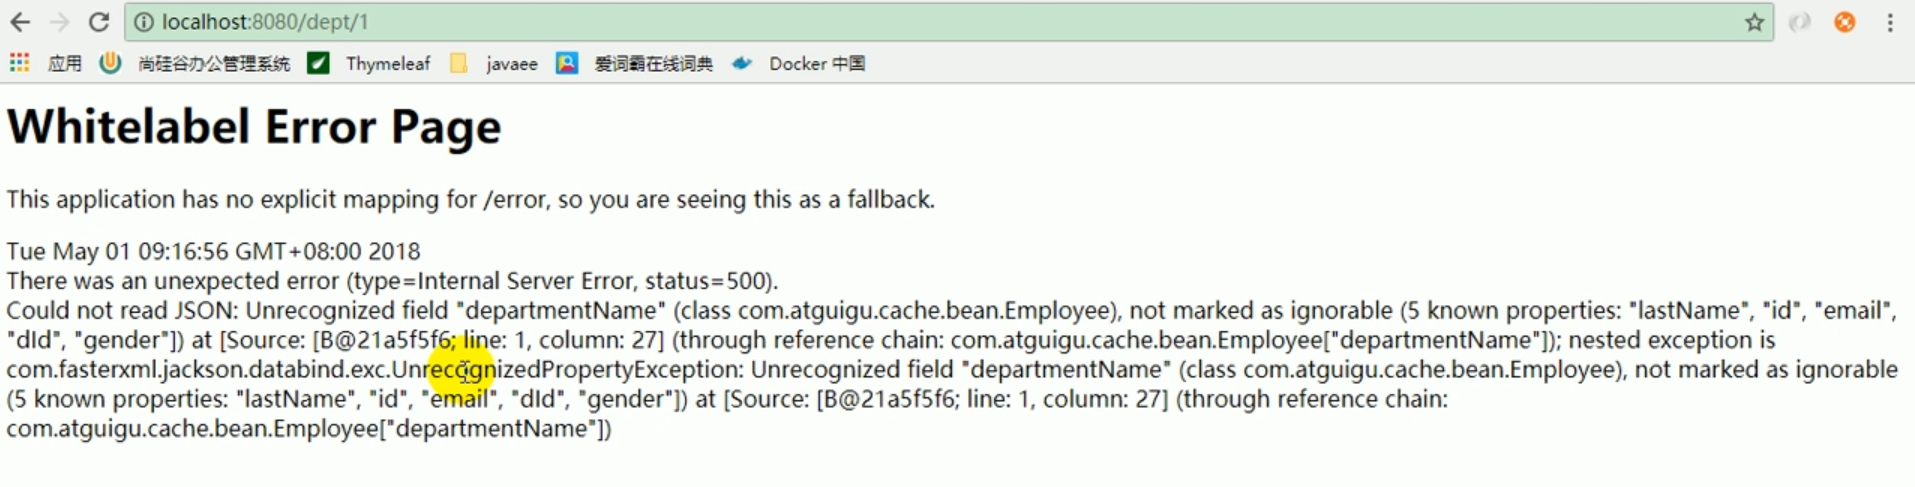
The error reported above means that json cannot be read.
Because it is necessary to convert the department's json object into the employee's json object, which is not possible.
This is because the redisCacheManager we placed is for operating employees.
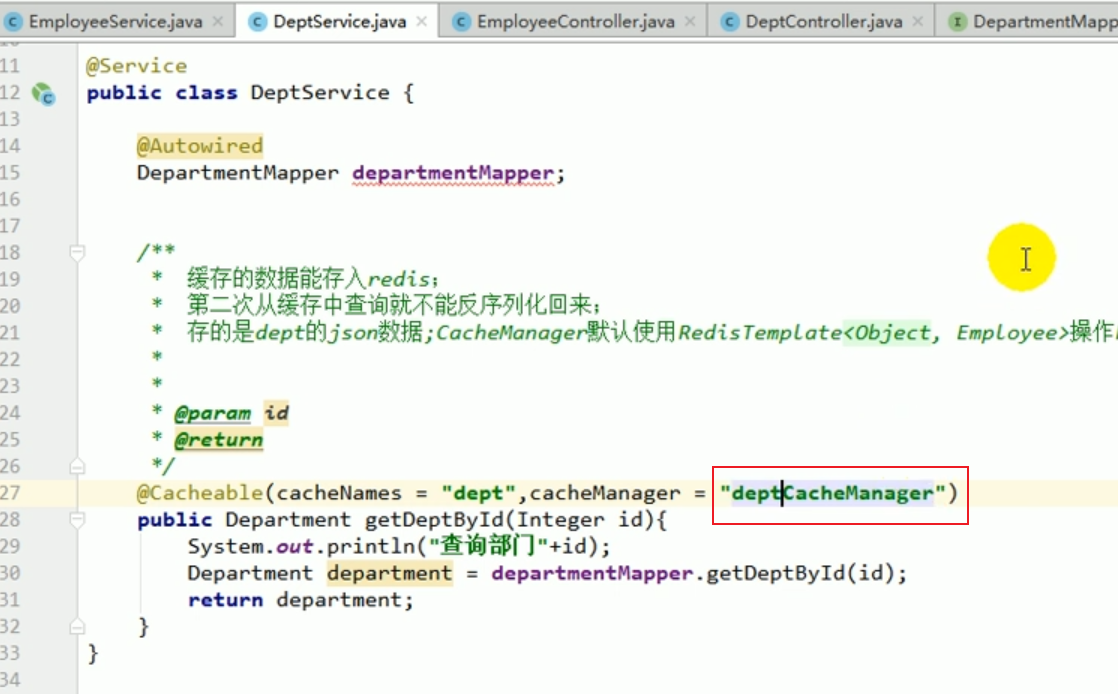
So, the effect we see now is very magical.
The cached data can be stored in redis.
But when we query from the cache for the second time, we cannot deserialize it back.
It turns out that what we store is dept's json data, and our cachemanager uses the employee's template to operate redis by default.
This thing can only deserialize employee data.
Solution to the error
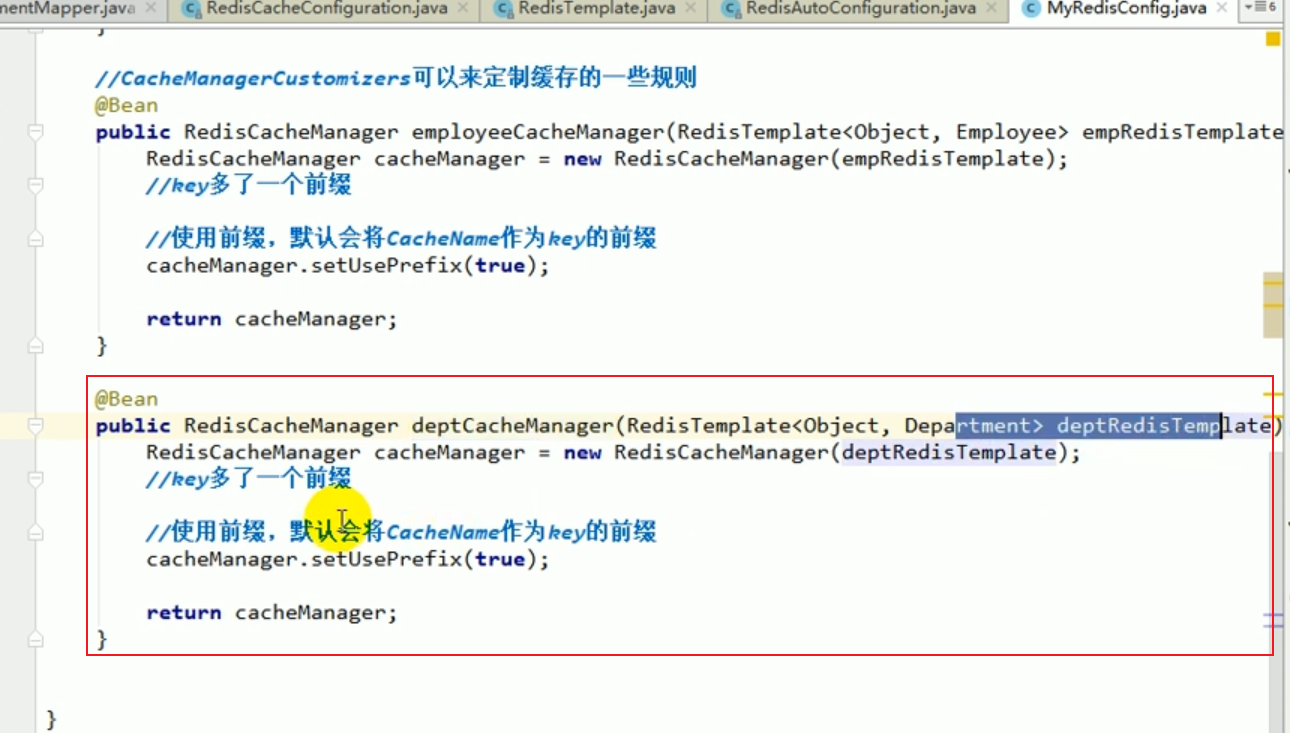
At this time, there are two redisCacheManagers. Which one should we use?
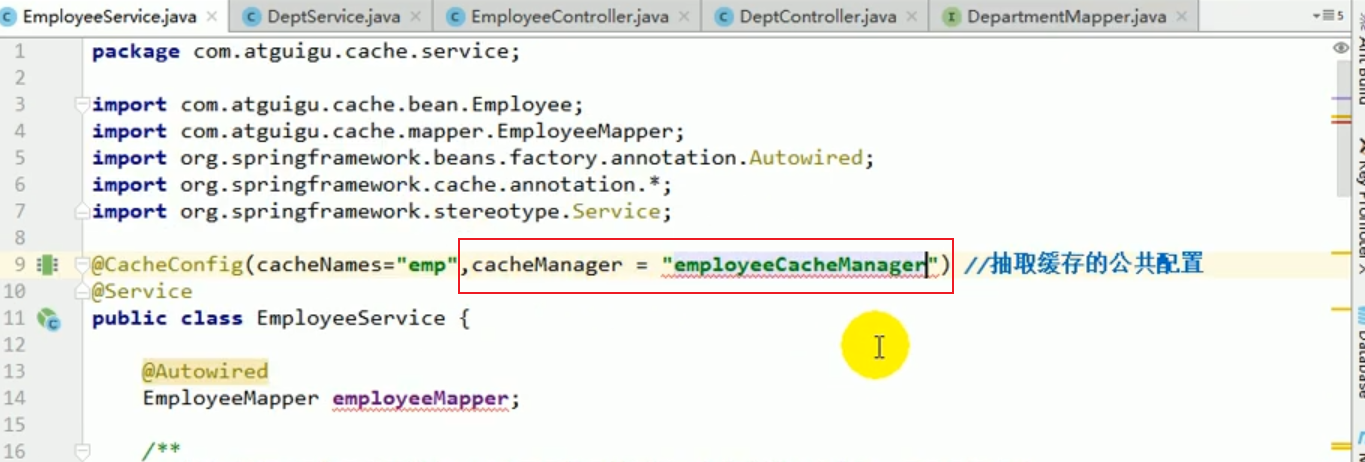
We can specify it in the service.
Then we restart the project, and the result is an error:

If , if we have multiple cacheManagers, we must use a certain cacheManager as our default configured cache manager.
For example, we can perform the following operations to fix the content of this startup error:
Restart for project testing
At this time, let’s see if we can deserialize and read our department information from redis normally and successfully when we perform the second department query?
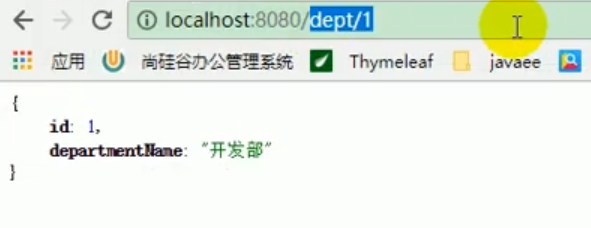
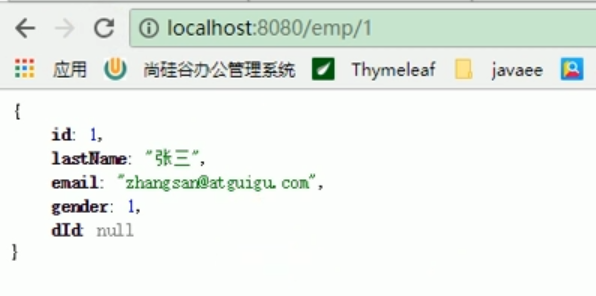
At this time, we discovered that whether it is an employee or a department, we can successfully deserialize and query it from redis .
This is perfect.
Coding method to operate the cache
What we said earlier is all using annotations to place data in the cache.
However, during development, we often encounter such situations.
That is, when our development reaches a certain stage, we need to put some data into the cache.
We need to use coding to operate the cache.
For example, after we query the department information, we want to put this information into redis.
We can inject the department’s cacheManager.

Then during the coding process, we can obtain the cache by operating this cacheManager,
Then, we can operate the cache component to increase the data. Delete, modify and check.
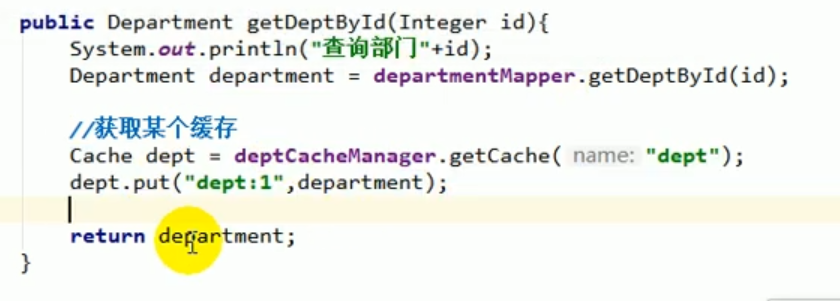
We tested the above code and started the project, and found that it was ok and successfully put data into redis:
The above is the detailed content of Springboot cache redis integration method. For more information, please follow other related articles on the PHP Chinese website!

Hot AI Tools

Undresser.AI Undress
AI-powered app for creating realistic nude photos

AI Clothes Remover
Online AI tool for removing clothes from photos.

Undress AI Tool
Undress images for free

Clothoff.io
AI clothes remover

Video Face Swap
Swap faces in any video effortlessly with our completely free AI face swap tool!

Hot Article
Hot Tools

Notepad++7.3.1
Easy-to-use and free code editor

SublimeText3 Chinese version
Chinese version, very easy to use

Zend Studio 13.0.1
Powerful PHP integrated development environment

Dreamweaver CS6
Visual web development tools

SublimeText3 Mac version
God-level code editing software (SublimeText3)
Hot Topics


 How to build the redis cluster mode
Apr 10, 2025 pm 10:15 PM
How to build the redis cluster mode
Apr 10, 2025 pm 10:15 PM
Redis cluster mode deploys Redis instances to multiple servers through sharding, improving scalability and availability. The construction steps are as follows: Create odd Redis instances with different ports; Create 3 sentinel instances, monitor Redis instances and failover; configure sentinel configuration files, add monitoring Redis instance information and failover settings; configure Redis instance configuration files, enable cluster mode and specify the cluster information file path; create nodes.conf file, containing information of each Redis instance; start the cluster, execute the create command to create a cluster and specify the number of replicas; log in to the cluster to execute the CLUSTER INFO command to verify the cluster status; make
 How to clear redis data
Apr 10, 2025 pm 10:06 PM
How to clear redis data
Apr 10, 2025 pm 10:06 PM
How to clear Redis data: Use the FLUSHALL command to clear all key values. Use the FLUSHDB command to clear the key value of the currently selected database. Use SELECT to switch databases, and then use FLUSHDB to clear multiple databases. Use the DEL command to delete a specific key. Use the redis-cli tool to clear the data.
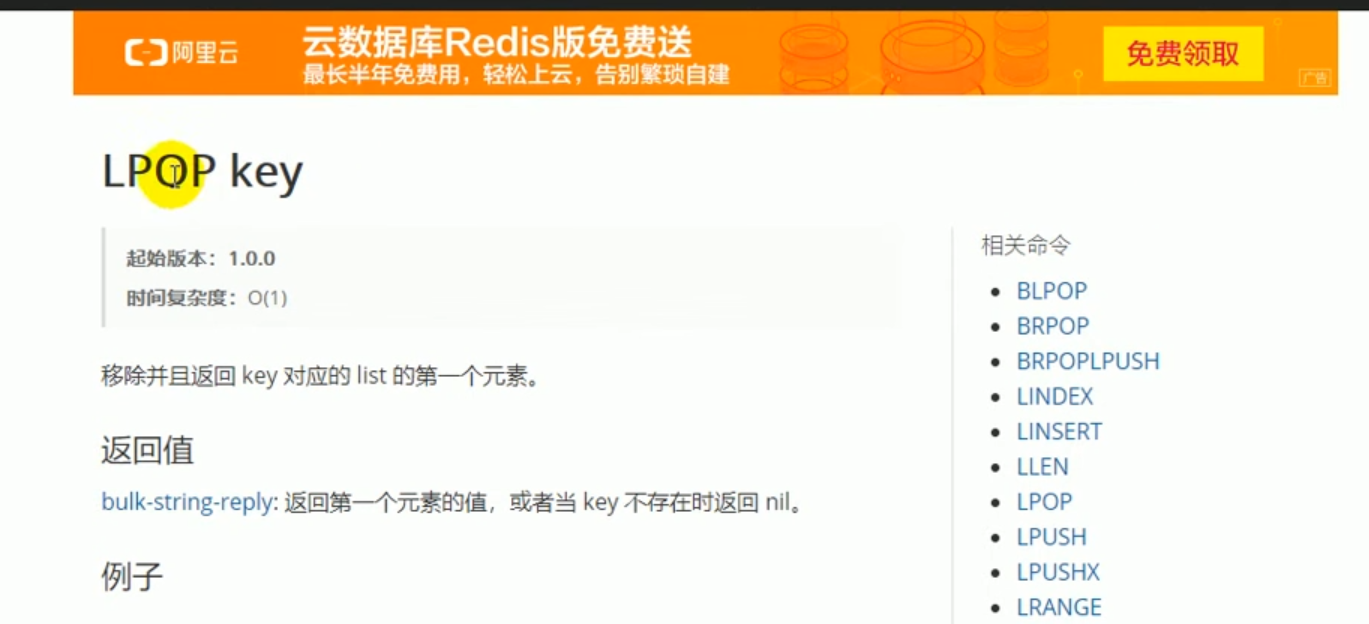
 How to read redis queue
Apr 10, 2025 pm 10:12 PM
How to read redis queue
Apr 10, 2025 pm 10:12 PM
To read a queue from Redis, you need to get the queue name, read the elements using the LPOP command, and process the empty queue. The specific steps are as follows: Get the queue name: name it with the prefix of "queue:" such as "queue:my-queue". Use the LPOP command: Eject the element from the head of the queue and return its value, such as LPOP queue:my-queue. Processing empty queues: If the queue is empty, LPOP returns nil, and you can check whether the queue exists before reading the element.
 How to use the redis command
Apr 10, 2025 pm 08:45 PM
How to use the redis command
Apr 10, 2025 pm 08:45 PM
Using the Redis directive requires the following steps: Open the Redis client. Enter the command (verb key value). Provides the required parameters (varies from instruction to instruction). Press Enter to execute the command. Redis returns a response indicating the result of the operation (usually OK or -ERR).
 How to configure Lua script execution time in centos redis
Apr 14, 2025 pm 02:12 PM
How to configure Lua script execution time in centos redis
Apr 14, 2025 pm 02:12 PM
On CentOS systems, you can limit the execution time of Lua scripts by modifying Redis configuration files or using Redis commands to prevent malicious scripts from consuming too much resources. Method 1: Modify the Redis configuration file and locate the Redis configuration file: The Redis configuration file is usually located in /etc/redis/redis.conf. Edit configuration file: Open the configuration file using a text editor (such as vi or nano): sudovi/etc/redis/redis.conf Set the Lua script execution time limit: Add or modify the following lines in the configuration file to set the maximum execution time of the Lua script (unit: milliseconds)
 How to use redis lock
Apr 10, 2025 pm 08:39 PM
How to use redis lock
Apr 10, 2025 pm 08:39 PM
Using Redis to lock operations requires obtaining the lock through the SETNX command, and then using the EXPIRE command to set the expiration time. The specific steps are: (1) Use the SETNX command to try to set a key-value pair; (2) Use the EXPIRE command to set the expiration time for the lock; (3) Use the DEL command to delete the lock when the lock is no longer needed.
 How to use the redis command line
Apr 10, 2025 pm 10:18 PM
How to use the redis command line
Apr 10, 2025 pm 10:18 PM
Use the Redis command line tool (redis-cli) to manage and operate Redis through the following steps: Connect to the server, specify the address and port. Send commands to the server using the command name and parameters. Use the HELP command to view help information for a specific command. Use the QUIT command to exit the command line tool.
 How to set the redis expiration policy
Apr 10, 2025 pm 10:03 PM
How to set the redis expiration policy
Apr 10, 2025 pm 10:03 PM
There are two types of Redis data expiration strategies: periodic deletion: periodic scan to delete the expired key, which can be set through expired-time-cap-remove-count and expired-time-cap-remove-delay parameters. Lazy Deletion: Check for deletion expired keys only when keys are read or written. They can be set through lazyfree-lazy-eviction, lazyfree-lazy-expire, lazyfree-lazy-user-del parameters.
