

How to use Python to operate Redis under Windows

First of all, let’s talk about installing redis under windows. The installation package can be found on the official website. You can download the msi installation file or the zip compressed file.

After downloading the zip file, unzip it. After unzipping, these files are:

The windows service documentation.docx inside is A document with installation instructions and usage instructions.
You can also directly download the msi installation file and install it directly. These files are also in the installation directory after installation, and you can configure redis accordingly.
After the installation is complete, you can test redis. Double-click redis-cli.exe. If no error is reported, you should be connected to the local redis for a simple test:
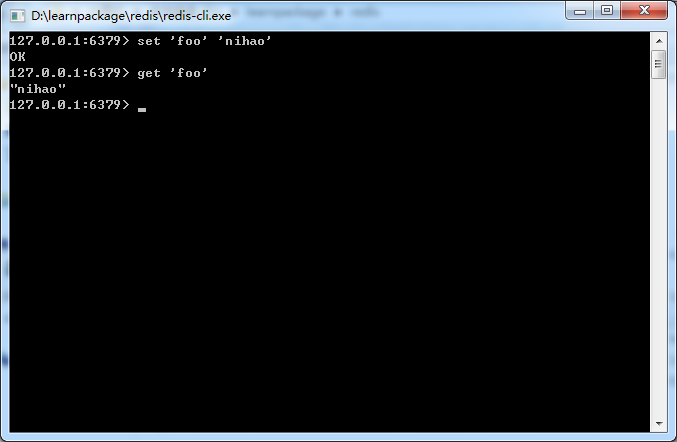
The default installation is port 6379, and the test was successful.
You can also enter help to view the help:
127.0.0.1:6379> help
redis-cli 3.2.100
to get help about redis commands type:
   "help @<group>" to get a list of commands in <group>
   "help <command>" for help on <command>
   "help <tab>" to get a list of possible help topics
   "quit" to exit
to set redis-cli perferences:
   ":set hints" enable online hints
   ":set nohints" disable online hints
set your preferences in ~/.redisclirc
Let’s talk about using python to operate redis. If you use python to install redis, you need to install the redis-py library
1. Install redis-py
easy_install redis You can also use pip install redis to install, or download and execute python setup.py install to install
2. Install parser installation
parser can control how to parse the content of redis response. redis-py contains two parser classes, pythonparser and hiredisparser. By default, redis-py will use hiredisparser if the hiredis module is installed, otherwise pythonparser will be used. hiredisparser is written in C and maintained by the redis core team. Its performance is more than 10 times higher than that of pythonparser, so it is recommended to use it. Installation method, use easy_install:
easy_install hiredis or pip install hiredis
3. Use python to operate redis
redis- py provides two classes, redis and strictredis, for implementing redis commands. strictredis is used to implement most official commands and uses official syntax and commands (for example, the set command corresponds to the strictredis.set method). redis is a subclass of strictredis for backward compatibility with older versions of redis-py.
import redis
r = redis.strictredis(host='127.0.0.1', port=6379)
r.set('foo', 'hello')
r.rpush('mylist', 'one')
print r.get('foo')
print r.rpop('mylist')
redis-py uses connection pool to manage all connections to a redis server, avoiding the overhead of establishing and releasing connections each time. By default, each redis instance maintains its own connection pool. You can directly create a connection pool and then use it as parameter redis, so that multiple redis instances can share a connection pool.
pool = redis.connectionpool(host='127.0.0.1', port=6379)
r = redis.redis(connection_pool=pool)
r.set('one', 'first')
r.set('two', 'second')
print r.get('one')
print r.get('two')
The redis pipeline mechanism can execute multiple commands in one request, thus avoiding multiple round-trip delays.
pool = redis.connectionpool(host='127.0.0.1', port=6379)
r = redis.redis(connection_pool=pool)
pipe = r.pipeline()
pipe.set('one', 'first')
pipe.set('two', 'second')
pipe.execute()
pipe.set('one'. 'first').rpush('list', 'hello').rpush('list', 'world').execute()
redis-py defaults to atomic operations in a pipeline. To change this method, you can pass in transaction=false
pipe = r.pipeline(transaction=false)
The above is the detailed content of How to use Python to operate Redis under Windows. For more information, please follow other related articles on the PHP Chinese website!

Hot AI Tools

Undresser.AI Undress
AI-powered app for creating realistic nude photos

AI Clothes Remover
Online AI tool for removing clothes from photos.

Undress AI Tool
Undress images for free

Clothoff.io
AI clothes remover

Video Face Swap
Swap faces in any video effortlessly with our completely free AI face swap tool!

Hot Article
Hot Tools

Notepad++7.3.1
Easy-to-use and free code editor

SublimeText3 Chinese version
Chinese version, very easy to use

Zend Studio 13.0.1
Powerful PHP integrated development environment

Dreamweaver CS6
Visual web development tools

SublimeText3 Mac version
God-level code editing software (SublimeText3)
Hot Topics


 PHP and Python: Different Paradigms Explained
Apr 18, 2025 am 12:26 AM
PHP and Python: Different Paradigms Explained
Apr 18, 2025 am 12:26 AM
PHP is mainly procedural programming, but also supports object-oriented programming (OOP); Python supports a variety of paradigms, including OOP, functional and procedural programming. PHP is suitable for web development, and Python is suitable for a variety of applications such as data analysis and machine learning.
 Choosing Between PHP and Python: A Guide
Apr 18, 2025 am 12:24 AM
Choosing Between PHP and Python: A Guide
Apr 18, 2025 am 12:24 AM
PHP is suitable for web development and rapid prototyping, and Python is suitable for data science and machine learning. 1.PHP is used for dynamic web development, with simple syntax and suitable for rapid development. 2. Python has concise syntax, is suitable for multiple fields, and has a strong library ecosystem.
 PHP and Python: A Deep Dive into Their History
Apr 18, 2025 am 12:25 AM
PHP and Python: A Deep Dive into Their History
Apr 18, 2025 am 12:25 AM
PHP originated in 1994 and was developed by RasmusLerdorf. It was originally used to track website visitors and gradually evolved into a server-side scripting language and was widely used in web development. Python was developed by Guidovan Rossum in the late 1980s and was first released in 1991. It emphasizes code readability and simplicity, and is suitable for scientific computing, data analysis and other fields.
 Golang vs. Python: Performance and Scalability
Apr 19, 2025 am 12:18 AM
Golang vs. Python: Performance and Scalability
Apr 19, 2025 am 12:18 AM
Golang is better than Python in terms of performance and scalability. 1) Golang's compilation-type characteristics and efficient concurrency model make it perform well in high concurrency scenarios. 2) Python, as an interpreted language, executes slowly, but can optimize performance through tools such as Cython.
 Python vs. C : Learning Curves and Ease of Use
Apr 19, 2025 am 12:20 AM
Python vs. C : Learning Curves and Ease of Use
Apr 19, 2025 am 12:20 AM
Python is easier to learn and use, while C is more powerful but complex. 1. Python syntax is concise and suitable for beginners. Dynamic typing and automatic memory management make it easy to use, but may cause runtime errors. 2.C provides low-level control and advanced features, suitable for high-performance applications, but has a high learning threshold and requires manual memory and type safety management.
 How to solve complex BelongsToThrough relationship problem in Laravel? Use Composer!
Apr 17, 2025 pm 09:54 PM
How to solve complex BelongsToThrough relationship problem in Laravel? Use Composer!
Apr 17, 2025 pm 09:54 PM
In Laravel development, dealing with complex model relationships has always been a challenge, especially when it comes to multi-level BelongsToThrough relationships. Recently, I encountered this problem in a project dealing with a multi-level model relationship, where traditional HasManyThrough relationships fail to meet the needs, resulting in data queries becoming complex and inefficient. After some exploration, I found the library staudenmeir/belongs-to-through, which easily installed and solved my troubles through Composer.
 laravel installation code
Apr 18, 2025 pm 12:30 PM
laravel installation code
Apr 18, 2025 pm 12:30 PM
To install Laravel, follow these steps in sequence: Install Composer (for macOS/Linux and Windows) Install Laravel Installer Create a new project Start Service Access Application (URL: http://127.0.0.1:8000) Set up the database connection (if required)
 How to use the Redis cache solution to efficiently realize the requirements of product ranking list?
Apr 19, 2025 pm 11:36 PM
How to use the Redis cache solution to efficiently realize the requirements of product ranking list?
Apr 19, 2025 pm 11:36 PM
How does the Redis caching solution realize the requirements of product ranking list? During the development process, we often need to deal with the requirements of rankings, such as displaying a...
