

How docker compose installs redis cluster

1. redis configuration information template
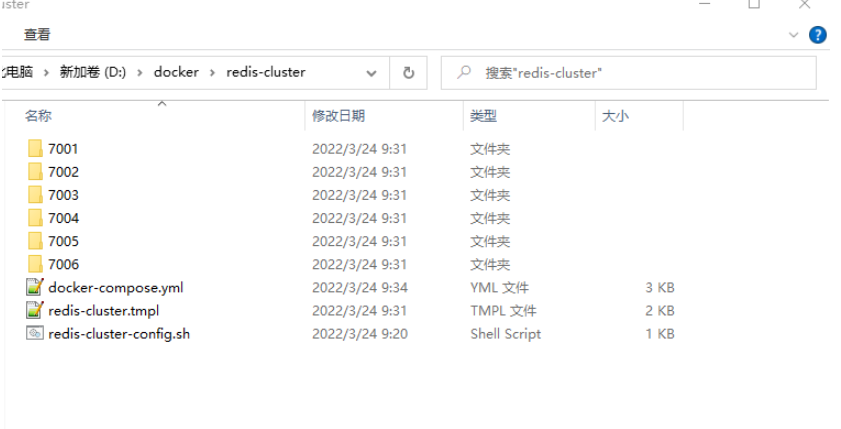
File name: redis-cluster.tmpl
# redis端口
port ${PORT}
#redis 访问密码
requirepass 123456
#redis 访问Master节点密码
masterauth 123456
# 关闭保护模式
protected-mode no
# 开启集群
cluster-enabled yes
# 集群节点配置
cluster-config-file nodes.conf
# 超时
cluster-node-timeout 5000
# 集群节点IP host模式为宿主机IP
# cluster-announce-ip 192.168.1.10
# 集群节点端口 7001 - 7006
cluster-announce-port ${PORT}
cluster-announce-bus-port 1${PORT}
# 开启 appendonly 备份模式
appendonly yes
# 每秒钟备份
appendfsync everysec
# 对aof文件进行压缩时,是否执行同步操作
no-appendfsync-on-rewrite no
# 当目前aof文件大小超过上一次重写时的aof文件大小的100%时会再次进行重写
auto-aof-rewrite-percentage 100
# 重写前AOF文件的大小最小值 默认 64mb
auto-aof-rewrite-min-size 64mb

# 日志配置
# debug:会打印生成大量信息,适用于开发/测试阶段
# verbose:包含很多不太有用的信息,但是不像debug级别那么混乱
# notice:适度冗长,适用于生产环境
# warning:仅记录非常重要、关键的警告消息
loglevel notice
# 日志文件路径
logfile "/data/redis.log"2. Write batch generation configuration file script
File name:redis-cluster-config.sh
for port in `seq 7001 7006`; do \
  mkdir -p ./${port}/conf \
  && PORT=${port} envsubst < ./redis-cluster.tmpl > ./${port}/conf/redis.conf \
  && mkdir -p ./${port}/data; \
done3. Batch generation configuration file
Executionredis-cluster-config.sh Generate configuration file
4. Write docker-compose file
File name:docker- compose.yml
version: '3'
services:
  redis-7001:
    image: redis:6
    container_name: redis-7001
    command:
      ["redis-server", "/usr/local/etc/redis/redis.conf"]
    volumes:
      - ./7001/conf/redis.conf:/usr/local/etc/redis/redis.conf
      - ./7001/data:/data
    ports:
      - "7001:7001"
      - "17001:17001"
    environment:
      # 设置时区为上海,否则时间会有问题
      - TZ=Asia/Shanghai
    logging:
      options:
        max-size: '100m'
        max-file: '10'
  redis-7002:
    container_name: redis-7002
      - ./7002/conf/redis.conf:/usr/local/etc/redis/redis.conf
      - ./7002/data:/data
      - "7002:7002"
      - "17002:17002"
  redis-7003:
    container_name: redis-7003
      - ./7003/conf/redis.conf:/usr/local/etc/redis/redis.conf
      - ./7003/data:/data
      - "7003:7003"
      - "17003:17003"
  redis-7004:
    container_name: redis-7004
      - ./7004/conf/redis.conf:/usr/local/etc/redis/redis.conf
      - ./7004/data:/data
      - "7004:7004"
      - "17004:17004"
  redis-7005:
    container_name: redis-7005
      - ./7005/conf/redis.conf:/usr/local/etc/redis/redis.conf
      - ./7005/data:/data
      - "7005:7005"
      - "17005:17005"
  redis-7006:
    container_name: redis-7006
      - ./7006/conf/redis.conf:/usr/local/etc/redis/redis.conf
      - ./7006/data:/data
      - "7006:7006"
- "17006:17006"5. Create a cluster and allocate slots
Note: 192.168.44.65 is the host ip
| ip | port |
|---|---|
| 7001 | |
| 7002 | |
| 7003 | ##192.168.44.65 |
| 192.168.44.65 | |
| ##192.168.44.65 | |
执行命令: C:\Users\billow>docker exec -it redis-7001 redis-cli -p 7001 -a 123456 --cluster create 192.168.44.65:7001 192.168.44.65:7002 192.168.44.65:7003 192.168.44.65:7004 192.168.44.65:7005 192.168.44.65:7006 --cluster-replicas 1 >>> Performing hash slots allocation on 6 nodes... Master[0] -> Slots 0 - 5460 Master[1] -> Slots 5461 - 10922 Master[2] -> Slots 10923 - 16383 Adding replica 192.168.44.65:7005 to 192.168.44.65:7001 Adding replica 192.168.44.65:7006 to 192.168.44.65:7002 Adding replica 192.168.44.65:7004 to 192.168.44.65:7003 >>> Trying to optimize slaves allocation for anti-affinity [WARNING] Some slaves are in the same host as their master M: 741c7bb537888ff97866896abb22da27c22f8eaf 192.168.44.65:7001 slots:[0-5460] (5461 slots) master M: e5f687462a0c47f51c3abf4b8d77d646a3d63fa9 192.168.44.65:7002 slots:[5461-10922] (5462 slots) master M: 9936d3690d971eccfc8b8ed43c5defc66f318454 192.168.44.65:7003 slots:[10923-16383] (5461 slots) master S: b7b6fa6a4766c32c5d42d759548d6fcdf2b9159b 192.168.44.65:7004 replicates e5f687462a0c47f51c3abf4b8d77d646a3d63fa9 S: 2275c996f25a8815342e2435af073eb29565778b 192.168.44.65:7005 replicates 9936d3690d971eccfc8b8ed43c5defc66f318454 S: f69a5d0ae974816396a9d9e613c13f6ceea25de2 192.168.44.65:7006 replicates 741c7bb537888ff97866896abb22da27c22f8eaf Can I set the above configuration? (type 'yes' to accept): yes >>> Nodes configuration updated >>> Assign a different config epoch to each node >>> Sending CLUSTER MEET messages to join the cluster Waiting for the cluster to join . >>> Performing Cluster Check (using node 192.168.44.65:7001) M: 741c7bb537888ff97866896abb22da27c22f8eaf 192.168.44.65:7001 slots:[0-5460] (5461 slots) master 1 additional replica(s) S: f69a5d0ae974816396a9d9e613c13f6ceea25de2 172.25.0.11:7006 slots: (0 slots) slave replicates 741c7bb537888ff97866896abb22da27c22f8eaf M: 9936d3690d971eccfc8b8ed43c5defc66f318454 172.25.0.7:7003 slots:[10923-16383] (5461 slots) master 1 additional replica(s) M: e5f687462a0c47f51c3abf4b8d77d646a3d63fa9 172.25.0.8:7002 slots:[5461-10922] (5462 slots) master 1 additional replica(s) S: 2275c996f25a8815342e2435af073eb29565778b 172.25.0.10:7005 slots: (0 slots) slave replicates 9936d3690d971eccfc8b8ed43c5defc66f318454 S: b7b6fa6a4766c32c5d42d759548d6fcdf2b9159b 172.25.0.9:7004 slots: (0 slots) slave replicates e5f687462a0c47f51c3abf4b8d77d646a3d63fa9 [OK] All nodes agree about slots configuration. >>> Check for open slots... >>> Check slots coverage... [OK] All 16384 slots covered. Copy after login 六、测试:命令: -- 集群、分配插槽 docker exec -it redis-7001 redis-cli -p 7001 -a 123456 --cluster create 192.168.44.65:7001 192.168.44.65:7002 192.168.44.65:7003 192.168.44.65:7004 192.168.44.65:7005 192.168.44.65:7006 --cluster-replicas 1 -- 测试 docker exec -it redis-7001 redis-cli -h 192.168.44.65 -p 7003 -a 123456 -c -- 查看集群状态 cluster nodes -- 查看分片信息 cluster slots -- 查看集群信息 cluster info Copy after login 执行结果:
七、手动扩容添加两个新的节点用于手动扩容 version: '3'
services:
redis-7007:
image: redis:6
container_name: redis-7007
command:
["redis-server", "/usr/local/etc/redis/redis.conf"]
volumes:
- ./7007/conf/redis.conf:/usr/local/etc/redis/redis.conf
- ./7007/data:/data
ports:
- "7007:7007"
- "17007:17007"
environment:
# 设置时区为上海,否则时间会有问题
- TZ=Asia/Shanghai
logging:
options:
max-size: '100m'
max-file: '10'
redis-7008:
container_name: redis-7008
- ./7008/conf/redis.conf:/usr/local/etc/redis/redis.conf
- ./7008/data:/data
- "7008:7008"
- "17008:17008"
networks:
default:
external:
name: learn_shopCopy after login 执行命令: 八、添加主从节点1、添加主节点-- 进入任意节点 docker exet -it redis-7001 bash -- 添加主节点(192.168.44.65:7001 -a 123456 这个可以是任何已存在的节点,主要用于获取集群信息) redis-cli --cluster add-node 192.168.44.65:7007 192.168.44.65:7001 -a 123456 Copy after login 结果:
查看刚加的主节点: 127.0.0.1:7001> cluster nodes 741c7bb537888ff97866896abb22da27c22f8eaf 172.25.0.10:7001@17001 myself,master - 0 1648104789000 1 connected 0-5460 2275c996f25a8815342e2435af073eb29565778b 172.25.0.6:7005@17005 slave 9936d3690d971eccfc8b8ed43c5defc66f318454 0 1648104789523 3 connected 6f0c7d0ae166717d645e84b48b72b9706c7c758a 172.25.0.13:7007@17007 master - 0 1648104790133 0 connected 9936d3690d971eccfc8b8ed43c5defc66f318454 172.25.0.8:7003@17003 master - 0 1648104790546 3 connected 10923-16383 f69a5d0ae974816396a9d9e613c13f6ceea25de2 172.25.0.11:7006@17006 slave 741c7bb537888ff97866896abb22da27c22f8eaf 0 1648104790000 1 connected b7b6fa6a4766c32c5d42d759548d6fcdf2b9159b 172.25.0.9:7004@17004 slave e5f687462a0c47f51c3abf4b8d77d646a3d63fa9 0 1648104790000 2 connected e5f687462a0c47f51c3abf4b8d77d646a3d63fa9 172.25.0.7:7002@17002 master - 0 1648104791062 2 connected 5461-10922 Copy after login 2、添加从节点-- 进入任意节点 docker exet -it redis-7001 bash -- 添加从节点(192.168.44.65:7001 -a 123456 这个可以是任何已存在的节点,主要用于获取集群信息)(6f0c7d0ae166717d645e84b48b72b9706c7c758a 为刚加的主节点 id) redis-cli --cluster add-node --cluster-slave --cluster-master-id 6f0c7d0ae166717d645e84b48b72b9706c7c758a 192.168.44.65:7008 192.168.44.65:7001 -a 123456 Copy after login 结果:
九、分配插槽刚加入的主从节点还不能使用,因为还没有分配插槽 rebalance host:port --weight <arg> --auto-weights --threshold <arg> --use-empty-masters --timeout <arg> --simulate --pipeline <arg> host:port:这个是必传参数,用来从一个节点获取整个集群信息,相当于获取集群信息的入口。 --weight <arg>:节点的权重,格式为node_id=weight,如果需要为多个节点分配权重的话,需要添加多个--weight <arg>参数,即--weight b31e3a2e=5 --weight 60b8e3a1=5,node_id可为节点名称的前缀,只要保证前缀位数能唯一区分该节点即可。没有传递–weight的节点的权重默认为1。 --auto-weights:这个参数在rebalance流程中并未用到。 --threshold <arg>:只有节点需要迁移的slot阈值超过threshold,才会执行rebalance操作。具体计算方法可以参考下面的rebalance命令流程的第四步。 --use-empty-masters:rebalance是否考虑没有节点的master,默认没有分配slot节点的master是不参与rebalance的,设置--use-empty-masters可以让没有分配slot的节点参与rebalance。 --timeout <arg>:设置migrate命令的超时时间。 --simulate:设置该参数,可以模拟rebalance操作,提示用户会迁移哪些slots,而不会真正执行迁移操作。 --pipeline <arg>:与reshar的pipeline参数一样,定义cluster getkeysinslot命令一次取出的key数量,不传的话使用默认值为10。 Copy after login -- 分配插槽(192.168.44.65:7001 -a 123456 这个可以是任何已存在的节点,主要用于获取集群信息) redis-cli --cluster rebalance --cluster-threshold 1 --cluster-use-empty-masters 192.168.44.65:7001 -a 123456 Copy after login 如果需要模拟执行添加 : --cluster-simulate 结果:
查看节点信息:
十、集群测试root@aa1e004c00ff:/data# redis-cli -p 7001 -a 123456 -c Warning: Using a password with '-a' or '-u' option on the command line interface may not be safe. 127.0.0.1:7001> set 1 1 -> Redirected to slot [9842] located at 172.25.0.7:7002 OK 172.25.0.7:7002> set 2 2 -> Redirected to slot [5649] located at 172.25.0.13:7007 OK 172.25.0.13:7007> set 3 3 -> Redirected to slot [1584] located at 172.25.0.10:7001 OK 172.25.0.10:7001> set 4 4 -> Redirected to slot [14039] located at 172.25.0.8:7003 OK 172.25.0.8:7003> set 5 5 -> Redirected to slot [9974] located at 172.25.0.7:7002 OK 172.25.0.7:7002> set 6 6 -> Redirected to slot [5781] located at 172.25.0.13:7007 OK 172.25.0.13:7007> set 7 7 -> Redirected to slot [1716] located at 172.25.0.10:7001 OK 172.25.0.10:7001> 172.25.0.10:7001> 172.25.0.10:7001> 172.25.0.10:7001> 172.25.0.10:7001> get 1 -> Redirected to slot [9842] located at 172.25.0.7:7002 "1" 172.25.0.7:7002> get 2 -> Redirected to slot [5649] located at 172.25.0.13:7007 "2" 172.25.0.13:7007> get 3 -> Redirected to slot [1584] located at 172.25.0.10:7001 "3" 172.25.0.10:7001> get 4 -> Redirected to slot [14039] located at 172.25.0.8:7003 "4" 172.25.0.8:7003> get 5 -> Redirected to slot [9974] located at 172.25.0.7:7002 "5" 172.25.0.7:7002> get 6 -> Redirected to slot [5781] located at 172.25.0.13:7007 "6" 172.25.0.13:7007> get 7 -> Redirected to slot [1716] located at 172.25.0.10:7001 "7" Copy after login 十一、常用命令集群 cluster info :打印集群的信息 cluster nodes :列出集群当前已知的所有节点( node),以及这些节点的相关信息。 节点 cluster meet <ip> <port> :将 ip 和 port 所指定的节点添加到集群当中,让它成为集群的一份子。 cluster forget <node_id> :从集群中移除 node_id 指定的节点。 cluster replicate <node_id> :将当前节点设置为 node_id 指定的节点的从节点。 cluster saveconfig :将节点的配置文件保存到硬盘里面。 槽(slot) cluster addslots <slot> [slot ...] :将一个或多个槽( slot)指派( assign)给当前节点。 cluster delslots <slot> [slot ...] :移除一个或多个槽对当前节点的指派。 cluster flushslots :移除指派给当前节点的所有槽,让当前节点变成一个没有指派任何槽的节点。 cluster setslot <slot> node <node_id> :将槽 slot 指派给 node_id 指定的节点,如果槽已经指派给另一个节点,那么先让另一个节点删除该槽>,然后再进行指派。 cluster setslot <slot> migrating <node_id> :将本节点的槽 slot 迁移到 node_id 指定的节点中。 cluster setslot <slot> importing <node_id> :从 node_id 指定的节点中导入槽 slot 到本节点。 cluster setslot <slot> stable :取消对槽 slot 的导入( import)或者迁移( migrate)。 键 cluster keyslot <key> :计算键 key 应该被放置在哪个槽上。 cluster countkeysinslot <slot> :返回槽 slot 目前包含的键值对数量。 cluster getkeysinslot <slot> <count> :返回 count 个 slot 槽中的键 Copy after login The above is the detailed content of How docker compose installs redis cluster. For more information, please follow other related articles on the PHP Chinese website! Statement of this Website
The content of this article is voluntarily contributed by netizens, and the copyright belongs to the original author. This site does not assume corresponding legal responsibility. If you find any content suspected of plagiarism or infringement, please contact admin@php.cn

Hot AI Tools
Undresser.AI UndressAI-powered app for creating realistic nude photos 
AI Clothes RemoverOnline AI tool for removing clothes from photos. 
Undress AI ToolUndress images for free 
Clothoff.ioAI clothes remover 
Video Face SwapSwap faces in any video effortlessly with our completely free AI face swap tool! 
Hot Article
Assassin's Creed Shadows: Seashell Riddle Solution
1 months ago
By DDD
What's New in Windows 11 KB5054979 & How to Fix Update Issues
3 weeks ago
By DDD
Where to find the Crane Control Keycard in Atomfall
1 months ago
By DDD
How to fix KB5055523 fails to install in Windows 11?
2 weeks ago
By DDD
InZoi: How To Apply To School And University
3 weeks ago
By DDD
Hot Tools
Notepad++7.3.1Easy-to-use and free code editor 
SublimeText3 Chinese versionChinese version, very easy to use 
Zend Studio 13.0.1Powerful PHP integrated development environment 
Dreamweaver CS6Visual web development tools 
SublimeText3 Mac versionGod-level code editing software (SublimeText3)
Hot Topics How to exit the container by docker
Apr 15, 2025 pm 12:15 PM
How to exit the container by docker
Apr 15, 2025 pm 12:15 PM
Four ways to exit Docker container: Use Ctrl D in the container terminal Enter exit command in the container terminal Use docker stop <container_name> Command Use docker kill <container_name> command in the host terminal (force exit)  How to copy files in docker to outside
Apr 15, 2025 pm 12:12 PM
How to copy files in docker to outside
Apr 15, 2025 pm 12:12 PM
Methods for copying files to external hosts in Docker: Use the docker cp command: Execute docker cp [Options] <Container Path> <Host Path>. Using data volumes: Create a directory on the host, and use the -v parameter to mount the directory into the container when creating the container to achieve bidirectional file synchronization.  How to check the name of the docker container
Apr 15, 2025 pm 12:21 PM
How to check the name of the docker container
Apr 15, 2025 pm 12:21 PM
You can query the Docker container name by following the steps: List all containers (docker ps). Filter the container list (using the grep command). Gets the container name (located in the "NAMES" column).  How to restart docker
Apr 15, 2025 pm 12:06 PM
How to restart docker
Apr 15, 2025 pm 12:06 PM
How to restart the Docker container: get the container ID (docker ps); stop the container (docker stop <container_id>); start the container (docker start <container_id>); verify that the restart is successful (docker ps). Other methods: Docker Compose (docker-compose restart) or Docker API (see Docker documentation).  How to start mysql by docker
Apr 15, 2025 pm 12:09 PM
How to start mysql by docker
Apr 15, 2025 pm 12:09 PM
The process of starting MySQL in Docker consists of the following steps: Pull the MySQL image to create and start the container, set the root user password, and map the port verification connection Create the database and the user grants all permissions to the database  How to update the image of docker
Apr 15, 2025 pm 12:03 PM
How to update the image of docker
Apr 15, 2025 pm 12:03 PM
The steps to update a Docker image are as follows: Pull the latest image tag New image Delete the old image for a specific tag (optional) Restart the container (if needed)  How to create containers for docker
Apr 15, 2025 pm 12:18 PM
How to create containers for docker
Apr 15, 2025 pm 12:18 PM
Create a container in Docker: 1. Pull the image: docker pull [mirror name] 2. Create a container: docker run [Options] [mirror name] [Command] 3. Start the container: docker start [Container name]  How to start containers by docker
Apr 15, 2025 pm 12:27 PM
How to start containers by docker
Apr 15, 2025 pm 12:27 PM
Docker container startup steps: Pull the container image: Run "docker pull [mirror name]". Create a container: Use "docker create [options] [mirror name] [commands and parameters]". Start the container: Execute "docker start [Container name or ID]". Check container status: Verify that the container is running with "docker ps". 
|


