

How nginx+redis realizes session sharing

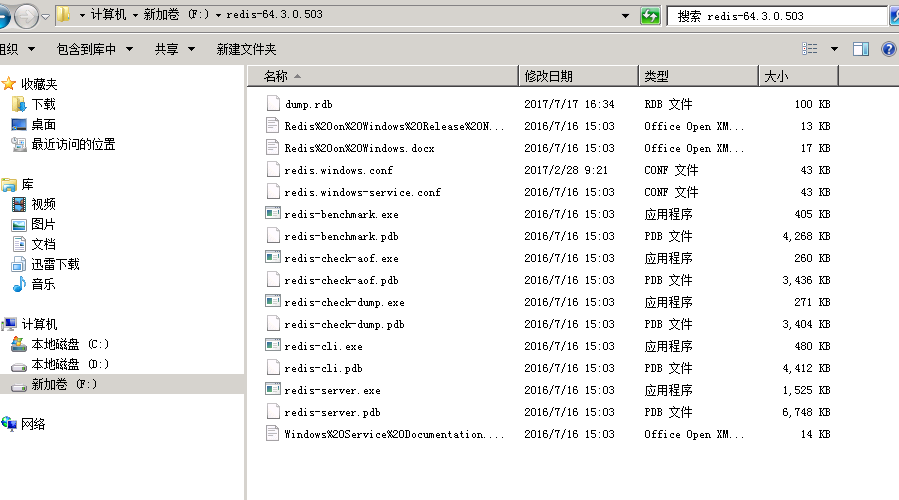
1. The first step is to install redis. My server is Windows. I downloaded the installation-free version. Just decompress it. The directory is as follows. At the beginning, redis does not require a password by default. If you want to set a password, you can go to the redis.windows.conf file and find requirepass, delete the # sign in front, and set the password after it.
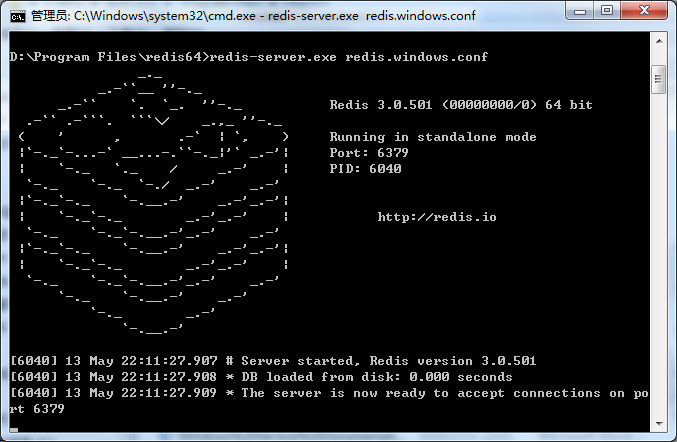
2. Enter the root directory of redis from cmd and type the following command: redis-server.exeredis.windows.conf. In this way, redis can be started. If the startup is successful, the following screen will appear. Of course, you can also modify the conf file and add a password. requirepass xxxxx
#3. Next we can do some configuration work to achieve global caching of session data.
1) First, add the jar package. If you are a maven project, you need to add the following code to pom.xml
<!-- redis -->
 <dependency>
  <groupid>org.springframework.session</groupid>
  <artifactid>spring-session-data-redis</artifactid>
  <version>1.3.1.release</version>
  <type>pom</type>
 </dependency>
If it is not a maven project, you need to add the following jar packages.

2) Write redis.properties, the code is as follows
redis_isopen:yes
#主机地址
redis_hostname=xxx.xxx.xxx.xxx
#端口
redis_port=6379
#密码
redis_password=xxxxxxxx
#连接超时时间
redis_timeout=200000
redis_maxidle:300
redis_maxactive:600
redis_maxwait:100000
redis_testonborrow:true
is basically similar to the connection statement for our configuration database.
3) Write the spring-redis.xml configuration file. This file configures some basic information about redis.
<?xml version="1.0" encoding="utf-8" standalone="no"?>
<beans xmlns="http://www.springframework.org/schema/beans"
 xmlns:context="http://www.springframework.org/schema/context" xmlns:tx="http://www.springframework.org/schema/tx"
 xmlns:util="http://www.springframework.org/schema/util" xmlns:xsi="http://www.w3.org/2001/xmlschema-instance"
 xsi:schemalocation="http://www.springframework.org/schema/beans http://www.springframework.org/schema/beans/spring-beans.xsd http://www.springframework.org/schema/context http://www.springframework.org/schema/context/spring-context.xsd http://www.springframework.org/schema/tx http://www.springframework.org/schema/tx/spring-tx.xsd http://www.springframework.org/schema/util http://www.springframework.org/schema/util/spring-util.xsd ">
 <!-- session设置 maxinactiveintervalinseconds为session的失效时间,单位为秒-->
 <bean
 class="org.springframework.session.data.redis.config.annotation.web.http.redishttpsessionconfiguration">
 <property name="maxinactiveintervalinseconds" value="3600"></property>
 </bean>
 <!-- redis连接池 -->
 <bean id="poolconfig" class="redis.clients.jedis.jedispoolconfig">
 <property name="maxidle" value="${redis_maxidle}" />
 <property name="testonborrow" value="${redis_testonborrow}" />
 </bean>
 <!-- redis连接工厂 -->
 <bean id="connectionfactory"
 class="org.springframework.data.redis.connection.jedis.jedisconnectionfactory">
 <property name="hostname" value="${redis_hostname}" />
 <property name="port" value="${redis_port}" />
 <property name="password" value="${redis_password}" />
 <property name="timeout" value="${redis_timeout}" />
 <property name="poolconfig" ref="poolconfig"></property>
 </bean>
</beans>4) In application.xml (spring’s main configuration file), you need to add scanning of the redis.properties configuration file, as follows.
<!-- 读取redis参数配置 -->
 <bean id="propertyconfigurer"
 class="org.springframework.beans.factory.config.propertyplaceholderconfigurer">
 <property name="locations">
  <list>
  <value>/web-inf/classes/redis.properties</value>
  </list>
 </property>
 </bean>
5) Introduce spring-redis.xml into the main configuration file, as follows.
<import resource="spring-redis.xml" />
6) In web.xml, add a filter about the session. Only in this way will the session be manipulated by redis.
<filter>
 <filter-name>springsessionrepositoryfilter</filter-name>
 <filter-class>org.springframework.web.filter.delegatingfilterproxy</filter-class>
 </filter>
 <filter-mapping>
 <filter-name>springsessionrepositoryfilter</filter-name>
 <url-pattern>/*</url-pattern>
 </filter-mapping>
After this, we will realize the management of session by redis.
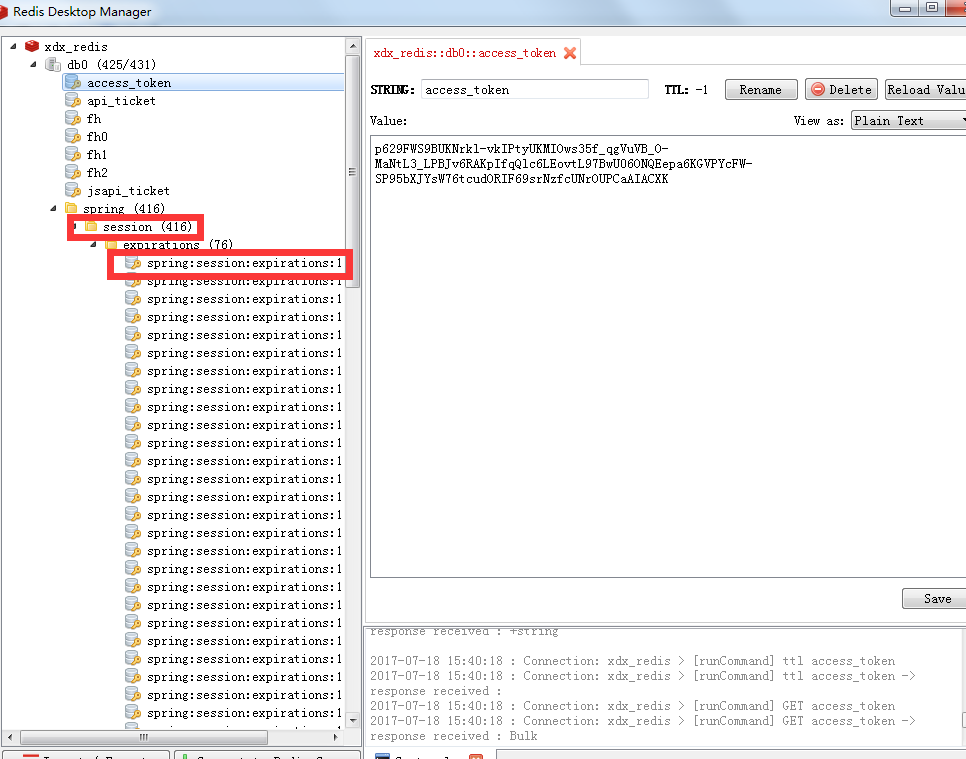
7) We can install a redis client to view the data inside, called redis desktop manager. As shown below, it is very useful and you can see the data in the redis database.
#ps. When you exit again, you need to write like this to avoid errors. (ssh project)
public string yipinexit(){
 iterator<string>keys=session.keyset().iterator();
 while(keys.hasnext()){
  string key=keys.next();
  session.remove(key);
 }
 return "yipinexit";
}The above is the detailed content of How nginx+redis realizes session sharing. For more information, please follow other related articles on the PHP Chinese website!

Hot AI Tools

Undresser.AI Undress
AI-powered app for creating realistic nude photos

AI Clothes Remover
Online AI tool for removing clothes from photos.

Undress AI Tool
Undress images for free

Clothoff.io
AI clothes remover

Video Face Swap
Swap faces in any video effortlessly with our completely free AI face swap tool!

Hot Article
Hot Tools

Notepad++7.3.1
Easy-to-use and free code editor

SublimeText3 Chinese version
Chinese version, very easy to use

Zend Studio 13.0.1
Powerful PHP integrated development environment

Dreamweaver CS6
Visual web development tools

SublimeText3 Mac version
God-level code editing software (SublimeText3)
Hot Topics


 How to check the name of the docker container
Apr 15, 2025 pm 12:21 PM
How to check the name of the docker container
Apr 15, 2025 pm 12:21 PM
You can query the Docker container name by following the steps: List all containers (docker ps). Filter the container list (using the grep command). Gets the container name (located in the "NAMES" column).
 How to configure nginx in Windows
Apr 14, 2025 pm 12:57 PM
How to configure nginx in Windows
Apr 14, 2025 pm 12:57 PM
How to configure Nginx in Windows? Install Nginx and create a virtual host configuration. Modify the main configuration file and include the virtual host configuration. Start or reload Nginx. Test the configuration and view the website. Selectively enable SSL and configure SSL certificates. Selectively set the firewall to allow port 80 and 443 traffic.
 How to configure Lua script execution time in centos redis
Apr 14, 2025 pm 02:12 PM
How to configure Lua script execution time in centos redis
Apr 14, 2025 pm 02:12 PM
On CentOS systems, you can limit the execution time of Lua scripts by modifying Redis configuration files or using Redis commands to prevent malicious scripts from consuming too much resources. Method 1: Modify the Redis configuration file and locate the Redis configuration file: The Redis configuration file is usually located in /etc/redis/redis.conf. Edit configuration file: Open the configuration file using a text editor (such as vi or nano): sudovi/etc/redis/redis.conf Set the Lua script execution time limit: Add or modify the following lines in the configuration file to set the maximum execution time of the Lua script (unit: milliseconds)
 How to check whether nginx is started
Apr 14, 2025 pm 01:03 PM
How to check whether nginx is started
Apr 14, 2025 pm 01:03 PM
How to confirm whether Nginx is started: 1. Use the command line: systemctl status nginx (Linux/Unix), netstat -ano | findstr 80 (Windows); 2. Check whether port 80 is open; 3. Check the Nginx startup message in the system log; 4. Use third-party tools, such as Nagios, Zabbix, and Icinga.
 How to create containers for docker
Apr 15, 2025 pm 12:18 PM
How to create containers for docker
Apr 15, 2025 pm 12:18 PM
Create a container in Docker: 1. Pull the image: docker pull [mirror name] 2. Create a container: docker run [Options] [mirror name] [Command] 3. Start the container: docker start [Container name]
 How to start containers by docker
Apr 15, 2025 pm 12:27 PM
How to start containers by docker
Apr 15, 2025 pm 12:27 PM
Docker container startup steps: Pull the container image: Run "docker pull [mirror name]". Create a container: Use "docker create [options] [mirror name] [commands and parameters]". Start the container: Execute "docker start [Container name or ID]". Check container status: Verify that the container is running with "docker ps".
 How to start nginx
Apr 14, 2025 pm 01:06 PM
How to start nginx
Apr 14, 2025 pm 01:06 PM
Question: How to start Nginx? Answer: Install Nginx Startup Nginx Verification Nginx Is Nginx Started Explore other startup options Automatically start Nginx
 How to run nginx apache
Apr 14, 2025 pm 12:33 PM
How to run nginx apache
Apr 14, 2025 pm 12:33 PM
To get Nginx to run Apache, you need to: 1. Install Nginx and Apache; 2. Configure the Nginx agent; 3. Start Nginx and Apache; 4. Test the configuration to ensure that you can see Apache content after accessing the domain name. In addition, you need to pay attention to other matters such as port number matching, virtual host configuration, and SSL/TLS settings.
