

How to integrate https with Springboot

1 Introduction
HTTP is unsafe, we need to put SSL on it to make it HTTPS. This article will use examples to introduce SpringbootintegrationHTTPS.
2 Basics of cryptography
If you want to talk about https, you must talk about Security, and naturally you have to talk about security; when you talk about security, it must involve passwords Learn some knowledge.
2.1 Cryptosystem
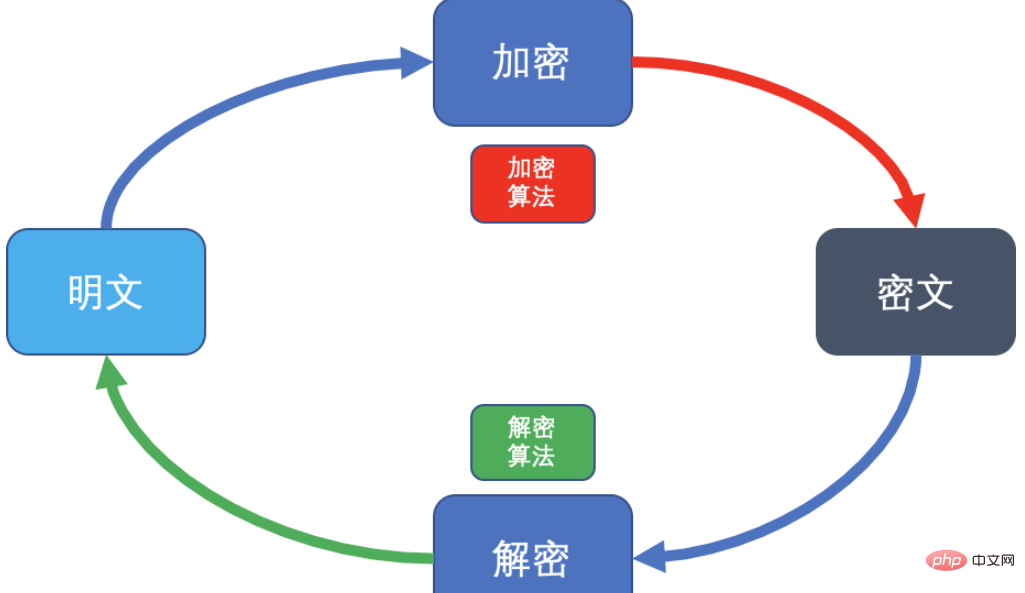
To establish a cryptographic system, it needs to be composed of five spaces, which are:
Plain text M: before encryption or decryption The information after;
Cipher text C: The information after plain text encryption;
Key K: The encryption key and the decryption key Composition;
Encryption E: Transformation from plaintext to ciphertext;
Decryption D: Transformation from ciphertext to plaintext.
As shown in the figure:
2.2 Two encryption methods
2.2.1 Symmetric encryption
Symmetric encryption, or also called single-key encryption, refers to an encryption method in which the encryption key and the decryption key are the same (or it is easy to calculate one from the other).
The main advantages of symmetric encryption are: fast encryption and decryption operations and high efficiency;
Limitations: complex key distribution, difficult key management, poor openness of secure communication systems, digital signatures ;
represents the algorithm: DES algorithm, AES algorithm;
Give a small example:
明文为48,加密算法f(x)=8x+71,
则密文C=8*48+71=455
则解密算法为f(x)=(x-71)/8;
则解密后的明文M=(455-71)/8=48;
2.2.2 Asymmetric encryption
Asymmetric encryption refers to an encryption method that uses different keys for encryption and decryption, and the decryption key cannot be derived from the encryption key.
Main advantages: simple key distribution, easy management, good system openness, and digital signatures can be realized;
Limitations: encryption and decryption operation efficiency is low;
Representative algorithms: RSA algorithm, ECC algorithm;
Give a big example:
The steps are as follows:
| Step | Description | Formula | Note |
|---|---|---|---|
| Find two Prime numbers | P, Q | ||
| Calculate the common modulus | N =P*Q | ||
| Calculate Euler function | φ(N) = (P- 1)(Q-1) | ||
| 1 E must be an integer E and φ(N) must be a coprime number | 5 | ||
| E * D % φ(N) = 1 |
##6 |
||
| C = M^E mod N | C: ciphertext M: plaintext | 7 | |
| M =C^ D mod N | C: ciphertext M: plaintext |
其中,公钥=(E , N) ,私钥=(D, N),对外,我们只暴露公钥。 1.找出两个质数 随便找两个质数,我们找P=5,Q=11。 2.计算公共模数 公共模数N=P*Q=5*11=55 3.计算欧拉函数 φ(N) = (P-1)(Q-1)=4*10=40 4.计算公钥E 1 <p>至此,整个非对称加密过程演示了一遍,希望大家能理解,特别是非对称加密,因为<strong>HTTPS</strong>使用的是非对称加密。实际的使用算法更复杂,密钥长度会更大。</p><h3 id="证书">2.3 证书</h3><p>要使用SSL,需要有证书,这个证书文件是包含公钥密钥,也就是非对称加密中要使用的。</p><p>获取证书有两种方式:</p> Copy after login
为方便起见,在本次实例中使用自签证书,两种证书整合过程并无差异。 3 Springboot整合HTTPS3.1 先让Web跑起来作为一个Web应用,我们先让它跑起来,然后再整合 (1)引入Web依赖: <dependency> <groupid>org.springframework.boot</groupid> <artifactid>spring-boot-starter-web</artifactid></dependency> Copy after login (2)配置端口: server.port=80 Copy after login (3)实现 @RestControllerpublic class HelloController {@GetMapping("/hello")public String hello() {return "Welcome to www.pkslow.com";
}
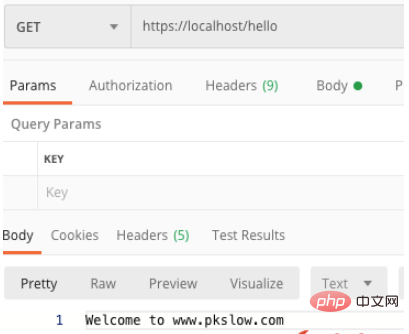
}Copy after login 完成上面工作后,启动应用即可。 访问http://localhost/hello 得到下面结果,说明整个Web应用起来了。
3.2 生成密钥文件jks通过命令行生成密钥文件如下: keytool -genkey -alias localhost -keyalg RSA -keysize 2048 -sigalg SHA256withRSA -keystore localhost.jks -dname CN=localhost,OU=Test,O=pkslow,L=Guangzhou,C=CN -validity 731 -storepass changeit -keypass changeit Copy after login 命令行重要参数的意义:
执行完以上命令后,就会生成 3.3 重新配置并重启按照实际情况重新配置 server.port=443server.ssl.enabled=trueserver.ssl.key-store-type=jksserver.ssl.key-store=classpath:localhost.jksserver.ssl.key-store-password=changeitserver.ssl.key-alias=localhost Copy after login 重启后访问如下: 发现有红色警告,因为这是自签名的 通过
3.4 使用PKS12格式如果想使用PKCS12替换JKS,命令和配置可以参考下面: 生成密钥: keytool -genkey -alias localhost -keyalg RSA -keysize 2048 -sigalg SHA256withRSA -storetype PKCS12 -keystore localhost.p12 -dname CN=localhost,OU=Test,O=pkslow,L=Guangzhou,C=CN -validity 731 -storepass changeit -keypass changeit Copy after login 配置文件如下: server.port=443server.ssl.enabled=trueserver.ssl.key-store-type=PKCS12server.ssl.key-store=classpath:localhost.p12server.ssl.key-store-password=changeitserver.ssl.key-alias=localhost Copy after login |

The above is the detailed content of How to integrate https with Springboot. For more information, please follow other related articles on the PHP Chinese website!

Hot AI Tools

Undresser.AI Undress
AI-powered app for creating realistic nude photos

AI Clothes Remover
Online AI tool for removing clothes from photos.

Undress AI Tool
Undress images for free

Clothoff.io
AI clothes remover

Video Face Swap
Swap faces in any video effortlessly with our completely free AI face swap tool!

Hot Article
Hot Tools

Notepad++7.3.1
Easy-to-use and free code editor

SublimeText3 Chinese version
Chinese version, very easy to use

Zend Studio 13.0.1
Powerful PHP integrated development environment

Dreamweaver CS6
Visual web development tools

SublimeText3 Mac version
God-level code editing software (SublimeText3)
Hot Topics
 1662
1662
 14
1419
52
1313
25
1262
29
1235
24
14
1419
52
1313
25
1262
29
1235
24

 How to use Redis to implement distributed locks in SpringBoot
Jun 03, 2023 am 08:16 AM
How to use Redis to implement distributed locks in SpringBoot
Jun 03, 2023 am 08:16 AM
1. Redis implements distributed lock principle and why distributed locks are needed. Before talking about distributed locks, it is necessary to explain why distributed locks are needed. The opposite of distributed locks is stand-alone locks. When we write multi-threaded programs, we avoid data problems caused by operating a shared variable at the same time. We usually use a lock to mutually exclude the shared variables to ensure the correctness of the shared variables. Its scope of use is in the same process. If there are multiple processes that need to operate a shared resource at the same time, how can they be mutually exclusive? Today's business applications are usually microservice architecture, which also means that one application will deploy multiple processes. If multiple processes need to modify the same row of records in MySQL, in order to avoid dirty data caused by out-of-order operations, distribution needs to be introduced at this time. The style is locked. Want to achieve points
 How to solve the problem that springboot cannot access the file after reading it into a jar package
Jun 03, 2023 pm 04:38 PM
How to solve the problem that springboot cannot access the file after reading it into a jar package
Jun 03, 2023 pm 04:38 PM
Springboot reads the file, but cannot access the latest development after packaging it into a jar package. There is a situation where springboot cannot read the file after packaging it into a jar package. The reason is that after packaging, the virtual path of the file is invalid and can only be accessed through the stream. Read. The file is under resources publicvoidtest(){Listnames=newArrayList();InputStreamReaderread=null;try{ClassPathResourceresource=newClassPathResource("name.txt");Input
 How to implement Springboot+Mybatis-plus without using SQL statements to add multiple tables
Jun 02, 2023 am 11:07 AM
How to implement Springboot+Mybatis-plus without using SQL statements to add multiple tables
Jun 02, 2023 am 11:07 AM
When Springboot+Mybatis-plus does not use SQL statements to perform multi-table adding operations, the problems I encountered are decomposed by simulating thinking in the test environment: Create a BrandDTO object with parameters to simulate passing parameters to the background. We all know that it is extremely difficult to perform multi-table operations in Mybatis-plus. If you do not use tools such as Mybatis-plus-join, you can only configure the corresponding Mapper.xml file and configure The smelly and long ResultMap, and then write the corresponding sql statement. Although this method seems cumbersome, it is highly flexible and allows us to
 Comparison and difference analysis between SpringBoot and SpringMVC
Dec 29, 2023 am 11:02 AM
Comparison and difference analysis between SpringBoot and SpringMVC
Dec 29, 2023 am 11:02 AM
SpringBoot and SpringMVC are both commonly used frameworks in Java development, but there are some obvious differences between them. This article will explore the features and uses of these two frameworks and compare their differences. First, let's learn about SpringBoot. SpringBoot was developed by the Pivotal team to simplify the creation and deployment of applications based on the Spring framework. It provides a fast, lightweight way to build stand-alone, executable
 How SpringBoot customizes Redis to implement cache serialization
Jun 03, 2023 am 11:32 AM
How SpringBoot customizes Redis to implement cache serialization
Jun 03, 2023 am 11:32 AM
1. Customize RedisTemplate1.1, RedisAPI default serialization mechanism. The API-based Redis cache implementation uses the RedisTemplate template for data caching operations. Here, open the RedisTemplate class and view the source code information of the class. publicclassRedisTemplateextendsRedisAccessorimplementsRedisOperations, BeanClassLoaderAware{//Declare key, Various serialization methods of value, the initial value is empty @NullableprivateRedisSe
 How to use Nginx Proxy Manager to implement reverse proxy under HTTPS protocol
Sep 26, 2023 am 08:40 AM
How to use Nginx Proxy Manager to implement reverse proxy under HTTPS protocol
Sep 26, 2023 am 08:40 AM
How to use NginxProxyManager to implement reverse proxy under HTTPS protocol. In recent years, with the popularity of the Internet and the diversification of application scenarios, the access methods of websites and applications have become more and more complex. In order to improve website access efficiency and security, many websites have begun to use reverse proxies to handle user requests. The reverse proxy for the HTTPS protocol plays an important role in protecting user privacy and ensuring communication security. This article will introduce how to use NginxProxy
 How to use Nginx Proxy Manager to implement automatic jump from HTTP to HTTPS
Sep 26, 2023 am 11:19 AM
How to use Nginx Proxy Manager to implement automatic jump from HTTP to HTTPS
Sep 26, 2023 am 11:19 AM
How to use NginxProxyManager to implement automatic jump from HTTP to HTTPS. With the development of the Internet, more and more websites are beginning to use the HTTPS protocol to encrypt data transmission to improve data security and user privacy protection. Since the HTTPS protocol requires the support of an SSL certificate, certain technical support is required when deploying the HTTPS protocol. Nginx is a powerful and commonly used HTTP server and reverse proxy server, and NginxProxy
 How to get the value in application.yml in springboot
Jun 03, 2023 pm 06:43 PM
How to get the value in application.yml in springboot
Jun 03, 2023 pm 06:43 PM
In projects, some configuration information is often needed. This information may have different configurations in the test environment and the production environment, and may need to be modified later based on actual business conditions. We cannot hard-code these configurations in the code. It is best to write them in the configuration file. For example, you can write this information in the application.yml file. So, how to get or use this address in the code? There are 2 methods. Method 1: We can get the value corresponding to the key in the configuration file (application.yml) through the ${key} annotated with @Value. This method is suitable for situations where there are relatively few microservices. Method 2: In actual projects, When business is complicated, logic
