

Steps to draw Spider-Man using Python+Turtle library

一、效果展示
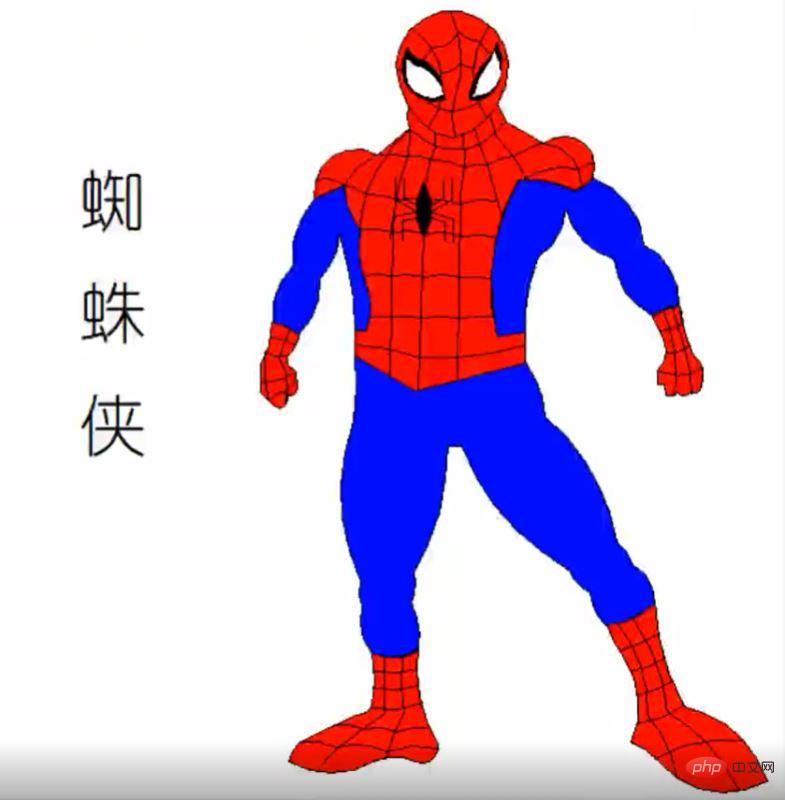
在介绍代码之前,先来看下本文的实现效果。
Pinstaller(Python打包为exe文件)
之前自己把 Python 文件打包成 exe 的时候,折腾了很久,本文将详细地讲述如何快速生成在不安装 Python 的电脑上也能执行的文件
1. 在 prompt 中运行 pip install pyinstaller , 安装 pyinstaller 库
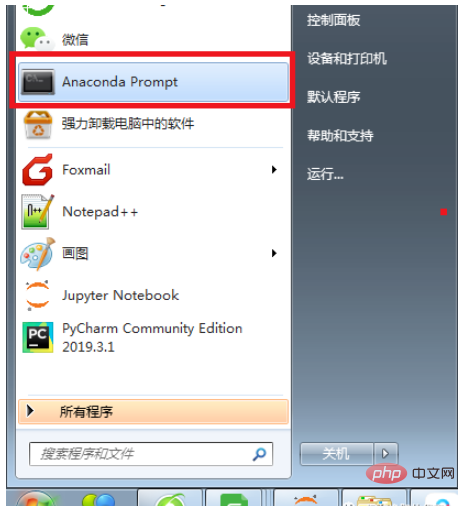
2. 在 prompt 中运行 where pyinstaller

3. 找到待打包文件存放的路径
把要打包的文件放到找到的路径
C:\Users\Administrator\Anaconda3\Scripts 中 (我的路径是这个,你就按照第二步的路径)
4. 调用 cmd 窗口
把待打包文件放在
C:\Users\Administrator\Anaconda3 \Scripts 目录下,在该文件夹中按shift+鼠标右键 , 点击 在此处打开命令窗口 调用 cmd
5. 在 cmd 中输入 pyinstaller -F 文件名
例子:打包 Python 绘制皮卡丘的视频,在cmd中输入 pyinstaller -F pkq_1.py
即可生成普通图标的exe可执行文件。
6. 生成 exe 文件
可以在路径
C:\Users\Administrator\Anaconda3\Scripts 下的 dist 文件夹中找到打包好的exe文件(即不用安装 Python 也可以运行的文件)。
这样生成的文件图标是标准固定格式,如果想生成特定特定形状的图标需要用第7点中的语句。
7. 生成自定义形状的图标,在cmd中输入:pyinstaller -i ico路径 -F xxxxx.py
例子: 打包 Python 绘制皮卡丘视频的py文件,在cmd中输入 (注: 我把ico图标和待打包文件放到一个文件夹下了, 所以直接输入了ico的名字)
pyinstaller -i pikaqiu2.ico -F pkq_1.py
生成图标是皮卡丘形状的exe文件。
二、代码详解
Python绘制蜘蛛侠的原理是:应用turtle库绘制身体的不同部位。
1.导入库
首先导入本文需要加载的库,如果你有些库还没有安装,导致运行代码时报错,可以在Anaconda Prompt中用pip方法安装。
# -*- coding: UTF-8 -*-
'''
代码用途 :画蜘蛛侠
作者     :阿黎逸阳
博客     :  https://blog.csdn.net/qq_32532663/article/details/106176609
'''
import os
import pygame
import turtle as t
本文应用到的库较少,只应用了os、pygame和turtle三个库。
os库可以设置文件读取的位置。
pygame库是为了绘制过程更有趣,在绘图过程中添加了背景音乐。
turtle库是绘图库,相当于给你一支画笔,你可以在画布上用数学逻辑控制的代码完成绘图。
2.播放音乐
接着应用pygame库播放背景音乐,本文的音乐是《Sunflower》。
os.chdir(r'F:\公众号\56.蜘蛛侠')
#播放音乐
print('播放音乐')
pygame.mixer.init()
pygame.mixer.music.load("Cope - Sunflower (Original Version).mp3")
pygame.mixer.music.set_volume(0.5)
pygame.mixer.music.play(1, 10)这一部分的代码和整体代码是剥离的,可以选泽在最开始放上该代码,也可以直接删除。
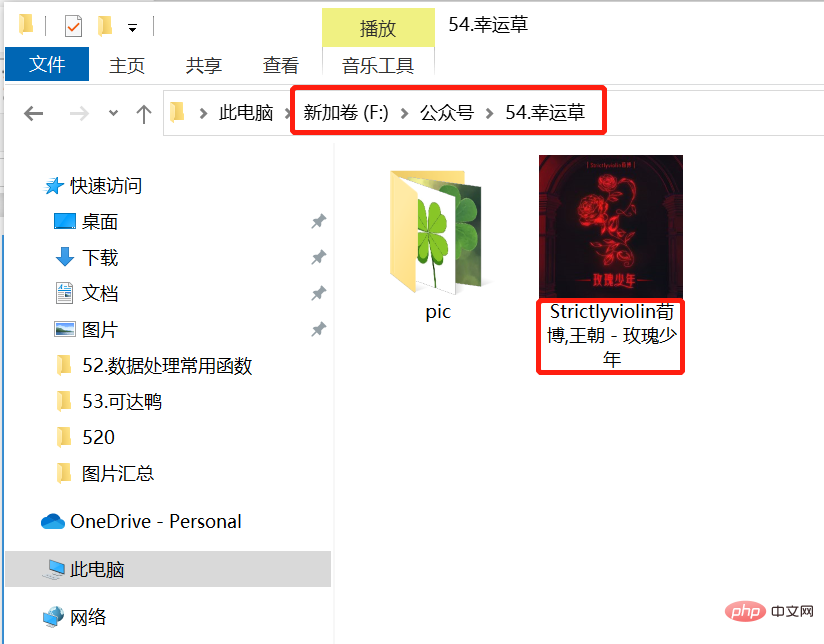
如果选择播放音乐,需要在代码music.load函数中把你想放音乐的电脑本地存放地址填进去。
有部分朋友对这一块有疑问,填充格式可参考如下图片:
3.定义画蜘蛛侠上半身的函数
然后设置画板的大小,并定义绘制蜘蛛侠上半身的函数。
t.title('阿黎逸阳的代码公众号')
t.speed(10)
#t.screensize(1000, 800)
t.setup(startx=0, starty = 0, width=800, height = 600)
def up_body():
    #画头
    t.penup()
    t.goto(60, 200)
    t.pendown()
    t.pensize(1)
    t.color('black', 'red')
    t.begin_fill()
    t.setheading(60)
    t.circle(60, 30)
    t.left(4)
    t.circle(40, 173)
    t.left(4)
    t.circle(60, 30)
    #画脖子
    t.setheading(260)
    t.circle(30, 29)
    #画肩膀
    t.setheading(220)
    t.forward(30)
    #画手上肌肉
    t.setheading(150)
    t.circle(30, 130)
    #画胸部的内部线
    t.setheading(30)
    t.circle(-100, 13)
    t.setheading(270)
    t.circle(50, 40)
    t.setheading(255)
    t.circle(55, 40)
    t.circle(-40, 50)
    #画腰部的外横线
    t.setheading(0)
    t.forward(-7)
    t.setheading(270)
    t.forward(18)
    #画腰线
    t.setheading(-30)
    t.forward(50)
    t.setheading(15)
    t.forward(80)
    t.setheading(90)
    t.forward(22)
    #重复的地方
    #画衣服内轮廓
    t.setheading(190)
    t.forward(20)
    t.setheading(103)
    t.circle(-160, 41)
    #画手内轮廓
    t.setheading(5)
    t.circle(-80, 30)
    t.setheading(20)
    t.circle(30, 30)
    #重复的地方
    #手臂上肌肉
    t.setheading(70)
    t.circle(22, 150)
    t.setheading(150)
    t.forward(30)
    t.setheading(120)
    t.forward(15)
t.end_fill()关键代码详解:
t.pensize(width):设置画笔的尺寸。
t.color(color):设置画笔的颜色。
t.penup():抬起画笔,一般用于另起一个地方绘图使用。
t.goto(x,y):画笔去到某个位置,参数为(x,y),对应去到的横坐标和纵坐标。
t.pendown():放下画笔,一般和penup组合使用。
t.left(degree):画笔向左转多少度,括号里表示度数。
t.right(degree):画笔向右转多少度,括号里表示度数。
t.circle(radius,extent,steps):radius指半径,若为正,半径在小乌龟左侧radius远的地方,若为负,半径在小乌龟右侧radius远的地方;extent指弧度;steps指阶数。
画外轮廓的关键是:通过调节circle函数中的半径和弧度来调节曲线的弧度,从而使得蜘蛛侠的轮廓比较流畅。
4.定义画左手和右手的函数
接着定义画左手和右手的函数。
def left_hand():
    #画左手臂
    #画胸部的内部线
    t.penup()
    t.goto(-69, 134)
    t.color('black', 'blue')
    t.pendown()
    t.begin_fill()
    t.setheading(30)
    t.circle(-100, 13)
    t.setheading(270)
    t.circle(50, 40)
    t.setheading(255)
    t.circle(55, 40)
    t.circle(-40, 50)
    #画腰部的外横线
    t.setheading(0)
    t.forward(-8)
    t.setheading(90)
    t.circle(220, 18)
    t.setheading(-90)
    t.circle(-40, 50)
    t.setheading(-85)
    t.circle(-50, 50)
    t.setheading(135)
    t.circle(30, 40)
    t.setheading(95)
    t.circle(-50, 50)
    t.setheading(98)
    t.circle(-60, 51)
    t.end_fill()
def right_hand():
    #画右手臂
    #画衣服内轮廓
    t.penup()
    t.goto(80, 39)
    t.color('black', 'blue')
    t.pendown()
    t.begin_fill()
    t.setheading(190)
    t.forward(20)
    t.setheading(103)
    t.circle(-160, 41)
    #画手内轮廓
    t.setheading(5)
    t.circle(-80, 30)
    t.setheading(20)
    t.circle(30, 30)
    t.setheading(-20)
    t.circle(-55, 65)
    t.setheading(-30)
    t.circle(-50, 60)
    t.setheading(180)
    t.circle(30, 40)
    t.setheading(154)
    t.circle(-48, 60)
    t.setheading(164)
    t.circle(-50, 60)
    t.setheading(-90)
    t.circle(-40, 60)
    t.left(40)
    t.circle(150, 23)
    t.end_fill()
def left_wrist():
    #画左手腕
    t.penup()
    t.goto(-81, 37)
    t.color('black', 'red')
    t.pendown()
    t.begin_fill()
    t.setheading(135)
    t.circle(30, 40)
    t.setheading(-90)
    t.circle(-60, 30)
    t.setheading(-90)
    t.forward(20)
    t.setheading(-45)
    t.forward(12)
    t.circle(6, 180)
    t.setheading(-50)
    t.circle(5, 160)
    t.setheading(95)
    t.forward(10)
    t.setheading(135)
    t.forward(8)
    t.setheading(95)
    t.forward(6)
    t.setheading(35)
    t.circle(30, 10)
    t.left(10)
    t.circle(30, 27)
    t.end_fill()
    #画手腕上的线
    #横线
    #第一条横线
    t.penup()
    t.goto(-84, 30)
    t.color('black')
    t.pendown()
    t.setheading(145)
    t.circle(30, 36)
    #第二条横线
    t.penup()
    t.goto(-90, 22)
    t.color('black')
    t.pendown()
    t.setheading(185)
    t.circle(-30, 31)
    #第三条横线
    t.penup()
    t.goto(-83, 10)
    t.color('black')
    t.pendown()
    t.setheading(210)
    t.circle(-50, 31)
    #第四条横线
    t.penup()
    t.goto(-102, -10)
    t.color('black')
    t.pendown()
    t.setheading(50)
    t.circle(-20, 41)
    t.setheading(55)
    t.circle(-90, 8)
    #第一条竖线
    t.penup()
    t.goto(-105, 24)
    t.color('black')
    t.pendown()
    t.setheading(-95)
    t.circle(100, 20)
    #第二条竖线
    t.penup()
    t.goto(-87, 42)
    t.color('black')
    t.pendown()
    t.setheading(-110)
    t.forward(22)
    t.setheading(-63)
    t.circle(-50, 40)
def right_wrist():
    #画右手腕
    t.penup()
    t.goto(189, 57)
    t.color('black', 'red')
    t.pendown()
    t.begin_fill()
    t.setheading(180)
    t.circle(30, 40)
    t.setheading(-55)
    t.circle(-100, 10)
    t.circle(-20, 70)
    t.setheading(-90)
    t.forward(10)
    t.setheading(-0)
    t.forward(5)
    t.setheading(-85)
    t.forward(8)
    t.setheading(-20)
    t.circle(8, 60)
    t.setheading(-35)
    t.circle(8, 70)
    t.setheading(-15)
    t.circle(6, 70)
    t.setheading(60)
    t.circle(20, 80)
    t.setheading(115)
    t.circle(-100, 20)
    t.end_fill()
    #画第一条横线
    t.goto(191, 45)
    t.color('black')
    t.pendown()
    t.setheading(215)
    t.circle(-30, 34)
    #画第二条横线
    t.penup()
    t.goto(197, 29)
    t.color('black')
    t.pendown()
    t.setheading(215)
    t.circle(-30, 37)
    #画第三条横线
    t.penup()
    t.goto(174, 11)
    t.color('black')
    t.pendown()
    t.setheading(-0)
    t.circle(-30, 27)
    t.setheading(20)
    t.circle(-20, 27)
    t.setheading(40)
    t.circle(-30, 23)
    #画第一条竖线
    t.penup()
    t.goto(178, 55)
    t.color('black')
    t.pendown()
    t.setheading(-70)
    t.circle(-200, 9)
    t.setheading(-82)
    t.circle(-100, 18)
    #画第二条竖线
    t.penup()
    t.goto(185, 55)
    t.color('black')
    t.pendown()
    t.setheading(-70)
    t.circle(-200, 8)
    t.setheading(-68)
t.circle(-80, 25)5.定义画蜘蛛的函数
接着定义画蜘蛛的函数。
def spider():
    #画蜘蛛
    t.penup()
    t.goto(8, 146)
    t.color('black')
    t.pendown()
    t.begin_fill()
    t.setheading(-120)
    t.circle(40, 60)
    t.setheading(60)
    t.circle(40,60)
    t.end_fill()
    #画蜘蛛的脚
    #右边的脚1
    t.penup()
    t.goto(13, 129)
    t.color('black')
    t.pendown()
    t.setheading(30)
    t.forward(10)
    t.setheading(90)
    t.forward(15)
    #右边的脚2
    t.penup()
    t.goto(14, 125)
    t.color('black')
    t.pendown()
    t.setheading(30)
    t.forward(16)
    t.setheading(90)
    t.forward(17)
    #右边的脚3
    t.penup()
    t.goto(14, 124)
    t.color('black')
    t.pendown()
    t.setheading(-20)
    t.forward(16)
    t.setheading(-90)
    t.forward(17)
    #右边的脚4
    t.penup()
    t.goto(14, 120)
    t.color('black')
    t.pendown()
    t.setheading(-20)
    t.forward(10)
    t.setheading(-90)
    t.forward(15)
    #画蜘蛛的脚
    #左边的脚1
    t.penup()
    t.goto(3, 129)
    t.color('black')
    t.pendown()
    t.setheading(150)
    t.forward(10)
    t.setheading(90)
    t.forward(15)
    #右边的脚2
    t.penup()
    t.goto(2, 125)
    t.color('black')
    t.pendown()
    t.setheading(150)
    t.forward(16)
    t.setheading(90)
    t.forward(17)
    #右边的脚3
    t.penup()
    t.goto(2, 124)
    t.color('black')
    t.pendown()
    t.setheading(-170)
    t.forward(16)
    t.setheading(-99)
    t.forward(17)
    #右边的脚4
    t.penup()
    t.goto(3, 120)
    t.color('black')
    t.pendown()
    t.setheading(-170)
    t.forward(10)
    t.setheading(-90)
t.forward(15)6.调用函数绘制图形
最后调用函数绘制图形。
print('绘制上半身外轮廓')
up_body()
print('绘制右手')
right_hand()
print('绘制左手')
left_hand()
print('绘制左拳头')
left_wrist()
print('绘制右拳头')
right_wrist()
print('绘制蜘蛛')
spider()
The above is the detailed content of Steps to draw Spider-Man using Python+Turtle library. For more information, please follow other related articles on the PHP Chinese website!

Hot AI Tools

Undresser.AI Undress
AI-powered app for creating realistic nude photos

AI Clothes Remover
Online AI tool for removing clothes from photos.

Undress AI Tool
Undress images for free

Clothoff.io
AI clothes remover

Video Face Swap
Swap faces in any video effortlessly with our completely free AI face swap tool!

Hot Article
Hot Tools

Notepad++7.3.1
Easy-to-use and free code editor

SublimeText3 Chinese version
Chinese version, very easy to use

Zend Studio 13.0.1
Powerful PHP integrated development environment

Dreamweaver CS6
Visual web development tools

SublimeText3 Mac version
God-level code editing software (SublimeText3)
Hot Topics


 PHP and Python: Different Paradigms Explained
Apr 18, 2025 am 12:26 AM
PHP and Python: Different Paradigms Explained
Apr 18, 2025 am 12:26 AM
PHP is mainly procedural programming, but also supports object-oriented programming (OOP); Python supports a variety of paradigms, including OOP, functional and procedural programming. PHP is suitable for web development, and Python is suitable for a variety of applications such as data analysis and machine learning.
 Choosing Between PHP and Python: A Guide
Apr 18, 2025 am 12:24 AM
Choosing Between PHP and Python: A Guide
Apr 18, 2025 am 12:24 AM
PHP is suitable for web development and rapid prototyping, and Python is suitable for data science and machine learning. 1.PHP is used for dynamic web development, with simple syntax and suitable for rapid development. 2. Python has concise syntax, is suitable for multiple fields, and has a strong library ecosystem.
 PHP and Python: A Deep Dive into Their History
Apr 18, 2025 am 12:25 AM
PHP and Python: A Deep Dive into Their History
Apr 18, 2025 am 12:25 AM
PHP originated in 1994 and was developed by RasmusLerdorf. It was originally used to track website visitors and gradually evolved into a server-side scripting language and was widely used in web development. Python was developed by Guidovan Rossum in the late 1980s and was first released in 1991. It emphasizes code readability and simplicity, and is suitable for scientific computing, data analysis and other fields.
 Python vs. JavaScript: The Learning Curve and Ease of Use
Apr 16, 2025 am 12:12 AM
Python vs. JavaScript: The Learning Curve and Ease of Use
Apr 16, 2025 am 12:12 AM
Python is more suitable for beginners, with a smooth learning curve and concise syntax; JavaScript is suitable for front-end development, with a steep learning curve and flexible syntax. 1. Python syntax is intuitive and suitable for data science and back-end development. 2. JavaScript is flexible and widely used in front-end and server-side programming.
 Can vs code run in Windows 8
Apr 15, 2025 pm 07:24 PM
Can vs code run in Windows 8
Apr 15, 2025 pm 07:24 PM
VS Code can run on Windows 8, but the experience may not be great. First make sure the system has been updated to the latest patch, then download the VS Code installation package that matches the system architecture and install it as prompted. After installation, be aware that some extensions may be incompatible with Windows 8 and need to look for alternative extensions or use newer Windows systems in a virtual machine. Install the necessary extensions to check whether they work properly. Although VS Code is feasible on Windows 8, it is recommended to upgrade to a newer Windows system for a better development experience and security.
 How to run sublime code python
Apr 16, 2025 am 08:48 AM
How to run sublime code python
Apr 16, 2025 am 08:48 AM
To run Python code in Sublime Text, you need to install the Python plug-in first, then create a .py file and write the code, and finally press Ctrl B to run the code, and the output will be displayed in the console.
 Can visual studio code be used in python
Apr 15, 2025 pm 08:18 PM
Can visual studio code be used in python
Apr 15, 2025 pm 08:18 PM
VS Code can be used to write Python and provides many features that make it an ideal tool for developing Python applications. It allows users to: install Python extensions to get functions such as code completion, syntax highlighting, and debugging. Use the debugger to track code step by step, find and fix errors. Integrate Git for version control. Use code formatting tools to maintain code consistency. Use the Linting tool to spot potential problems ahead of time.
 Where to write code in vscode
Apr 15, 2025 pm 09:54 PM
Where to write code in vscode
Apr 15, 2025 pm 09:54 PM
Writing code in Visual Studio Code (VSCode) is simple and easy to use. Just install VSCode, create a project, select a language, create a file, write code, save and run it. The advantages of VSCode include cross-platform, free and open source, powerful features, rich extensions, and lightweight and fast.
