

Clipchamp: How to use the new video editor in Windows 11 version 22H2

Clipchamp Plans
Until recently, Clipchamp offered a variety of plans to choose from, and it was arguably overpriced for what it offered. Microsoft recently simplified Clipchamp's pricing structure, so you can now use the free plan or subscribe to the Essentials plan for $11.99 per month or $119.99 per year.
The free plan includes most of the basic features you would expect. You get a multi-track video editor and you can use all your own assets or some of the stock assets provided by Clipchamp. Some of them are free, but not all. You can only export videos at 1080p resolution, but unfortunately, this is a limitation that also exists with the Essentials plan.
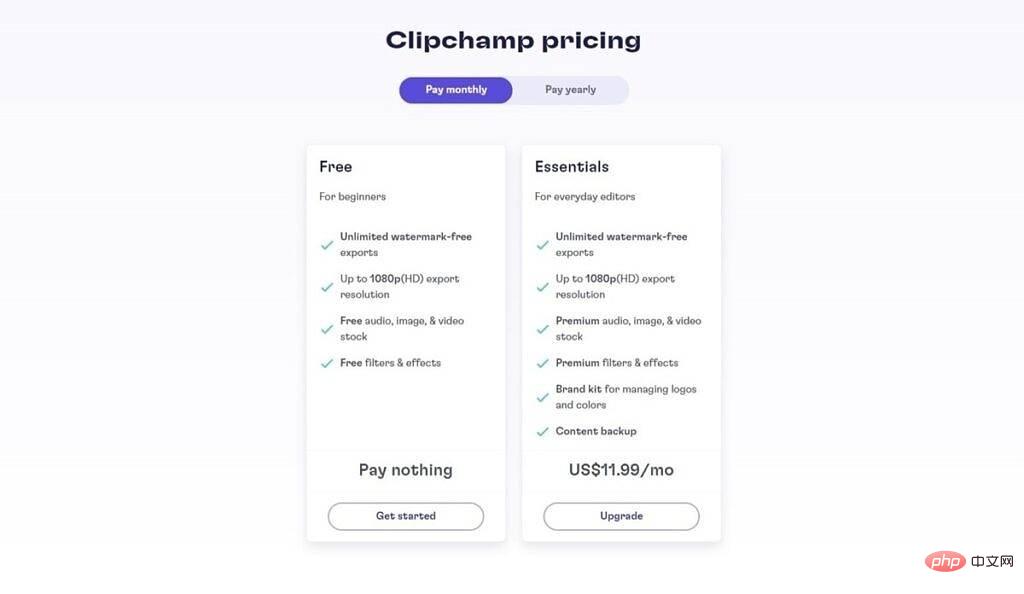
If you choose to pay for the Essentials plan, you get a broader catalog of inventory assets such as images, audio, and video. While some are free, most of these assets are part of the Essentials plan, which might come in handy if you create videos frequently. If you have the Essentials plan, you also have access to more video filters and can upload custom fonts. Additionally, the Essentials plan allows you to create a branding kit, including color palettes, custom fonts, and logos that you can easily add to your videos.
Perhaps the biggest benefit of the Essentials plan is the cloud backup feature. This will back up all your media files and projects to the cloud, so you can continue working on them on any PC.
Starting a Clipchamp Project
When you first launch Clipchamp, you'll see the home page, which allows you to start a new project. You'll need to create a Clipchamp account, but if you have a Microsoft account linked to Windows 11, this should be easy. Once you've set up your account, your homepage will look like this:

Here you can choose from a few ways to start making a new video. At the top of the page, there's a simple "Start New Video" button that lets you create a new video from scratch. If you only want to use your own assets, this may be your preferred option.
Start with a template
Under this, you can choose to start a new project using a template. There are template categories, such as YouTube or Instagram, that also allow you to start with the correct aspect ratio. For example, most Instagram templates feature a 1:1 aspect ratio, which is the most common for the social network.
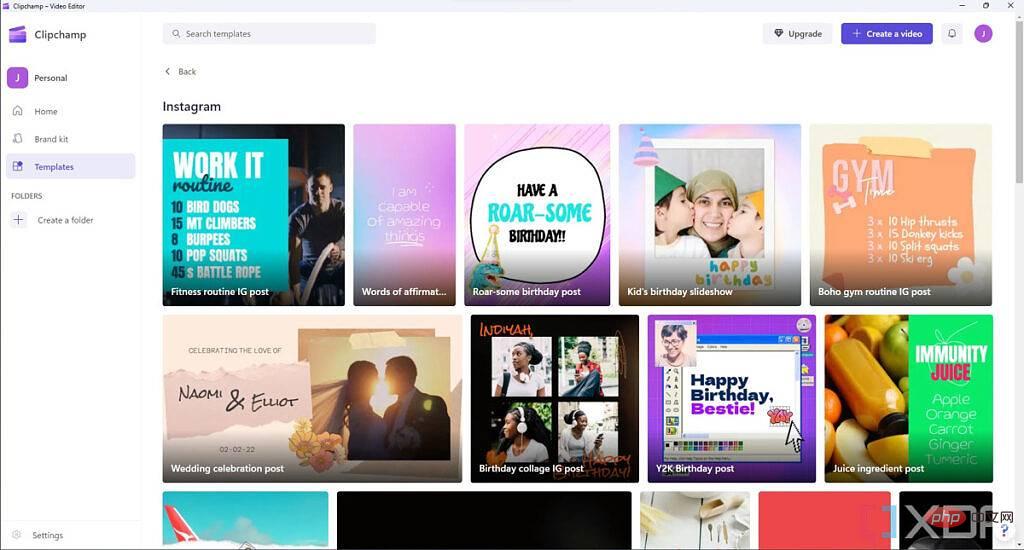
Different templates include content such as video, audio, and text to help you create layouts or simply add an intro or outro to your video. You can also add templates to your project later, so you're not limited to just one.
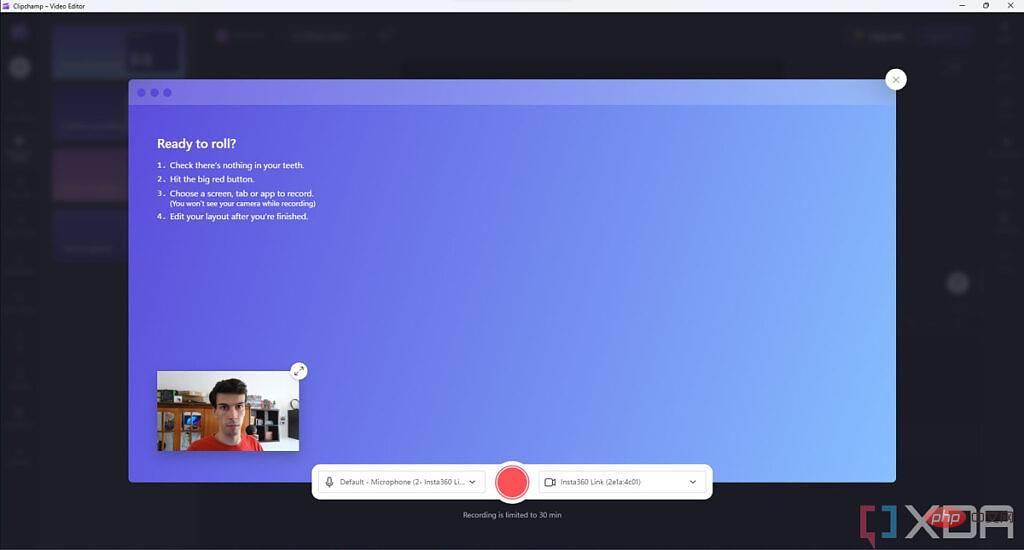
Start with a recording
Alternatively, you can start your video project with a brand new recording file. You can use your webcam to record, record your screen, or record both, which might be a good idea for presentations or tutorials. You can also add recordings at any time while editing your project.
When you start recording, you will be prompted to select your webcam and microphone (if you are using them). You can then click the record button to start recording.
#If you are also recording the screen, you will be asked to choose what you want to record - this can be the entire screen, an application window, or a specific area of the screen. You can also choose to record system audio, but this is off by default.
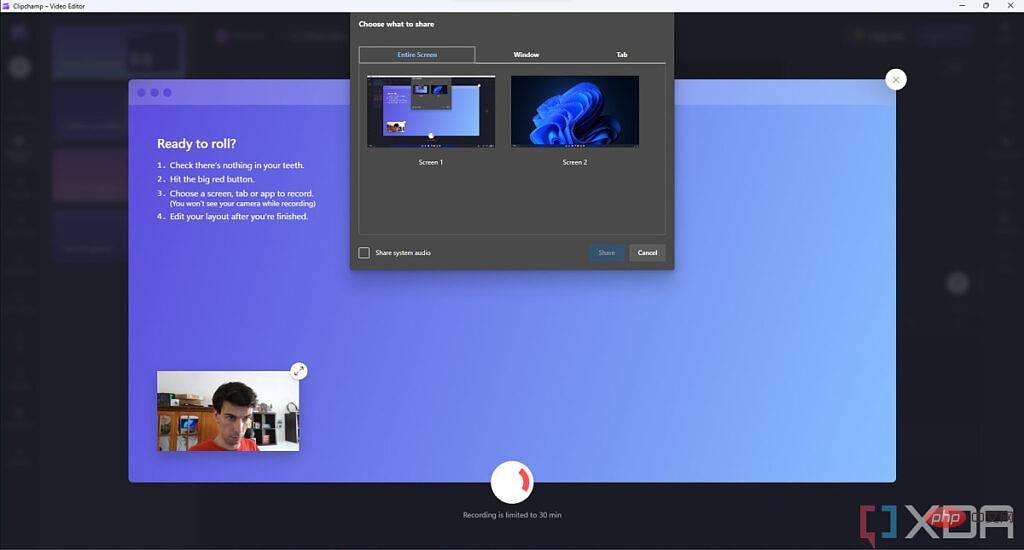
After you select the portion of the screen you want to capture, recording will start automatically and can last up to 30 minutes if you are recording your screen. Once you've finished recording, you can watch and choose to re-record or add it to your project, as shown below:
The webcam and screen recording are in different tracks , so you can adjust the position and size to your liking afterwards. This brings us to the next part, which is actually editing a project.
How to use Clipchamp Video Editor
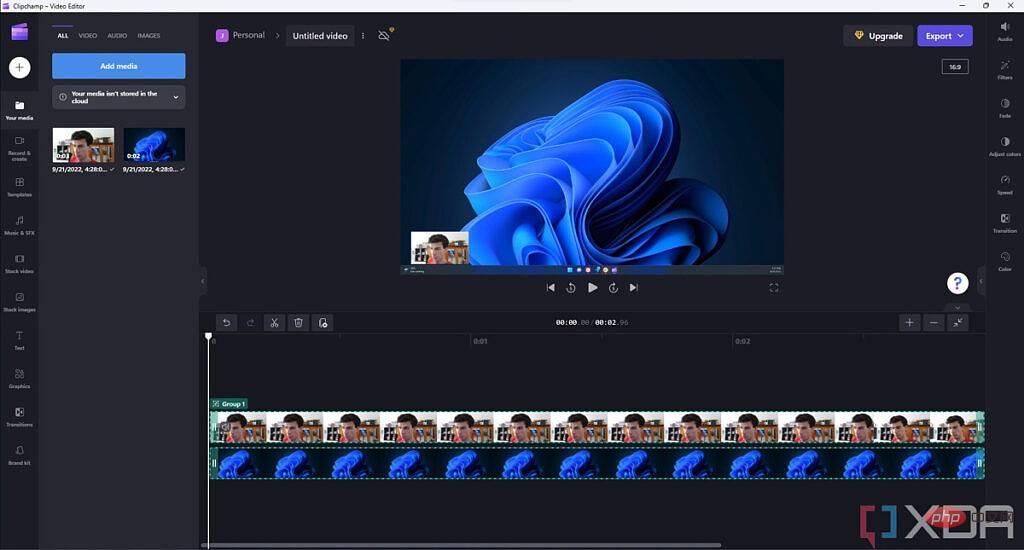
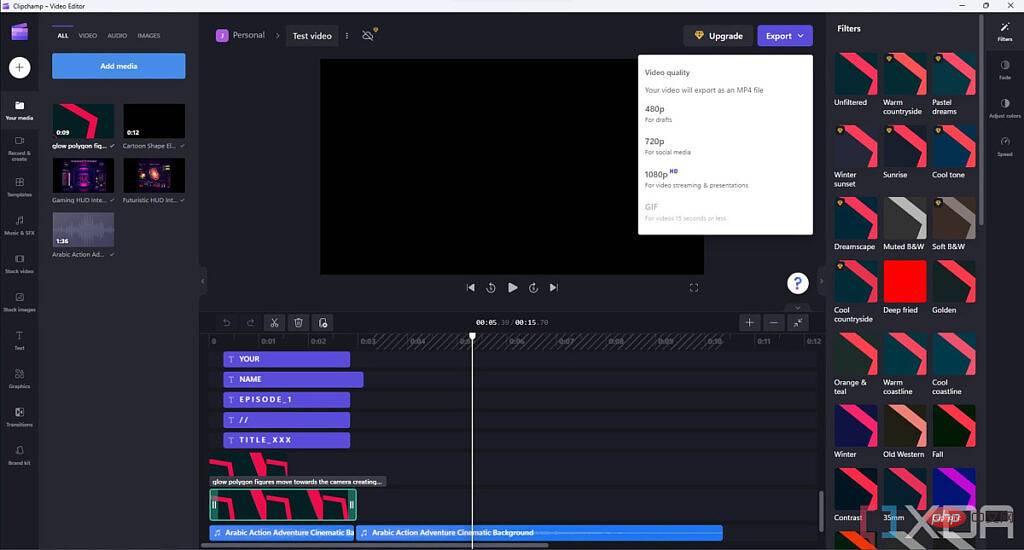
After creating your project, you will be taken to the video editing interface, which is where you will spend the most time. We're not going to get into the details of the whole video editing thing, but here's a quick look at what you can do with it.
As shown above, the video editing interface is divided into several parts. Front and center is a preview of your video so you can see what the final result will look like, and you can also resize and move video elements if you want to change the aspect ratio for a specific format. Below it, you'll see a video timeline with all the tracks you've currently added. In this screenshot we haven't added any media yet so it looks clean, but you can add as many tracks as you like.
On the left side of the screen, you'll see all the content tools—the media, inventory assets, templates, and more you've added to your project. On the right, you can see the filters and effects you want to apply to the content in your final video.
Timeline
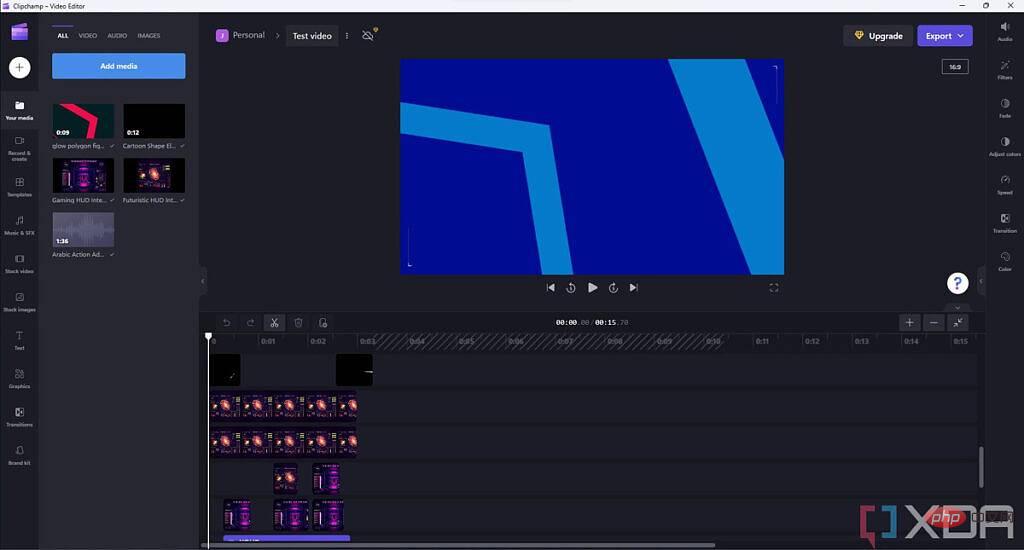
Clipchamp is a multi-track video editor, which means you can play multiple video and audio files simultaneously. This might be useful, for example, if you want to mix your recording with some background music, or if you want to overlay a camera over your screen recording. In the screenshot below you can already see a lot of the automatically created tracks, since we started this project using a template with all these assets added to it.

For example, you can move assets around the timeline, delete them, or cut them to split the video into different clips.
If you want to add more assets to the final video, you can drag them from the media pane on the left side of the screen to the timeline. You can drag content into an existing track on the timeline, or you can create a new track by dragging content to the edge of an existing track.
One thing to note is that videos often have audio tracks as well, but Clipchamp usually merges them together by default. You can do audio editing directly on the video track, but you can also split the audio track from the video for easier management. This also makes it easier for you to reuse the audio elsewhere. If you've edited video before, using the timeline should feel familiar.
Media and Content Tools
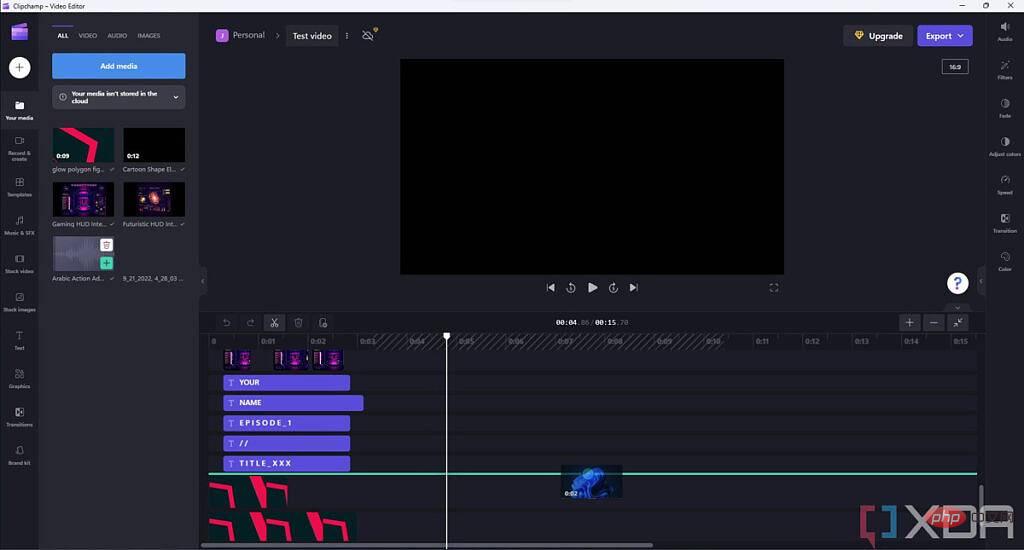
When you first open a project, the default view will show all the media you have added to the project in the left pane. In the screenshot below, we're starting with a template so you can see some video, image, and audio assets.
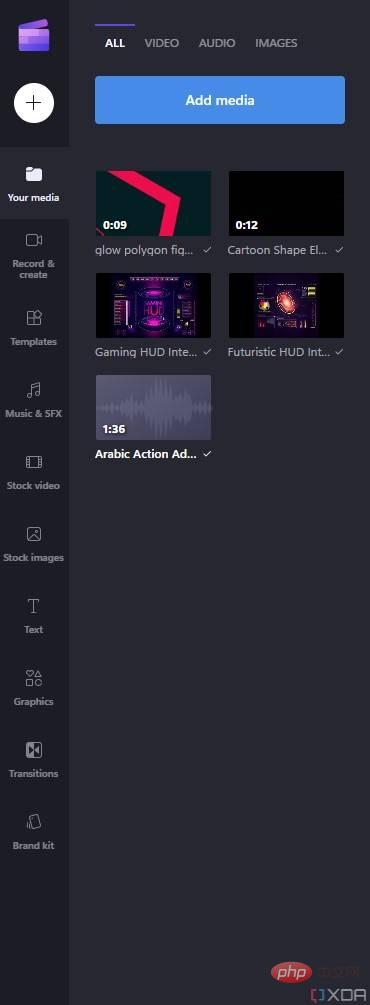
From there, you have a few options to add more content to the video. Here are all the options available in this menu:
- Your Media - Manage existing media in your project, or add more media to your phone from local storage or cloud services by scanning the QR code. Adding your own media to a project doesn't automatically add it to the timeline, so you have full control over where you want it added in the final video. You can also filter existing media by type, which is useful when you're adding a large number of assets.
- Record and Create – This tab allows you to record your screen or webcam (or both) directly within Clipchamp, as we explained above. There's also a text-to-speech tool so you can write text synthesized into an audio file that you can add to your video. You can choose from multiple languages and voices for your text.
- Templates – Add content from pre-built templates, including outro, intro or splash screen. Templates can contain multiple files such as audio, video, and images. After the cursor position, the template is automatically added to the timeline.
- Music & Sound Effects - Add stock music and sound effects from the Clipchamp library to your videos. You can choose from a range of genres and categories to get a specific vibe. Some assets are available in the free plan, while others require you to pay for the Essentials plan.
- Stock Video - Add stock video clips from the Clipchamp library, including video overlays. Some assets are only available on paid Essentials plans.
- Stock Images - Add images from the Clipchamp library to your videos. This can include still video frames and overlays to add more pizzazz to your videos. Some assets are free, but most require the Essentials plan.
- Text - Add text to your video such as title screen, subtitles and lower third. You can choose from a range of existing fonts, or, if you have the Essentials plan, upload your own.
- Graphics - Add overlays, backgrounds, GIFs or stickers to your videos.
- Transition - Add transition effects to videos, very useful when switching between different video files in the timeline.
- Branding Kit - Access assets in your personal branding kit, including fonts, logos and color palettes. This feature requires the Essentials plan.
Filters and Effects
Finally, in the right pane you will see a set of filters and effects that you can apply to content in your timeline . The options available depend on the content type you select, so some options are only available for video files, while others are only available for audio.
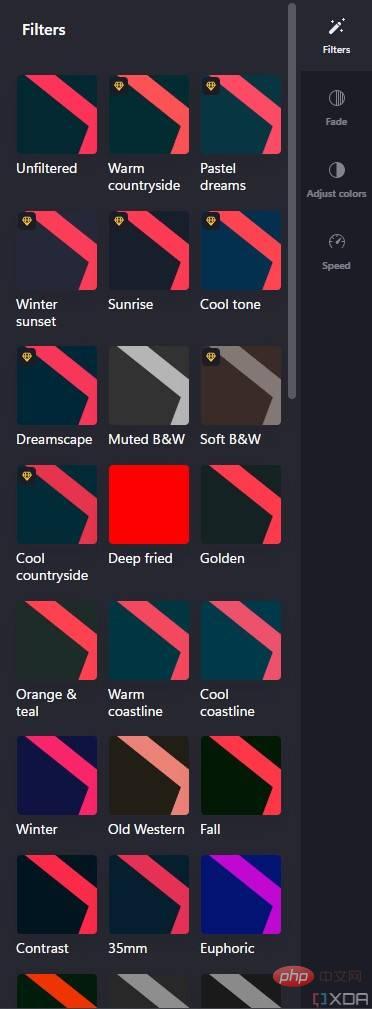
Here is a brief description of all the options available here:
- Adjust Color (Applies to videos, images, and Text assets) - Change properties such as exposure, saturation and contrast of the selected asset.
- Audio (can be used for audio assets or videos with audio tracks) – This allows you to change the volume of the audio track in the final video. For example, you can lower the volume of background music while keeping it high.
- Color (Available for text resources) – Change the color of text and background.
- Fade (Available for all asset types except transitions) – Sets a fade-in and fade-out animation for the item of your choice.
- Filters (Available for video, image, and text assets) – Add filters to change the appearance of your image or video file. Some filters require the Essentials plan.
- Speed (Applies to video assets and motion graphics) - Change the playback speed of the file.
- Text (Available for text resources) – Change the text, font, and alignment of text resources.
- Transform (for text resources) – Change the size and position of text resources. Note that you can also drag the text in the video preview to move it.
- Transition (Available for transition assets) - Change transition animation and duration.
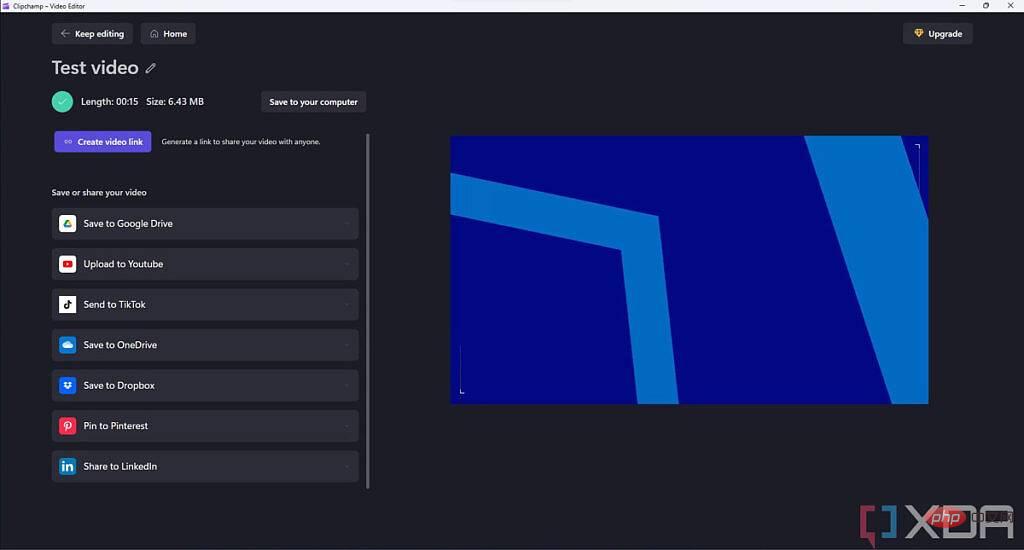
Export your project
After you have made all the edits you want to make to your video, the last step is to export it, which is very simple. At the top of the Clipchamp window, there is an Export button you can click. You can export videos in 480p, 720p or 1080p resolution, or as GIFs if they are less than 15 seconds long.
Clipchamp can also detect if there are gaps in your video that have no visual assets and warn you before you export the video so you don't have to re-edit it later. After selecting the output resolution, the export will start and download to your computer automatically. You can also save it to a cloud storage service or upload it directly to YouTube, TikTok, or Pinterest.
# If this is your first time using Clipchamp, here are all the basics you need to know. This is definitely a more basic video editor than tools like Adobe Premiere or DaVinci Resolve, but on the other hand, it's fairly easy to master and you can still make engaging videos this way. It's a great tool for beginners, but it may not be as suitable for experienced video editors.
The above is the detailed content of Clipchamp: How to use the new video editor in Windows 11 version 22H2. For more information, please follow other related articles on the PHP Chinese website!

Hot AI Tools

Undresser.AI Undress
AI-powered app for creating realistic nude photos

AI Clothes Remover
Online AI tool for removing clothes from photos.

Undress AI Tool
Undress images for free

Clothoff.io
AI clothes remover

Video Face Swap
Swap faces in any video effortlessly with our completely free AI face swap tool!

Hot Article
Hot Tools

Notepad++7.3.1
Easy-to-use and free code editor

SublimeText3 Chinese version
Chinese version, very easy to use

Zend Studio 13.0.1
Powerful PHP integrated development environment

Dreamweaver CS6
Visual web development tools

SublimeText3 Mac version
God-level code editing software (SublimeText3)
Hot Topics


 How to fix file names or extensions that are too long in Windows 11?
Apr 22, 2023 pm 04:37 PM
How to fix file names or extensions that are too long in Windows 11?
Apr 22, 2023 pm 04:37 PM
Have you ever faced any issues while transferring files that prevented you from doing so? Well, many Windows users have recently reported that they faced issues while copying and pasting files into a folder, where an error was thrown saying “The file name of the destination folder is too long”. Additionally, some other Windows users expressed frustration when opening any file and said "the file name or extension is too long" and they were unable to open the file. This disappoints users by not allowing them to transfer files to any other folder. While analyzing the issue, we have come up with a series of solutions that may help alleviate the issue and allow users to transfer files easily. If you are in a similar situation, please see this post for more information. Source: https
 How to turn off Windows Defender Smart Screen in Windows 11, 10?
Apr 26, 2023 am 11:46 AM
How to turn off Windows Defender Smart Screen in Windows 11, 10?
Apr 26, 2023 am 11:46 AM
Many Windows users have recently reported that they were annoyed when Windows Defender SmartScreen warned users not to launch applications that were not recognized by Microsoft Windows and they had to click on the "Run anyway" option every time. Windows users are unsure what they can currently do to avoid or disable it. After researching the issue, we found that Windows Defender functionality on the system can be disabled through the Settings application or the Local Group Policy Editor or by adjusting the registry files. By doing this, users will no longer have to face the defender SmartScreen. If your system also encounters
 Detailed guide to 15 Python editors/IDEs, there is always one that suits you!
Aug 09, 2023 pm 05:44 PM
Detailed guide to 15 Python editors/IDEs, there is always one that suits you!
Aug 09, 2023 pm 05:44 PM
There is no better way to write Python code than using an integrated development environment (IDE). Not only can they make your work simpler and more logical, they can also improve programming experience and efficiency. Everyone knows this. The question is, how to choose the best Python development environment among the many options.
 Essential software for C language programming: five good helpers recommended for beginners
Feb 20, 2024 pm 08:18 PM
Essential software for C language programming: five good helpers recommended for beginners
Feb 20, 2024 pm 08:18 PM
C language is a basic and important programming language. For beginners, it is very important to choose appropriate programming software. There are many different C programming software options on the market, but for beginners, it can be a bit confusing to choose which one is right for you. This article will recommend five C language programming software to beginners to help them get started quickly and improve their programming skills. Dev-C++Dev-C++ is a free and open source integrated development environment (IDE), especially suitable for beginners. It is simple and easy to use, integrating editor,
 Fix the issue where Windows 11/10 login options are disabled
May 07, 2023 pm 01:10 PM
Fix the issue where Windows 11/10 login options are disabled
May 07, 2023 pm 01:10 PM
Many Windows users have encountered the problem of being unable to log in to Windows 11/10 systems due to failed login attempts or multiple system shutdowns. Users are frustrated because there is nothing they can do about it. Users may forget their PIN code to log into the system, or experience lags when using or installing software, and the system may be forced to shut down multiple times. Therefore, we have compiled a list of the best available solutions that will undoubtedly help consumers solve this problem. To learn more, continue reading this article. Note: Before doing this, make sure you have your system's administrator credentials and Microsoft account password to reset your PIN. If not, wait an hour or so and try with the correct PIN
 Introduction to Go language development tools: a list of essential tools
Mar 29, 2024 pm 01:06 PM
Introduction to Go language development tools: a list of essential tools
Mar 29, 2024 pm 01:06 PM
Title: Introduction to Go language development tools: List of essential tools In the development process of Go language, using appropriate development tools can improve development efficiency and code quality. This article will introduce several essential tools commonly used in Go language development, and attach specific code examples to allow readers to understand their usage and functions more intuitively. 1.VisualStudioCodeVisualStudioCode is a lightweight and powerful cross-platform development tool with rich plug-ins and functions.
 How to use ClipChamp: the free Windows 11 video editor
Apr 20, 2023 am 11:55 AM
How to use ClipChamp: the free Windows 11 video editor
Apr 20, 2023 am 11:55 AM
Remember Windows MovieMaker on Windows 7? Since discontinuing Windows MovieMaker, Microsoft hasn't launched any real movie makers. On the other hand, they tried to revamp the Photos app with a small and lightweight built-in video editor. After a long time, Microsoft launched Clipchamp, a better video processor for all Windows 11 devices. In this article, we’ll take a deep dive into how to get everything from the Clipchamp app on your Windows 11 device. How to use Clipchamp – Detailed tutorials are available
 Ten Python IDEs and code editors highly recommended!
Apr 19, 2023 pm 07:04 PM
Ten Python IDEs and code editors highly recommended!
Apr 19, 2023 pm 07:04 PM
Python is a very easy to learn, powerful programming language. Python includes efficient high-level data structures, providing simple and efficient object-oriented programming. The learning process of Python is indispensable without an IDE or code editor, or an integrated development editor (IDE). These Python development tools help developers speed up development using Python and improve efficiency. An efficient code editor or IDE should provide plug-ins, tools and other features that can help developers develop efficiently. 1.VimVim can be said to be the best IDE for Python. Vim is an advanced text editor designed to provide the actual Unix editor 'Vi' functionality and support more and more complete features.