

Fix: Microphone not working issue on Windows 11

The microphone is one of the most important components of your PC, and it can be frustrating when you encounter problems with it. Additionally, with the launch of the new Windows 11, many users are confused on how to fix any microphone-related issues.
Whether you're participating in or hosting an online team meeting, taking an online course, or just connecting with friends online via Skype, Discord, Zoom, or Microsoft Teams, you need a good and effective microphone. However, when the microphone is not working properly for some reason, you may face communication difficulties.
While making a voice call, video chat, or recording audio, the microphone may keep cutting off, causing audio interference, going undetected, or it may stop working entirely. This issue may occur with your system microphone, headset, external microphone (USB), or both.
While Windows 11 has tons of features and an easy-to-use interface, if you're not yet comfortable with the new operating system, you might be confused by some of the troubleshooting procedures. This article will guide you on how to fix microphone issues on your Windows 11 PC. Let's see how.
Method One: Check Privacy Settings
If you disable the microphone from the privacy settings, applications on your system may not be able to access the microphone. Follow these steps to enable the microphone in privacy settings:
Step 1: Simultaneously press the Win I keys on your keyboard to open Settingswindow.
Step 2: In the Settings app, go to the left side of the pane and click Privacy & Security.
Step 3: Now, navigate to the right side, scroll down and find App permissions.
Click Microphone below it

##Step 4:On the right of the next screen side, go to Let the app access your microphone and check if it's turned on.
If not, move the toggle switch to the right to turn it on.Step 5: Now, click Let apps access your microphone to expand the section.
You will find a list of all Windows applications. Find your app and enable it to access the microphone if it's not already enabled.
*Note - The applications listed here are only new applications and not all applications installed on the system, so it is recommended to default to Enable microphone permission for all apps. Follow these steps to enable microphone access for all desktop applications:
Step 6: Scroll down and go to Options-Let desktop applications access your microphone .
Move the slider to the right to turn it on.
Step 1: Press the Win R keys simultaneously on your keyboard to launch the Run Command window.
Step 2: In the Run command search box, type mmsys.cpl and press Enter to open the sound dialog box.

Step 3: In the "Sound" dialog box, go to "Recording" tab and select the correct Microphone.
Now, press theSet Defaults button at the bottom.

Step 4: Also, double-click your microphone to open its properties dialog box.
Step 5: Here, select the "Levels" tab and increase the Speaker volume level to maximum.

Step 6: You can also increase the Microphone Boost level if available.
PressApply and then OKSave changes and exit.
You have now successfully set the desiredMicrophone as the default microphone, which should resolve all microphone issues on your Windows 11 PC.
Method 3: If Others Can't Hear You
While first you have to check that the headphones are properly connected to your device and this won't cause problems, if this doesn't help, check your The headset is selected as the input device and tests your microphone. That's it:
Step 1: Right-click Start and select Settings from the menu.
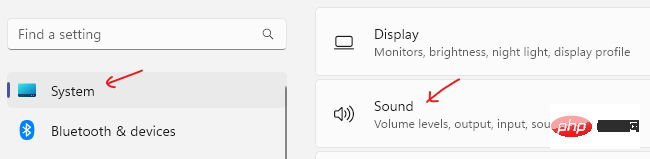
Step 2: In the "Settings" application, click the "System" option on the left.
Step 3: Now, go to the right side and click on Sounds.
Step 4:On the right side of the next screen, scroll down a little and under the "Enter" section , go to "Select a device to use for speaking or recording."
Here, click the drop-down menu next to it and check if your headset is selected as the default microphone.

*NOTE –If not, you can follow Step 1 in Method 2 to 3Set it as default.
Step 5: If your headset has not been added as an input device yet, click Pair a new input device next to Add device .
Step 6: Now, click on Microphone to open its settings.
Step 7: In the right pane of the next screen, under the General section, click next to Audio of the drop-down menu (Allow applications and windows to use this device for audio) and set it to "Allow".
Step 8: Now, go to Input settings and navigate to Test your microphone.
Click the Start Test button to check your microphone and speak for at least 5 seconds.
Step 9: Click Stop the test when finished.
This can help you resolve any microphone issues on your Windows 11 PC.
Method 5: What to do if you have microphone issues on Skype
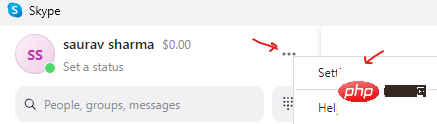
Step 1:LaunchSkype and in the upper left corner, Click on the three horizontal dots ( More ) next to your profile name.
Select a setting from the list.
Step 2: In the Skype Settings window, click Audio and Video options.
Step 3: Now, go to the right side, scroll down and under Audio, go to Microphone.
Here, select your headphones from the drop-down list next to it.

Step 4: Also select the speakers or headphones of your choice in the Speakers section.
Step 5: You can also click Test Audio to check the selected speaker or microphone.
You can now communicate using Skype and others should be able to hear you.
Method 6: Run the Windows Recording Audio Troubleshooter
Step 1:Press the Win I shortcut key on your keyboard to open " Settings"App.
Step 2: In the Settings window, click System Options on the left.
Step 3: Now, move to the right side and click on Sound.
Step 4: On the right side of the Sounds screen, scroll down to the Advanced section.
Here, under the Resolve common sound problems option, click Input Devices.

Step 5: RecordingAudioThe troubleshooter will now start running.
Step 6: It will display a screen where you have to select the device that you have to troubleshoot.
SelectMicrophone.
Step 7: The troubleshooter will now start detecting any issues.
If it finds any issues, it will automatically apply the fix.
When finished, close the Troubleshooter and Settings windows. Restart the system and the microphone should now be working properly.
Method 7: Remove Echo from the Microphone
It can be annoying if everything you speak on the microphone has an echo. While using headphones can solve the problem of your microphone picking up sound from your PC speakers, it may not always help. It's possible that some audio settings are turned on and causing the problem. Follow these instructions to get rid of the echo issue:
Step 1: Simultaneously press the Win R keys on your keyboard to open Run Command.
Step 2: In the Run Command window, type mmsys.cpl in the search bar and press Enter to open the Sound window.
Step 3: In the "Sound" dialog box, go to "Recording" tab and double-click your Microphone to open the Properties window.
Step 4:Now, click on the Listen tab and check if the box next to "Listen to this device" is unchecked .
If checked, uncheck the box and press OK to save changes and exit.

#Selecting this field may cause your voice to echo on the microphone. Unchecking this field may help resolve microphone issues on Windows 11 PCs.
Now, listen to the sound produced by the microphone. When finished, uncheck the box and press OK to exit.
Method 8: Check if the device driver is disabled
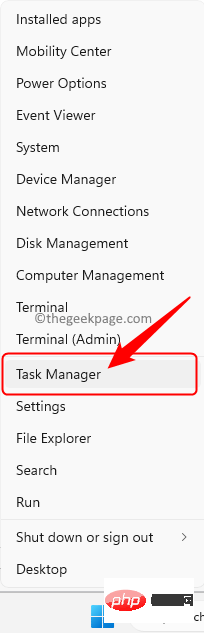
Step 1:Right-click the Start menu and select Device Manager .

Step 2: In the "Device Manager" window, go to "Audio Input and Output " section and click it to expand it.
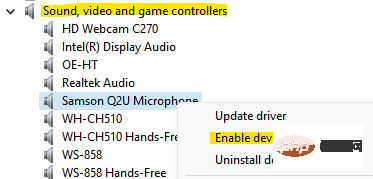
Right-click on your Microphone and find the Enable device option. If you can see the Enable device option in the menu, it means your microphone is disabled.
Just click Enable device
Once done, close the Device Manager window and restart your PC, the microphone issue should get fixed.
Method 9: Update Device Driver
Step 1: Press the Win R hotkey to open the "Run" commandwindow.
Step 2: In the Run command search bar, type devmgmt.msc and press Enter to open Device ManagerWindow.
Step 3: In the Device Manager window, click to expand the Audio Input and Output sections.
Right-click Microphone and select Update Driver from the right-click menu.

Step 4: In the Update Driver window, click Automatically search for drivers Options.

Now Windows will start detecting any available updates for the driver. If available, it will automatically update it to the latest version.
When finished, exit the Device Manager window and restart your PC. Now, check if the microphone issue is resolved.
If the problem is with the Xbox microphone, go to Settings>Game>Capture> Capturing audio while recording gameplay>Disable.
If this doesn't work, then you must check if the audio hardware is working properly. For example, if you are using an external microphone like a USB microphone, then remove it from the port and plug it into a different port to check if it is working properly now. It is recommended to plug the USB microphone directly into the device port without using an extender. Make sure the microphone isn't loosely connected, the wires or cables aren't damaged, the microphone is closer to your mouth, or the microphone's physical mute isn't turned on.
Alternatively, you can also try recording your voice to double-check whether there is indeed a problem with the microphone or other issues. If the microphone problem only occurs while playing games or Discord, Zoom or other similar applications, then use a specific application to resolve the microphone issue.
Also, this may sound obvious, but make sure there are no loose connections.
The above is the detailed content of Fix: Microphone not working issue on Windows 11. For more information, please follow other related articles on the PHP Chinese website!

Hot AI Tools

Undresser.AI Undress
AI-powered app for creating realistic nude photos

AI Clothes Remover
Online AI tool for removing clothes from photos.

Undress AI Tool
Undress images for free

Clothoff.io
AI clothes remover

Video Face Swap
Swap faces in any video effortlessly with our completely free AI face swap tool!

Hot Article
Hot Tools

Notepad++7.3.1
Easy-to-use and free code editor

SublimeText3 Chinese version
Chinese version, very easy to use

Zend Studio 13.0.1
Powerful PHP integrated development environment

Dreamweaver CS6
Visual web development tools

SublimeText3 Mac version
God-level code editing software (SublimeText3)
Hot Topics
 1655
1655
 14
1414
52
1307
25
1253
29
1228
24
14
1414
52
1307
25
1253
29
1228
24

 Hyperx headset microphone has no sound
Feb 16, 2024 am 09:12 AM
Hyperx headset microphone has no sound
Feb 16, 2024 am 09:12 AM
The quality of hyperx headphones has always been very good, but some users find that the microphone of the headphones has no sound when using it. There are many possible reasons for this situation. Here are some of them. Several kinds. There is no sound from the hyperx headset microphone. 1. Connect and check whether the microphone is fully inserted into the headphone jack. You can try plugging and unplugging it a few times. 2. If other equipment conditions permit, you can plug the headset into other normally operating equipment to see if it can be used normally and whether the audio link is normal. 3. Audio settings Check the audio settings to make sure that the speakers and microphone are enabled normally and not muted or at a low volume. 4. To disable the software, you can try disabling the audio adapter.
 Your microphone is muted by system settings on Google Meet on Windows 10/11
May 12, 2023 pm 11:58 PM
Your microphone is muted by system settings on Google Meet on Windows 10/11
May 12, 2023 pm 11:58 PM
GoogleMeet is used for communication and collaboration purposes. High-quality video conferences can be held where people can talk and share their views. But a few users face microphone issues, and the most common error is "Your microphone has been muted by the system setting." If this happens, others will not be able to hear you. But don’t panic this problem can be solved. A few reasons for microphone issues are, your microphone gets muted, changes in microphone settings, outdated drivers, etc. In this article, we will see different ways on how to fix “Your microphone is muted by the system” Settings issue in Windows 10. Method One: Check if the Microphone is Mute Before jumping into different solutions, just check the screen when you are in a meeting
 Logitech headset microphone is silent, please fix it
Jan 18, 2024 am 08:03 AM
Logitech headset microphone is silent, please fix it
Jan 18, 2024 am 08:03 AM
Some users may encounter the problem of no sound from the headset microphone when using Logitech drivers. Check whether the headset microphone cable is plugged in properly or whether the headset is muted. This can be solved by turning it on in the settings. There is no sound from the Logitech-driven headset microphone: 1. Users need to first check whether the headset microphone is plugged into the wrong wire. 2. If it is wrong, just plug it in again. If not, then you need to check whether the headset microphone is broken. 3. Open "Settings" and search for "Control Panel" in "Settings". 4. Select "Hardware and Sound". 5. Click "Manage Audio Devices". 6. After entering the interface, click the "Recording" option and double-click "Microphone". 7. After entering, click "Level" to increase the microphone volume to the maximum. If it is not loud enough, you can strengthen the microphone settings. 8. Last look
 How to solve the microphone mute problem in Win10 Knives Out
Jan 11, 2024 am 10:24 AM
How to solve the microphone mute problem in Win10 Knives Out
Jan 11, 2024 am 10:24 AM
Knives Out is a very popular game on Windows 10 computers. Many friends like to play it with their friends, but many of them encounter the situation where the microphone has no sound, so what should I do? Let’s take a look at the solution below. What to do if there is no sound from the Knives Out microphone in Windows 10: 1. Enter the Knives Out game interface and turn on the microphone switch. 2. Enter the game settings and check "My Microphone" in the sound settings. 3. If it still doesn’t work, click Start in the lower left corner and open the “Control Panel”. 4. After opening, click "Hardware and Sound" and then "Manage Audio Devices". 5. Select the "Recording" tab and double-click "Microphone". 6. Click "Use this device". 7. Then turn up the volume.
 Quick way to check hardware ID in Device Manager
May 20, 2023 am 10:52 AM
Quick way to check hardware ID in Device Manager
May 20, 2023 am 10:52 AM
Hardware ID is an identifier from your PC or all hardware devices connected to it, therefore, create a unique identification for these devices. This is a quick way for the operating system to detect the device and install related software. Hardware ID includes bus type, hardware manufacturer and device ID. Since in some cases a device may have different variants, you can also find subsystem identifiers and revision details along with the usual hardware identifiers. This shows the differences between devices. So, how does it help you? This will help you identify the device manufacturer and find relevant device drivers. So if you're looking for a driver for a specific piece of hardware, it's best to know its hardware ID. In this case, you can view the hardware ID in Device Manager. Please follow the
 Why can't my computer detect the microphone?
Sep 12, 2023 pm 05:11 PM
Why can't my computer detect the microphone?
Sep 12, 2023 pm 05:11 PM
The reason why the microphone is not detected on the computer may be a microphone connection problem, a microphone driver problem, a system settings problem, a microphone failure, an operating system problem, a firewall or security software problem, etc. Detailed introduction: 1. Microphone connection problem, please make sure the microphone is correctly connected to the computer, check whether the microphone is plugged into the correct audio jack, and make sure the connection is firm. If you are using a USB microphone, make sure the USB plug is correctly plugged into the computer's USB interface. , the plug is not inserted to the bottom, which may cause the computer to be unable to detect the microphone, etc.
 What's the fix for missing WiFi icon in Windows 11?
May 09, 2023 pm 10:22 PM
What's the fix for missing WiFi icon in Windows 11?
May 09, 2023 pm 10:22 PM
Some users have reported that the Wi-Fi option or icon is missing on their Windows 11 PC. Missing or corrupt network drivers or Windows operating system or hardware issues can be some of the reasons why this issue pops up on Windows 11 PC. If you are unable to find the WiFi icon in the system tray on your PC, then we have listed some methods that can help you fix this issue and get back the missing Wi-Fi icon. Go ahead and try the fixes mentioned in this article one by one in the order mentioned below. Before trying to fix it, check if there are any buttons/physical switches with a WiFi icon on your laptop. If there are any such switches, press them once to enable the WiFi option. Fix 1 – Re
 Can't allow access to camera and microphone in iPhone
Apr 23, 2024 am 11:13 AM
Can't allow access to camera and microphone in iPhone
Apr 23, 2024 am 11:13 AM
Are you getting "Unable to allow access to camera and microphone" when trying to use the app? Typically, you grant camera and microphone permissions to specific people on a need-to-provide basis. However, if you deny permission, the camera and microphone will not work and will display this error message instead. Solving this problem is very basic and you can do it in a minute or two. Fix 1 – Provide Camera, Microphone Permissions You can provide the necessary camera and microphone permissions directly in settings. Step 1 – Go to the Settings tab. Step 2 – Open the Privacy & Security panel. Step 3 – Turn on the “Camera” permission there. Step 4 – Inside, you will find a list of apps that have requested permission for your phone’s camera. Step 5 – Open the “Camera” of the specified app