

How to use Mission Control in macOS

What is mission control?
If you have used virtual desktops on a Windows computer, Mission Control is essentially the same. This feature displays all open windows on your desktop in a single page. You can have multiple desktops on your machine, and these virtual desktops are called Spaces.
#How to use Mission Control on macOS?
There are many ways to call Mission Control. The easiest way is to swipe up on the trackpad with three fingers. Swipe down to exit Mission Control. You can also enter Mission Control by pressing the F3 key on your MacBook and press F3 again to turn it off. Another keyboard shortcut you can use is the Control up arrow key and the Control down arrow key to exit it, this even works with third-party keyboards like those used with an iMac or Mac Mini.
If your Mac has a Touch Bar, you can access Mission Control by pressing the button on the right end to view the function bar.
Tip: There is a Mission Control shortcut in the Applications folder that you can access from the Finder. You can add it to the Dock for quick access.
How to create new spaces in Mission Control and switch between spaces
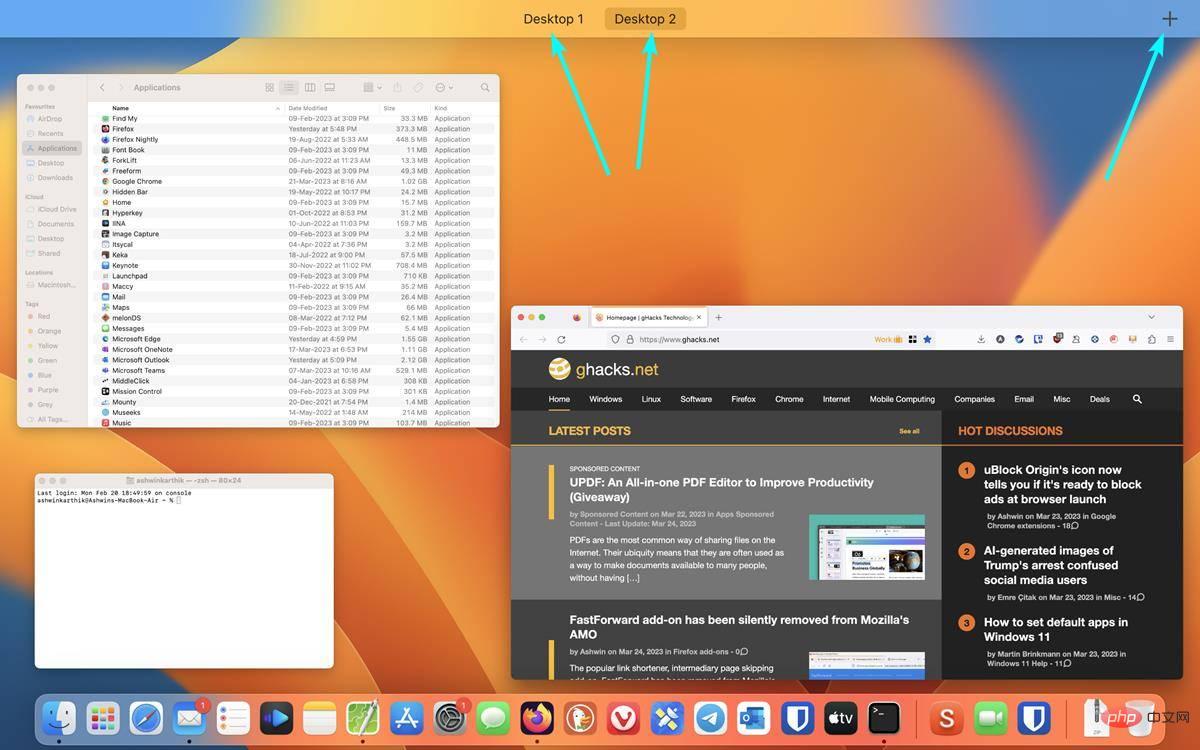
I told you, you can have multiple desktops, spaces. macOS supports up to 16 spaces. To create one, simply open Mission Control via one of the methods above and click the button at the top of the screen. This will add a new virtual desktop. Each space has its own thumbnail and name (Desktop 1, Desktop 2, etc.).
Click and drag a space’s thumbnail to rearrange the order in which they appear, which is especially useful when you switch between them.
To switch between spaces on your Mac, swipe left or right on the trackpad with 3 or 4 fingers (2 on Magic Mouse). It's a bit like sliding the home bar (at the bottom) on your iPhone to switch between apps. The keyboard shortcut for moving between spaces is the Ctrl right or left arrow key. You can also switch to a different space from Mission Control view by clicking on the desktop you want to access.
How to open an application in a virtual desktop in macOS
Switch to a space and open an application, and its window will be restricted to that space. You can move apps from one space to another by clicking and dragging them in the Mission Control view. It also supports full-screen applications, if you enable the option after clicking the green button in the upper left corner. However, a full-screen application is created in a new space and takes up the entire thumbnail in its space, i.e. you will not be able to view other application windows in the thumbnail. Likewise, you can also use split view for apps in a space via the green button on the title bar, which allows you to display 2 app windows side by side.
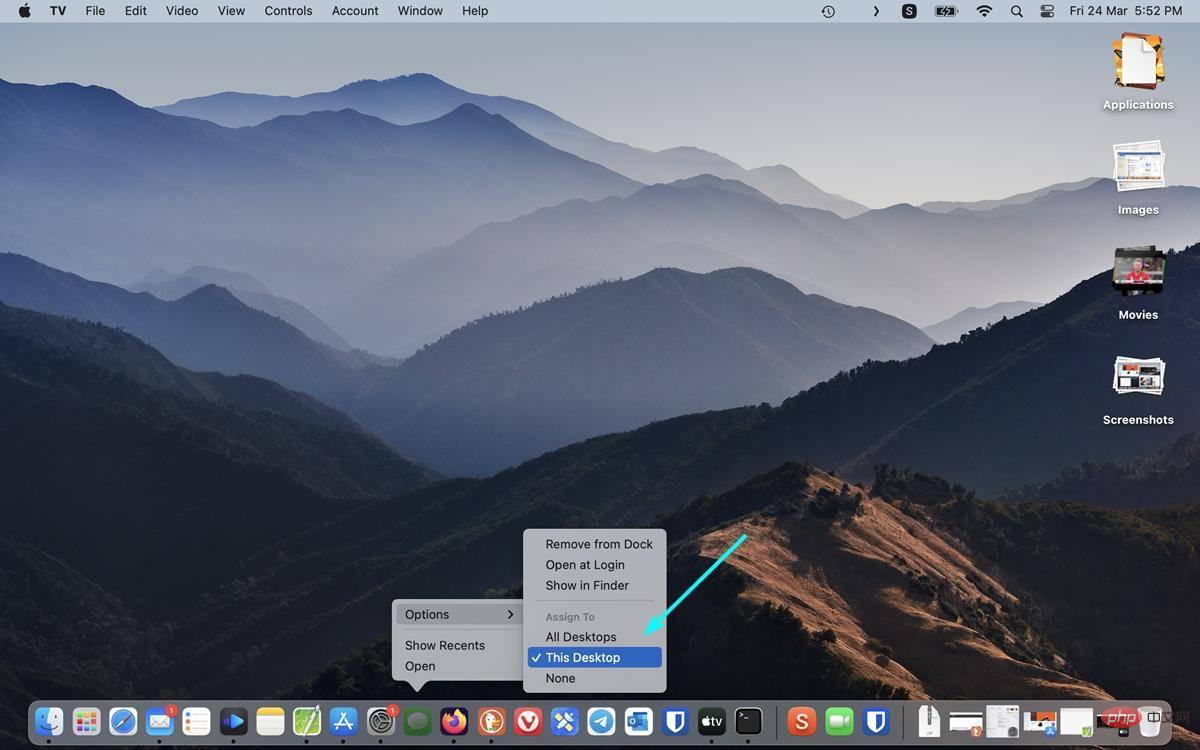
Mission Control lets you copy text, images, files, and folders between spaces using regular shortcuts like Command C and Command V Paste content into different applications across virtual desktops. macOS allows you to open apps in a specific space. Let's say you have 2 virtual desktops, one for work and another for personal use. Here's how you can assign apps to a specific app. For example, let's try setting the Messages app to open in a second desktop. To do this, you need to switch to that space. Then, right-click the Messages app on the dock and select Options > (Assign to) this desktop. If you have multiple monitors, you need to select the corresponding number to assign it to that monitor.
Exit the Messages app, switch to the first desktop, and try opening the app again. This time, it automatically switches to the second desktop with the focus on the application. To unassign an app from the space, just right-click on it again, select Options and set it to None. You can also specify an application to open on all desktops.
Mission Control Tips and Tricks
You can customize each space with your own wallpaper, set a different background for your desktop, use the Ctrl-click menu and select Change wallpaper.
If you use Mission Control, you probably know that it displays all windows of open applications. For example, if you have 2 Safari windows open, Mission Control will display them as 2 windows. You can change this setting from the Settings app > Desktop & Dock > Mission Control page. Toggles the option to show "Group windows by application," which places windows from the same application in a cascading style view.
To close a space, access Mission Control and hover your cursor over one of the thumbnails, an X button will appear. Click it to exit the space and any open windows in it will be moved to another window, so you won't lose any unsaved work.
The above is the detailed content of How to use Mission Control in macOS. For more information, please follow other related articles on the PHP Chinese website!

Hot AI Tools

Undresser.AI Undress
AI-powered app for creating realistic nude photos

AI Clothes Remover
Online AI tool for removing clothes from photos.

Undress AI Tool
Undress images for free

Clothoff.io
AI clothes remover

Video Face Swap
Swap faces in any video effortlessly with our completely free AI face swap tool!

Hot Article
Hot Tools

Notepad++7.3.1
Easy-to-use and free code editor

SublimeText3 Chinese version
Chinese version, very easy to use

Zend Studio 13.0.1
Powerful PHP integrated development environment

Dreamweaver CS6
Visual web development tools

SublimeText3 Mac version
God-level code editing software (SublimeText3)
Hot Topics


 3 tips to easily customize your Mac computer name, host name and Bonjour name
Mar 06, 2024 pm 12:20 PM
3 tips to easily customize your Mac computer name, host name and Bonjour name
Mar 06, 2024 pm 12:20 PM
Many Mac users tend to keep the default name of their device and may never consider changing it. Many people choose to stick with the name from the initial setup, such as "Johnny's MacBook Air" or simply "iMac." Learning how to change the name of your Mac is a very useful skill, especially when you have multiple devices, as it can help you quickly distinguish and manage them. Next, we will teach you step by step how to change the computer name, host name and Bonjour name (local host name) in macOS system. Why should you change your Mac name? Changing the name of your Mac can not only show your personality, but also help improve the user experience: Personalize your Mac: The default name may not be to your taste, change it to a name you like.
 What software is crystaldiskmark? -How to use crystaldiskmark?
Mar 18, 2024 pm 02:58 PM
What software is crystaldiskmark? -How to use crystaldiskmark?
Mar 18, 2024 pm 02:58 PM
CrystalDiskMark is a small HDD benchmark tool for hard drives that quickly measures sequential and random read/write speeds. Next, let the editor introduce CrystalDiskMark to you and how to use crystaldiskmark~ 1. Introduction to CrystalDiskMark CrystalDiskMark is a widely used disk performance testing tool used to evaluate the read and write speed and performance of mechanical hard drives and solid-state drives (SSD). Random I/O performance. It is a free Windows application and provides a user-friendly interface and various test modes to evaluate different aspects of hard drive performance and is widely used in hardware reviews
 CrystalDiskinfo usage tutorial-What software is CrystalDiskinfo?
Mar 18, 2024 pm 04:50 PM
CrystalDiskinfo usage tutorial-What software is CrystalDiskinfo?
Mar 18, 2024 pm 04:50 PM
CrystalDiskInfo is a software used to check computer hardware devices. In this software, we can check our own computer hardware, such as reading speed, transmission mode, interface, etc.! So in addition to these functions, how to use CrystalDiskInfo and what exactly is CrystalDiskInfo? Let me sort it out for you! 1. The Origin of CrystalDiskInfo As one of the three major components of a computer host, a solid-state drive is the storage medium of a computer and is responsible for computer data storage. A good solid-state drive can speed up file reading and affect consumer experience. When consumers receive new devices, they can use third-party software or other SSDs to
 How to set the keyboard increment in Adobe Illustrator CS6 - How to set the keyboard increment in Adobe Illustrator CS6
Mar 04, 2024 pm 06:04 PM
How to set the keyboard increment in Adobe Illustrator CS6 - How to set the keyboard increment in Adobe Illustrator CS6
Mar 04, 2024 pm 06:04 PM
Many users are using the Adobe Illustrator CS6 software in their offices, so do you know how to set the keyboard increment in Adobe Illustrator CS6? Then, the editor will bring you the method of setting the keyboard increment in Adobe Illustrator CS6. Interested users can take a look below. Step 1: Start Adobe Illustrator CS6 software, as shown in the figure below. Step 2: In the menu bar, click the [Edit] → [Preferences] → [General] command in sequence. Step 3: The [Keyboard Increment] dialog box pops up, enter the required number in the [Keyboard Increment] text box, and finally click the [OK] button. Step 4: Use the shortcut key [Ctrl]
 How to set up WeChat Mac to automatically convert voice messages into text - How to set up voice to text conversion
Mar 19, 2024 am 08:28 AM
How to set up WeChat Mac to automatically convert voice messages into text - How to set up voice to text conversion
Mar 19, 2024 am 08:28 AM
Recently, some friends have consulted the editor about how to set up WeChat Mac to automatically convert voice messages into text. The following is a method for setting up WeChat Mac to automatically convert voice messages into text. Friends in need can come and learn more. Step 1: First, open the Mac version of WeChat. As shown in the picture: Step 2: Next, click "Settings". As shown in the picture: Step 3: Then, click "General". As shown in the picture: Step 4: Then check the option "Automatically convert voice messages in chat to text". As shown in the picture: Step 5: Finally, close the window. As shown in the picture:
 How to display thumbnails in Vscode_How to display thumbnails in Vscode
Apr 02, 2024 pm 02:43 PM
How to display thumbnails in Vscode_How to display thumbnails in Vscode
Apr 02, 2024 pm 02:43 PM
1. First enter Visual Studio Code and click [File] in the upper left corner. 2. Then click [Preferences]. 3. Click the [Settings] item. 4. Then click [Text Editor-Thumbnail]. 5. Finally, in the thumbnail item, turn on [Control whether to display thumbnails].
 3 Ways to Convert HEIC Photos to JPG on Mac
Mar 15, 2024 pm 08:43 PM
3 Ways to Convert HEIC Photos to JPG on Mac
Mar 15, 2024 pm 08:43 PM
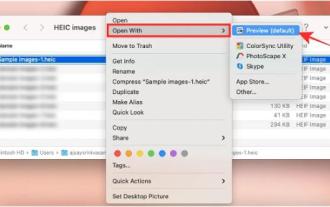
By default, iPhone takes photos from the camera in HEIC format. HEIC stands for High Efficiency Image Container and can hold more pixel data than PNG or JPG files, taking up significantly less space on iPhone storage compared to other formats. These files work best on iPhones but are not widely accepted on the internet because they often result in blurry/grainy pictures when you share them with non-Apple devices. To ensure that HEIC images are compatible on other devices, you may need to convert them to JPG format. This article will introduce how to convert HEIC images to JPG on Mac. How to Convert HEIC Photos to JPG on Mac [3 Methods] Method
 How to resolve an incompatible software attempt to load with Edge?
Mar 15, 2024 pm 01:34 PM
How to resolve an incompatible software attempt to load with Edge?
Mar 15, 2024 pm 01:34 PM
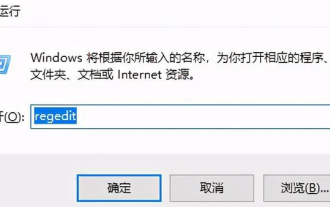
When we use the Edge browser, sometimes incompatible software attempts to be loaded together, so what is going on? Let this site carefully introduce to users how to solve the problem of trying to load incompatible software with Edge. How to solve an incompatible software trying to load with Edge Solution 1: Search IE in the start menu and access it directly with IE. Solution 2: Note: Modifying the registry may cause system failure, so operate with caution. Modify registry parameters. 1. Enter regedit during operation. 2. Find the path\HKEY_LOCAL_MACHINE\SOFTWARE\Policies\Micros