

What to do if win10 fails to install nvidia driver

Solution to the failure to install the nvidia driver in win10: 1. Press "Win R" to bring up the run dialog box, enter "winver" and press Enter to check the system version; 2. Upgrade to the latest version through Win10 automatic update or Download the latest Win10 image, and then upgrade to the latest Win10 version through the image; 3. Download the latest graphics driver, save it to the hard disk, wait until the system is installed and enter the system interface, unplug the network cable, and then run the pre-downloaded graphics driver Just install the driver.

The operating environment of this tutorial: Windows 10 system, Dell G3 computer.
What should I do if the nvidia driver fails to be installed on win10?
About how to deal with the inability to install the NVIDIA driver in Win10
You will encounter an error message when installing the NVIDIA driver, such as the following picture:

means "The NVIDIA graphics driver is not compatible with this version of Windows."
How to solve?
First of all, this prompt is divided into two situations
1. The Win10 system version is too old. For example, the Win10 system installed a few years ago has never been upgraded, or the system has never been upgraded. A lower version was installed when installing the system (I have encountered this situation). NVIDIA's latest driver requires at least Windows 10 1709 or above.
How to check the version of your system?
"Win R" brings up the run dialog box, enter "winver" and press Enter to view the version.

Solution: Automatically upgrade to the latest version through Win10, or download the latest Win10 image, and then The image is upgraded to the latest Win10 version.
The above situation is relatively rare now, and the more common situation should be the following situation.
2. Installing the latest Windows 10 system is caused by automatically installing the GeForce DCH graphics driver through Windows Update immediately after logging in for the first time. The DCH driver is also known as the "Universal Windows Driver" which leverages the Windows UWP platform driver while also offering simpler updates and maintainability. Once installed in this way, if you try to download and update the driver through NVIDIA's official website, or download and update through a third-party automatic update software, you will be prompted with an error and cannot update.
Solution:
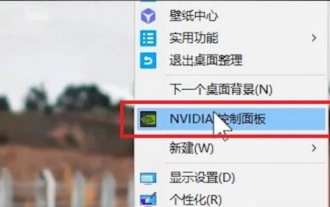
①Before installing the operating system, download the latest graphics card driver and save it to the hard disk (non-system partition)/U disk/ Under the mobile hard disk, wait until the system is installed and enter the system interface to unplug the network cable , and then run the pre-downloaded graphics card driver to install the driver. This prompt will not appear when you download the new driver.
②You can also use the NVIDIA GeForce Experience application to bypass this problem. This method validates as it is able to get the UWD version of the driver. However, you must create an NVIDIA account to use GeForce Experience. Although it is a little more troublesome, it can solve the problem. (Suitable for users who have automatically updated the graphics card driver after the system is installed and do not want to reinstall the system)
③Baidu"Display Driver Uninstaller( DDU)"This is a tool to completely uninstall the graphics card. After downloading, run the program to clean and uninstall the graphics card driver. Note that you must select the graphics card driver here. After cleaning, restart, unplug the network cable, and then install the downloaded official graphics card driver. .

For more related knowledge, please visit the FAQ column!
The above is the detailed content of What to do if win10 fails to install nvidia driver. For more information, please follow other related articles on the PHP Chinese website!

Hot AI Tools

Undresser.AI Undress
AI-powered app for creating realistic nude photos

AI Clothes Remover
Online AI tool for removing clothes from photos.

Undress AI Tool
Undress images for free

Clothoff.io
AI clothes remover

Video Face Swap
Swap faces in any video effortlessly with our completely free AI face swap tool!

Hot Article
Hot Tools

Notepad++7.3.1
Easy-to-use and free code editor

SublimeText3 Chinese version
Chinese version, very easy to use

Zend Studio 13.0.1
Powerful PHP integrated development environment

Dreamweaver CS6
Visual web development tools

SublimeText3 Mac version
God-level code editing software (SublimeText3)
Hot Topics
 1668
1668
 14
1427
52
1329
25
1273
29
1256
24
14
1427
52
1329
25
1273
29
1256
24

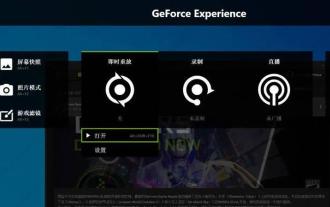 How to solve the problem that the NVIDIA graphics card screen recording shortcut key cannot be used?
Mar 13, 2024 pm 03:52 PM
How to solve the problem that the NVIDIA graphics card screen recording shortcut key cannot be used?
Mar 13, 2024 pm 03:52 PM
NVIDIA graphics cards have their own screen recording function. Users can directly use shortcut keys to record the desktop or game screen. However, some users reported that the shortcut keys cannot be used. So what is going on? Now, let this site give users a detailed introduction to the problem of the N-card screen recording shortcut key not responding. Analysis of the problem of NVIDIA screen recording shortcut key not responding Method 1, automatic recording 1. Automatic recording and instant replay mode. Players can regard it as automatic recording mode. First, open NVIDIA GeForce Experience. 2. After calling out the software menu with the Alt+Z key, click the Open button under Instant Replay to start recording, or use the Alt+Shift+F10 shortcut key to start recording.
 Does Logitech ghub driver not support win7? -Why can Logitech ghub driver only be installed on the c drive?
Mar 18, 2024 pm 05:37 PM
Does Logitech ghub driver not support win7? -Why can Logitech ghub driver only be installed on the c drive?
Mar 18, 2024 pm 05:37 PM
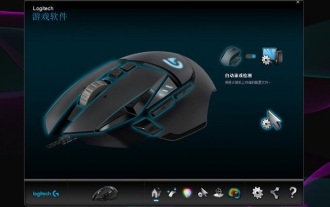
Does Logitech ghub driver not support win7? Not compatible. Since Windows 7 has stopped updating and is no longer Microsoft's main operating system, many new software no longer supports it, such as Logitech ghub. The main interface of the Logitech driver: 1. The main software interface is on the left. The three buttons are lighting, buttons, and sensitivity settings. 2. In the settings of the lighting interface, the general special effects are relatively conventional, and the audio visual effects are the highlight. They can change color according to the sound frequency, and can be set according to the high, middle and bass bands, with different colors and effects. 3. In button settings, users can edit them here according to their special requirements. 4. In the sensitivity settings, many users will have some of their own settings. They can add the DPI speed switching point by themselves, but
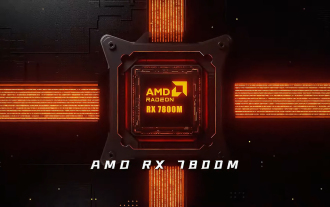 AMD Radeon RX 7800M in OneXGPU 2 outperforms Nvidia RTX 4070 Laptop GPU
Sep 09, 2024 am 06:35 AM
AMD Radeon RX 7800M in OneXGPU 2 outperforms Nvidia RTX 4070 Laptop GPU
Sep 09, 2024 am 06:35 AM
OneXGPU 2 is the first eGPUto feature the Radeon RX 7800M, a GPU that even AMD hasn't announced yet. As revealed by One-Netbook, the manufacturer of the external graphics card solution, the new AMD GPU is based on RDNA 3 architecture and has the Navi
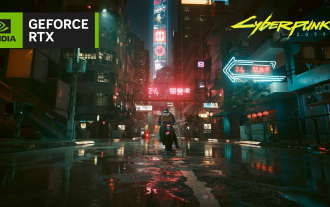 Cyberpunk 2077 sees up to a 40% performance boost with new optimized path tracing mod
Aug 10, 2024 pm 09:45 PM
Cyberpunk 2077 sees up to a 40% performance boost with new optimized path tracing mod
Aug 10, 2024 pm 09:45 PM
One of the standout features ofCyberpunk 2077is path tracing, but it can put a heavy toll on performance. Even systems with reasonably capable graphics cards, such as the RTX 4080 (Gigabyte AERO OC curr. $949.99 on Amazon), struggle to offer a stable
 Steps to restore Logitech driver to default configuration
Feb 28, 2024 am 11:04 AM
Steps to restore Logitech driver to default configuration
Feb 28, 2024 am 11:04 AM
Facing the Logitech driver that cannot be used normally, it can only be solved by restoring the factory settings. However, many friends do not know how to restore the factory settings. The following will provide you with detailed steps to restore the factory settings. I hope it can help you. Steps to restore the Logitech driver to the default configuration: 1. First download the Logitech dedicated driver software GHub, and open it after the download is complete. 2. Then open the mouse to set up, and click the settings (gear) in the upper right corner. 3. At the bottom, click "Restore default settings" , click directly and reopen the software to restore factory settings. How to connect the Logitech driver to the device 1. Open the back cover of the mouse and take out the wireless mouse socket. 2. Select the mouse socket next to the computer. 3. Set the corresponding parameter information for the mouse. 4. Bluetooth pair the device and long press Bluetooth.
 How to download Razer mouse driver
Mar 11, 2024 pm 03:40 PM
How to download Razer mouse driver
Mar 11, 2024 pm 03:40 PM
Steps to download the Razer mouse driver: 1. Open the browser and enter the Razer official website; 2. On the official website page, find and click "Technical Support" or a similar option; 3. On the technical support page, select "Mouse" or the specific subcategory; 4. On the mouse driver download page, you can see various mouse models and their corresponding drivers; 5. Click the download link for the selected driver; 6. After the download is completed, check whether the downloaded file is complete , make sure nothing is damaged or missing.
 Where is the preferred graphics processor in the nvidia control panel - Introduction to the location of the preferred graphics processor in the nvidia control panel
Mar 04, 2024 pm 01:50 PM
Where is the preferred graphics processor in the nvidia control panel - Introduction to the location of the preferred graphics processor in the nvidia control panel
Mar 04, 2024 pm 01:50 PM
Friends, do you know where the preferred graphics processor of the nvidia control panel is? Today I will explain the location of the preferred graphics processor of the nvidia control panel. If you are interested, come and take a look with the editor. I hope it can help you. . 1. We need to right-click a blank space on the desktop and open the "nvidia Control Panel" (as shown in the picture). 2. Then enter "Manage 3D Settings" under "3D Settings" on the left (as shown in the picture). 3. After entering, you can find "Preferred Graphics Processor" on the right (as shown in the picture).
 Detailed explanation of what to do if NVIDIA graphics card driver installation fails
Mar 14, 2024 am 08:43 AM
Detailed explanation of what to do if NVIDIA graphics card driver installation fails
Mar 14, 2024 am 08:43 AM
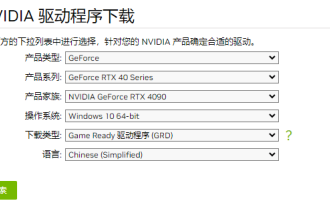
NVIDIA is currently the most popular graphics card manufacturer, and many users prefer to install NVIDIA graphics cards on their computers. However, you will inevitably encounter some problems during use, such as NVIDIA driver installation failure. How to solve this? There are many reasons for this situation. Let’s take a look at the specific solutions. Step 1: Download the latest graphics card driver You need to go to the NVIDIA official website to download the latest driver for your graphics card. Once on the driver page, select your product type, product series, product family, operating system, download type and language. After clicking search, the website will automatically query the driver version suitable for you. With GeForceRTX4090