
 Backend Development
Python Tutorial
How to use libpcap library for packet capture and data processing in Python
Backend Development
Python Tutorial
How to use libpcap library for packet capture and data processing in Python
How to use libpcap library for packet capture and data processing in Python

This article brings you relevant knowledge about Python, which mainly introduces how to use the libpcap library for packet capture and data processing, including installing libpcap, using the libpcap library, etc. Let’s take a look at the content below. I hope it will be helpful to everyone.
【Related recommendations: Python3 video tutorial】
python version: python 3.9
libpcap version: 1.11.0b7
The python libpcap library is a development package that binds the underlying c language libpcap library. It is designed to provide the unix c libpcap library API accessible to python applications (and Npcap and WinPcap provided for win32 systems), directly using the underlying c code, with very good performance.
Here is recorded how to install and use the libpcap library in python3.9 under Windows 10 environment (for Linux and mac systems, please refer to Windows).
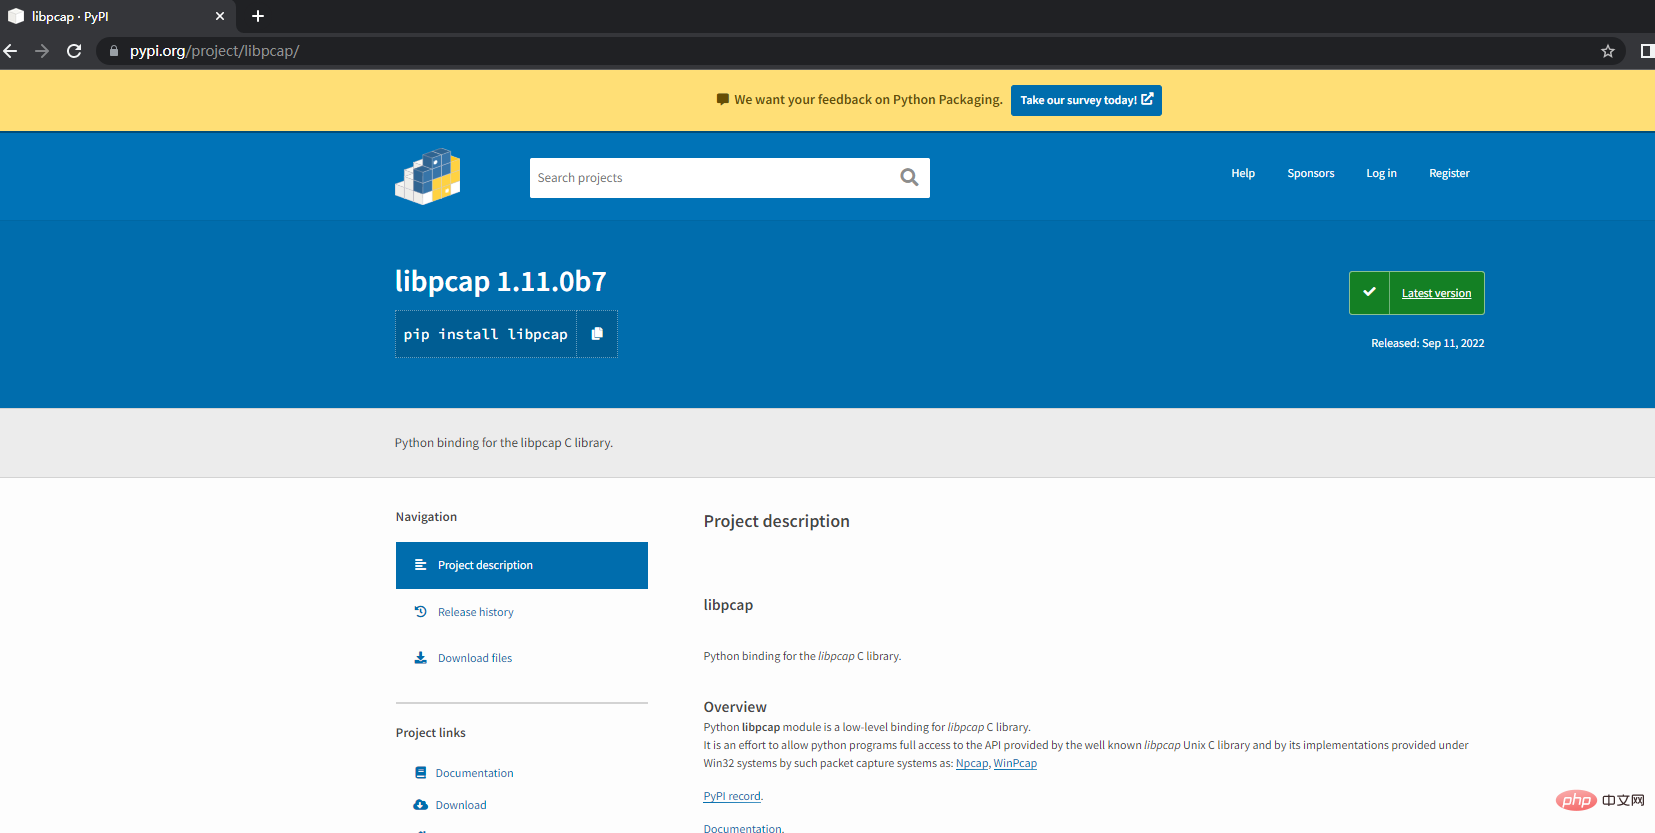
pypi address: https://pypi.org/project/libpcap/
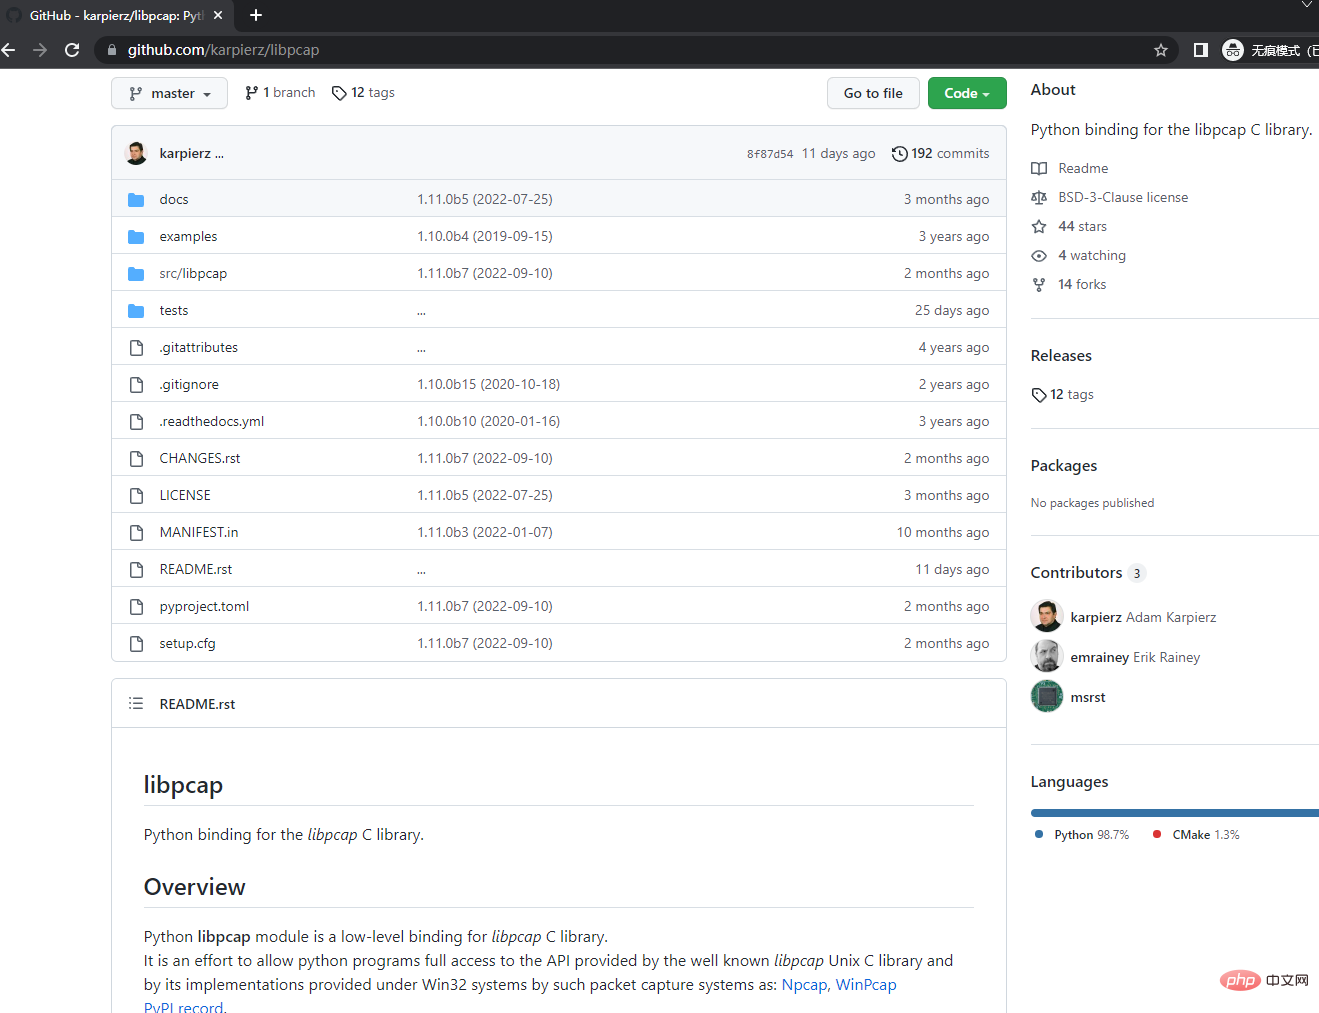
github address: https://github.com/karpierz/libpcap
1. Install the libpcap library
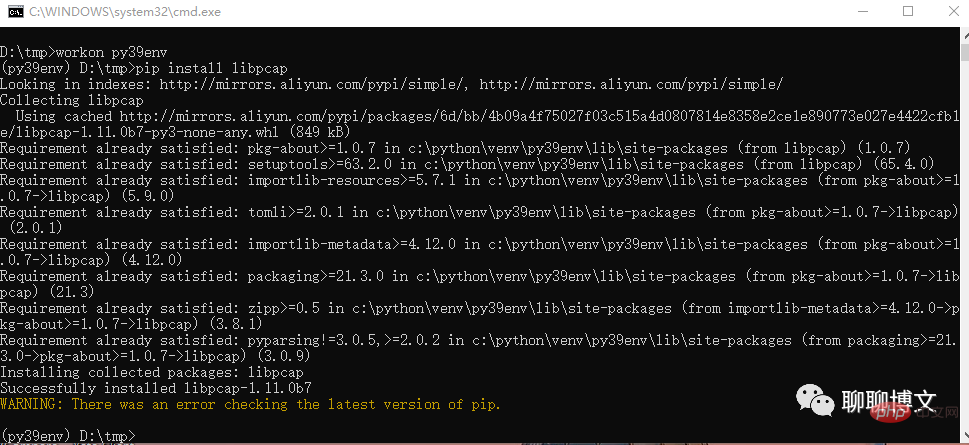
1. Online installation
Use pip directly to install:
pip install libpcap
The latest version is installed by default.
2. Offline installation
2.1 Download the offline installation file
You can download it at pypi page source code or whl file.
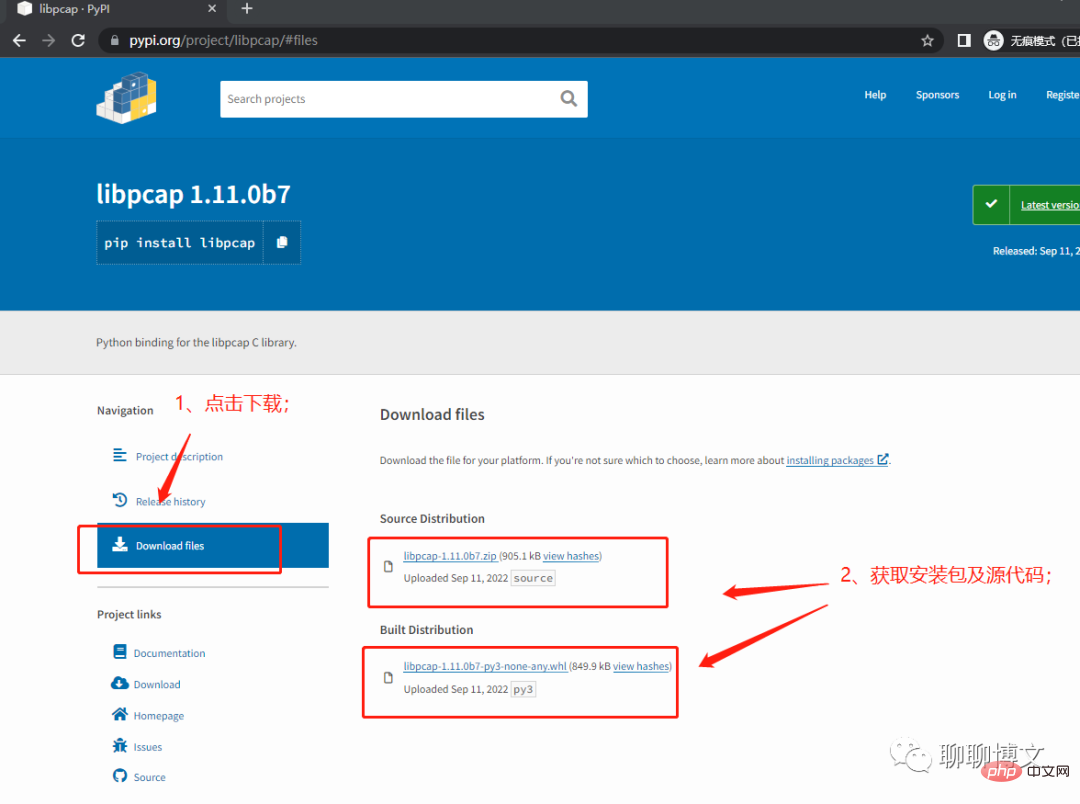
2.2 Perform offline installation operation
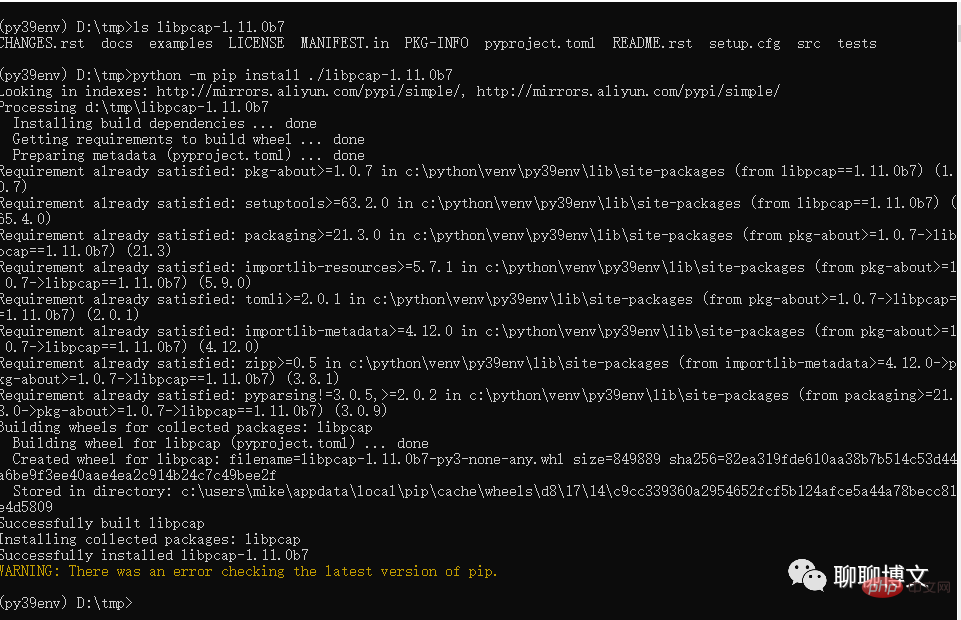
1) You can use the source code for installation
Extract the file to the current directory , and then execute the installation command:
python -m pip install ./libpcap-1.11.0b7
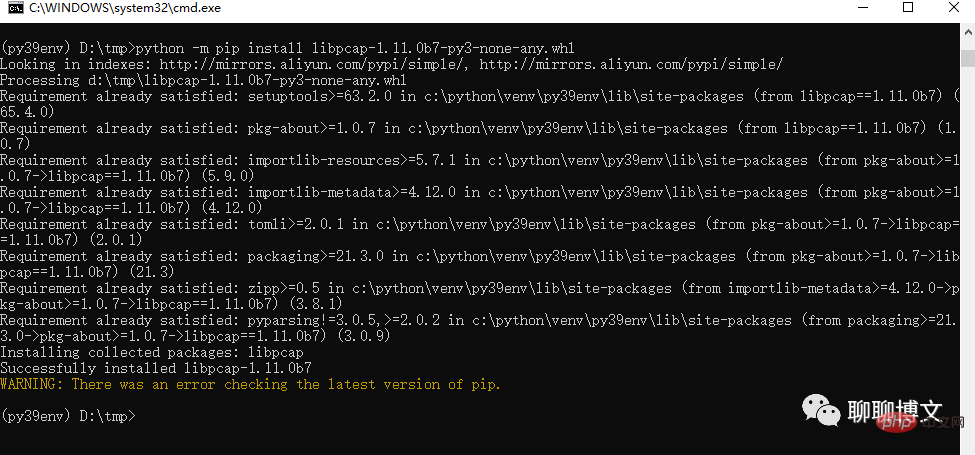
2) You can also use the whl file for offline installation
The installation command is as follows:
python -m pip install libpcap-1.11.0b7-py3-none-any.whl
2. Use libpcap library
1. Import and specify the pcap library
import libpcap
libpcap.config(LIBPCAP="wpcap")
2. Introduction to commonly used APIs
tcpdump is implemented based on libpcap. The documentation for C language libpcap can be found on the tcpdump official website:
https://www.tcpdump.org/manpages /pcap.3pcap.html
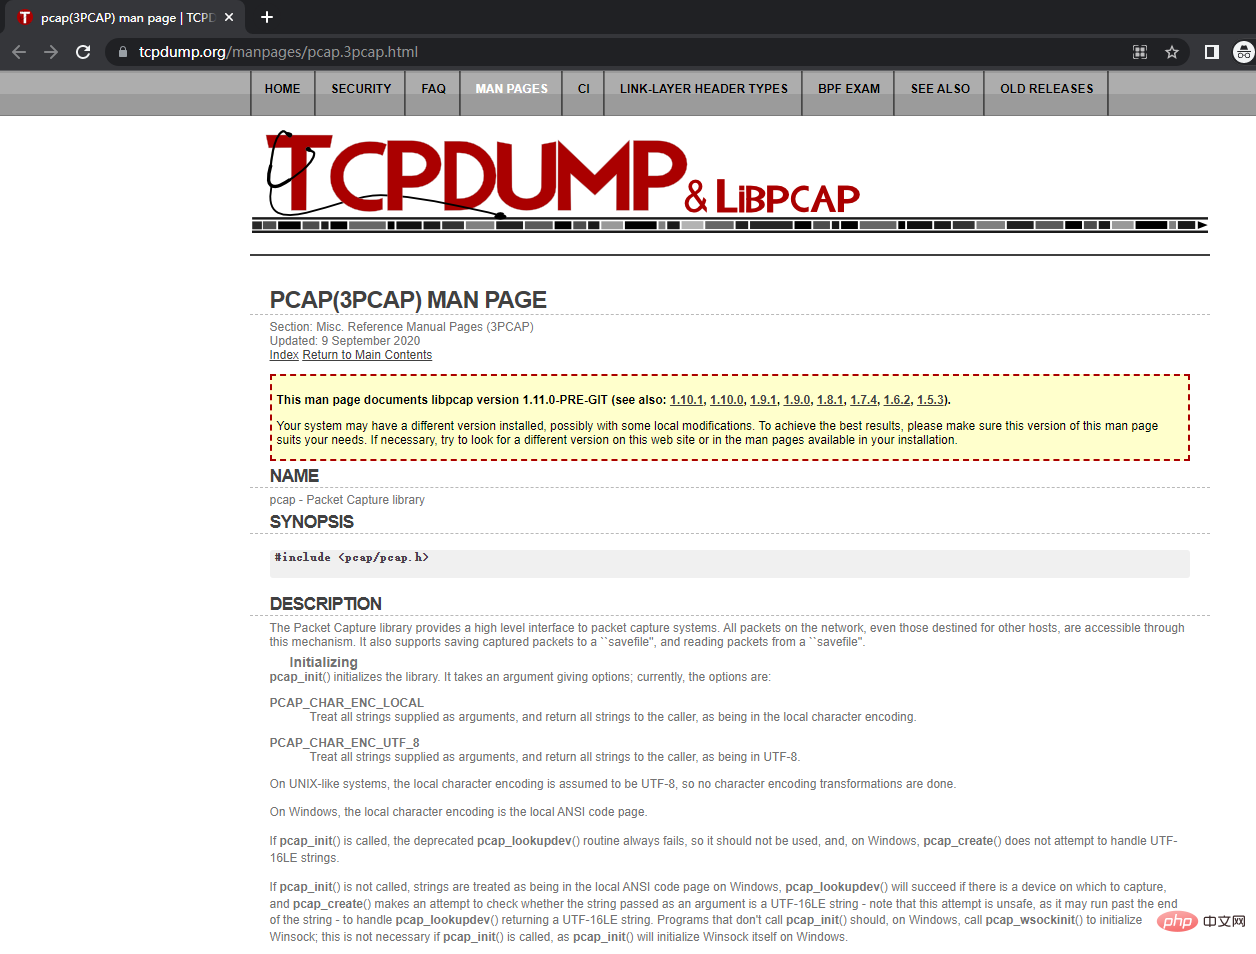
Here is a description of common Python interfaces.
2.1 Get the network device interface
lookupdev(errbuf)
Function: This function uses For finding network devices, the returned value can be called directly by the open_live function.
Parameters:
errbuf is a c language string type, used to obtain error information.
Usage example:
import ctypes as ct
import libpcap as pcap
errbuf = ct.create_string_buffer(pcap.PCAP_ERRBUF_SIZE + 1)
device = pcap.lookupdev(errbuf)
print(errbuf.value)
findalldevs(alldevs, errbuf)
Function: This function Used to find all network devices.
Parameters:
alldevs is the pcap_if_t structure pointer, used to store all found network device information.
errbuf is a c language string type, used to obtain error information.
Usage example:
import ctypes as ct
import libpcap as pcap
errbuf = ct.create_string_buffer(pcap.PCAP_ERRBUF_SIZE + 1)
alldevs = ct.POINTER(pcap.pcap_if_t)()
pcap.findalldevs(ct.byref(alldevs), errbuf)
print(alldevs[0].name)
pcap.freealldevs(alldevs)
2.2 Packet capture interface
- ##open_live(device:bytes,snaplen:int,promisc:int,to_ms:int, errbuf)
import ctypes as ct
import libpcap as pcap
device = b'eth0' # linux
errbuf = ct.create_string_buffer(pcap.PCAP_ERRBUF_SIZE + 1)
handle = pcap.open_live(device,4096,1,1000,errbuf)
if errbuf.value:
print("hanle error :",errbuf.value)- open_offline(fname:bytes,errbuf) ##Function: This function is used to open offline Capture file
Parameters:
fname is the file name, for example: b"/tmp/test1.cap"
errbuf is the c language string type, used to obtain error message.
Return value: Returns a pcap_t type pointer. This pointer must be used in all subsequent operations.
Usage example:
import ctypes as ct
import libpcap as pcap
errbuf = ct.create_string_buffer(pcap.PCAP_ERRBUF_SIZE + 1)
handle = pcap.open_offline(fname,errbuf)
if errbuf.value:
print("hanle error :",errbuf.value)2.3 Packet acquisition interface
- next(handle,pheader)
- Function: This function is used to obtain data packets, only one packet at a time.
parameter:
handle为pcap_t类型指针
pheader为pcap_pkthdr结构体指针,可通过pkthdr函数创建
返回值:返回u_char类型指针,代表包数据,可使用struct.unpack函数解析
使用示例:
import libpcap as pcap
pheader = pcap.pkthdr()
packet = pcap.next(handle,pheader)
2.4 写文件接口
dump_open(handle,fname:bytes)
功能:该函数用于打开文件,存储获取到的数据包。
参数:
handle为pcap_t类型指针
fname为文件名称
返回值:返回pcap_dumper_t 类型指针,后面的所有操作都要使用这个指针。
使用示例:
import libpcap as pcap

fname = b"realtime1.cap"
fPcap = pcap.dump_open(handle,fname)
dump(handle,pheader,packet)
功能:该函数用于存储获取到的数据包。
参数:
handle为pcap_dumper_t类型指针
pheader为pcap_pkthdr结构体指针
packet是数据包
返回值:无返回值
使用示例:
fPcapUbyte = ct.cast(fPcap,ct.POINTER(ct.c_ubyte))
pcap.dump(fPcapUbyte,pheader,packet)
dump_flush(handle)
功能:该函数用于将缓存的数据刷到磁盘
参数:
handle为pcap_dumper_t类型指针
返回值:错误码,0代表成功,-1代表出错
2.5 资源释放接口
close(handle)
功能:释放pcap_t类型指针
参数:
handle为pcap_t类型指针
返回值:无返回值
dump_close(handle)
功能:释放pcap_dumper_t类型指针
参数:
handle为pcap_dumper_t类型指针
返回值:无返回值
3、典型使用场景
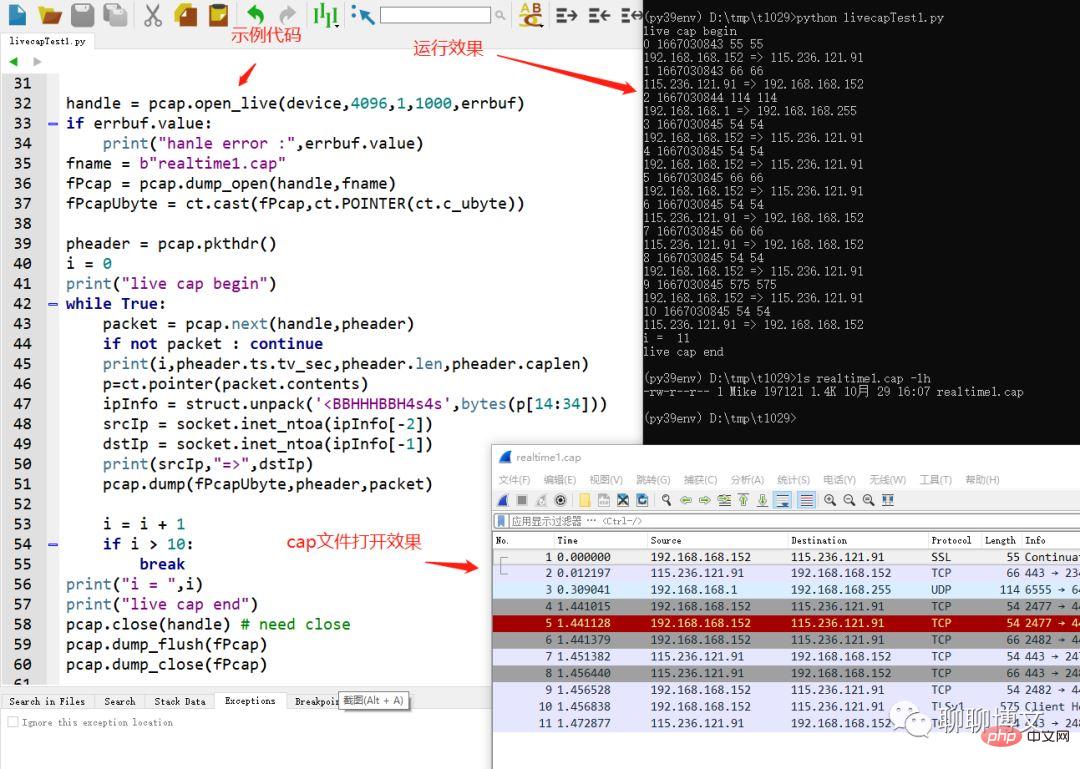
3.1、网卡实时抓包
可以使用libpcap库进行网卡实时数据抓包,这里进行简单的示例:
1)首先需要获取或指定抓包设备
方法1 :指定网卡接口名称
device = b'\Device\NPF_{BFDBF91E-9848-417D-B8AB-D3ED19990717}' # windows
device = b'eth0' # linux
Windows网卡接口名称可在wireshark的捕获界面看到,具体如下:

linux网卡名称获取:ifconfig
方法2 :使用lookupdev获取网卡接口名称
device = pcap.lookupdev(errbuf)
方法3 :使用findalldevs获取网卡接口名称
alldevs = ct.POINTER(pcap.pcap_if_t)()
pcap.findalldevs(ct.byref(alldevs), errbuf)
device =alldevs[0].name
2)使用open_live函数进行网卡抓包;
3)使用pkthdr函数创建header,获取包头信息(时间戳、包大小);
4)使用next函数循环读取数据包,需要注意的是,获取的packet对象的contents是C语言类型,需要使用它ctypes的pointer函数进行转换;
5)数据包(比如IP头)的解析可使用struct的unpack函数;
6)如果要将抓包数据存盘,可使用dump_open、dump、dump_flush系列函数进行操作,需要注意的是,dump_open函数的第二个参数必须是byte类型;
示例代码及运行效果:
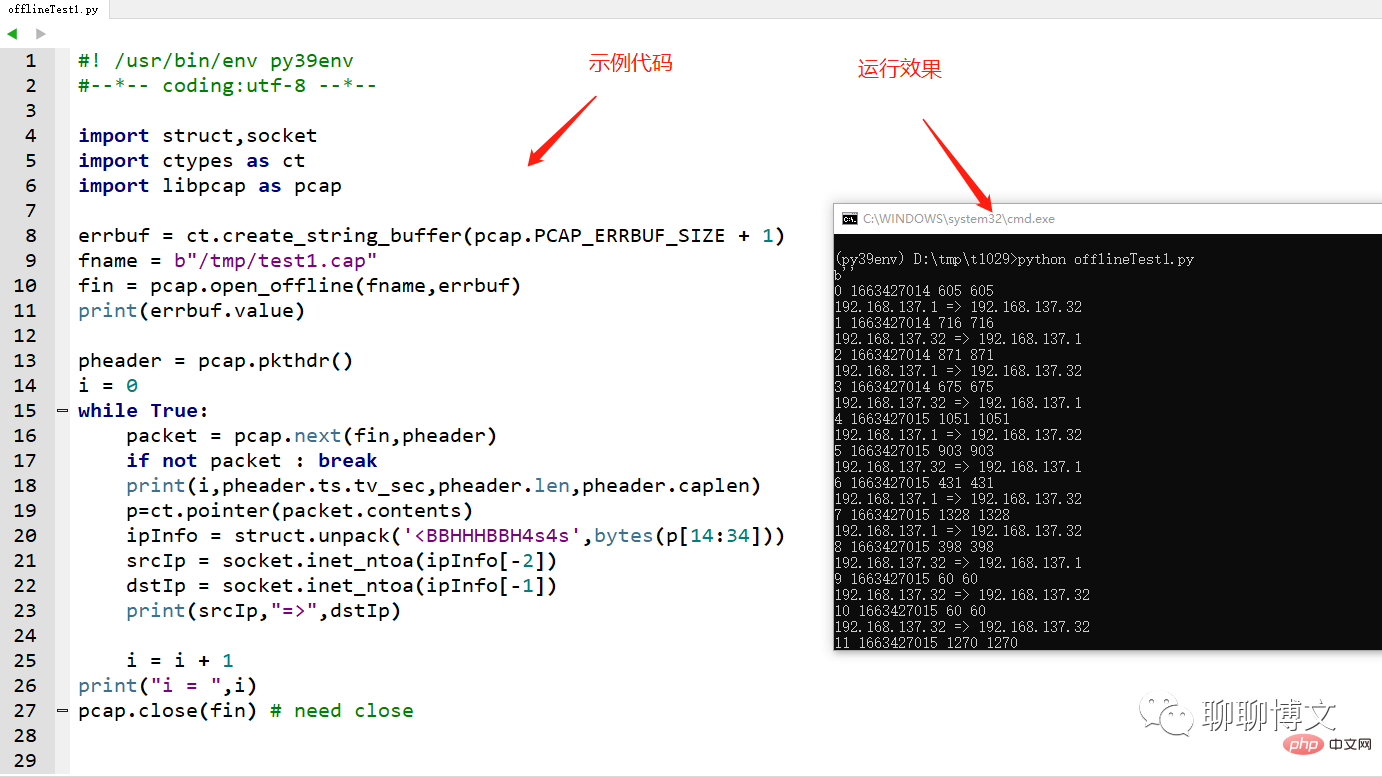
3.2、离线数据解析
可以使用libpcap库进行离线抓包文件的解析,这里进行简单的示例:
1)首先需要使用open_offline函数打开pcap文件,需要注意的是,函数的第一个参数必须是byte类型;
2)使用pkthdr函数创建header,获取包头信息(时间戳、包大小);
3)使用next函数循环读取数据包,需要注意的是,获取的packet对象的contents是C语言类型,需要使用它ctypes的pointer函数进行转换;
4)数据包(比如IP头)的解析可使用struct的unpack函数;
示例代码及运行效果:
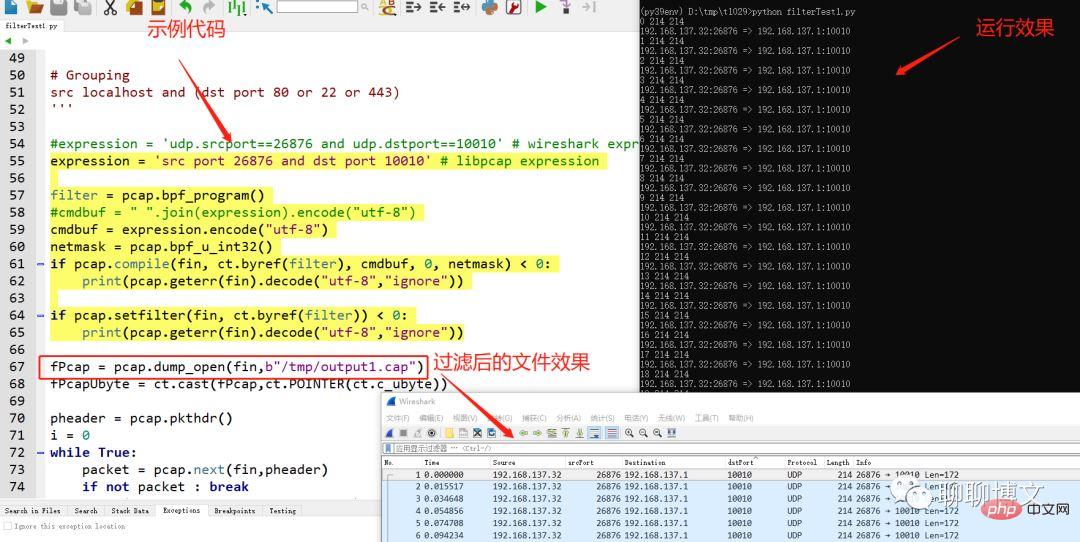
3.3、使用过滤条件抓包
网卡实时抓包和离线数据解析时,可以设置过滤条件,避免数据量过大。
过滤条件示例:
1) 过滤IP
host 过滤某个ip的所有包
host 8.8.8.8
src 过滤源ip
src 8.8.8.8
dst过滤目的ip
dst 8.8.8.8
2)过滤端口
port进行单个端口过滤
port 22
portange进行多个端口过滤
portange 1-1024
可使用src或dst指定端口方向
src port 22
dst port 22
3)指定协议
tcp
udp
icmp
4)使用组合条件
and 进行与逻辑
src localhost and dst port 22
src localhost && dst port 22
or 进行或逻辑
port 80 or 22
port 80 || 22
Sample code and running effect:
Python3 video tutorial]
The above is the detailed content of How to use libpcap library for packet capture and data processing in Python. For more information, please follow other related articles on the PHP Chinese website!

Hot AI Tools

Undresser.AI Undress
AI-powered app for creating realistic nude photos

AI Clothes Remover
Online AI tool for removing clothes from photos.

Undress AI Tool
Undress images for free

Clothoff.io
AI clothes remover

Video Face Swap
Swap faces in any video effortlessly with our completely free AI face swap tool!

Hot Article
Hot Tools

Notepad++7.3.1
Easy-to-use and free code editor

SublimeText3 Chinese version
Chinese version, very easy to use

Zend Studio 13.0.1
Powerful PHP integrated development environment

Dreamweaver CS6
Visual web development tools

SublimeText3 Mac version
God-level code editing software (SublimeText3)
Hot Topics
 1655
1655
 14
1414
52
1307
25
1255
29
1228
24
14
1414
52
1307
25
1255
29
1228
24

 PHP and Python: Different Paradigms Explained
Apr 18, 2025 am 12:26 AM
PHP and Python: Different Paradigms Explained
Apr 18, 2025 am 12:26 AM
PHP is mainly procedural programming, but also supports object-oriented programming (OOP); Python supports a variety of paradigms, including OOP, functional and procedural programming. PHP is suitable for web development, and Python is suitable for a variety of applications such as data analysis and machine learning.
 Choosing Between PHP and Python: A Guide
Apr 18, 2025 am 12:24 AM
Choosing Between PHP and Python: A Guide
Apr 18, 2025 am 12:24 AM
PHP is suitable for web development and rapid prototyping, and Python is suitable for data science and machine learning. 1.PHP is used for dynamic web development, with simple syntax and suitable for rapid development. 2. Python has concise syntax, is suitable for multiple fields, and has a strong library ecosystem.
 PHP and Python: A Deep Dive into Their History
Apr 18, 2025 am 12:25 AM
PHP and Python: A Deep Dive into Their History
Apr 18, 2025 am 12:25 AM
PHP originated in 1994 and was developed by RasmusLerdorf. It was originally used to track website visitors and gradually evolved into a server-side scripting language and was widely used in web development. Python was developed by Guidovan Rossum in the late 1980s and was first released in 1991. It emphasizes code readability and simplicity, and is suitable for scientific computing, data analysis and other fields.
 Python vs. JavaScript: The Learning Curve and Ease of Use
Apr 16, 2025 am 12:12 AM
Python vs. JavaScript: The Learning Curve and Ease of Use
Apr 16, 2025 am 12:12 AM
Python is more suitable for beginners, with a smooth learning curve and concise syntax; JavaScript is suitable for front-end development, with a steep learning curve and flexible syntax. 1. Python syntax is intuitive and suitable for data science and back-end development. 2. JavaScript is flexible and widely used in front-end and server-side programming.
 How to run sublime code python
Apr 16, 2025 am 08:48 AM
How to run sublime code python
Apr 16, 2025 am 08:48 AM
To run Python code in Sublime Text, you need to install the Python plug-in first, then create a .py file and write the code, and finally press Ctrl B to run the code, and the output will be displayed in the console.
 Can vs code run in Windows 8
Apr 15, 2025 pm 07:24 PM
Can vs code run in Windows 8
Apr 15, 2025 pm 07:24 PM
VS Code can run on Windows 8, but the experience may not be great. First make sure the system has been updated to the latest patch, then download the VS Code installation package that matches the system architecture and install it as prompted. After installation, be aware that some extensions may be incompatible with Windows 8 and need to look for alternative extensions or use newer Windows systems in a virtual machine. Install the necessary extensions to check whether they work properly. Although VS Code is feasible on Windows 8, it is recommended to upgrade to a newer Windows system for a better development experience and security.
 Where to write code in vscode
Apr 15, 2025 pm 09:54 PM
Where to write code in vscode
Apr 15, 2025 pm 09:54 PM
Writing code in Visual Studio Code (VSCode) is simple and easy to use. Just install VSCode, create a project, select a language, create a file, write code, save and run it. The advantages of VSCode include cross-platform, free and open source, powerful features, rich extensions, and lightweight and fast.
 How to run python with notepad
Apr 16, 2025 pm 07:33 PM
How to run python with notepad
Apr 16, 2025 pm 07:33 PM
Running Python code in Notepad requires the Python executable and NppExec plug-in to be installed. After installing Python and adding PATH to it, configure the command "python" and the parameter "{CURRENT_DIRECTORY}{FILE_NAME}" in the NppExec plug-in to run Python code in Notepad through the shortcut key "F6".
