

Practical Word skills sharing: How to format an A4 document into an A3 document?

In the previous article " Sharing practical Word skills: How to flexibly format documents into columns? 》, we learned about the four techniques for dividing Word documents into columns, and today we will talk about the techniques for formatting A4 documents into A3 double-fold printing in Word. Come and take a look!

In today's era, we are no strangers to the word "printing". Printing text, pictures, etc. is a "commonplace" for office clerks.
After the Word document is created, it is often necessary to print it out. The most commonly used printing method is to press the [Ctrl P] key combination, or click the [File]-[Print] command to open the "Print" "Settings interface, click the "Print" button to print the document.

#In Word, printing regular documents is very simple, but the above method can only achieve the most common printing requirements. In our office, we often need to print various types of documents, and we also encounter special printing requirements, such as A4 typesetting to A3 double-sided printing.
For example, an A4 document needs to be printed on A3 paper and then folded and bound. How should I set up printing? In fact, there is a very simple setting in Word, which is to set book folding printing.
How to do it specifically? Let’s learn how to set up A4 to A3 formatting in Word.
(1) First, we need to adjust the number of pages in the document to a multiple of 4, such as 4, 8, 12, 16... Here we can see that the current document is 8 pages.
#Knowledge expansion: Why should it be set to a multiple of 4?
We all know that the default paper for Word documents is A4 paper. A3 paper folded in half becomes two A4 papers, so it is easy to understand that the contents of A4 documents on both sides can be printed on A3 paper.
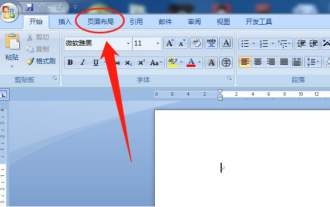
(2) Click the dialog box launcher in the lower right corner of the [Layout]-[Page Setup] group to open the "Page Setup" dialog box. Select the "Paper" tab and set the "Paper Size" to "A3".
(3) Then select the "Margins" tab and select the "Book Fold" option in the "Multiple Pages" drop-down list box in the "Page Range" column . At this point, you can view the adjusted double-sided layout effect in the "Preview" column.
# (4) After the setting process is completed, the document can be printed. Click [File]-[Print], select "Microsoft Print to PDF" for "Printer", open the dialog box as shown below, and check the "Manual duplex printing" check box (Note: If your printer does not support double-sided printing, If you want to print on both sides, check the manual double-sided printing option; if you support double-sided printing, leave it unchecked).
Tips: If manual double-sided printing is checked, two PDF documents will be output, one for the odd pages of the page, and the other for the odd pages of the page. Even pages; If manual double-sided printing is not checked, a PDF document that can be printed directly on both sides will be generated.
(5) Click the "Properties" button, set the "Paper Format" to "A3" in the dialog box that opens, and then click the "OK" button to generate a PDF document.
(6) Double-click to open the PDF document, click the [File]-[Print] command, or click the "Print" button directly on the PDF interface.

(7) Select "Printer" as "Microsoft Print to PDF". In the "Subset" drop-down list, first select "Odd-numbered pages only" so that we can print the contents of the odd-numbered pages on A3 paper.
(8) After printing is completed, put the paper into the printer, then select "Only print even pages" in the "Subset" drop-down list, and check the "Print in reverse order" check box, and then print document, at this time, the contents of the even-numbered pages in the document can be printed correspondingly on the back of the A3 paper.

In this way, all A4 documents are printed on A3 paper, and the entire document is similar to a book folding style. Finally, place the A3 papers in order, fold them in half, and then staple them to complete.
Tips: When printing documents, it is recommended to use PDF to print documents, which can achieve odd-even page printing and facilitate double-sided printing.
Recommended tutorial: "Word Tutorial"
The above is the detailed content of Practical Word skills sharing: How to format an A4 document into an A3 document?. For more information, please follow other related articles on the PHP Chinese website!

Hot AI Tools

Undresser.AI Undress
AI-powered app for creating realistic nude photos

AI Clothes Remover
Online AI tool for removing clothes from photos.

Undress AI Tool
Undress images for free

Clothoff.io
AI clothes remover

Video Face Swap
Swap faces in any video effortlessly with our completely free AI face swap tool!

Hot Article
Hot Tools

Notepad++7.3.1
Easy-to-use and free code editor

SublimeText3 Chinese version
Chinese version, very easy to use

Zend Studio 13.0.1
Powerful PHP integrated development environment

Dreamweaver CS6
Visual web development tools

SublimeText3 Mac version
God-level code editing software (SublimeText3)
Hot Topics


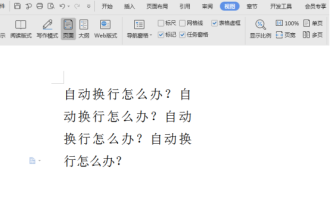 How to cancel automatic word wrapping in word
Mar 19, 2024 pm 10:16 PM
How to cancel automatic word wrapping in word
Mar 19, 2024 pm 10:16 PM
When editing content in a word document, lines may automatically wrap. If no adjustment is made at this time, it will have a great impact on our editing and make people very headache. What is going on? In fact, it is a problem with the ruler. Below, I will introduce the solution to how to cancel automatic word wrapping in word. I hope it can help everyone! After opening a Word document and entering text, when you try to copy and paste, the text may jump to a new line. In this case, you need to adjust the settings to solve this problem. 2. To solve this problem, we must first know the cause of this problem. At this time we click View under the toolbar. 3. Then click the "Ruler" option below. 4. At this time we will find that a ruler appears above the document with several conical markers on it.
 Detailed explanation of how to display the ruler in Word and how to operate the ruler!
Mar 20, 2024 am 10:46 AM
Detailed explanation of how to display the ruler in Word and how to operate the ruler!
Mar 20, 2024 am 10:46 AM
When we use Word, in order to edit the content more beautifully, we often use rulers. You should know that the rulers in Word include horizontal rulers and vertical rulers, which are used to display and adjust the document's page margins, paragraph indents, tabs, etc. So, how do you display the ruler in Word? Next, I will teach you how to set the ruler display. Students in need should quickly collect it! The steps are as follows: 1. First, we need to bring up the word ruler. The default word document does not display the word ruler. We only need to click the [View] button in word. 2. Then, we find the option of [Ruler] and check it. In this way, we can adjust the word ruler! Yes or no
 How to add handwritten signature to word document
Mar 20, 2024 pm 08:56 PM
How to add handwritten signature to word document
Mar 20, 2024 pm 08:56 PM
Word documents are widely used due to their powerful functions. Not only can various formats be inserted into Word, such as pictures and tables, etc., but now for the integrity and authenticity of the files, many files require a manual signature at the end of the document. It sounds like this How to solve complex problems? Today I will teach you how to add a handwritten signature to a word document. Use a scanner, camera or mobile phone to scan or photograph the handwritten signature, and then use PS or other image editing software to perform necessary cropping on the image. 2. Select "Insert - Picture - From File" in the Word document where you want to insert the handwritten signature, and select the cropped handwritten signature. 3. Double-click the handwritten signature picture (or right-click the picture and select "Set Picture Format"), and the "Set Picture Format" pops up.
 How to set page margins for Word
Mar 19, 2024 pm 10:00 PM
How to set page margins for Word
Mar 19, 2024 pm 10:00 PM
Among office software, Word is one of our most commonly used software. The text documents we produce are generally operated with Word. Some documents need to be submitted in paper version as required. Before printing, the layout must be set before it can be presented. produce better results. So the question is, how do you set page margins in Word? We have specific course explanations to help you solve your doubts. 1. Open or create a new word document and click the "Page Layout" menu on the menu bar. 2. Click the "Margins" button of the "Page Setup" option. 3. Select a commonly used page margin in the list. 4. If there are no suitable margins in the list, click "Custom Margins". 5. The "Page Setup" dialog box pops up, enter the "Margins" option respectively.
 Where is the shading setting in word?
Mar 20, 2024 am 08:16 AM
Where is the shading setting in word?
Mar 20, 2024 am 08:16 AM
We often use word for office work, but do you know where the shading settings are in word? Today I will share with you the specific operation steps. Come and take a look, friends! 1. First, open the word document, select a paragraph of text paragraph information that needs to be added with shading, then click the [Start] button on the toolbar, find the paragraph area, and click the drop-down button on the right (as shown in the red circle in the figure below) ). 2. After clicking the drop-down box button, in the pop-up menu options, click the [Border and Shading] option (as shown in the red circle in the figure below). 3. In the pop-up [Border and Shading] dialog box, click the [Shading] option (as shown in the red circle in the figure below). 4. In the filled column, select a color
 How to draw a dotted line in word
Mar 19, 2024 pm 10:25 PM
How to draw a dotted line in word
Mar 19, 2024 pm 10:25 PM
Word is a software that we often use in our office. It has many functions that can facilitate our operations. For example, for a large article, we can use the search function inside to find out that a word in the full text is wrong, so we can directly replace it. Make changes one by one; when submitting the document to your superiors, you can beautify the document to make it look better, etc. Below, the editor will share with you the steps on how to draw a dotted line in Word. Let's learn together! 1. First, we open the word document on the computer, as shown in the figure below: 2. Then, enter a string of text in the document, as shown in the red circle in the figure below: 3. Next, press and hold [ctrl+A] Select all the text, as shown in the red circle in the figure below: 4. Click [Start] on the top of the menu bar
 Specific steps to delete down arrow in Word!
Mar 19, 2024 pm 08:50 PM
Specific steps to delete down arrow in Word!
Mar 19, 2024 pm 08:50 PM
In daily office work, if you copy a piece of text from a website and paste it directly into Word, you will often see a [down arrow]. This [down arrow] can be deleted by selecting it, but if there are too many such symbols, So is there a quick way to delete all arrows? So today I will share with you the specific steps to delete the downward arrow in Word! First of all, the [Down Arrow] in Word actually represents [Manual Line Break]. We can replace all [Down Arrows] with [Paragraph Mark] symbols, as shown in the figure below. 2. Then, we select the [Find and Replace] option on the menu bar (as shown in the red circle in the figure below). 3. Then, click the [Replace] command, a pop-up box will pop up, click [Special Symbols]
 How to draw a table in Word
Mar 19, 2024 pm 11:50 PM
How to draw a table in Word
Mar 19, 2024 pm 11:50 PM
Word is a very powerful office software. Compared with WPS, Word has more advantages in detail processing. Especially when the document description is too complex, it is generally more worry-free to use Word. Therefore, when you enter the society, you must learn some tips on using word. Some time ago, my cousin asked me a question like this. I often see other people drawing tables when using Word, and I feel very high-level. I laughed at that time. It seemed like high-level content, but actually it only took 3 steps to operate. Do you know how to draw a table in Word? 1. Open word, select the place where you want to insert the table, and find the "Insert" option in the upper menu bar. 2. Click the "Table" option, and densely packed small cubes will appear.
