
 Development Tools
VSCode
Build a VSCode development and debugging environment (powerful and practical plug-in recommendation)
Development Tools
VSCode
Build a VSCode development and debugging environment (powerful and practical plug-in recommendation)
Build a VSCode development and debugging environment (powerful and practical plug-in recommendation)

Related recommendations: "vscode tutorial"
As VSCode continues to improve and become more powerful, it is time to migrate some development to VS Code .
Currently using VS2019 to develop .NET Core applications, I have always had the idea to copy the VS development environment in VS Code and migrate to VS Code at the same time.
Then let’s start now.
First, install the latest version of VS Code: https://code.visualstudio.com/. After the installation is complete, you may be prompted to upgrade. Just upgrade. The upgraded version information:
Version: 1.40.1 (system setup)
Commit: 8795a9889db74563ddd43eb0a897a2384129a619
Date: 2019-11-13T16:49:35.976Z
Electron: 6.1.2Chrome: 76.0.3809.146Node.js : 12.4 .0V8: 7.6.303.31-electron.0OS: Windows_NT x64 10.0.16299
The next operation is divided into several steps:
1. Install various powerful VSCodePlug-in
2. Create .NET Core solutions and projects
3. Debug and run
Okay, let’s get started.
1. Install various powerful VS Code plug-ins
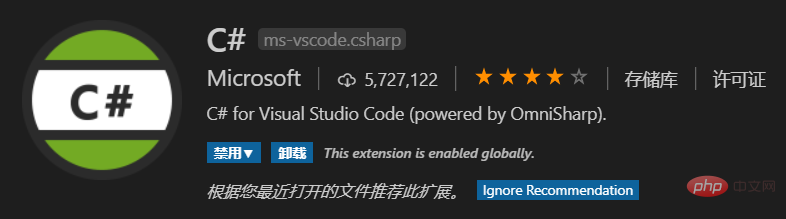
1. C# extension for Visual Studio Code
This plug-in The most important features:
- Lightweight development tools for .NET Core.
- Great C# editing support, including Syntax Highlighting, IntelliSense, Go to Definition, Find All References, etc.
- Debugging support for .NET Core (CoreCLR). NOTE: Mono debugging is not supported. Desktop CLR debugging has limited support.
- Support for project.json and csproj projects on Windows, macOS and Linux .
2. C# Extensions
The most useful function of this plug-in is that you can right-click to create a new C# class and C# interface , and supports various code snippets, such as ctor, prop, etc. For specific functional features, you can view the plug-in description.

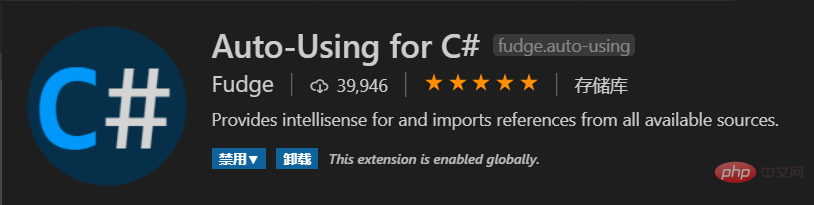
3. Auto-Using for C
#This plug-in automatically adds using references.
4. vscode-solution-explorer
This plug-in adds a solution tab to VS Code, supporting new solutions, new projects, and adding references. Nuget package, this plug-in is very useful
Adds a Solution Explorer panel where you can find a Visual Studio Solution File Explorer.
-
Can load any .sln version
Supports csproj, vcxproj, fsproj and vbproj (from vs2017 and before)
Supports dotnet core projects
You can create, delete, rename or move project folders and files.
You can create, delete, rename or move solution, solution folders and projects.
You can add or remove packages and references when the project is of kind CPS (dotnet core).

5. Code Runner (Produced by Teacher Han Jun, must be a high-quality product)
Run code snippet or code file for multiple languages: C, C, Java, JavaScript, PHP, Python, Perl, Perl 6, Ruby, Go, Lua, Groovy, PowerShell, BAT/CMD, BASH/SH, F# Script, F# (.NET Core), C# Script, C# (.NET Core), VBScript, TypeScript, CoffeeScript, Scala, Swift, Julia, Crystal, OCaml Script, R, AppleScript, Elixir, Visual Basic .NET, Clojure, Haxe, Objective-C, Rust, Racket, Scheme, AutoHotkey, AutoIt, Kotlin, Dart, Free Pascal, Haskell, Nim, D, Lisp , Kit, and custom command
Select a piece of code and run directly

6. vscode-icons
Through this plug-in, give each file and folder an icon that is more familiar to you

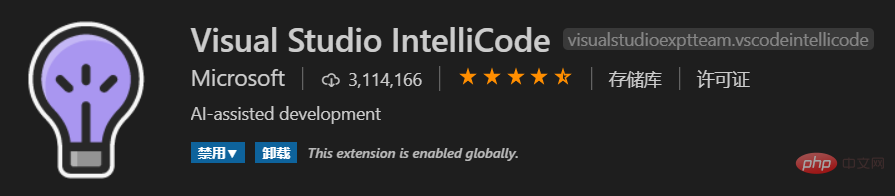
7. Visual Studio IntelliCode
VS Code Intelligent Tips , based on the context, automatically recommend the code you use next, the background is based on AI
8. NuGet Package Manager
Nuget package management, quickly query, locate and install Nuget packages. But I tried to customize the Nuget source for an afternoon, but I couldn’t get it. It’s probably because the URL is wrong

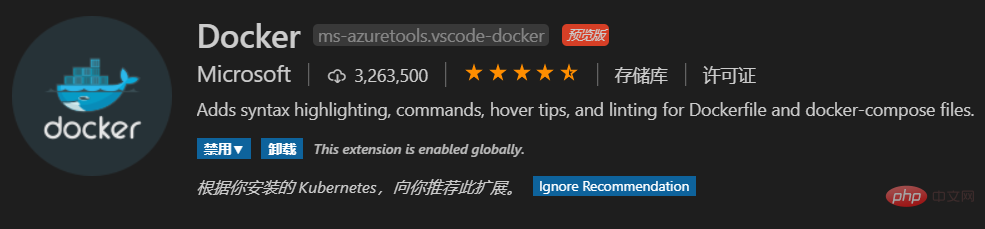
9. Docker
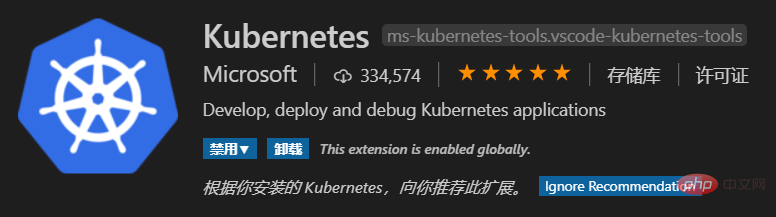
10. Kubernetes
Others also need to configure source code management similar to GitHub and TFS. TFS has two plug-ins, but they are not easy to use. I will update them after they are completed. .
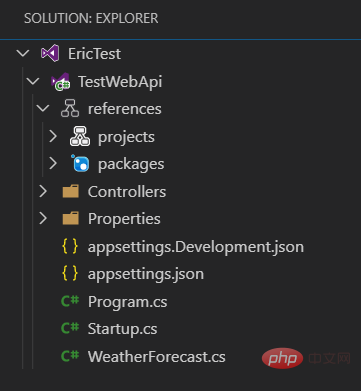
2. Create .NET Core solutions and projects
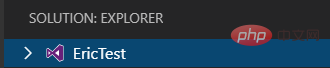
At this point, the basic configuration of the VS Code environment is almost complete. There are two next steps: models, create solutions and projects.
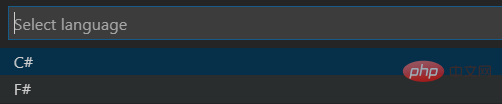
1. Through vscode-solution-explorer


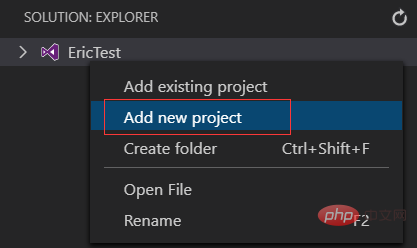
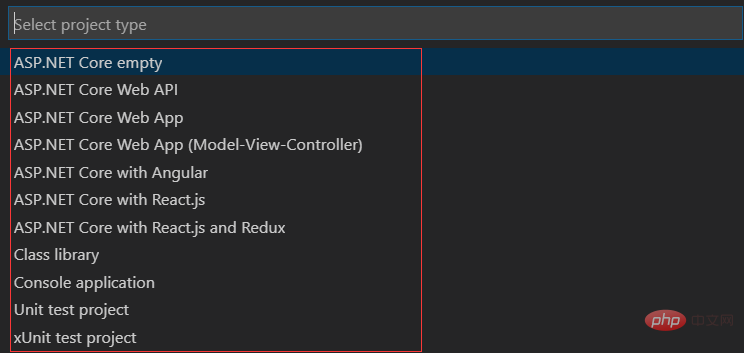
Select C
2. Through the Dotnet CLI command line
Create a new sln:dotnet
dotnet "new" "webapi" "-lang" "C#" "-n" "TestWebApi" "-o" "TestWebApi"
dotnet "sln" "e:\Work\ServiceDependency\EricTest.sln" "add" "e:\Work\ServiceDependency\TestWebApi\TestWebApi.csproj"
3. Debug and run
In the Debug tab Add debugging configuration, focusing on setting the program to be debugged
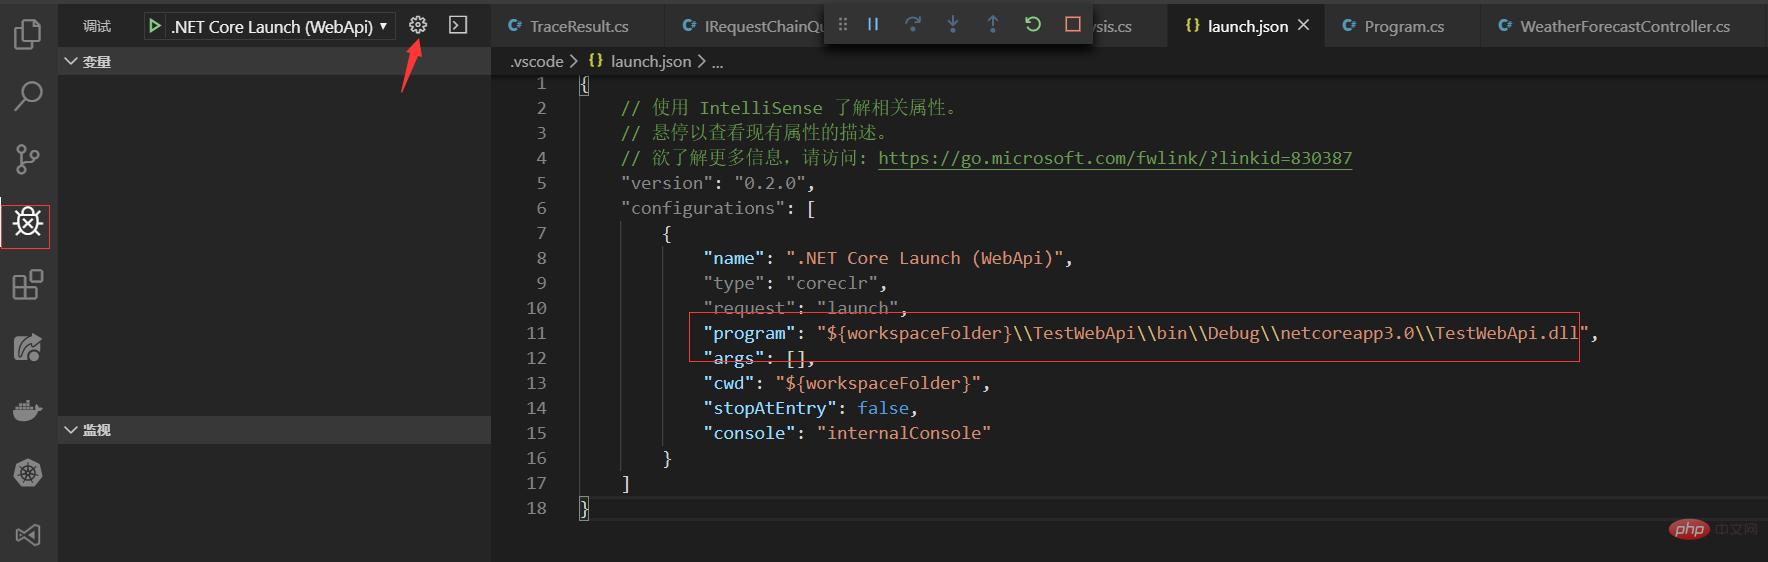
##After saving, start debugging:
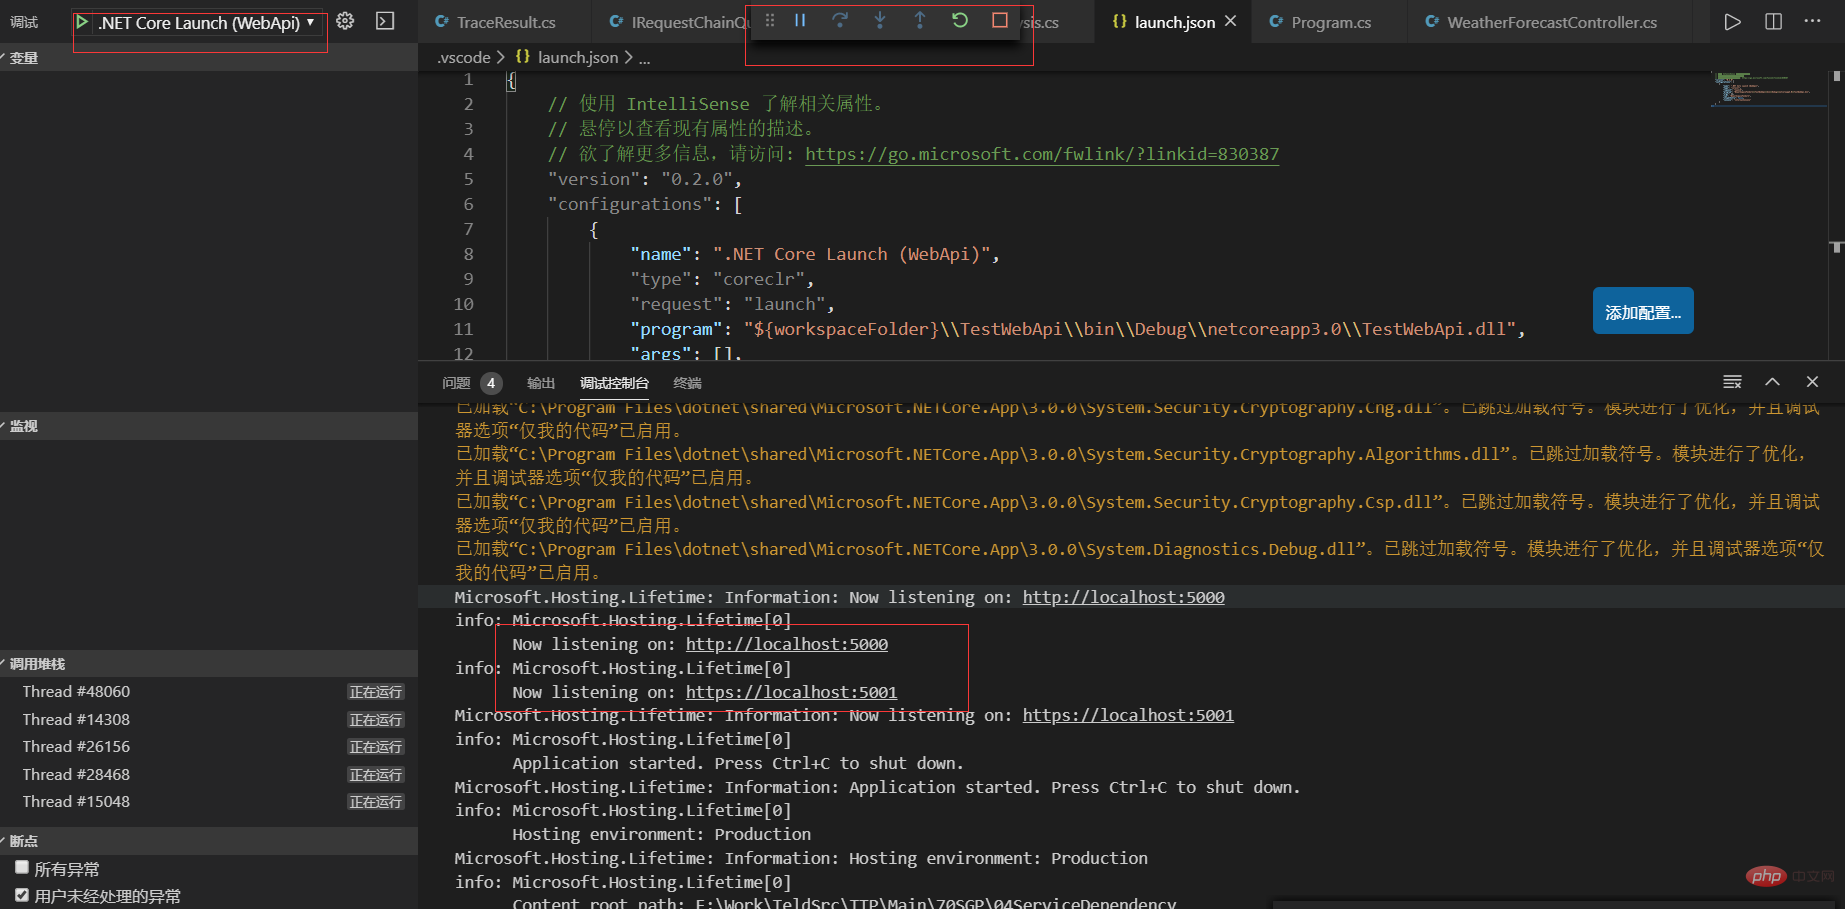 Add a breakpoint in the program, and then
is ready for debugging.
For more programming related knowledge, please visit:
The above is the detailed content of Build a VSCode development and debugging environment (powerful and practical plug-in recommendation). For more information, please follow other related articles on the PHP Chinese website!

Hot AI Tools

Undresser.AI Undress
AI-powered app for creating realistic nude photos

AI Clothes Remover
Online AI tool for removing clothes from photos.

Undress AI Tool
Undress images for free

Clothoff.io
AI clothes remover

Video Face Swap
Swap faces in any video effortlessly with our completely free AI face swap tool!

Hot Article
Hot Tools

Notepad++7.3.1
Easy-to-use and free code editor

SublimeText3 Chinese version
Chinese version, very easy to use

Zend Studio 13.0.1
Powerful PHP integrated development environment

Dreamweaver CS6
Visual web development tools

SublimeText3 Mac version
God-level code editing software (SublimeText3)
Hot Topics


 How to define header files for vscode
Apr 15, 2025 pm 09:09 PM
How to define header files for vscode
Apr 15, 2025 pm 09:09 PM
How to define header files using Visual Studio Code? Create a header file and declare symbols in the header file using the .h or .hpp suffix name (such as classes, functions, variables) Compile the program using the #include directive to include the header file in the source file. The header file will be included and the declared symbols are available.
 What computer configuration is required for vscode
Apr 15, 2025 pm 09:48 PM
What computer configuration is required for vscode
Apr 15, 2025 pm 09:48 PM
VS Code system requirements: Operating system: Windows 10 and above, macOS 10.12 and above, Linux distribution processor: minimum 1.6 GHz, recommended 2.0 GHz and above memory: minimum 512 MB, recommended 4 GB and above storage space: minimum 250 MB, recommended 1 GB and above other requirements: stable network connection, Xorg/Wayland (Linux)
 How to solve the problem of vscode Chinese annotations becoming question marks
Apr 15, 2025 pm 11:36 PM
How to solve the problem of vscode Chinese annotations becoming question marks
Apr 15, 2025 pm 11:36 PM
How to solve the problem that Chinese comments in Visual Studio Code become question marks: Check the file encoding and make sure it is "UTF-8 without BOM". Change the font to a font that supports Chinese characters, such as "Song Style" or "Microsoft Yahei". Reinstall the font. Enable Unicode support. Upgrade VSCode, restart the computer, and recreate the source file.
 How to use VSCode
Apr 15, 2025 pm 11:21 PM
How to use VSCode
Apr 15, 2025 pm 11:21 PM
Visual Studio Code (VSCode) is a cross-platform, open source and free code editor developed by Microsoft. It is known for its lightweight, scalability and support for a wide range of programming languages. To install VSCode, please visit the official website to download and run the installer. When using VSCode, you can create new projects, edit code, debug code, navigate projects, expand VSCode, and manage settings. VSCode is available for Windows, macOS, and Linux, supports multiple programming languages and provides various extensions through Marketplace. Its advantages include lightweight, scalability, extensive language support, rich features and version
 Common commands for vscode terminal
Apr 15, 2025 pm 10:06 PM
Common commands for vscode terminal
Apr 15, 2025 pm 10:06 PM
Common commands for VS Code terminals include: Clear the terminal screen (clear), list the current directory file (ls), change the current working directory (cd), print the current working directory path (pwd), create a new directory (mkdir), delete empty directory (rmdir), create a new file (touch) delete a file or directory (rm), copy a file or directory (cp), move or rename a file or directory (mv) display file content (cat) view file content and scroll (less) view file content only scroll down (more) display the first few lines of the file (head)
 vscode terminal usage tutorial
Apr 15, 2025 pm 10:09 PM
vscode terminal usage tutorial
Apr 15, 2025 pm 10:09 PM
vscode built-in terminal is a development tool that allows running commands and scripts within the editor to simplify the development process. How to use vscode terminal: Open the terminal with the shortcut key (Ctrl/Cmd). Enter a command or run the script. Use hotkeys (such as Ctrl L to clear the terminal). Change the working directory (such as the cd command). Advanced features include debug mode, automatic code snippet completion, and interactive command history.
 Where to write code in vscode
Apr 15, 2025 pm 09:54 PM
Where to write code in vscode
Apr 15, 2025 pm 09:54 PM
Writing code in Visual Studio Code (VSCode) is simple and easy to use. Just install VSCode, create a project, select a language, create a file, write code, save and run it. The advantages of VSCode include cross-platform, free and open source, powerful features, rich extensions, and lightweight and fast.
 How to switch Chinese mode with vscode
Apr 15, 2025 pm 11:39 PM
How to switch Chinese mode with vscode
Apr 15, 2025 pm 11:39 PM
VS Code To switch Chinese mode: Open the settings interface (Windows/Linux: Ctrl, macOS: Cmd,) Search for "Editor: Language" settings Select "Chinese" in the drop-down menu Save settings and restart VS Code
