How to implement js css without caching in nginx
The method for nginx to implement js css without caching: first find and open the nginx.conf file in the nginx installation directory; then configure the content as "location ~ \.(js|css|html|png|jpg)$ {add_header...}" can be done.

The operating environment of this tutorial: Windows NT system, nginx1.14&&css3 version, thinkpad t480 computer.
Recommended: "css video tutorial"
When developing locally, we often encounter inexplicable problems caused by cache. The most violent way is to clear the browser The server's cache, or use Ctrl F5, Shift F5 to force refresh the page.
Sometimes after pressing it several times, the cache still cannot be cleared. The only way is to temporarily disable the browser's static resource cache. Just modify the .conf file in nginx.

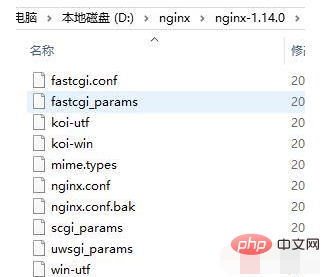
Find the nginx.conf file in the nginx installation directory and configure it as follows:
location / {
    ...
}
#下面这个就是禁止缓存
location ~ \.(js|css|html|png|jpg)$ {
    add_header Cache-Control no-store;
}The above is the detailed content of How to implement js css without caching in nginx. For more information, please follow other related articles on the PHP Chinese website!

Hot AI Tools

Undresser.AI Undress
AI-powered app for creating realistic nude photos

AI Clothes Remover
Online AI tool for removing clothes from photos.

Undress AI Tool
Undress images for free

Clothoff.io
AI clothes remover

Video Face Swap
Swap faces in any video effortlessly with our completely free AI face swap tool!

Hot Article

Hot Tools

Notepad++7.3.1
Easy-to-use and free code editor

SublimeText3 Chinese version
Chinese version, very easy to use

Zend Studio 13.0.1
Powerful PHP integrated development environment

Dreamweaver CS6
Visual web development tools

SublimeText3 Mac version
God-level code editing software (SublimeText3)

Hot Topics
 1655
1655
 14
14
 1413
1413
 52
52
 1306
1306
 25
25
 1252
1252
 29
29
 1226
1226
 24
24
 HTML: The Structure, CSS: The Style, JavaScript: The Behavior
Apr 18, 2025 am 12:09 AM
The roles of HTML, CSS and JavaScript in web development are: 1. HTML defines the web page structure, 2. CSS controls the web page style, and 3. JavaScript adds dynamic behavior. Together, they build the framework, aesthetics and interactivity of modern websites.
 How to check the name of the docker container
Apr 15, 2025 pm 12:21 PM
You can query the Docker container name by following the steps: List all containers (docker ps). Filter the container list (using the grep command). Gets the container name (located in the "NAMES" column).
 How to start containers by docker
Apr 15, 2025 pm 12:27 PM
Docker container startup steps: Pull the container image: Run "docker pull [mirror name]". Create a container: Use "docker create [options] [mirror name] [commands and parameters]". Start the container: Execute "docker start [Container name or ID]". Check container status: Verify that the container is running with "docker ps".
 How to check whether nginx is started
Apr 14, 2025 pm 01:03 PM
How to confirm whether Nginx is started: 1. Use the command line: systemctl status nginx (Linux/Unix), netstat -ano | findstr 80 (Windows); 2. Check whether port 80 is open; 3. Check the Nginx startup message in the system log; 4. Use third-party tools, such as Nagios, Zabbix, and Icinga.
 How to create containers for docker
Apr 15, 2025 pm 12:18 PM
Create a container in Docker: 1. Pull the image: docker pull [mirror name] 2. Create a container: docker run [Options] [mirror name] [Command] 3. Start the container: docker start [Container name]
 Solve caching issues in Craft CMS: Using wiejeben/craft-laravel-mix plug-in
Apr 18, 2025 am 09:24 AM
When developing websites using CraftCMS, you often encounter resource file caching problems, especially when you frequently update CSS and JavaScript files, old versions of files may still be cached by the browser, causing users to not see the latest changes in time. This problem not only affects the user experience, but also increases the difficulty of development and debugging. Recently, I encountered similar troubles in my project, and after some exploration, I found the plugin wiejeben/craft-laravel-mix, which perfectly solved my caching problem.
 How to start nginx
Apr 14, 2025 pm 01:06 PM
Question: How to start Nginx? Answer: Install Nginx Startup Nginx Verification Nginx Is Nginx Started Explore other startup options Automatically start Nginx
 How to optimize website performance: Experiences and lessons learned from using the Minify library
Apr 17, 2025 pm 11:18 PM
In the process of developing a website, improving page loading has always been one of my top priorities. Once, I tried using the Miniify library to compress and merge CSS and JavaScript files in order to improve the performance of the website. However, I encountered many problems and challenges during use, which eventually made me realize that Miniify may no longer be the best choice. Below I will share my experience and how to install and use Minify through Composer.


