

Component-based project development in Vue (detailed tutorial)
This article mainly introduces the Vue project component engineering development practice plan. It is very good and has reference value. Friends in need can refer to it
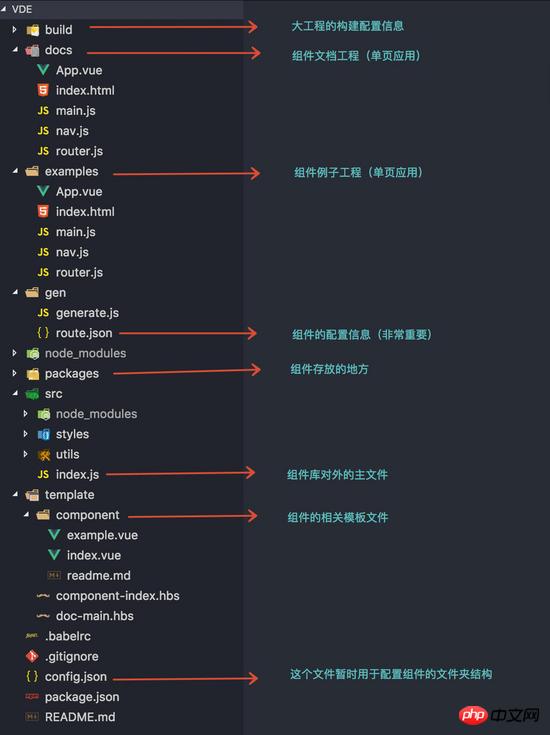
We temporarily named the extracted scaffolding vde- cli, the component library project directory structure generated through vde-cli scaffolding is as follows:
Core functions
Component Library
The packages folder of the project is used to store various components in the component library. There is no need to create components by manually creating files. It is completed directly through a command to create components. Each component has a separate component folder. The component folder contains at least three files: "index.vue", "example.vue", and "readme.md". These files are created by creating the component. The passed parameters are generated by adding the specified template. The command to create a component is as follows:
npm run generate
The two parameters are the name of the component and the one used later. The navigation name displayed in documentation and example projects.
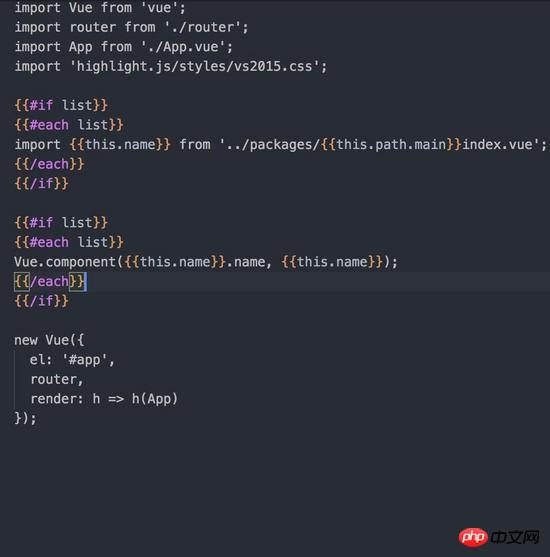
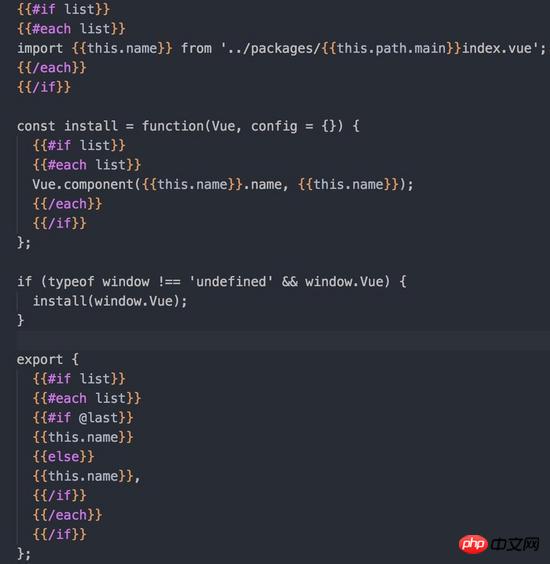
The external main file of the component library is the project's src/index.js. As long as the component is created through the above command, this file will be automatically updated (saving you the time of manual update)
Doc document project
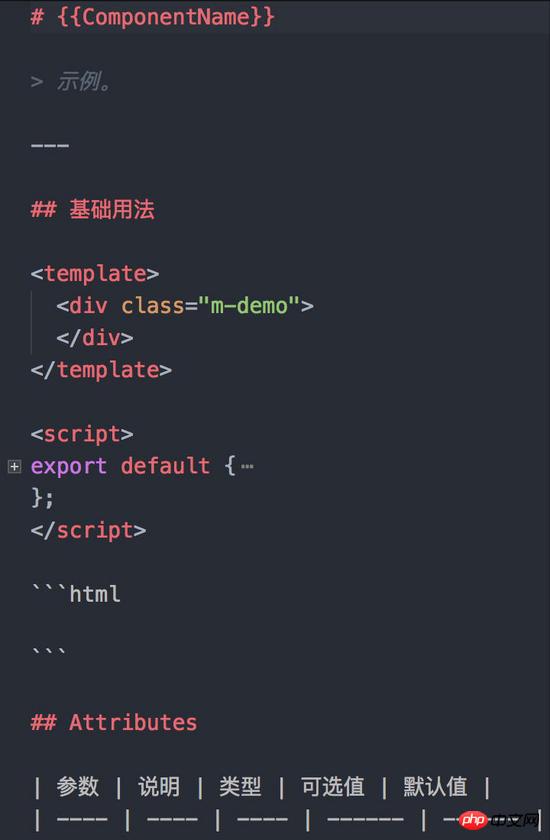
Doc document project is a small single-page system used to display your component documentation. The component document is the readme.md file stored in each component folder. We use vue-markdown-loader to parse this file and turn it into a vue component that is also displayed on the page. When you create a component through the above command, all dependent component parts of the Doc document project will be automatically updated (no manual operation is required)
Example example project
Example example project and Doc document The project is similar to a small single-page system used to display examples of your components. Examples of components are the example.vue files stored under each component folder. After creating the component through the instructions, you can test the component you wrote in this file.
The above document project and example project each have a corresponding service through webpack-dev-sever. Adding components and modifying file information under component files will automatically refresh these two applications.
Use one picture to represent the flow chart of the entire large project as follows:
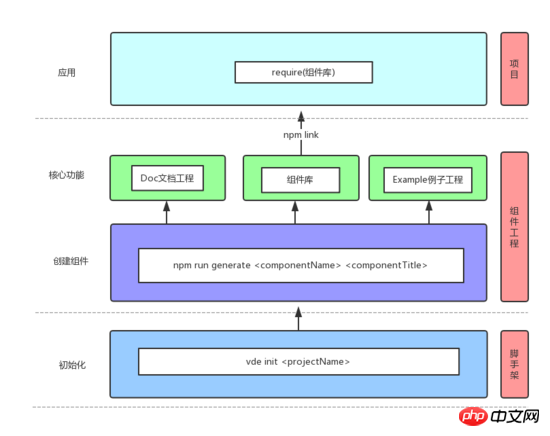
Main implementation methods
As mentioned above, the entire large project is actually composed of component library, document project and example project. Of course, the core thing is the component, so everything needs to start with creating the component:
All components are stored in the packages of the large project, which means that packages are the root directory where all components are stored (related to component configuration information). The first thing to note is that each component folder contains at least three files: the component main file (index.vue), the component example file (example.vue), and the component document file (readme.md). The three files included in each component are generated through a corresponding template file. The formats of these three templates can be customized according to your own needs, roughly similar to:
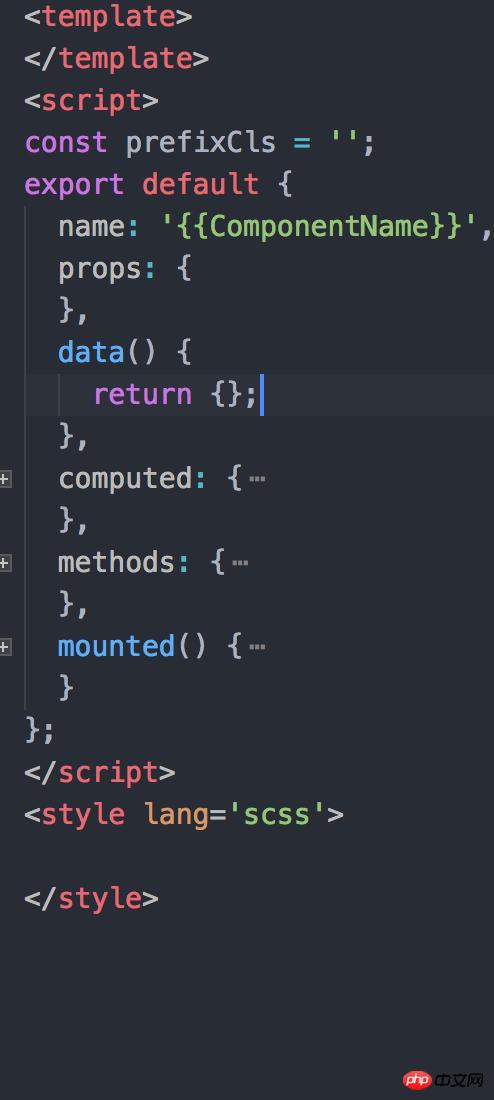
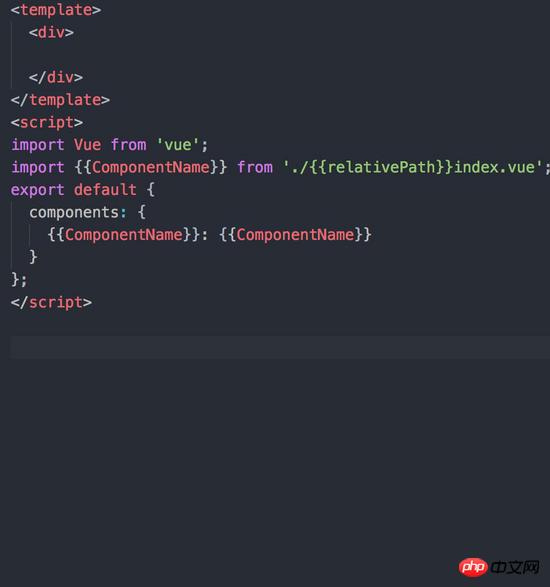
Pass two parameters through the command to create a component. One represents the name of the component (the name of the folder where the component is created), and the other is the title of the component (the navigation name used for document projects and example projects). show). With these two parameters, we can combine the component's template file to generate the corresponding component, and then write these component information into gen/route.json, because both the document project and the example project rely heavily on this information. After the component is created, a very important task is to automatically register the new component information (docs/main.js) in the document project and update the external main file (src/index.js) of the component library. These two files are also Generated through templates, the template formats are as follows:
Use
Only four commands are needed to start an automation component project:
1. Global installation of the vde-cli module
npm install -g vde-cli
2. Initialization project
$ vde init <project-name>
3. Install the required modules
$ npm install
4. Start the project
$ npm run start
然后整个工程就能运行起来了,应用的时候可以根据实际需求修改组件相关的模板和加入自己的组件库的其它配置信息就可以了。文档工程和例子工程的路由等信息都会在通过创建组件命令的时候自动更新,你在更改组件的文档和组件功能的时候,文档工程和例子工程都会实时更新。
实际项目接入
这里推荐使用npm link的方式,在项目里npm link本地用vde init的那个工程即可。
上面是我整理给大家的,希望今后会对大家有帮助。
相关文章:
使用vue2.0+vue-dplayer这些技术如何实现hls播放的示例
The above is the detailed content of Component-based project development in Vue (detailed tutorial). For more information, please follow other related articles on the PHP Chinese website!

Hot AI Tools

Undresser.AI Undress
AI-powered app for creating realistic nude photos

AI Clothes Remover
Online AI tool for removing clothes from photos.

Undress AI Tool
Undress images for free

Clothoff.io
AI clothes remover

Video Face Swap
Swap faces in any video effortlessly with our completely free AI face swap tool!

Hot Article
Hot Tools

Notepad++7.3.1
Easy-to-use and free code editor

SublimeText3 Chinese version
Chinese version, very easy to use

Zend Studio 13.0.1
Powerful PHP integrated development environment

Dreamweaver CS6
Visual web development tools

SublimeText3 Mac version
God-level code editing software (SublimeText3)
Hot Topics


 How to use bootstrap in vue
Apr 07, 2025 pm 11:33 PM
How to use bootstrap in vue
Apr 07, 2025 pm 11:33 PM
Using Bootstrap in Vue.js is divided into five steps: Install Bootstrap. Import Bootstrap in main.js. Use the Bootstrap component directly in the template. Optional: Custom style. Optional: Use plug-ins.
 How to add functions to buttons for vue
Apr 08, 2025 am 08:51 AM
How to add functions to buttons for vue
Apr 08, 2025 am 08:51 AM
You can add a function to the Vue button by binding the button in the HTML template to a method. Define the method and write function logic in the Vue instance.
 How to use watch in vue
Apr 07, 2025 pm 11:36 PM
How to use watch in vue
Apr 07, 2025 pm 11:36 PM
The watch option in Vue.js allows developers to listen for changes in specific data. When the data changes, watch triggers a callback function to perform update views or other tasks. Its configuration options include immediate, which specifies whether to execute a callback immediately, and deep, which specifies whether to recursively listen to changes to objects or arrays.
 What does vue multi-page development mean?
Apr 07, 2025 pm 11:57 PM
What does vue multi-page development mean?
Apr 07, 2025 pm 11:57 PM
Vue multi-page development is a way to build applications using the Vue.js framework, where the application is divided into separate pages: Code Maintenance: Splitting the application into multiple pages can make the code easier to manage and maintain. Modularity: Each page can be used as a separate module for easy reuse and replacement. Simple routing: Navigation between pages can be managed through simple routing configuration. SEO Optimization: Each page has its own URL, which helps SEO.
 How to reference js file with vue.js
Apr 07, 2025 pm 11:27 PM
How to reference js file with vue.js
Apr 07, 2025 pm 11:27 PM
There are three ways to refer to JS files in Vue.js: directly specify the path using the <script> tag;; dynamic import using the mounted() lifecycle hook; and importing through the Vuex state management library.
 How to return to previous page by vue
Apr 07, 2025 pm 11:30 PM
How to return to previous page by vue
Apr 07, 2025 pm 11:30 PM
Vue.js has four methods to return to the previous page: $router.go(-1)$router.back() uses <router-link to="/" component window.history.back(), and the method selection depends on the scene.
 How to use vue traversal
Apr 07, 2025 pm 11:48 PM
How to use vue traversal
Apr 07, 2025 pm 11:48 PM
There are three common methods for Vue.js to traverse arrays and objects: the v-for directive is used to traverse each element and render templates; the v-bind directive can be used with v-for to dynamically set attribute values for each element; and the .map method can convert array elements into new arrays.
 How to jump to the div of vue
Apr 08, 2025 am 09:18 AM
How to jump to the div of vue
Apr 08, 2025 am 09:18 AM
There are two ways to jump div elements in Vue: use Vue Router and add router-link component. Add the @click event listener and call this.$router.push() method to jump.
