
 Web Front-end
JS Tutorial
Vue+ElementUI method to realize dynamic rendering and visual configuration of forms
Web Front-end
JS Tutorial
Vue+ElementUI method to realize dynamic rendering and visual configuration of forms
Vue+ElementUI method to realize dynamic rendering and visual configuration of forms
This article mainly introduces the method of Vue ElementUI to realize dynamic rendering and visual configuration of forms. Friends who need it can refer to it
Dynamic rendering means having asynchronous data, which probably looks like this:
{
 "inline": true,
 "labelPosition": "right",
 "labelWidth": "",
 "size": "small",
 "statusIcon": true,
 "formItemList": [
 {
 "type": "input",
 "label": "姓名",
 "disable": false,
 "readonly": false,
 "value": "",
 "placeholder": "请输入姓名",
 "rules": [],
 "key": "name",
 "subtype": "text"
 },
 {
 "type": "radio",
 "label": "性别",
 "value": "",
 "button": false,
 "border": true,
 "rules": [],
 "key": "gender",
 "options": [
 {
  "value": "1",
  "label": "男",
  "disabled": false
 },
 {
  "value": "0",
  "label": "女",
  "disabled": false
 }
 ]
 }
 ]
}Then you need to render this json like this:

The data of the final submitted form looks like this:
{
 "name": "Genji",
 "gender": "1"
}Then our goal is to encapsulate such a Component:
<dynamic-form :config="someConfig" v-model="someData" />
Implementation
Before you start, you need to know how v-model works:
<input v-model="something">
This is nothing more It is syntactic sugar for the following example:
<input
 :value="something"
 @input="something = $event.target.value">
After understanding this, let’s implement this component step by step.
First, forward the configuration to el-form:
<template>
<el-form
class="dynamic-form"
:inline="formConfig.inline"
:model="value"
:label-position="formConfig.labelPosition"
:label-width="formConfig.labelWidth"
:size='formConfig.size'
:status-icon="formConfig.statusIcon">
<slot/>
</el-form>
</template>
<script>
export default {
props: {
formConfig: {
type: Object,
required: true
},
value: {
type: Object,
required: true
}
},
}
</script>The second step, set the default value.
Because each form-item will require a v-model, so before rendering, ensure that each field has a value. One thing to note here is that the prop passed in by the parent component should not be directly modified within the component, so we use {...this.value} to quickly make a copy, and finally don’t forget to notify the parent component. The code is as follows:
export default {
 props: {
 formConfig: {...},
 value: {...},
 },
 methods: {
 setDefaultValue() {
 const formData = { ...this.value }
 // 设置默认值
 this.formConfig.formItemList.forEach(({ key, value }) => {
 if (formData[key] === undefined || formData[key] === null) {
  formData[key] = value
 }
 })
 this.$emit('input', formData)
 }
 },
 mounted() {
 this.setDefaultValue()
 },
}The third step is to render form-item.
How to render the following data into the familiar el-form-item?
{
 "type": "input",
 "label": "姓名",
 "disable": false,
 "readonly": false,
 "value": "",
 "placeholder": "请输入姓名",
 "rules": [],
 "key": "name",
 "subtype": "text"
}The first one, using vue’s built-in component component, may be written like this:
<el-form-item>
 <component :is="`el-${item.type}`" />
</el-form-item>The second one, use v-if to judge one by one:
<el-form-item> <el-input v-if="item.type === 'input'" /> <span v-else>未知控件类型</span> </el-form-item>
Consider Since the processing logic of each form control is very different, the author adopted the second method.
According to this idea, we encapsulate a dynamic-form-item , receive an item, and render an el-form-item:
<template>
<el-form-item :rules="item.Rules" :label="item.label" :prop="item.key">
<el-input
v-if="item.type==='input'"
v-bind="$attrs" v-on="$listeners"
:type="item.subtype"
:placeholder="item.placeholder"
:disabled="item.disable"
:readonly="item.readonly"
:autosize="item.autosize"></el-input>
<el-select
v-else-if="item.type==='select'"
v-bind="$attrs" v-on="$listeners"
:multiple="item.multiple"
:disabled="item.disabled"
:multiple-limit="item.multipleLimit">
<el-option
v-for="o in item.options"
:key="o.value"
:label="o.label"
:value="o.value"
:disabled="o.disabled">
</el-option>
</el-select>
<!--突然有点想念JSX-->
...
<span v-else>未知控件类型</span>
</el-form-item>
</template>
<script>
export default {
props: {
item: {
type: Object,
required: true
}
}
}
</script>tips: Use v-bind="$attrs" v-on="$listeners" You can easily forward the v-model directive of the parent component. For details, see vue high-order components.
Finally, we can loop out a complete form:
<dynamic-form-item
 v-for="item in formConfig.formItemList"
 :key="item.key"
 v-if="value[item.key]!==undefined"
 :item="item"
 :value="value[item.key]"
 @input="handleInput($event, item.key)" />
Cannot be used herev-model="value[item.key]" , above As mentioned, props cannot be modified directly within the component, so we will forward it here.
methods: {
 handleInput(val, key) {
 // 这里element-ui没有上报event,直接就是value了
 this.$emit('input', { ...this.value, [key]: val })
 },
 setDefaultValue() {...}
},Full code address: src/components/dynamic-form/form.vue
##Extended functions
1. Number display unit, limit the number of decimal places
element-ui does not have this function, but I think it is quite common, so I used el-input to manually encapsulate it An input-number: 
<!--普通使用--> <input-number v-model="someNumber" :min="1" :max="99" :decimal1="2" append="元"></input-number> <!--在dynamic-form-item中的应用--> <input-number v-else-if="item.type==='number'" v-bind="$attrs" v-on="$listeners" :min="item.min" :max="item.max" :decimal1="item.decimal1" :append="item.append" :prepend="item.prepend" :disabled="item.disabled"></input-number>
src/components/dynamic-form/input-number.vue
2. Asynchronous verification
Thanks to async-validator, we can easily customize verification rules. 
{
 "type": "input",
 ...
 "rules":[
  {
   "sql": "SELECT {key} FROM balabala",
   "message": "xx已被占用",
   "trigger": "blur"
  }
 ]
} dynamic-form-item component, traverse item.rules and convert sql verification into Custom validator function:
<template>
<el-form-item :rules="Rules" >
...
</el-form-item>
</template>
<script>
import request from '@/utils/request'
export default {
props: {
item: {...}
},
computed: {
Rules() {
const rules = this.item.rules
if (rules === undefined) return undefined
const R = []
rules.forEach(rule => {
if (rule.sql) {
const validator = (rule2, value, callback) => {
// 根据项目自行修改
request('/api/validate', 'POST', {
key: rule2.field,
value,
sql: rule.sql.replace(/{key}/ig, rule2.field)
})
.then(res => {
callback(!res || undefined)
})
.catch(err => {
this.$message.error(err.message)
callback(false)
})
}
R.push({ validator, message: rule.message, trigger: 'blur' })
} else {
R.push(rule)
}
})
return R
}
},
}
</script>{
"type": "cascader",
...
"areaShortcut": "provinceAndCityData"
}<template> <el-form-item> ... <el-cascader :options="item.options || require('element-china-area-data')[item.areaShortcut]" ></el-cascader> </el-form-item> </template>
{
 "type": "checkbox",
 ...
 "optionsUrl": "/api/some/options"
}<template>
<el-form-item>
...
<el-select>
<el-option
v-for="o in item.options || ajaxOptions"
></el-option>
</el-select>
</el-form-item>
</template>
<script>
import request from '@/utils/request'
export default {
props: {
item: {...}
},
computed: {...},
data() {
return {
ajaxOptions: []
}
},
created() {
const { optionsUrl, key, type } = this.item
if (optionsUrl) {
// 根据项目自行修改
request(`${optionsUrl}?key=${key}`, 'GET')
.then(res => {
this.ajaxOptions = res
})
.catch(err => { this.$message.error(err.message) })
}
}
}
</script>nodejs example of method to connect to mongodb database
Select selector multi-selection verification method in iview
Using Axios Element to implement global request loading method
The above is the detailed content of Vue+ElementUI method to realize dynamic rendering and visual configuration of forms. For more information, please follow other related articles on the PHP Chinese website!

Hot AI Tools

Undresser.AI Undress
AI-powered app for creating realistic nude photos

AI Clothes Remover
Online AI tool for removing clothes from photos.

Undress AI Tool
Undress images for free

Clothoff.io
AI clothes remover

Video Face Swap
Swap faces in any video effortlessly with our completely free AI face swap tool!

Hot Article
Hot Tools

Notepad++7.3.1
Easy-to-use and free code editor

SublimeText3 Chinese version
Chinese version, very easy to use

Zend Studio 13.0.1
Powerful PHP integrated development environment

Dreamweaver CS6
Visual web development tools

SublimeText3 Mac version
God-level code editing software (SublimeText3)
Hot Topics
 1659
1659
 14
1415
52
1310
25
1258
29
1232
24
14
1415
52
1310
25
1258
29
1232
24

 Fix: Windows 11's dynamic refresh rate doesn't work
Apr 13, 2023 pm 08:52 PM
Fix: Windows 11's dynamic refresh rate doesn't work
Apr 13, 2023 pm 08:52 PM
You can measure a screen's refresh rate by counting the number of times the image updates per second. DRR is a new feature included in Windows 11 that helps you save battery life while still providing a smoother display, but it's no surprise when it doesn't work properly. Screens with higher refresh rates are expected to become more common as more manufacturers announce plans to stop producing 60Hz monitors. This will result in smoother scrolling and better gaming, but it will come at the cost of reduced battery life. However, the dynamic refresh rate feature in this iteration of the OS is a nifty addition that can have a big impact on your overall experience. Read on as we discuss what to do if Windows 11’s dynamic refresh rate isn’t working
 How to Hide Dynamic Island and Red Indicator in iPhone Screen Recording
Apr 13, 2023 am 09:13 AM
How to Hide Dynamic Island and Red Indicator in iPhone Screen Recording
Apr 13, 2023 am 09:13 AM
On iPhone, Apple's screen recording feature records a video of what you're doing on the screen, which is useful if you want to capture gameplay, walk someone through a tutorial in an app, demonstrate a bug, or anything else. On older iPhones that have a notch at the top of the display, the notch is not visible in screen recording, as it should be. But on newer iPhones with the Dynamic Island cutout, such as the iPhone 14 Pro and iPhone 14 Pro Max, the Dynamic Island animation displays the red recording indicator, which causes the cutout to be visible in captured videos. this might
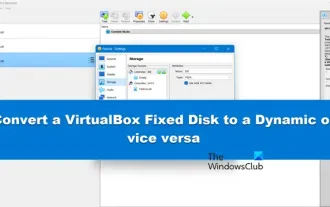 Convert VirtualBox fixed disk to dynamic disk and vice versa
Mar 25, 2024 am 09:36 AM
Convert VirtualBox fixed disk to dynamic disk and vice versa
Mar 25, 2024 am 09:36 AM
When creating a virtual machine, you will be asked to select a disk type, you can select fixed disk or dynamic disk. What if you choose fixed disks and later realize you need dynamic disks, or vice versa? Good! You can convert one to the other. In this post, we will see how to convert VirtualBox fixed disk to dynamic disk and vice versa. A dynamic disk is a virtual hard disk that initially has a small size and grows in size as you store data in the virtual machine. Dynamic disks are very efficient at saving storage space because they only take up as much host storage space as needed. However, as disk capacity expands, your computer's performance may be slightly affected. Fixed disks and dynamic disks are commonly used in virtual machines
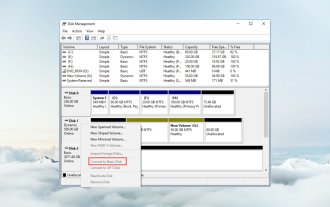 How to convert dynamic disk to basic disk on Windows 11
Sep 23, 2023 pm 11:33 PM
How to convert dynamic disk to basic disk on Windows 11
Sep 23, 2023 pm 11:33 PM
If you want to convert a dynamic disk to a basic disk in Windows 11, you should create a backup first as the process will erase all data in it. Why should you convert dynamic disk to basic disk in Windows 11? According to Microsoft, dynamic disks have been deprecated from Windows and their use is no longer recommended. Additionally, Windows Home Edition does not support dynamic disks, so you will not be able to access these logical drives. If you want to combine more disks into a larger volume, it is recommended to use Basic Disks or Storage Spaces. In this article, we will show you how to convert dynamic disk to basic disk on Windows 11 How to convert dynamic disk to basic disk in Windows 11? In the beginning
 How to Get Live Tiles on the Desktop and Start Menu in Windows 11
Apr 14, 2023 pm 05:07 PM
How to Get Live Tiles on the Desktop and Start Menu in Windows 11
Apr 14, 2023 pm 05:07 PM
Imagine you are looking for something on your system but are not sure which application to open or select. This is where the Live Tiles feature comes into play. A live tile for any supported application can be added to the desktop or Windows system's Start menu, with its tiles changing frequently. LiveTiles make application widgets come alive in a very pleasing way. Not just for its appearance, but even for convenience. Suppose you are using whatsapp or facebook application on your system, wouldn't it be convenient if the number of notifications is displayed on the application icon? This is possible if any such supported app is added as a live tile. Let’s see how to do it in Windows
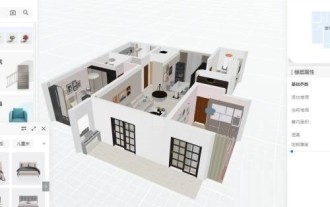 How to render orthogonal top view in Kujiale_Tutorial on rendering orthogonal top view in Kujiale
Apr 02, 2024 pm 01:10 PM
How to render orthogonal top view in Kujiale_Tutorial on rendering orthogonal top view in Kujiale
Apr 02, 2024 pm 01:10 PM
1. First open the design plan to be rendered in Kujiale. 2. Then open top view rendering under the rendering menu. 3. Then click Orthogonal in the parameter settings in the top view rendering interface. 4. Finally, after adjusting the model angle, click Render Now to render the orthogonal top view.
 How to disable dynamic display of folders and files to prevent quick access in Windows 10 and 11?
May 06, 2023 pm 04:58 PM
How to disable dynamic display of folders and files to prevent quick access in Windows 10 and 11?
May 06, 2023 pm 04:58 PM
Microsoft introduced Quick Access in Windows 10 and retained the feature in the recently released Windows 11 operating system. Quick Access replaces the Favorites system in File Explorer. One of the core differences between the two features is that Quick Access adds a dynamic component to its list. Some folders appear permanently, while others appear based on usage. Fixed folders are displayed with a pin icon, while dynamic folders do not have such an icon. You can see a comparison between My Favorites and Quick Access here for more details. Quick Access is more powerful than Favorites, but dynamic folder lists add an element of clutter to it. Files that are useless or should not be highlighted in File Explorer may be displayed
 How to use Dynamic Lock on Windows 11
Apr 13, 2023 pm 08:31 PM
How to use Dynamic Lock on Windows 11
Apr 13, 2023 pm 08:31 PM
What is dynamic locking on Windows 11? Dynamic Lock is a Windows 11 feature that locks your computer when a connected Bluetooth device (your phone or wearable) goes out of range. The Dynamic Lock feature automatically locks your PC even if you forget to use the Windows Key + L shortcut while walking away. Dynamic Lock works with any connected device with Bluetooth, but it's best to use a device with enough battery power and range, such as your phone. Once your device becomes inaccessible for 30 seconds, Windows will automatically lock the screen. Pair a Bluetooth device with Windows 11 For everything to work properly, you need to first
