

How to use take in redux-saga
This time I will show you how to use take in redux-saga. What are the precautions when using take in redux-saga. Here are practical cases, let’s take a look.
Bring me an API usage method that I have studied for a long time.
The take API usage method in the effect in redux-saga is mostly used for call, put, and select, but the take method is more common. I really don’t have a chance to use it, and I don’t know where to use it. Anyway, since it is written by redux-saga, there must be its usage. No matter 37 21, learn how to use it first.
Let’s take a look at the introduction first:
take
take’s performance is the same as takeEvery, it monitors an action, but unlike takeEvery, it is not triggered every time the action is triggered. All correspond, but the corresponding action will only occur when the execution sequence reaches the take statement.
When using the take statement in the genetator to wait for an action, the generator is blocked, waiting for the action to be distributed, and then continues execution.
takeEvery just listens to each action and then executes the processing function. takeEvery has no control over when and how to respond.
But take is different. We can decide in the generator function when to respond to an action and what to do after an action is triggered.
The biggest difference: take will only respond to the corresponding action when the execution flow is reached, while takeEvery will respond to the action once registered.
The above code:
effects: {
* takeDemo1({payload}, {put, call, take}) {
},
* takeInputChange({payload}, {put, call, take,takeEvery,takeLatest}) {
// yield call(delay,1000);
console.log(takeEvery);
// for (let i = 0; i < 3; i++) {
const action = yield take('takeBlur'});
console.log(action, 'action');
console.log(payload.value);
// }
},
* takeBlur() {
console.log(323)
},
}changeHandle(e){
this.props.dispatch({type:'takeInputChange',payload:{value:e.target.value}})
}
blur(){
this.props.dispatch({type:'takeBlur'})
}
render() {
return (
<p style={{position: 'relative'}}>
<Input onChange={this.changeHandle.bind(this)} onBlur={this.blur.bind(this)}/>
</p>
)
}There is an input on the page, bound to two methods, the first is the onchange method, the other is the onBlur method,
When the input value When changing, this function is called through this.props.dispatch({type:'takeInputChange'}), but because the take method is encountered, execution cannot continue (paused). If the take here is replaced by takeEvery is quite different. The function will continue to execute, that is, the following two consoles will execute,
and the method of takeEvery execution is placed in its callback, see the following code
yield takeEvery('takeBlur',()=>{console.log(payload.value)});What needs to be emphasized is that this function will be triggered every time the input changes, so every time it changes, you will see that the console will print the value in the console.
Next, if the input loses focus, The onBlur method will be executed, and this.props.dispatch({type:'takeBlur'}) is called at this time;
Because the take in takeInputChange has monitored the takeBlur action, it will continue to execute what needs to be executed. Content.
This take has been studied for a long time anyway. I don’t know when this thing can be used.
I believe that after reading the case in this article, you have mastered the method, and more How exciting, please pay attention to other related articles on php Chinese website!
Recommended reading:
How to implement a forced refresh on the WeChat web side after backing off
Set cookie expiration for automatic update and automatic acquisition
How to use the React BootStrap framework
The above is the detailed content of How to use take in redux-saga. For more information, please follow other related articles on the PHP Chinese website!

Hot AI Tools

Undresser.AI Undress
AI-powered app for creating realistic nude photos

AI Clothes Remover
Online AI tool for removing clothes from photos.

Undress AI Tool
Undress images for free

Clothoff.io
AI clothes remover

Video Face Swap
Swap faces in any video effortlessly with our completely free AI face swap tool!

Hot Article
Hot Tools

Notepad++7.3.1
Easy-to-use and free code editor

SublimeText3 Chinese version
Chinese version, very easy to use

Zend Studio 13.0.1
Powerful PHP integrated development environment

Dreamweaver CS6
Visual web development tools

SublimeText3 Mac version
God-level code editing software (SublimeText3)
Hot Topics


 Windows 11 shutdown prompts task host window task host is executing the shutdown task solution
Feb 12, 2024 pm 12:40 PM
Windows 11 shutdown prompts task host window task host is executing the shutdown task solution
Feb 12, 2024 pm 12:40 PM
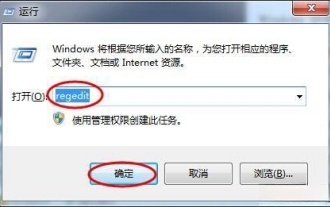
Recently, many Win11 users have reported that when shutting down, they are prompted that the taskhostwindow task host is executing the shutdown task. So what is going on? Users can enter the Desktop folder under the local registry editor, and then select AutoEndTasks in the right window to set it. Let this site carefully introduce to users the solution to this problem when shutting down. Windows 11 shutdown prompts that the taskhostwindow task host is executing the shutdown task. Solution 1. Use the key combination win key + r key, enter "regedit" and press Enter, as shown in the figure below. 2. Search for [HKEY
 How to set up the keyboard boot function on a GIGABYTE motherboard (enable keyboard boot mode on GIGABYTE motherboard)
Dec 31, 2023 pm 05:15 PM
How to set up the keyboard boot function on a GIGABYTE motherboard (enable keyboard boot mode on GIGABYTE motherboard)
Dec 31, 2023 pm 05:15 PM
How to set up keyboard startup on Gigabyte's motherboard. First, if it needs to support keyboard startup, it must be a PS2 keyboard! ! The setting steps are as follows: Step 1: Press Del or F2 to enter the BIOS after booting, and go to the Advanced (Advanced) mode of the BIOS. Ordinary motherboards enter the EZ (Easy) mode of the motherboard by default. You need to press F7 to switch to the Advanced mode. ROG series motherboards enter the BIOS by default. Advanced mode (we use Simplified Chinese to demonstrate) Step 2: Select to - [Advanced] - [Advanced Power Management (APM)] Step 3: Find the option [Wake up by PS2 keyboard] Step 4: This option The default is Disabled. After pulling down, you can see three different setting options, namely press [space bar] to turn on the computer, press group
 Detailed explanation of how to use take and limit in Laravel
Mar 10, 2024 pm 05:51 PM
Detailed explanation of how to use take and limit in Laravel
Mar 10, 2024 pm 05:51 PM
"Detailed explanation of how to use take and limit in Laravel" In Laravel, take and limit are two commonly used methods, used to limit the number of records returned in database queries. Although their functions are similar, there are some subtle differences in specific usage scenarios. This article will analyze the usage of these two methods in detail and provide specific code examples. 1. Take method In Laravel, the take method is used to limit the number of records returned, usually combined with the orderBy method.
 How to enable direct connection of independent graphics card on Shenzhou Xuanlong m7e8s3?
Jan 04, 2024 am 09:24 AM
How to enable direct connection of independent graphics card on Shenzhou Xuanlong m7e8s3?
Jan 04, 2024 am 09:24 AM
How to enable the direct connection of the independent graphics card of the Shenzhou Xuanlong m7. To enable the direct connection function of the independent graphics card of the Shenzhou Xuanlong m7, you can follow the following steps: 1. First, make sure that you have installed the driver of the independent graphics card. You can go to the official Shenzhou website or the official website of the independent graphics card manufacturer to download and install the latest driver suitable for your graphics card model. 2. On the computer desktop, right-click a blank space and select "NVIDIA Control Panel" in the pop-up menu (if it is an AMD graphics card, select "AMDRadeon Settings"). 3. In the control panel, find "3D Settings" or a similarly named option and click to enter. 4. In "3D Settings" you need to find "Global Settings" or a similarly named option. Here you can specify the use of a unique
 How to identify genuine and fake shoe boxes of Nike shoes (master one trick to easily identify them)
Sep 02, 2024 pm 04:11 PM
How to identify genuine and fake shoe boxes of Nike shoes (master one trick to easily identify them)
Sep 02, 2024 pm 04:11 PM
As a world-renowned sports brand, Nike's shoes have attracted much attention. However, there are also a large number of counterfeit products on the market, including fake Nike shoe boxes. Distinguishing genuine shoe boxes from fake ones is crucial to protecting the rights and interests of consumers. This article will provide you with some simple and effective methods to help you distinguish between real and fake shoe boxes. 1: Outer packaging title By observing the outer packaging of Nike shoe boxes, you can find many subtle differences. Genuine Nike shoe boxes usually have high-quality paper materials that are smooth to the touch and have no obvious pungent smell. The fonts and logos on authentic shoe boxes are usually clear and detailed, and there are no blurs or color inconsistencies. 2: LOGO hot stamping title. The LOGO on Nike shoe boxes is usually hot stamping. The hot stamping part on the genuine shoe box will show
 What is the resolution of Savior y7000p when playing CF (how to adjust the full screen when playing CF on Savior y7000)
Jan 07, 2024 am 10:13 AM
What is the resolution of Savior y7000p when playing CF (how to adjust the full screen when playing CF on Savior y7000)
Jan 07, 2024 am 10:13 AM
What is the resolution of Savior Y7000P when playing CF? The resolution of Savior Y7000P when playing CF is 1920*1080. Because this computer is equipped with a GTX1650 graphics card and an i5-9300H processor, its performance is relatively good and sufficient to meet the needs of games such as CF. At the same time, 1920*1080 is the current resolution of mainstream e-sports monitors, and the image quality and clarity are sufficient. In addition, if there are players with higher requirements, you can appropriately lower the game image quality settings to obtain a smoother gaming experience. In order to enjoy a clearer visual experience, you can adjust the resolution of the Savior y7000p to 2560*1400. This way, you will be able to enjoy higher quality image display. Equipped with the Savior Y7000P 2022 model
 How to roll back version in Win11?
Jun 30, 2023 pm 05:21 PM
How to roll back version in Win11?
Jun 30, 2023 pm 05:21 PM
How to cancel the version of Win11? Many friends think it is not easy to use after upgrading win11, so you can choose to return to the previous version. So you know how to do it? Many users don’t know that the method is actually not difficult. Below, the editor will share with you how to return Win10. Let’s learn together. Share how to return to Win10 1. Enter "Settings". 2. Select "Windows Update" and then click "Restore". 3. Select "Previous Version of Windows" in "Recovery Options" and click "Return". 4. Select the reason and click "Next". 5. You will see a "Check for updates" notification, select "No, thank you". 6. Read what you need to know, and then click "
 How to view and edit SQL files
Feb 26, 2024 pm 05:12 PM
How to view and edit SQL files
Feb 26, 2024 pm 05:12 PM
A SQL file is a text file that usually contains a series of SQL statements. To open a SQL file, you can use a text editor or a specialized SQL development tool. The easiest way to open a SQL file is with a text editor, such as Notepad or Notepad++ in Windows, or Text Editor in Mac. Here are the steps to open a SQL file: First, find the SQL file you want to open, right-click the file, and select "Open with". in the pop-up window
