
 Backend Development
PHP Tutorial
Website Alipay payment principle and tutorial sharing on integration and use in yii2
Backend Development
PHP Tutorial
Website Alipay payment principle and tutorial sharing on integration and use in yii2
Website Alipay payment principle and tutorial sharing on integration and use in yii2

In this article, we mainly share with you the payment principle of Alipay on the website and the integrated usage tutorial in yii2. First, we need to apply for Alipay to settle in. For specific methods, please refer to the website:
https://open .alipay.com/platform/home.htm
Apply according to the specific process of the website. You only need to follow the website prompts to complete the application.
After applying, we can see the following interface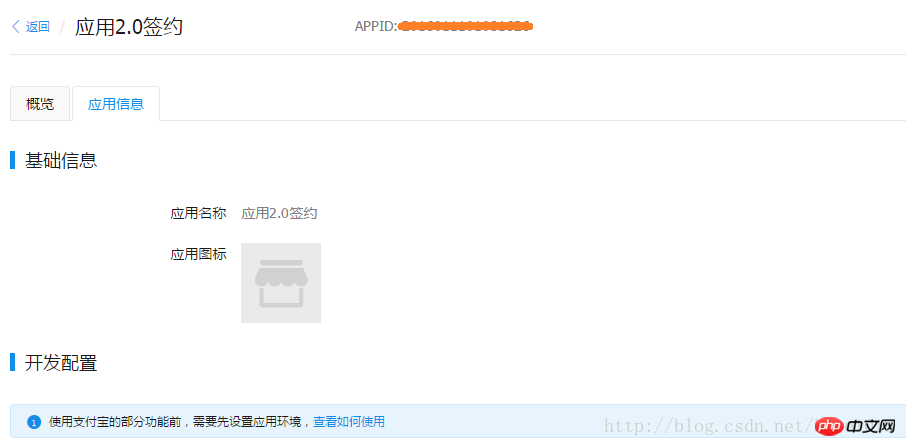
Please refer to the method of generating public and private keys:
https://docs.open.alipay.com/291/105971
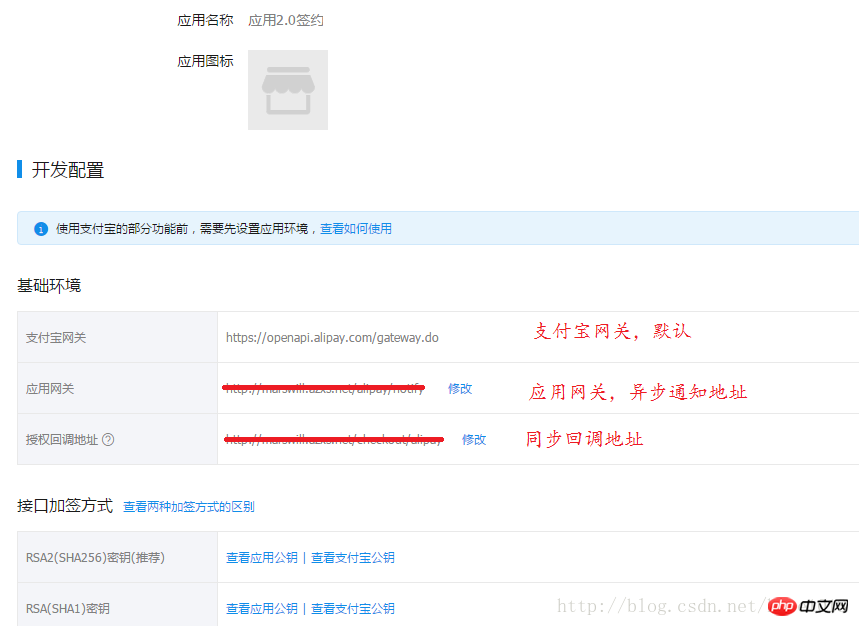
We can get several parameters here:
app_id Application ID
notify_url Asynchronous notification address
return_url Synchronous callback address
alipay_public_key Alipay public key
After obtaining these parameters, we can start development
We need to download Alipay sdk and demo
Download Address:
https://docs.open.alipay.com/270/106291/
We need to put the sdk into the customized extension in our project Directory, such as common/vendors, for more convenient use, we will introduce the pagepay folder in the Alipay demo and put it into our sdk. Of course, you can also encapsulate it yourself. 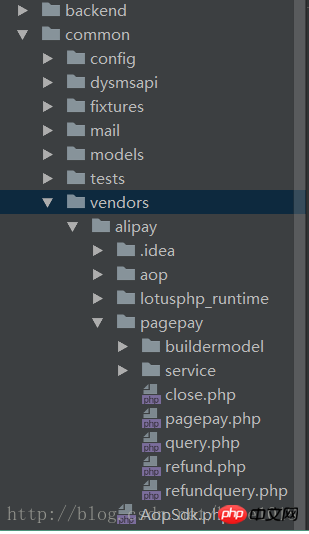
Then we can write the config code in the demo into our common/config/params.php to facilitate calling it in the form of a component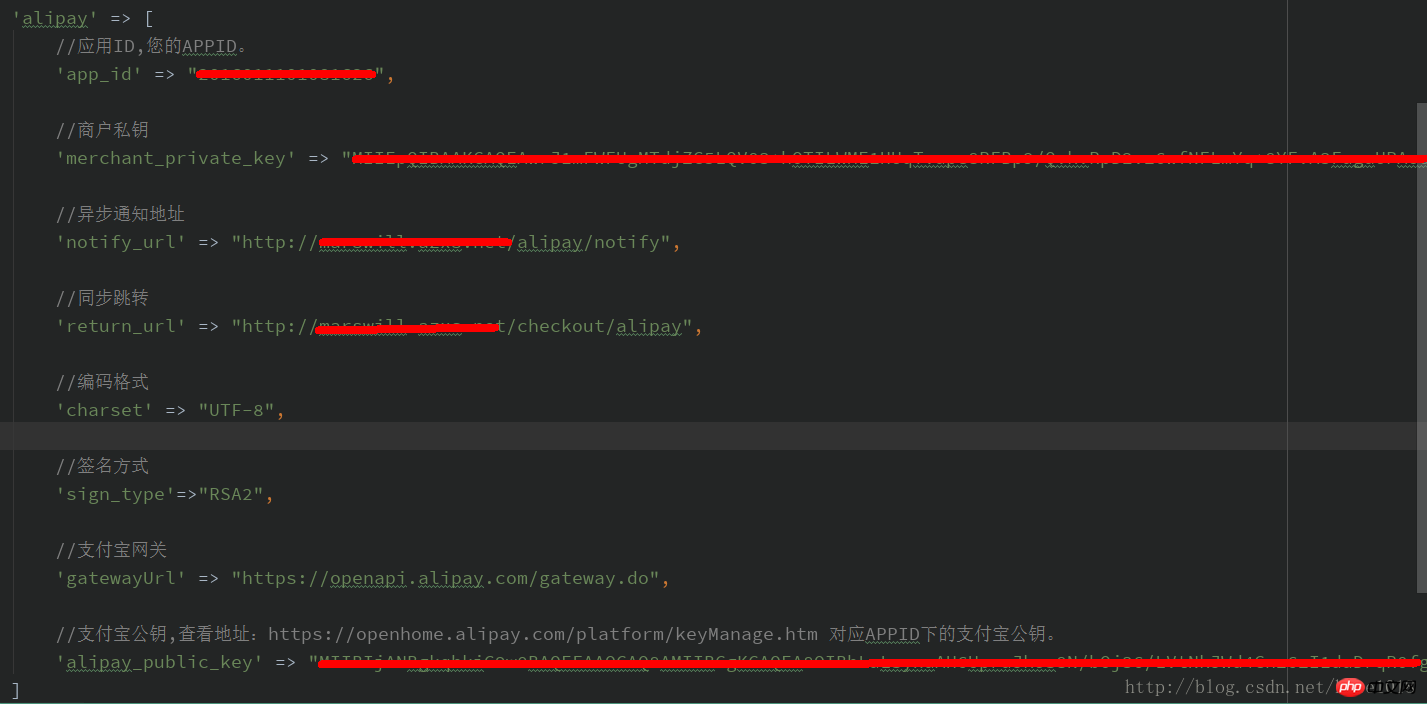
Key content:
Note that both the asynchronous notification address and the synchronous jump address must be addresses that can be accessed online. The private key is the private key generated in the previous generator, and the public key can be viewed on the website.
So, below we will implement payment in the code.
1. Introduce AlipayTradePagePayContentBuilder.php and AlipayTradeService.php in the controller

2. We create a Test method to make payment:
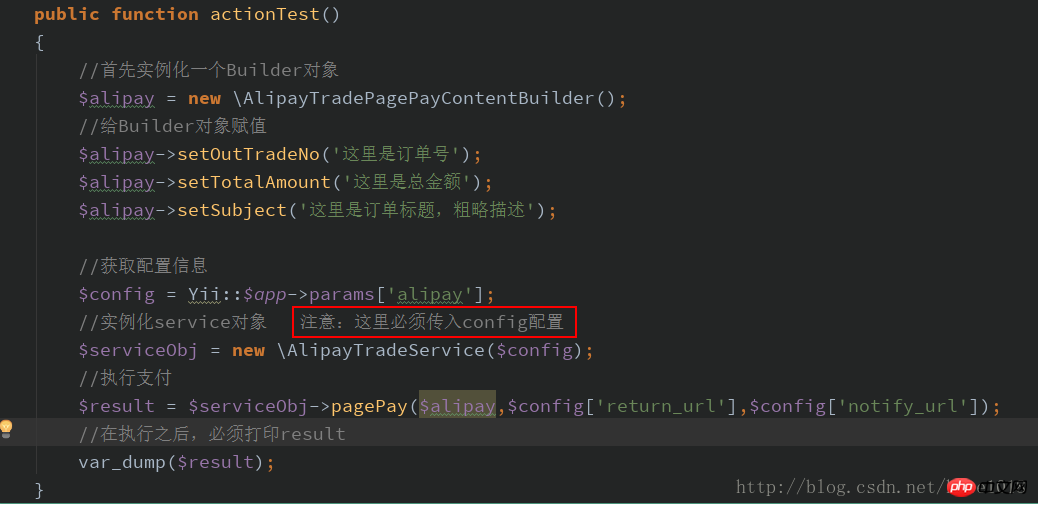
3. Note that the return_url and notify_url we configured previously must be addresses accessible online, and then we can execute our own methods asynchronously and synchronously respectively
When notify asynchronous notification and synchronous callback return_url, you also need to introduce the AlipayTradeService.php file
synchronous return_url, because we configure the alipay method under the check controller, we can implement it like this: 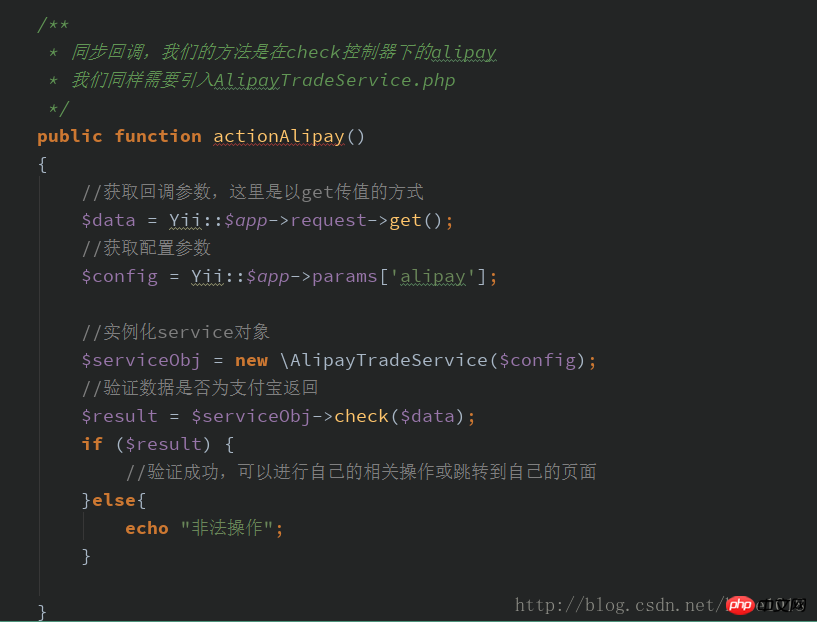
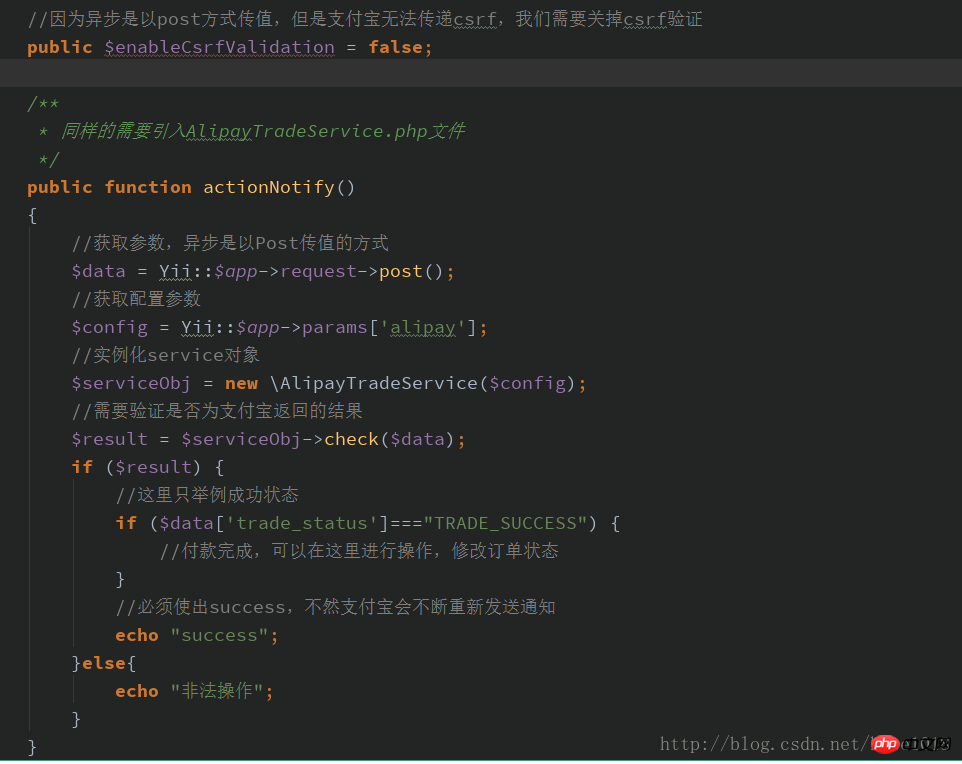
Asynchronous notify_url, the same can be achieved like this:
At this point, we have completed the entire Alipay payment process. If it helps you, please give it a like, thank you
This article is reproduced from AxiosGao-About Alipay computer website payment recommendations in yii2. Please follow the original author's blog to see more exciting sharing
First we need to apply for Alipay settlement. For specific methods, please refer to the website:
https://open.alipay.com/platform/home.htm
Apply according to the specific process of the website. You only need to follow the website prompts to complete the application.
After applying, we can see the following interface
Please refer to the method of generating public and private keys:
https://docs.open.alipay.com/291/105971
We can get several parameters here:
app_id Application ID
notify_url Asynchronous notification address
return_url Synchronous callback address
alipay_public_key Alipay public key
After obtaining these parameters, we can start development
We need to download Alipay sdk and demo
Download Address:
https://docs.open.alipay.com/270/106291/
We need to put the sdk into a customized extension directory in our project, such as common/vendors. For more convenient use, we will introduce the pagepay folder in the Alipay demo and put it into our sdk , of course you can also encapsulate it yourself.
Then we can write the config code in the demo into our common/config/params.php to facilitate calling it in the form of a component
Key content:
Note that both the asynchronous notification address and the synchronous jump address must be addresses that can be accessed online. The private key is the private key generated in the previous generator, and the public key can be viewed on the website.
So, below we will implement payment in the code.
1. Introduce AlipayTradePagePayContentBuilder.php and AlipayTradeService.php in the controller
2. We create a Test method to make payment:
3. Note that the return_url and notify_url we configured previously must be addresses accessible online, and then we can execute our own methods asynchronously and synchronously respectively
When notify asynchronous notification and synchronous callback return_url, you also need to introduce the AlipayTradeService.php file
synchronous return_url, because we configure the alipay method under the check controller, we can implement it like this:
Asynchronous notify_url, the same can be achieved like this:
PHP development Examples of WeChat payment and Alipay payment
PHP background signature implementation method of Alipay payment
Summary of PHP's Alipay payment interface
The above is the detailed content of Website Alipay payment principle and tutorial sharing on integration and use in yii2. For more information, please follow other related articles on the PHP Chinese website!

Hot AI Tools

Undresser.AI Undress
AI-powered app for creating realistic nude photos

AI Clothes Remover
Online AI tool for removing clothes from photos.

Undress AI Tool
Undress images for free

Clothoff.io
AI clothes remover

Video Face Swap
Swap faces in any video effortlessly with our completely free AI face swap tool!

Hot Article
Hot Tools

Notepad++7.3.1
Easy-to-use and free code editor

SublimeText3 Chinese version
Chinese version, very easy to use

Zend Studio 13.0.1
Powerful PHP integrated development environment

Dreamweaver CS6
Visual web development tools

SublimeText3 Mac version
God-level code editing software (SublimeText3)
Hot Topics


 How to pay for a taxi ride on Baidu Maps. Introduction to the payment steps for a taxi ride.
Mar 13, 2024 am 10:04 AM
How to pay for a taxi ride on Baidu Maps. Introduction to the payment steps for a taxi ride.
Mar 13, 2024 am 10:04 AM
Baidu Map APP has now become the preferred travel navigation software for many users, so some of the functions here are comprehensive and can be selected and operated for free to solve some of the problems that you may encounter in daily travel. You can all check some of your own travel routes and plan some of your own travel plans. After checking the corresponding routes, you can choose appropriate travel methods according to your own needs. So whether you choose some public transportation, Cycling, walking or taking a taxi can all satisfy your needs. There are corresponding navigation routes that can successfully lead you to a certain place. Then everyone will feel more convenient if they choose to take a taxi. There are many drivers They are all able to take orders online, and taxi-hailing has become super
 How uniapp application implements payment and order management
Oct 19, 2023 am 10:37 AM
How uniapp application implements payment and order management
Oct 19, 2023 am 10:37 AM
uniapp is a cross-platform application development framework that can develop small programs, Apps and H5 at the same time. In uniapp applications, payment and order management are very common needs. This article will introduce how to implement payment functions and order management in the uniapp application, and give specific code examples. 1. Implementing the payment function The payment function is the key to realizing online transactions, and it usually requires integrating the SDK of a third-party payment platform. The following are the specific steps to implement the payment function in uniapp: Register and obtain a third-party payment platform
 Analysis of the function and principle of nohup
Mar 25, 2024 pm 03:24 PM
Analysis of the function and principle of nohup
Mar 25, 2024 pm 03:24 PM
Analysis of the role and principle of nohup In Unix and Unix-like operating systems, nohup is a commonly used command that is used to run commands in the background. Even if the user exits the current session or closes the terminal window, the command can still continue to be executed. In this article, we will analyze the function and principle of the nohup command in detail. 1. The role of nohup: Running commands in the background: Through the nohup command, we can let long-running commands continue to execute in the background without being affected by the user exiting the terminal session. This needs to be run
 In-depth discussion of the principles and practices of the Struts framework
Feb 18, 2024 pm 06:10 PM
In-depth discussion of the principles and practices of the Struts framework
Feb 18, 2024 pm 06:10 PM
Principle analysis and practical exploration of the Struts framework. As a commonly used MVC framework in JavaWeb development, the Struts framework has good design patterns and scalability and is widely used in enterprise-level application development. This article will analyze the principles of the Struts framework and explore it with actual code examples to help readers better understand and apply the framework. 1. Analysis of the principles of the Struts framework 1. MVC architecture The Struts framework is based on MVC (Model-View-Con
 In-depth understanding of the batch Insert implementation principle in MyBatis
Feb 21, 2024 pm 04:42 PM
In-depth understanding of the batch Insert implementation principle in MyBatis
Feb 21, 2024 pm 04:42 PM
MyBatis is a popular Java persistence layer framework that is widely used in various Java projects. Among them, batch insertion is a common operation that can effectively improve the performance of database operations. This article will deeply explore the implementation principle of batch Insert in MyBatis, and analyze it in detail with specific code examples. Batch Insert in MyBatis In MyBatis, batch Insert operations are usually implemented using dynamic SQL. By constructing a line S containing multiple inserted values
 An in-depth discussion of the functions and principles of Linux RPM tools
Feb 23, 2024 pm 03:00 PM
An in-depth discussion of the functions and principles of Linux RPM tools
Feb 23, 2024 pm 03:00 PM
The RPM (RedHatPackageManager) tool in Linux systems is a powerful tool for installing, upgrading, uninstalling and managing system software packages. It is a commonly used software package management tool in RedHatLinux systems and is also used by many other Linux distributions. The role of the RPM tool is very important. It allows system administrators and users to easily manage software packages on the system. Through RPM, users can easily install new software packages and upgrade existing software
 Detailed explanation of the principle of MyBatis paging plug-in
Feb 22, 2024 pm 03:42 PM
Detailed explanation of the principle of MyBatis paging plug-in
Feb 22, 2024 pm 03:42 PM
MyBatis is an excellent persistence layer framework. It supports database operations based on XML and annotations. It is simple and easy to use. It also provides a rich plug-in mechanism. Among them, the paging plug-in is one of the more frequently used plug-ins. This article will delve into the principles of the MyBatis paging plug-in and illustrate it with specific code examples. 1. Paging plug-in principle MyBatis itself does not provide native paging function, but you can use plug-ins to implement paging queries. The principle of paging plug-in is mainly to intercept MyBatis
 An in-depth analysis of the functions and working principles of the Linux chage command
Feb 24, 2024 pm 03:48 PM
An in-depth analysis of the functions and working principles of the Linux chage command
Feb 24, 2024 pm 03:48 PM
The chage command in the Linux system is a command used to modify the password expiration date of a user account. It can also be used to modify the longest and shortest usable date of the account. This command plays a very important role in managing user account security. It can effectively control the usage period of user passwords and enhance system security. How to use the chage command: The basic syntax of the chage command is: chage [option] user name. For example, to modify the password expiration date of user "testuser", you can use the following command
