

php实现文件下传的例子(附详细源码)

php实现文件上传的例子(附详细源码)
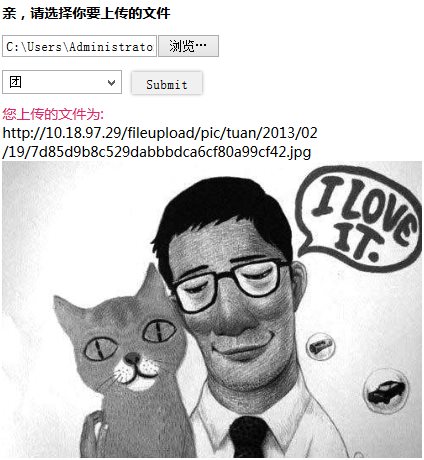
今天用PHP做了个文件上传工具,功能还是很完善滴,如下:
每个图片上传之后,都有自己的地址,改变原图位置或重命名时,将不会重复上传。
一、功能:
A:文件分类上传
B:生成相应的文件夹,如本例,选择团,生成文件夹tuan
C:点击图片,查看详细
二、HTML代码:
	<div id="container">
		<fieldset>
			<legend class="img"><img  src="/static/imghw/default1.png" data-src="css/logo.png" class="lazy"    style="max-width:90%" alt=" php实现文件下传的例子(附详细源码) " ></legend>
			<form action="" method="post" name="myform" id="myform" onsubmit="return false" enctype="multipart/form-data">
			    <strong>亲,请选择你要上传的文件</strong>
				<div class="file"><input type="file" id="fileToUpload" name="fileToUpload"></div>
				<select id="product">
               		<option value="" if echo> >请选择产品</option>
               		<option value="tuan" if echo> >团</option>
               	</select>
               	<button id="postBtn">Submit</button>
			</form>
			<div id="info"></div>
			<div style="position:relative; top:40px; left:20px;">
				<a id="loading" style="display:none"><img  src="/static/imghw/default1.png" data-src="css/loading.gif" class="lazy"    style="max-width:90%" alt=" php实现文件下传的例子(附详细源码) " ></a>
			</div>
			<a href="#" id="img_link" target="_blank">
				<div id="img_url">buding</div>
				<br>
				<img  class="preview" id="preview" src=""   style="max-width:90%" alt=" php实现文件下传的例子(附详细源码) " >
			</a>
		</fieldset>
</div>三、Javascript代码:
	<script type="text/javascript">
		$('#postBtn').click(function(){
			$('#preview').hide();
			$('#img_url').hide();
			$('#loading')
				.ajaxStart(function(){
					$(this).show();
				})
				.ajaxComplete(function(){
					$(this).hide();
				});
			if($('#fileToUpload').val() == ""){
				$('#info').html("亲,还没选择文件呢");
				var jObject={"Url":"","Height":413};
				var jString=JSON.stringify(jObject);
				window.parent.postMessage(jString,'*');
				return false;
			}
			if($('#product').val() == ""){
				$('#info').html("亲,还没选择产品呢");
				$('#info').css("color","#e9af32");
				var jObject={"Url":"","Height":413};
				var jString=JSON.stringify(jObject);
				window.parent.postMessage(jString,'*');
				return false;
			}
			var val = $('#product').val();
			$.ajaxFileUpload({
				url:'ajaxupload.php',
				secureuri:false,
				fileElementId:'fileToUpload',
				dataType: 'text',
				data:{product:val},
				success: function (data, status)
				{
					if(data.search(/http:\/\//i) < 0 ){
						$('#info').html(data);
						var jObject={"Url":"","Height":413};
						var jString=JSON.stringify(jObject);
						window.parent.postMessage(jString,'*');
					}else{
						$('#info').html("您上传的文件为:<br/>");
						$('#preview').attr("src",data);
						$('#img_link').attr("href",data);
						$('#img_url').html(data);
						$('#preview').show();
						$('#img_url').show();
						$('#preview').load(function(){
							var imgH=$('#preview').height();
							var jObject={"Url":data,"Height":imgH+228,"oid":"<?php echo @$_REQUEST['oid']; ?>"};
							var jString=JSON.stringify(jObject);
							window.parent.postMessage(jString,'*');
						});
					}
				},
				error: function (data, status, e){
					$('#info').html(data+e);
				}
			});
		});
</script>四、PHP代码
<?php require_once('config.php');
if(empty($_FILES) || empty($_REQUEST)){
	header('location:imgupload.php');
	exit;
}

array_push($_FILES, $_REQUEST);

$filename = 'fileToUpload';
$product = @$_FILES[0]['product'];
$today = date("Y-m-d");
$time = date("YmdHis");
$year = date("Y");
$month = date("m");
$day = date("d");
$img_path = $product.'/'.$year.'/'.$month.'/'.$day.'/';
$destination_dir = ROOT_PATH.'/pic/'.$img_path.'/';

if(!is_uploaded_file($_FILES[$filename]['tmp_name'])){//验证上传文件是否存在
	echo "请选择你想要上传的图片";
	exit;
}

if($product == "") {//选择产品
   	echo "请选择产品";
	exit;
}
	$files = $_FILES[$filename];

	if($max_file_size < $files['size']){//判断文件是否超过限制大小
		echo "图片太大了,传个小点的吧(<=2MB)";
		exit;
	}

	if(!file_exists($destination_dir)) {//判断上传目录是否存在,不存在则创建一个.
		if(!mkdir($destination_dir,0777,true)) {
			echo "创建目录 {".$destination_dir."} 失败<可能是权限问题>";
			exit;
		}
	}
	$type = pathinfo($files['name']);
    $type = strtolower($type["extension"]);
	$type =".".$type;
	$tmp_name = $files['tmp_name'];
	$md5file = md5_file($tmp_name);//生成md5文件
	$new_name =$md5file.$type;
    $img_relat_path = $img_path.$new_name;
	$img_abs_path =	$destination_dir.$new_name;

    $url = IMG_URL.$img_relat_path;

    //判断数据库中图片是否存在
    $sql="select url from file_url where md5 = '".$md5file."'";
    $res=$db->getOne($sql);
    if($res) {
        echo $res['url'];
        exit;
    }

    if(!move_uploaded_file ($files['tmp_name'], $img_abs_path)) {//上传文件
        echo "上传文件失败";
			exit;
    }
        //将图片存入数据库
    $sql="insert into file_url(url,product,md5,create_time) values('".$url."','".$product."','".$md5file."','".$today."')";
    $db->Execute($sql);
    $db->CloseDB();
    echo $url;
?>
Hot AI Tools

Undresser.AI Undress
AI-powered app for creating realistic nude photos

AI Clothes Remover
Online AI tool for removing clothes from photos.

Undress AI Tool
Undress images for free

Clothoff.io
AI clothes remover

Video Face Swap
Swap faces in any video effortlessly with our completely free AI face swap tool!

Hot Article
Hot Tools

Notepad++7.3.1
Easy-to-use and free code editor

SublimeText3 Chinese version
Chinese version, very easy to use

Zend Studio 13.0.1
Powerful PHP integrated development environment

Dreamweaver CS6
Visual web development tools

SublimeText3 Mac version
God-level code editing software (SublimeText3)
Hot Topics


 How to open img file
Sep 18, 2023 am 09:40 AM
How to open img file
Sep 18, 2023 am 09:40 AM
Methods to open img files include using virtual optical drive software, using compression software, and using special tools. Detailed introduction: 1. Use virtual optical drive software to open, download and install a virtual optical drive software, right-click the img file, select "Open with" or "Associated Program", select the installed virtual optical drive software in the pop-up dialog box, virtual The optical drive software will automatically load the img file and use it as a disc image in the virtual optical drive. Double-click the disc icon in the virtual optical drive to open the img file and access its contents, etc.
 What are the differences between Huawei GT3 Pro and GT4?
Dec 29, 2023 pm 02:27 PM
What are the differences between Huawei GT3 Pro and GT4?
Dec 29, 2023 pm 02:27 PM
Many users will choose the Huawei brand when choosing smart watches. Among them, Huawei GT3pro and GT4 are very popular choices. Many users are curious about the difference between Huawei GT3pro and GT4. Let’s introduce the two to you. . What are the differences between Huawei GT3pro and GT4? 1. Appearance GT4: 46mm and 41mm, the material is glass mirror + stainless steel body + high-resolution fiber back shell. GT3pro: 46.6mm and 42.9mm, the material is sapphire glass + titanium body/ceramic body + ceramic back shell 2. Healthy GT4: Using the latest Huawei Truseen5.5+ algorithm, the results will be more accurate. GT3pro: Added ECG electrocardiogram and blood vessel and safety
 Why NameResolutionError(self.host, self, e) from e and how to solve it
Mar 01, 2024 pm 01:20 PM
Why NameResolutionError(self.host, self, e) from e and how to solve it
Mar 01, 2024 pm 01:20 PM
The reason for the error is NameResolutionError(self.host,self,e)frome, which is an exception type in the urllib3 library. The reason for this error is that DNS resolution failed, that is, the host name or IP address attempted to be resolved cannot be found. This may be caused by the entered URL address being incorrect or the DNS server being temporarily unavailable. How to solve this error There may be several ways to solve this error: Check whether the entered URL address is correct and make sure it is accessible Make sure the DNS server is available, you can try using the "ping" command on the command line to test whether the DNS server is available Try accessing the website using the IP address instead of the hostname if behind a proxy
 PHP function introduction—get_headers(): Get the response header information of the URL
Jul 25, 2023 am 09:05 AM
PHP function introduction—get_headers(): Get the response header information of the URL
Jul 25, 2023 am 09:05 AM
PHP function introduction—get_headers(): Overview of obtaining the response header information of the URL: In PHP development, we often need to obtain the response header information of the web page or remote resource. The PHP function get_headers() can easily obtain the response header information of the target URL and return it in the form of an array. This article will introduce the usage of get_headers() function and provide some related code examples. Usage of get_headers() function: get_header
 How to open img file
Jul 06, 2023 pm 04:17 PM
How to open img file
Jul 06, 2023 pm 04:17 PM
How to open the img file: 1. Confirm the img file path; 2. Use the img file opener; 3. Select the opening method; 4. View the picture; 5. Save the picture. The img file is a commonly used image file format, usually used to store picture data.
 What is the difference between html and url
Mar 06, 2024 pm 03:06 PM
What is the difference between html and url
Mar 06, 2024 pm 03:06 PM
Differences: 1. Different definitions, url is a uniform resource locator, and html is a hypertext markup language; 2. There can be many urls in an html, but only one html page can exist in a url; 3. html refers to is a web page, and url refers to the website address.
 How to get your Steam ID in a few steps?
May 08, 2023 pm 11:43 PM
How to get your Steam ID in a few steps?
May 08, 2023 pm 11:43 PM
Nowadays, many Windows users who love games have entered the Steam client and can search, download and play any good games. However, many users' profiles may have the exact same name, making it difficult to find a profile or even link a Steam profile to other third-party accounts or join Steam forums to share content. The profile is assigned a unique 17-digit id, which remains the same and cannot be changed by the user at any time, whereas the username or custom URL can. Regardless, some users don't know their Steamid, and it's important to know this. If you don't know how to find your account's Steamid, don't panic. In this article
 How to use URL encoding and decoding in Java
May 08, 2023 pm 05:46 PM
How to use URL encoding and decoding in Java
May 08, 2023 pm 05:46 PM
Use url to encode and decode the class java.net.URLDecoder.decode(url, decoding format) decoder.decoding method for encoding and decoding. Convert into an ordinary string, URLEncoder.decode(url, encoding format) turns the ordinary string into a string in the specified format packagecom.zixue.springbootmybatis.test;importjava.io.UnsupportedEncodingException;importjava.net.URLDecoder;importjava.net. URLEncoder
