

Conditional formatting for Outlook email templates

This tutorial demonstrates how to automate font color changes in Outlook email templates using macros and HTML. It's perfect for users needing to send similar emails with varying highlighted phrases, eliminating repetitive manual formatting. Even beginners can follow along!
What We'll Achieve:
Imagine sending three project deadline reminders: 14 days, 7 days, and 1 day before the deadline. The text remains identical except for the time phrase, which will be brightly colored, changing based on the remaining time.
Example: "Dear all, ... You should be done in 14 days / 7 days / tomorrow."
We'll build an Outlook template enabling this "conditional formatting."

Let's start with simpler steps to build our skills.
Coloring Text in a Template:
The ~%WHAT_TO_ENTER macro, usually for adding email body content, helps create a color palette for quick font color changes. The following steps show how to color text using this macro:
Step 1: Create a Color Dropdown:
- Choose a template in the Shared Email Templates pane.
- Edit the template (either "Edit" or "Edit in Browser").
- Place your cursor before the text to color, then click "Insert Macro."

- Select
~%WHAT_TO_ENTER, choose "Dropdown list," set the "Window title" (e.g., "Color"), and list your colors under "Items." Remember to click "Insert."

 Remember to click "Insert."
The ~%WHAT_TO_ENTER macro appears in your template. This is only half the process! HTML editing is crucial.

Step 2: Edit the HTML Code:
- Open the HTML code editor ("View HTML").
- Place the
~%WHAT_TO_ENTERmacro and the text to color between<span></span>tags. The correctly formatted code will look like this:~%WHAT_TO_ENTER[blue;green;red;{title:'Color'}]";>Remember to replace the double quotes in{title:"Color"}with single quotes. - Ensure the complete HTML code is correctly structured. Double-check for typos!
- Click "OK" and "Save."


This method works for paragraphs, sentences, words, list items, and table cells. Errors during saving often indicate incorrect single quote usage in the {title:'Color'} section. 
Coloring Paragraphs, Sentences, Words, List Items, and Table Cells:
The process is identical for each element. Simply place the macro before the target text, create your color palette, and modify the HTML code accordingly. Examples of the correctly formatted HTML code for each element are shown in the original article.
Conditional Formatting for Outlook Emails:
Now, let's tackle the deadline reminder challenge. We'll use the ~%WHAT_TO_ENTER macro twice: once for the time phrase selection and again for color selection.
- Create a new template with the example text.
- Add the
~%WHAT_TO_ENTERmacro before the period, creating a dropdown for time phrases ("When").
- Add another
~%WHAT_TO_ENTERmacro before the first one, creating a color dropdown ("Color").
- Edit the HTML code to integrate both macros correctly, ensuring single quotes are used in the title attribute. The corrected HTML code is shown in the original article.
- Save your changes.


Now, when using the template, two dropdown lists appear, allowing you to select both the time phrase and its color. 
This completes the tutorial. Feel free to experiment and share your feedback!
The above is the detailed content of Conditional formatting for Outlook email templates. For more information, please follow other related articles on the PHP Chinese website!

Hot AI Tools

Undresser.AI Undress
AI-powered app for creating realistic nude photos

AI Clothes Remover
Online AI tool for removing clothes from photos.

Undress AI Tool
Undress images for free

Clothoff.io
AI clothes remover

Video Face Swap
Swap faces in any video effortlessly with our completely free AI face swap tool!

Hot Article
Hot Tools

Notepad++7.3.1
Easy-to-use and free code editor

SublimeText3 Chinese version
Chinese version, very easy to use

Zend Studio 13.0.1
Powerful PHP integrated development environment

Dreamweaver CS6
Visual web development tools

SublimeText3 Mac version
God-level code editing software (SublimeText3)
Hot Topics
 1655
1655
 14
1414
52
1307
25
1253
29
1227
24
14
1414
52
1307
25
1253
29
1227
24

 How to use Flash Fill in Excel with examples
Apr 05, 2025 am 09:15 AM
How to use Flash Fill in Excel with examples
Apr 05, 2025 am 09:15 AM
This tutorial provides a comprehensive guide to Excel's Flash Fill feature, a powerful tool for automating data entry tasks. It covers various aspects, from its definition and location to advanced usage and troubleshooting. Understanding Excel's Fla
 MEDIAN formula in Excel - practical examples
Apr 11, 2025 pm 12:08 PM
MEDIAN formula in Excel - practical examples
Apr 11, 2025 pm 12:08 PM
This tutorial explains how to calculate the median of numerical data in Excel using the MEDIAN function. The median, a key measure of central tendency, identifies the middle value in a dataset, offering a more robust representation of central tenden
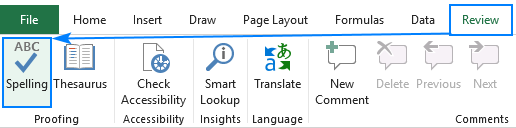 How to spell check in Excel
Apr 06, 2025 am 09:10 AM
How to spell check in Excel
Apr 06, 2025 am 09:10 AM
This tutorial demonstrates various methods for spell-checking in Excel: manual checks, VBA macros, and using a specialized tool. Learn to check spelling in cells, ranges, worksheets, and entire workbooks. While Excel isn't a word processor, its spel
 Excel shared workbook: How to share Excel file for multiple users
Apr 11, 2025 am 11:58 AM
Excel shared workbook: How to share Excel file for multiple users
Apr 11, 2025 am 11:58 AM
This tutorial provides a comprehensive guide to sharing Excel workbooks, covering various methods, access control, and conflict resolution. Modern Excel versions (2010, 2013, 2016, and later) simplify collaborative editing, eliminating the need to m
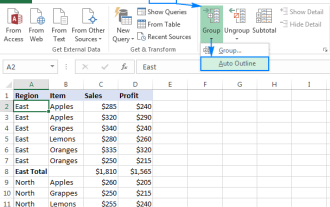 Excel: Group rows automatically or manually, collapse and expand rows
Apr 08, 2025 am 11:17 AM
Excel: Group rows automatically or manually, collapse and expand rows
Apr 08, 2025 am 11:17 AM
This tutorial demonstrates how to streamline complex Excel spreadsheets by grouping rows, making data easier to analyze. Learn to quickly hide or show row groups and collapse the entire outline to a specific level. Large, detailed spreadsheets can be
 Absolute value in Excel: ABS function with formula examples
Apr 06, 2025 am 09:12 AM
Absolute value in Excel: ABS function with formula examples
Apr 06, 2025 am 09:12 AM
This tutorial explains the concept of absolute value and demonstrates practical Excel applications of the ABS function for calculating absolute values within datasets. Numbers can be positive or negative, but sometimes only positive values are neede
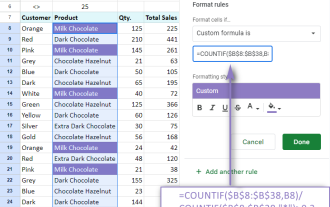 Google Spreadsheet COUNTIF function with formula examples
Apr 11, 2025 pm 12:03 PM
Google Spreadsheet COUNTIF function with formula examples
Apr 11, 2025 pm 12:03 PM
Master Google Sheets COUNTIF: A Comprehensive Guide This guide explores the versatile COUNTIF function in Google Sheets, demonstrating its applications beyond simple cell counting. We'll cover various scenarios, from exact and partial matches to han
 How to convert Excel to JPG - save .xls or .xlsx as image file
Apr 11, 2025 am 11:31 AM
How to convert Excel to JPG - save .xls or .xlsx as image file
Apr 11, 2025 am 11:31 AM
This tutorial explores various methods for converting .xls files to .jpg images, encompassing both built-in Windows tools and free online converters. Need to create a presentation, share spreadsheet data securely, or design a document? Converting yo
