
 Mobile Game Tutorial
Mobile Game Guide
Dragon Age: The Veilguard - The Waiting Stone Walkthrough
Mobile Game Tutorial
Mobile Game Guide
Dragon Age: The Veilguard - The Waiting Stone Walkthrough
Dragon Age: The Veilguard - The Waiting Stone Walkthrough

The Waiting Stone is a key quest in Harding's personal narrative across Dragon Age: The Veilguard, and is the closest look you get at the Deep Roads throughout the entire game. Since Harding is by your side from the start, this is likely to be one of the first personal quests you get.

Naturally, it involves Harding. As I just mentioned, it also involves the Deep Roads, which is a unique location only available for this quest (and similar ones in this arc). Since the final combat boss is Vulnerable to Necrotic (and Resists Electric) we suggest taking Lucanis or Emmrich along on this journey of personal discovery too.
Meet Harding's Contact, Stalgard

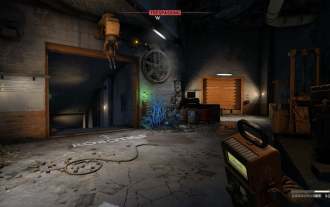
When you arrive, you'll need to make your way deeper into the Deep Roads. You are attacked by Deepstalkers, and while these Resist Necrotic attacks from whichever companion ou brought, they're fairly weak and more of a delaying factor than a damaging one. Fire Abilties cut through them, but even simple Light and Heavy attacks can get rid of them. A bigger concern are the regular explosions of rock you'll need to dodge when the ground glows red.
Head down to the elevator, pull the lever, and head across the stone section. Fight the few Deepstalkers that appear, then you'll meet Stalgard in a cutscene. Follow him through the settlement until the Darkspawn arrive.

Stay on the raised area when you arrive and target the Blighted Boils to stop the Darkspawn arriving, then continue to stay there and target the orange pustle on the Hurlock Blighter. If the Ghouls rush you and force you to move, use Abilities on the Hurlock Blighter to get rid of them first. Then, like the Deepstalkers, the Ghouls can be easily cut down. After this, keep following Stalgard until the Blight blocks your path.
Find The Root Of The Blight

Head up the stairs on the left and follow the platform around to the elevator. If you take a small detour with Harding's Stone Song, you can get a Traveler's Kit 5 Armor for Harding. Don't get in the elevator yet, instead use Harding's Stone Song on the rock blocking the shaft then get in and pull the lever.

Get out of the elevator from the back and follow the Blighted vein into a passage. This leads to a long corridor, where you can go left or right. You will need to do both to move on, but we'll start by going left.

Take out the Blighted Boil immediately on your right as you enter, then take out the Ghouls. Use Harding's Stone Song on the rock near where the Boil was to climb up, then again to push the rock into the wall. This lets you aim at the second Blighted Boil. When it is destroyed, move the wall rock back and use it to jump across to the ledge where you can destroy thhe third Blighted Boil.
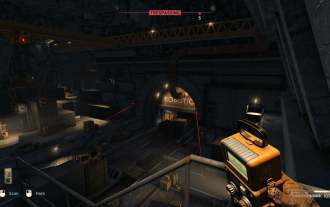
Use Stone Song to reveal the next rock and jump across the wooden platform and chutes to the new area, with more Darkspawn to fight. This is a cramped, winding area, so dodge away from the explosive Darkspawn and use area Abilities to damage as many as possible. Focus on the orange pustles of the Hurlock Blighters.

When they're defeated, you'll notice a central column with three veins leading off it. These reveal the Blighted Boils that need to be destroyed. The one on the right is on the large wall, the one on the left is on the wooden tower, and the one in the middle (which must be done last) is at the top of the column itself, and that vein leads to the exit.

From here, you're back in the passage, so now we'll go right. Defeat the few Ghouls again, then destroy the two Blighted Boils behind breakable wood on the left and right. You'll then be able to destroy one right by the entrance, revealing a rock you can climb up after using Stone Song.
Climb up and go along the wooden beams, jumping to the hanging platform for Mayhem in Gold 5 for Harding. Continue along the path until you see a Frenzied Ogre.
Defeat The Frenzied Ogre

The Frenzied Ogre Resists Necrotic damage and is Vulnerable to Fire damage, but also has Armor, so you'll want to use ranged attacks where you can. It's big and hits hard, but is also slow and has no allies with it. Dodge away when it glows red and keep a safe distance while aiming for the head. As long as you don't get drawn into taking it on face to face and being swept away, it's an easier fight than it looks.
Once it's dealt with, hit the Blighted Boil on the rock wall, the Blighted Boil on the ceiling of the stone building, and the final Blighted Boil on the large column. This reveals an exit that takes you back to the passage, so leave and take the elevator to Stalgard. Destroy the three Boils on the main door, enter, and follow Harding up the steps.
How To Defeat The Iron Construct

The Iron Construct is a hard hitting enemy with Armor, so you'll want to use ranged attacks to get that down. The issue is it also likes to rush you, which makes this impossible. Any area abilties you can use, or Harding's Seismic Shot to Stagger can help you even as you dodge away from it.
The Iron Construct has three main attacks:
- Launching rocks (dodge away from any red circles on the ground)
- Hammer swings (dodge away whenn the Iron Construct glows red)
- Hammer slams (dodge to the side of the red cone when it draws the hammer back)

It can also damage you by tunnelling. Sometimes the ground around the Iron Construct will glow red in a much bigger circle. This means it is about to burrow down, and this can deal high damage if you're nearby. It will soon reappear, which also causes damage, so keep aware of your surroundings whenever it disappears.
Make use of the whole arena, running up the steps for when you want to deal Close quarters damage, and dodging around the lower stone pit when you need to keep your distance
Once you have dropped the Iron Construct's Armor, Greater Deepstalkers will appear. These are fairly weak but their numbers can make them annoying, especially as they can distract you from the many different attacks of the Iron Construct. Since Lucanis or Emmrich can deal with the Construct, having Harding herself target these, and attack any that stray into your path. Keep Rook's Abilities for the Iron Construct, but when the Deepstalkers start to swarm, focus your regular attacks on them so they don't pile up.
What Are The Rewards For The Waiting Stone?

As well as progressing Harding's arc, you will get Scout's Compassion 5 for Harding, as well as 2 Dragonfire Catalyst and 2,500 XP. Back at the Lighthouse, you can encourage Harding to think of her magic as a blessing, or to be wary of it.This will impact how she acts later in the story, embracing her magic more through her narrative with your encouragement, or only using it when necessary. This does not impact her mechanics in combat, but will mean she will be more likey to choose (or reject) the magic within her throughout her companion story.
The above is the detailed content of Dragon Age: The Veilguard - The Waiting Stone Walkthrough. For more information, please follow other related articles on the PHP Chinese website!

Hot AI Tools

Undresser.AI Undress
AI-powered app for creating realistic nude photos

AI Clothes Remover
Online AI tool for removing clothes from photos.

Undress AI Tool
Undress images for free

Clothoff.io
AI clothes remover

Video Face Swap
Swap faces in any video effortlessly with our completely free AI face swap tool!

Hot Article
Hot Tools

Notepad++7.3.1
Easy-to-use and free code editor

SublimeText3 Chinese version
Chinese version, very easy to use

Zend Studio 13.0.1
Powerful PHP integrated development environment

Dreamweaver CS6
Visual web development tools

SublimeText3 Mac version
God-level code editing software (SublimeText3)
Hot Topics


 Assassin's Creed Shadows: Seashell Riddle Solution
Mar 28, 2025 am 01:58 AM
Assassin's Creed Shadows: Seashell Riddle Solution
Mar 28, 2025 am 01:58 AM
Assassin's Creed: Shadows boasts a vast world brimming with activities beyond the main storyline. Side missions and various encounters significantly enrich the immersive experience of in-game Japan. One particularly memorable encounter is the Seashe
 Where to find the Crane Control Keycard in Atomfall
Mar 28, 2025 am 02:17 AM
Where to find the Crane Control Keycard in Atomfall
Mar 28, 2025 am 02:17 AM
In Atomfall, discover hidden keys and passages, including multiple ways to access key locations. This guide focuses on using the Crane Control Keycard for easy, unguarded Entry to Skethermoor Prison, bypassing the need to cooperate with Captain Sims
 InZoi: How To Apply To School And University
Apr 02, 2025 am 12:08 AM
InZoi: How To Apply To School And University
Apr 02, 2025 am 12:08 AM
In the vibrant world of InZoi, you're free to shape your character's life, from exploring its diverse environments to mastering various skills. Whether it's culinary adventures, household chores, or relaxing on the beach, the choices are yours. But
 How to activate all Radio Towers for Joyce Tanner in Atomfall
Mar 28, 2025 am 12:04 AM
How to activate all Radio Towers for Joyce Tanner in Atomfall
Mar 28, 2025 am 12:04 AM
At this point in Atomfall, you’ve no doubt wandered into the Interchange, restored power to your first Data Store, and met the enigmatic Joyce Tanner inside. Tanner is more than happy to see someone who hasn’t immediately tried to kill her, an
 Roblox: Dead Rails – How To Summon And Defeat Nikola Tesla
Mar 31, 2025 am 11:08 AM
Roblox: Dead Rails – How To Summon And Defeat Nikola Tesla
Mar 31, 2025 am 11:08 AM
Dead Rails is currently one of the most popular games on Roblox. Where players take on the role of a survivor in a post-apocalyptic scenario, trying to escape from a variety of special enemies. It’s a game widely appreciated by the community, with fr
 Blue Prince: How To Get To The Basement
Apr 11, 2025 am 04:04 AM
Blue Prince: How To Get To The Basement
Apr 11, 2025 am 04:04 AM
Unlocking the Basement in Blue Prince: A Comprehensive Guide Finding the basement in Blue Prince is crucial for progressing to Room 46, but its location and access method aren't immediately obvious. This guide will walk you through accessing the base
 InZoi: How To Surf
Apr 03, 2025 am 03:43 AM
InZoi: How To Surf
Apr 03, 2025 am 03:43 AM
In InZoi, your Zois can enjoy a variety of activities, fulfilling their ever-changing Urges to keep them happy. Surfing is a popular choice, particularly for Zois with the "Life of Excitement" Desired Life. This guide explains how and whe
 Where to find the Site Office Key in Atomfall
Apr 02, 2025 pm 06:03 PM
Where to find the Site Office Key in Atomfall
Apr 02, 2025 pm 06:03 PM
In Atomfall's Interchange, the locked Site Office presents an early challenge. The "Strange Noises From Below" note hints at the key's location: the Robotics lab. However, accessing Robotics requires completing several preliminary tasks.
