

How to Integrate Passkeys in Python (FastAPI)

Introduction
In this guide, we will walk you through the process of integrating passkey authentication into a Python web application using the FastAPI framework. This implementation leverages Corbado's passkey-first web-js package, which streamlines the integration with a passkeys backend. By the end of this tutorial, you will have a working FastAPI app with passkey-based authentication.
Read the full original tutorial here
Prerequisites for FastAPI Passkey Integration
To follow this tutorial, you should have a basic understanding of Python, FastAPI, HTML, and JavaScript.
Additionally, you will need a Corbado account to use passkey services. Let's get started!
FastAPI Passkey Project Structure
Your FastAPI project will contain several key files. The essential ones include:
├── .env                 # Contains all environment variables
├── main.py              # Contains our webapplication (Handles routes)
└── templates
 ├── index.html       # Login page
 └── profile.html     # Profile page
Setting Up Your Corbado Account
Before you begin coding, set up a Corbado account. This will allow you to access their passkey services. Follow these steps:
- Sign Up: Register on the Corbado developer panel.
- Create a Project: Name your project and select "Corbado Complete" during setup.
- Environment Setup: Choose "DEV" as your environment and "Web app" for the application type.
- Session Management: Opt for "Corbado session management" to handle both passkey authentication and session management.
- Frontend Framework: Select "Vanilla JS" as your frontend framework.
- Configuration: Set your Application URL (e.g., http://localhost:8000) and Relying Party ID (e.g., localhost).
After setting up, you will receive HTML/JavaScript snippets that you'll integrate into your FastAPI project.
Initializing the FastAPI Project
Start by creating a main.py file if you haven't already. Install FastAPI and other necessary packages with:
pip install fastapi python-dotenv passkeys
Your main.py will handle the application logic, including setting up routes and managing sessions.
Configuring Environment Variables
In the root of your project, create a .env file to store your environment variables:
PROJECT_ID=your_project_id
API_SECRET=your_api_secret
Load these variables into your application using python-dotenv:
from dotenv import load_dotenv
import os

load_dotenv()
PROJECT_ID = os.getenv("PROJECT_ID")
API_SECRET = os.getenv("API_SECRET")
Creating HTML Templates with Session Management
Next, set up your HTML templates. In the templates/ directory, create login.html and profile.html. These will include the necessary JavaScript for integrating Corbado's authentication components.
Here is the basic structure for login.html:
<!DOCTYPE html>
<html>
<head>
    <link rel="stylesheet" href="https://unpkg.com/@corbado/web-js@latest/dist/bundle/index.css" />
    <script src="https://unpkg.com/@corbado/web-js@latest/dist/bundle/index.js"></script>
</head>
<body>
    <script>
        (async () => {
            await Corbado.load({
                projectId: "{{ PROJECT_ID }}",
                darkMode: "off",
                setShortSessionCookie: "true",
            });
            Corbado.mountAuthUI(document.getElementById('corbado-auth'), {
                onLoggedIn: () => window.location.href = '/profile',
            });
        })();
    </script>
    <div id="corbado-auth"></div>
</body>
</html>
For the profile.html, include elements to display user data and a logout button:
<!DOCTYPE html>
<html>
  <head>
    <link
      rel="stylesheet"
      href="https://unpkg.com/@corbado/web-js@latest/dist/bundle/index.css"
      />
      <script src="https://unpkg.com/@corbado/web-js@latest/dist/bundle/index.js"></script>
    </head>
    <body>

      <!-- Define passkey-list div and logout button -->
    <h2>:/protected ?</h2>
    <p>User ID: {{USER_ID}}</p>
    <p>Name: {{USER_NAME}}</p>
    <p>Email: {{USER_EMAIL}}</p>
    <div id="passkey-list"></div>
    <button id="logoutButton">Logout</button>


    <!-- Script to load Corbado and mount PasskeyList UI -->
    <script>
 (async () => {
            await Corbado.load({
                projectId: "{{ PROJECT_ID }}",
                darkMode: "off",
                setShortSessionCookie: "true" // set short session cookie automatically
 });

            // Get and mount PasskeyList UI
            const passkeyListElement = document.getElementById("passkey-list"); // Element where you want to render PasskeyList UI
            Corbado.mountPasskeyListUI(passkeyListElement);

            // Get the logout button
            const logoutButton = document.getElementById('logoutButton');
            // Add event listener to logout button
 logoutButton.addEventListener('click', function() {
              Corbado.logout()
 .then(() => {
                        window.location.replace("/");
 })
 .catch(err => {
                        console.error(err);
 });
 });
 })();
    </script>


</body>
</html>
Setting Up FastAPI Controller
Your controller logic will reside in the main.py file. This file will manage routes for both the login and profile pages. The login route will simply inject the PROJECT_ID into the template, while the profile route will validate the session and fetch user data using Corbado's Python SDK.
Example main.py:
from typing import List
from corbado_python_sdk.entities.session_validation_result import (
    SessionValidationResult,
)
from corbado_python_sdk.generated.models.identifier import Identifier

from fastapi import FastAPI, Request, Response
from fastapi.responses import HTMLResponse
from fastapi.templating import Jinja2Templates
from dotenv import load_dotenv
import os
from corbado_python_sdk import (
    Config,
    CorbadoSDK,
    IdentifierInterface,
    SessionInterface,
)

load_dotenv()

app = FastAPI()

templates = Jinja2Templates(directory="templates")

PROJECT_ID: str = os.getenv("PROJECT_ID", "pro-xxx")
API_SECRET: str = os.getenv("API_SECRET", "corbado1_xxx")

# Session config
short_session_cookie_name = "cbo_short_session"

# Config has a default values for 'short_session_cookie_name' and 'BACKEND_API'
config: Config = Config(
    api_secret=API_SECRET,
    project_id=PROJECT_ID,
)

# Initialize SDK
sdk: CorbadoSDK = CorbadoSDK(config=config)
sessions: SessionInterface = sdk.sessions
identifiers: IdentifierInterface = sdk.identifiers


@app.get("/", response_class=HTMLResponse)
async def get_login(request: Request):
    return templates.TemplateResponse(
        "login.html", {"request": request, "PROJECT_ID": PROJECT_ID}
    )


@app.get("/profile", response_class=HTMLResponse)
async def get_profile(request: Request):
    # Acquire cookies with your preferred method
    token: str = request.cookies.get(config.short_session_cookie_name) or ""
    validation_result: SessionValidationResult = (
        sessions.get_and_validate_short_session_value(short_session=token)
    )
    if validation_result.authenticated:

        emailList: List[Identifier] = identifiers.list_all_emails_by_user_id(
            user_id=validation_result.user_id
            or ""  # at this point user_id should be non empty string since user was authenticated
        )

        context = {
            "request": request,
            "PROJECT_ID": PROJECT_ID,
            "USER_ID": validation_result.user_id,
            "USER_NAME": validation_result.full_name,
            "USER_EMAIL": emailList[0].value,
        }
        return templates.TemplateResponse("profile.html", context)

    else:
        return Response(
            content="You are not authenticated or have not yet confirmed your email.",
            status_code=401,
        )


if __name__ == "__main__":
    import uvicorn

    uvicorn.run(app, host="127.0.0.1", port=8000)
Running the FastAPI Application
Finally, to run your FastAPI application, install Uvicorn:
pip install 'uvicorn[standard]'
Then, start your server:
uvicorn main:app --reload
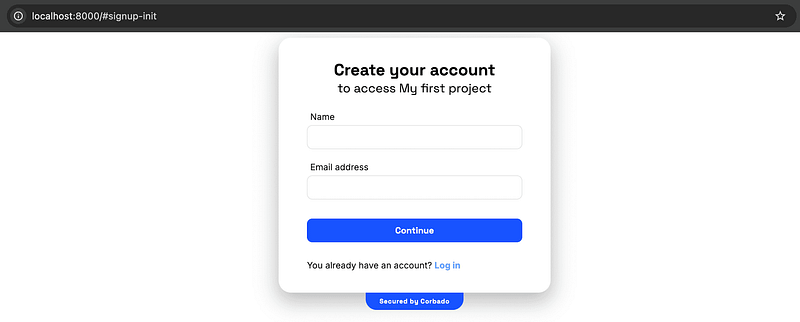
Visit http://localhost:8000 in your browser to see the UI component in action.
Conclusion
This tutorial demonstrated how to integrate passkey authentication into a FastAPI application using Corbado's web-js package. This setup provides a secure and modern authentication method, while also managing user sessions seamlessly. For more details on extending this implementation or integrating with existing apps, refer to the Corbado documentation.
The above is the detailed content of How to Integrate Passkeys in Python (FastAPI). For more information, please follow other related articles on the PHP Chinese website!

Hot AI Tools

Undresser.AI Undress
AI-powered app for creating realistic nude photos

AI Clothes Remover
Online AI tool for removing clothes from photos.

Undress AI Tool
Undress images for free

Clothoff.io
AI clothes remover

Video Face Swap
Swap faces in any video effortlessly with our completely free AI face swap tool!

Hot Article
Hot Tools

Notepad++7.3.1
Easy-to-use and free code editor

SublimeText3 Chinese version
Chinese version, very easy to use

Zend Studio 13.0.1
Powerful PHP integrated development environment

Dreamweaver CS6
Visual web development tools

SublimeText3 Mac version
God-level code editing software (SublimeText3)
Hot Topics
 1658
1658
 14
1415
52
1309
25
1257
29
1231
24
14
1415
52
1309
25
1257
29
1231
24

 Python vs. C : Applications and Use Cases Compared
Apr 12, 2025 am 12:01 AM
Python vs. C : Applications and Use Cases Compared
Apr 12, 2025 am 12:01 AM
Python is suitable for data science, web development and automation tasks, while C is suitable for system programming, game development and embedded systems. Python is known for its simplicity and powerful ecosystem, while C is known for its high performance and underlying control capabilities.
 The 2-Hour Python Plan: A Realistic Approach
Apr 11, 2025 am 12:04 AM
The 2-Hour Python Plan: A Realistic Approach
Apr 11, 2025 am 12:04 AM
You can learn basic programming concepts and skills of Python within 2 hours. 1. Learn variables and data types, 2. Master control flow (conditional statements and loops), 3. Understand the definition and use of functions, 4. Quickly get started with Python programming through simple examples and code snippets.
 Python: Games, GUIs, and More
Apr 13, 2025 am 12:14 AM
Python: Games, GUIs, and More
Apr 13, 2025 am 12:14 AM
Python excels in gaming and GUI development. 1) Game development uses Pygame, providing drawing, audio and other functions, which are suitable for creating 2D games. 2) GUI development can choose Tkinter or PyQt. Tkinter is simple and easy to use, PyQt has rich functions and is suitable for professional development.
 How Much Python Can You Learn in 2 Hours?
Apr 09, 2025 pm 04:33 PM
How Much Python Can You Learn in 2 Hours?
Apr 09, 2025 pm 04:33 PM
You can learn the basics of Python within two hours. 1. Learn variables and data types, 2. Master control structures such as if statements and loops, 3. Understand the definition and use of functions. These will help you start writing simple Python programs.
 Python vs. C : Learning Curves and Ease of Use
Apr 19, 2025 am 12:20 AM
Python vs. C : Learning Curves and Ease of Use
Apr 19, 2025 am 12:20 AM
Python is easier to learn and use, while C is more powerful but complex. 1. Python syntax is concise and suitable for beginners. Dynamic typing and automatic memory management make it easy to use, but may cause runtime errors. 2.C provides low-level control and advanced features, suitable for high-performance applications, but has a high learning threshold and requires manual memory and type safety management.
 Python and Time: Making the Most of Your Study Time
Apr 14, 2025 am 12:02 AM
Python and Time: Making the Most of Your Study Time
Apr 14, 2025 am 12:02 AM
To maximize the efficiency of learning Python in a limited time, you can use Python's datetime, time, and schedule modules. 1. The datetime module is used to record and plan learning time. 2. The time module helps to set study and rest time. 3. The schedule module automatically arranges weekly learning tasks.
 Python: Exploring Its Primary Applications
Apr 10, 2025 am 09:41 AM
Python: Exploring Its Primary Applications
Apr 10, 2025 am 09:41 AM
Python is widely used in the fields of web development, data science, machine learning, automation and scripting. 1) In web development, Django and Flask frameworks simplify the development process. 2) In the fields of data science and machine learning, NumPy, Pandas, Scikit-learn and TensorFlow libraries provide strong support. 3) In terms of automation and scripting, Python is suitable for tasks such as automated testing and system management.
 Python: Automation, Scripting, and Task Management
Apr 16, 2025 am 12:14 AM
Python: Automation, Scripting, and Task Management
Apr 16, 2025 am 12:14 AM
Python excels in automation, scripting, and task management. 1) Automation: File backup is realized through standard libraries such as os and shutil. 2) Script writing: Use the psutil library to monitor system resources. 3) Task management: Use the schedule library to schedule tasks. Python's ease of use and rich library support makes it the preferred tool in these areas.
