
 Web Front-end
JS Tutorial
Use ImageMagick for image scaling, synthesis and cropping (js python)_javascript skills
Web Front-end
JS Tutorial
Use ImageMagick for image scaling, synthesis and cropping (js python)_javascript skills
Use ImageMagick for image scaling, synthesis and cropping (js python)_javascript skills

In a recent project, I needed to process the cover of a book, which was to add a shadow line to form the concave and convex feeling of the spine, and then cut out the spine and divide it into two parts so that the client can realize the opening animation. Since it needs to be processed on the server side, I will study the use of imagemagick. At the same time, I am going to encapsulate a Node.js and Python method. I will mainly talk about it and then use imagemagick to scale, synthesize and crop the pictures.
First, the material files are as follows (the cover on the left is unprocessed, and the right is the shadow that needs to be synthesized):

First, scale the cover image file.png to a height of 1024, and generate newfile.png to facilitate synthesis with the shadow image. The command is as follows:
The method of convert for scaling is as follows:
convert -resize 1024 file.jpg newfile.jpg
The width of the image is 1024, and the height is calculated according to the original image ratio
convert -resize x768 file.jpg newfile.jpg
Get The image height is 768, and the width is calculated based on the original image ratio
convert -resize 1024×768! file.jpg newfile.jpg
Fixed width and height scaling, regardless of the original image width and height ratio. Scale the image to the specified size.
convert -resize “1024×768>” file.jpg newfile.jpg
Only when the width of src.jpg is greater than 1024 or the height is greater than 768, it will be reduced, otherwise newfile.jpg and file.jpg has the same dimensions.
convert -resize “1024×768<” file.jpg newfile.jpg
Only when the width of src.jpg is less than 1024 or the height is less than 768, it will be enlarged, otherwise newfile.jpg and file.jpg has the same dimensions.
The next step is to combine the shadow file onto the cover (composite yy.png from the upper left corner to file.png to generate newfile.png):
Here are the main explanations - Gravity parameter:
-gravity northwest refers to the upper right corner
If it is required to be in the middle, the parameter is center
If it is required to be in the lower right corner, the parameter is southeast
Others are based on the direction
The result after synthesis is as follows:

left: convert file.png -gravity southwest -crop 31x1024 0 0 left.png
right: convert file. png -gravity southeast -crop 737x1024 0 0 right.png
The cropping method is adjusted as follows:
convert file.png -crop widthxheight x y newfile
where widthxheight is the size of the target image, x y is the coordinate point of the original image, these two sets of values must appear in at least one set, and can also exist at the same time. In addition, this command can also use gravity to redefine the coordinate system.
The final results are as follows:


Hot AI Tools

Undresser.AI Undress
AI-powered app for creating realistic nude photos

AI Clothes Remover
Online AI tool for removing clothes from photos.

Undress AI Tool
Undress images for free

Clothoff.io
AI clothes remover

Video Face Swap
Swap faces in any video effortlessly with our completely free AI face swap tool!

Hot Article
Hot Tools

Notepad++7.3.1
Easy-to-use and free code editor

SublimeText3 Chinese version
Chinese version, very easy to use

Zend Studio 13.0.1
Powerful PHP integrated development environment

Dreamweaver CS6
Visual web development tools

SublimeText3 Mac version
God-level code editing software (SublimeText3)
Hot Topics


 How do I crop an IFrame in HTML?
Aug 29, 2023 pm 04:33 PM
How do I crop an IFrame in HTML?
Aug 29, 2023 pm 04:33 PM
Inline frames are called iframes in HTML. A label specifies a rectangular area within the content where the browser can display different documents with scroll bars and borders. To embed another document within the current HTML document, use inline frames. A reference to an element can be specified using the HTMLiframe name attribute. In JavaScript, references to elements are also made using the name attribute. An iframe is essentially used to display a web page within the currently displayed web page. The URL of the document containing the iframe is specified using the "src" attribute. Syntax The following is the syntax of HTML <iframesrc="URL"title="d
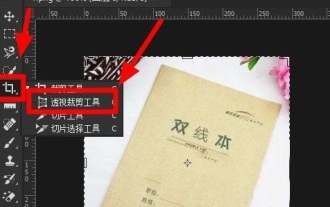 How to crop crooked pictures in photoshop? PS crop and tilt photo tutorial
Mar 25, 2024 pm 10:07 PM
How to crop crooked pictures in photoshop? PS crop and tilt photo tutorial
Mar 25, 2024 pm 10:07 PM
Some users find that some things in the picture are crooked and cannot be directly selected and cropped. Is there any way to straighten the things in the picture? In fact, this operation is very simple for PS masters. Here, the editor will tell the novice PS users how to crop crooked pictures into straight ones in Photoshop. This method is very easy to operate. I hope it can help everyone. PS tutorial for cropping tilted photos 1. Open Photoshop, move the mouse to the cropping tool on the left, then right-click the mouse and select "Perspective Cropping Tool". 2. Select the picture that needs to be straightened and determine the four points. 3. Then press the Enter key to straighten it successfully. 4. In this way, the things in the photo will be corrected, and
 iOS 17: How to use one-click cropping in photos
Sep 20, 2023 pm 08:45 PM
iOS 17: How to use one-click cropping in photos
Sep 20, 2023 pm 08:45 PM
With the iOS 17 Photos app, Apple makes it easier to crop photos to your specifications. Read on to learn how. Previously in iOS 16, cropping an image in the Photos app involved several steps: Tap the editing interface, select the crop tool, and then adjust the crop using a pinch-to-zoom gesture or dragging the corners of the crop tool. In iOS 17, Apple has thankfully simplified this process so that when you zoom in on any selected photo in your Photos library, a new Crop button automatically appears in the upper right corner of the screen. Clicking on it will bring up the full cropping interface with the zoom level of your choice, so you can crop to the part of the image you like, rotate the image, invert the image, or apply screen ratio, or use markers
 How to implement image thumbnail function in JavaScript?
Oct 25, 2023 am 08:56 AM
How to implement image thumbnail function in JavaScript?
Oct 25, 2023 am 08:56 AM
How to implement image thumbnail function in JavaScript? When we display images on a web page, we sometimes need to reduce the original large image to meet the layout requirements of the page, which requires the use of the image thumbnail function. In JavaScript, we can implement the thumbnail function of the image through the following methods: Use HTML to directly set the width and height of the image. The simplest way is to directly set the width and height attributes of the image in HTML to achieve the thumbnail effect. For example:&l
 How to combine several photos into one photo How to combine several photos into one photo
Feb 22, 2024 pm 04:00 PM
How to combine several photos into one photo How to combine several photos into one photo
Feb 22, 2024 pm 04:00 PM
Just select the pictures and templates in the puzzle and save them. Applicable model of the tutorial: iPhone13 System: iOS15.3 version: Meitu Xiu Xiu 9.5.70&& Tiantian P Picture 6.5.4 Analysis 1 First enter the home page of Meitu Xiu Xiu, find and click on the puzzle. 2 Jump to the album page, select the pictures to be combined, and click to start the puzzle. 3. After selecting the puzzle template, click the hook icon in the upper right corner of the page. Supplement: How to splice pictures in Tiantian P Picture 1. First enter the home page of Tiantian P Picture, find and click on Story Puzzle. 2 Wait for the page to jump, select the appropriate picture, and click Start Puzzle on the lower right. 3. After selecting the puzzle template you like, click the save icon in the upper right corner of the page. Summary/Notes You can only select 1 to 9 puzzle pieces at a time.
 How to synthesize green dye in minecraft
Jan 27, 2024 am 10:27 AM
How to synthesize green dye in minecraft
Jan 27, 2024 am 10:27 AM
In Minecraft, the synthesis of props is an important task. In order to obtain green dye, players need to prepare some specific materials for synthesis. Here's how to synthesize green dye. Minecraft green dye synthesis method 1. Make a workbench: Collect wood to make a workbench with bare hands and place it on the ground for later use. 2. Unlock the furnace: Make a furnace through the workbench, click on the furnace to open the production interface. 3. Synthesize cactus green: Put the collected cactus cubes into the furnace and add fuel to get cactus green. 4. Decompose bone meal: Put the bones into the workbench production interface and decompose them into bone meal. 5. Make green dye: Put 1 part bone meal and 1 part cactus green into the workbench to make green dye.
 Java development skills revealed: implementing image compression and cropping functions
Nov 20, 2023 pm 03:27 PM
Java development skills revealed: implementing image compression and cropping functions
Nov 20, 2023 pm 03:27 PM
Java is a programming language widely used in the field of software development. Its rich libraries and powerful functions can be used to develop various applications. Image compression and cropping are common requirements in web and mobile application development. In this article, we will reveal some Java development techniques to help developers implement image compression and cropping functions. First, let's discuss the implementation of image compression. In web applications, pictures often need to be transmitted over the network. If the image is too large, it will take longer to load and use more bandwidth. therefore, we
 How to combine two words into one word
Mar 19, 2024 pm 11:00 PM
How to combine two words into one word
Mar 19, 2024 pm 11:00 PM
Nowadays, the Internet is becoming more and more developed and convenient. The use of Word documents is very convenient and fast for our life, work and study. In our daily life, what should we do if we want to merge two word documents into one word document? There are two methods: the first one is the simplest copy and paste, but it will be very troublesome if the article is too long, so I will teach you another method. You can apply it next time you encounter a similar situation. . 1. Open word and open the first document. 2. Click where you want to insert the second document. 3. Click Insert-Object. 4. Select the object. 5. A dialog box pops up, click Create from file. 6. Click Browse, select the file to insert, and click OK. 7. again
