

Mysql学习用户认证原理与实现

这是有事没事时做的关于我们来理解在mysql核心代码中的用户验证原理,有兴趣的同学可以参考一下。
验证用户名和密码的过程,我们平时做一个系统的时候,很多时候都会涉及到身份验证。今天我们就来看下Mysql是如何进
行验证的。(注意是登录,不是登陆^_^)
一、用户认证原理
我们在应用程序中实现验证的方式基本上都是创建一张用户表,里面至少包含username和password两个字段,
password基本上都是加密后进行存储的。作为,对用户的限制较多,不是像我说的仅仅只有username和password
这么简单了。首先粗略的讲下访问控制。
信息系统中,访问控制分为自主访问控制(DAC)和强制访问控制(MAC)。具体到DBMS,自主访问控制就是我们所熟悉
的GRANT,REVOKE,大多数数据库都支持自助的访问控制。强制访问控制就是ORACLE中的LABEL,只有很少的一些系统支持MAC。
严格来说,登录并不属于访问控制机制,而应该属于用户身份识别和认证。在Mysql中,将登录和DAC的相关接口都实现在了
sql_acl.cc中(其实说登录是用户拥有的一种权限也未尝不可,正如ORACLE中的CREATE SESSION,不过登录并不仅仅是一种权
限,还包含很多其他的属性),从文件名大家可以看出来,ACL即ACCESS CONTROL LIST,访问控制列表,这是实现访问控制的
基本方法。下图是Mysql的整个访问控制的流程。
Mysql中用户管理模块的信息存储在系统表.User中,这个表不仅仅存放了授权用户的基本信息,还存放一些权限
信息。我们首先大概看一下这个表的结构。
| 代码如下 | 复制代码 |
+-----------------------+-----------------------------------+------+-----+---------+-------+

| Field | Type | Null | Key | Default | Extra |

+-----------------------+-----------------------------------+------+-----+---------+-------+

| Host | char(60) | NO | PRI | | |

| User | char(16) | NO | PRI | | |

| Password | char(41) | NO | | | |

| Select_priv | enum('N','Y') | NO | | N | |

| Insert_priv | enum('N','Y') | NO | | N | |

| Update_priv | enum('N','Y') | NO | | N | |

| Delete_priv | enum('N','Y') | NO | | N | |

| Create_priv | enum('N','Y') | NO | | N | |

| Drop_priv | enum('N','Y') | NO | | N | |

| Reload_priv | enum('N','Y') | NO | | N | |

| Shutdown_priv | enum('N','Y') | NO | | N | |

| Process_priv | enum('N','Y') | NO | | N | |

| File_priv | enum('N','Y') | NO | | N | |

| Grant_priv | enum('N','Y') | NO | | N | |

| References_priv | enum('N','Y') | NO | | N | |

| Index_priv | enum('N','Y') | NO | | N | |

| Alter_priv | enum('N','Y') | NO | | N | |

| Show_db_priv | enum('N','Y') | NO | | N | |

| Super_priv | enum('N','Y') | NO | | N | |

| Create_tmp_table_priv | enum('N','Y') | NO | | N | |

| Lock_tables_priv | enum('N','Y') | NO | | N | |

| Execute_priv | enum('N','Y') | NO | | N | |

| Repl_slave_priv | enum('N','Y') | NO | | N | |

| Repl_client_priv | enum('N','Y') | NO | | N | |

| Create_view_priv | enum('N','Y') | NO | | N | |

| Show_view_priv | enum('N','Y') | NO | | N | |

| Create_routine_priv | enum('N','Y') | NO | | N | |

| Alter_routine_priv | enum('N','Y') | NO | | N | |

| Create_user_priv | enum('N','Y') | NO | | N | |

| Event_priv | enum('N','Y') | NO | | N | |

| Trigger_priv | enum('N','Y') | NO | | N | |

| ssl_type | enum('','ANY','X509','SPECIFIED') | NO | | | |

| ssl_cipher | blob | NO | | NULL | |

| x509_issuer | blob | NO | | NULL | |

| x509_subject | blob | NO | | NULL | |

| max_questions | int(11) unsigned | NO | | 0 | |

| max_updates | int(11) unsigned | NO | | 0 | |

| max_connections | int(11) unsigned | NO | | 0 | |

| max_user_connections | int(11) unsigned | NO | | 0 | |

+-----------------------+-----------------------------------+------+-----+---------+-------+

39 rows in set (0.01 sec)
Copy after login |
|
这个表包含了39个字段,对于我们登录来说,应该主要是使用前三个字段,即Host,User,Password。
| 代码如下 | 复制代码 |
mysql>  Host,User,Password from user;

+-----------+------+----------+

| Host | User | Password |

+-----------+------+----------+

| localhost | root | |

| 127.0.0.1 | root | |

| localhost | | |

+-----------+------+----------+

3 rows in set (0.00 sec)
Copy after login |
|
这里比我们预想的只需要用户名和密码的方式有所出入,多了一个Host字段,这个字段起到什么作用呢?!原来Mysql的登录认证不仅需要验证用户名和密码,还需要验证连接的主机地址,这样也是为了提高安全性吧。那如果我想一个用户在任何地址都可以进行登录岂不是要设置很多地址?Mysql提供了通配符,可以设置Host字段为*,这就代表可以匹配任何Host。具体看下这三行的意思,这三行的密码均为空。针对root用户,不需要输入密码,客户端的地址为本机。第三行的用户名为空,Host为localhost,说明本地的任何用户均可以进行登录,即使是个不存在的用户也可以登录成功,但是仅限于登录,没有其他相关的权限,无法进行实际操作。
二、跟踪
在Connection Manager中提到了login_connection函数用于检查用户名和密码等相关信息,其源码如下(重点的函数代码
会着色):
| 代码如下 | 复制代码 |
static bool login_connection(THD *thd)
{
  NET *net= &thd->net;
  int error;
  DBUG_ENTER("login_connection");
  DBUG_PRINT("info", ("login_connection called by thread %lu",
                      thd->thread_id));

  /* Use "connect_timeout" value during connection phase */
  my_net_set_read_timeout(net, connect_timeout);
  my_net_set_write_timeout(net, connect_timeout);
error= check_connection(thd); //此处是验证的具体函数

  net_end_statement(thd);

  if (error)
  {                        // Wrong permissions
#ifdef __NT__
    if (vio_type(net->vio) == VIO_TYPE_NAMEDPIPE)
      my_sleep(1000);                /* must wait after eof() */
#endif
    statistic_increment(aborted_connects,&LOCK_status);
    DBUG_RETURN(1);
  }
  /* Connect completed, set read/write timeouts back to default */
  my_net_set_read_timeout(net, thd->variables.net_read_timeout);
  my_net_set_write_timeout(net, thd->variables.net_write_timeout);
  DBUG_RETURN(0);
}
Copy after login |
|
此函数主要是功能是调用函数check_connection进行用户认证,由于函数check_connection过长,对其进行简化,如下所示:
static int check_connection(THD *thd)

{
  uint connect_errors= 0;
  NET *net= &thd->net;
  ulong pkt_len= 0;
  char *end;

  DBUG_PRINT("info",
             ("New connection received on %s", vio_description(net->vio)));
#ifdef SIGNAL_WITH_VIO_CLOSE
  thd->set_active_vio(net->vio);
#endif

  if (!thd->main_security_ctx.host)         // If TCP/IP connection
  {
    char ip[30];

    if (vio_peer_addr(net->vio, ip, &thd->peer_port))
    {
      my_error(ER_BAD_HOST_ERROR, MYF(0), thd->main_security_ctx.host_or_ip);
      return 1;
    }
    if (!(thd->main_security_ctx.ip= my_strdup(ip,MYF(MY_WME))))
      return 1; /* The error is set by my_strdup(). */
    thd->main_security_ctx.host_or_ip= thd->main_security_ctx.ip;
    vio_in_addr(net->vio,&thd->remote.sin_addr);
    if (!(specialflag & SPECIAL_NO_RESOLVE))
    {
      vio_in_addr(net->vio,&thd->remote.sin_addr);
      thd->main_security_ctx.host=
        ip_to_hostname(&thd->remote.sin_addr, &connect_errors);
      /* Cut very long hostnames to avoid possible overflows */
      if (thd->main_security_ctx.host)
      {
        if (thd->main_security_ctx.host != my_localhost)
          thd->main_security_ctx.host[min(strlen(thd->main_security_ctx.host),
                                          HOSTNAME_LENGTH)]= 0;
        thd->main_security_ctx.host_or_ip= thd->main_security_ctx.host;
      }
      if (connect_errors > max_connect_errors)
      {
        my_error(ER_HOST_IS_BLOCKED, MYF(0), thd->main_security_ctx.host_or_ip);
        return 1;
      }
    }
    ...

if (acl_check_host(thd->main_security_ctx.host, thd->main_security_ctx.ip))//此处验证主机名或IP是否存在

    {
      my_error(ER_HOST_NOT_PRIVILEGED, MYF(0),
               thd->main_security_ctx.host_or_ip);
      return 1;
    }
  }
  else /* Hostname given means that the connection was on a socket */
  {
   ...
  }
  vio_keepalive(net->vio, TRUE);

  ...

  char *user= end;
  char *passwd= strend(user)+1;
  uint user_len= passwd - user - 1;
  char *db= passwd;
  char db_buff[NAME_LEN + 1];           // buffer to store db in utf8
  char user_buff[USERNAME_LENGTH + 1];    // buffer to store user in utf8
  uint dummy_errors;

  uint passwd_len= thd->client_capabilities & CLIENT_SECURE_CONNECTION ?
    (uchar)(*passwd++) : strlen(passwd);
  db= thd->client_capabilities & CLIENT_CONNECT_WITH_DB ?
    db + passwd_len + 1 : 0;
  uint db_len= db ? strlen(db) : 0;

  if (passwd + passwd_len + db_len > (char *)net->read_pos + pkt_len)
  {
    inc_host_errors(&thd->remote.sin_addr);
    my_error(ER_HANDSHAKE_ERROR, MYF(0), thd->main_security_ctx.host_or_ip);
    return 1;
  }

...
  /* If username starts and ends in "'", chop them off */
  if (user_len > 1 && user[0] == ''' && user[user_len - 1] == ''')
  {
    user[user_len-1]= 0;
    user++;
    user_len-= 2;
  }

  if (thd->main_security_ctx.user)
    x_free(thd->main_security_ctx.user);
  if (!(thd->main_security_ctx.user= my_strdup(user, MYF(MY_WME))))
    return 1; /* The error is set by my_strdup(). */
  return check_user(thd, COM_CONNECT, passwd, passwd_len, db, TRUE);//验证用户名和密码

}上面的源码主要做了如下几件事情:
- 获取客户端的IP和主机名
- acl_check_host函数验证USER表中是否存在相应的IP或HOST,如果不存在直接报错
- 获取用户名和密码
- check_user函数验证用户名和密码(不输入用户名默认为ODBC),如果系统表中不存在匹配的报错返回
- 获取用户的权限列表,验证用户的相关属性是否合法,如连接数是否超过上限,连接是否超时,操作是否超过限制等信息,如果不合法,则报错返回。
由于在一个认证的过程中涉及到的东西比较多,各个方面吧,我不能一一跟踪,只能大概了解其中的实现流程,捡重点进行

Hot AI Tools

Undresser.AI Undress
AI-powered app for creating realistic nude photos

AI Clothes Remover
Online AI tool for removing clothes from photos.

Undress AI Tool
Undress images for free

Clothoff.io
AI clothes remover

Video Face Swap
Swap faces in any video effortlessly with our completely free AI face swap tool!

Hot Article
Hot Tools

Notepad++7.3.1
Easy-to-use and free code editor

SublimeText3 Chinese version
Chinese version, very easy to use

Zend Studio 13.0.1
Powerful PHP integrated development environment

Dreamweaver CS6
Visual web development tools

SublimeText3 Mac version
God-level code editing software (SublimeText3)
Hot Topics


 Windows 11 shutdown prompts task host window task host is executing the shutdown task solution
Feb 12, 2024 pm 12:40 PM
Windows 11 shutdown prompts task host window task host is executing the shutdown task solution
Feb 12, 2024 pm 12:40 PM
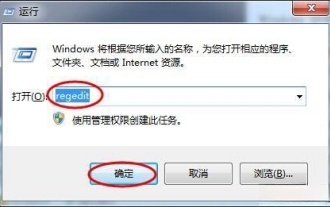
Recently, many Win11 users have reported that when shutting down, they are prompted that the taskhostwindow task host is executing the shutdown task. So what is going on? Users can enter the Desktop folder under the local registry editor, and then select AutoEndTasks in the right window to set it. Let this site carefully introduce to users the solution to this problem when shutting down. Windows 11 shutdown prompts that the taskhostwindow task host is executing the shutdown task. Solution 1. Use the key combination win key + r key, enter "regedit" and press Enter, as shown in the figure below. 2. Search for [HKEY
 How to check if aggregator host.exe is safe in Windows 11
Apr 13, 2023 pm 04:22 PM
How to check if aggregator host.exe is safe in Windows 11
Apr 13, 2023 pm 04:22 PM
When we launch Task Manager to terminate a task or stop an application, we usually find a large number of processes running. This is completely normal. However, sometimes we see programs that are using system resources that we are completely unaware of. One of these processes is the aggregator host.exe, which has been causing some confusion among users recently. Some of these processes may be legitimate Windows requirements, but others may be malicious programs running in the background and causing problems without the user's knowledge or consent. After we've seen the five ways you can launch Task Manager in Windows 11, we'll show you how to check if aggregator host.exe is safe or a virus. keep up
 17 ways to solve the kernel_security_check_failure blue screen
Feb 12, 2024 pm 08:51 PM
17 ways to solve the kernel_security_check_failure blue screen
Feb 12, 2024 pm 08:51 PM
Kernelsecuritycheckfailure (kernel check failure) is a relatively common type of stop code. However, no matter what the reason is, the blue screen error causes many users to be very distressed. Let this site carefully introduce 17 types to users. Solution. 17 solutions to kernel_security_check_failure blue screen Method 1: Remove all external devices When any external device you are using is incompatible with your version of Windows, the Kernelsecuritycheckfailure blue screen error may occur. To do this, you need to unplug all external devices before trying to restart your computer.
 What to do if no route to host
Oct 07, 2023 am 10:50 AM
What to do if no route to host
Oct 07, 2023 am 10:50 AM
The solutions to "no route to host" include checking the network connection, checking the IP address and port, checking the firewall configuration, checking the routing configuration, checking the network device configuration, checking the network service status, checking the network configuration and contacting the network administrator. Detailed introduction: 1. Check the network connection to ensure that the network connection between the client and the target host is normal. You can try to test network connectivity through the ping command or other network tools, and check whether hardware devices such as network cables, wireless networks, and routers are working properly. Make sure the network connection is stable, etc.
 What is the difference between master and host
Sep 28, 2023 pm 01:34 PM
What is the difference between master and host
Sep 28, 2023 pm 01:34 PM
The differences between master and host are: 1. Host can play the role of client or server, while master is the central server responsible for coordinating and managing other slave servers in a distributed system; 2. Host is an ordinary computer device, and master usually has Higher processing power and resources are used to process and distribute tasks, manage data, and maintain the stability of the entire system; 3. The host is a node in the network, and the master is the server that plays a core role in the distributed system.
 How to use the enum module to define enumeration types in Python 2.x
Jul 29, 2023 pm 09:33 PM
How to use the enum module to define enumeration types in Python 2.x
Jul 29, 2023 pm 09:33 PM
How to use the enum module to define enumeration types in Python2.x Introduction: An enumeration is a data type that limits the value of a variable to a limited range. Using enumeration types can make the code clearer and more readable. In Python2.x, we can use the enum module to define enumeration types. This article will introduce how to use the enum module to define and use enumeration types, and give corresponding code examples. Importing the enum module Before using the enum module, you first need to import the module. exist
 Flask-Security: Adding user authentication and password encryption to Python web applications
Jun 17, 2023 pm 02:28 PM
Flask-Security: Adding user authentication and password encryption to Python web applications
Jun 17, 2023 pm 02:28 PM
Flask-Security: Adding user authentication and password encryption to Python web applications As the Internet continues to develop, more and more applications require user authentication and password encryption to protect the security of user data. In the Python language, there is a very popular web framework-Flask. Flask-Security is an extension library based on the Flask framework, which can help developers easily
 Where is the host file
Jan 04, 2021 am 11:25 AM
Where is the host file
Jan 04, 2021 am 11:25 AM
The host file is located under the path "C:\Windows\System32\drivers\etc"; the host file is a plain text file that can be opened with ordinary text editing software, such as Notepad; the function of the host file is to contain the IP address Mapping relationship with Host name.
