

搭建Hadoop环境的详细过程

即上一篇《初步了解Hadoop》已经过去好多天了,今天继续hadoop学习之旅。大体了解hadoop原理,我们想先搭建hadoop环境,在这个过程中慢慢体会一下hadoop。 我在这里说的是hadoop伪分布式模式(Pseudo-Distributed Mode),其实网上已经有很多教程,在这里我
即上一篇《初步了解Hadoop》已经过去好多天了,今天继续hadoop学习之旅。大体了解hadoop原理,我们想先搭建hadoop环境,在这个过程中慢慢体会一下hadoop。
我在这里说的是hadoop伪分布式模式(Pseudo-Distributed Mode),其实网上已经有很多教程,在这里我详详细细的描述整个搭建过程,也算是自己重新回忆一下。
准备阶段(下载地址我这里就不给出了):
Win7旗舰版 Vmware-9.0.2
ubuntu-12.04 hadoop-0.20.2 jdk-8u5-linux-i586-demos
搭建流程:
1、装机阶段:
一、安装Ubuntu操作系统
二、在Ubuntu下创建hadoop用户组和用户
三、在Ubuntu下安装JDK
四、修改机器名
五、安装ssh服务
六、建立ssh无密码登录本机
七、安装hadoop
八、在单机上运行hadoop
一、安装Ubuntu操作系统
略……
二、在Ubuntu下创建hadoop用户组和用户
(1)安装Ubuntu时已经建立了一个用户,但是为了以后Hadoop操作,专门渐建立一个hadoop用户组和hadoop用户。

(2)给hadoop用户添加权限,打开/etc/sudoers文件。
sudo gedit /etc/sudoers
打开/etc/sudoers文件了,给hadoop用户赋予root用户同样的权限。在
root ALL=(ALL:ALL) ALL
下添加:
hadoop ALL=(ALL:ALL) ALL
三、在Ubuntu下安装JDK
1、创建JDK安装目录
(1)由于我使用的是VMware安装的Ubuntu系统,设置本地thisceshi文件夹共享到Ubuntu系统,指定的安装目录是:/usr/local/java。可是系统安装后在/usr/local下并没有java目录,这需要我们去创建一个java文件夹,
进入/usr/local文件夹
cd /usr/local
创建java文件夹,
sudo mkdir /usr/local/java
(2)解压JDK到目标目录
进入共享文件夹thisceshi,
cd /mnt/hgfs/thisceshi
然后进入到共享文件夹中,继续我们解压JDK到之前建好的java文件夹中,
sudo cp jdk-8u5-linux-i586-demos.tar.gz /usr/local/java
2、安装jdk
(1)切换到root用户下,
hadoop@s15:/mnt/hgfs/thisceshi$ su
密码:
(2)解压jdk-8u5-linux-i586-demos.tar.gz
sudo tar -zxf jdk-8u5-linux-i586-demos.tar.gz
此时java目录中多了一个jdk1.6.0_30文件夹。
3、配置环境变量
(1)打开/etc/profile文件,
sudo gedit /etc/profile
(2)添加变量,
#set java environment
export JAVA_HOME=/usr/local/java/jdk1.6.0_30
export JRE_HOME=/usr/local/java/jdk1.6.0_30/jre
export CLASSPATH=.:$JAVA_HOME/lib:$JRE_HOME/lib:$CLASSPATH
export PATH=$JAVA_HOME/bin:$JRE_HOME/bin:$JAVA_HOME:$PATH
一般更改/etc/profile文件后,需要重启机器才能生效,在这里我们可以使用如下指令可使配置文件立即生效,
source /etc/profile
(3)查看java环境变量是否配置成功,
java -version
显示如下:
java version "1.6.0_30"
Java(TM) SE Runtime Environment (build 1.6.0_30-b12)
Java HotSpot(TM) Client VM (build 20.5-b03, mixed mode, sharing)
但是在root下一切正常,在hadoop用户下就出现了问题,
程序“java”已包含在下列软件包中:
 * gcj-4.4-jre-headless
 * openjdk-6-jre-headless
 * cacao
 * gij-4.3
 * jamvm
在终端中我们分别运行下面指令,
sudo update-alternatives --install /usr/bin/java java /usr/local/java/jdk1.6.0_30/bin/java 300
sudo update-alternatives --install /usr/bin/javac javac /usr/local/java/jdk1.6.0_30/bin/javac 300
问题解决。
四、修改机器名
当ubuntu安装成功时,我们的机器名都默认为:ubuntu ,但为了以后集群中能够容易分辨各台服务器,需要给每台机器取个不同的名字。机器名由 /etc/hostname文件决定。这是我开始是根据网上教程也给修改了,其实伪分布式搭建的时候,可以省了,不然还造成一些不必要的麻烦。
1、打开/etc/hostname文件,运行指令,
sudo gedit /etc/hostname
2、然后hostname中添加s15五、安装ssh服务保存退出,即s15是当前用户别名。在这里需要重启系统后才会生效。
hadoop@s15:~$
五、安装ssh服务
1、安装openssh-server
sudo apt-get install openssh-server
2、等待安装,即可。


六、 建立ssh无密码登录本机
在这里,我自己还是模模糊糊的。
ssh生成密钥有rsa和dsa两种生成方式,默认情况下采用rsa方式。
1、创建ssh-key,,这里我们采用rsa方式,
ssh-keygen -t rsa -P ''
网上教程中后面是双引号,我在执行出现错误,换成单引号,则可以执行。

进入ssh,查看里面文件
hadoop@s15:~$ cd .ssh
hadoop@s15:~/.ssh$ ls
id_rsa  id_rsa.pub
2、进入~/.ssh/目录下,将idrsa.pub追加到authorizedkeys授权文件中,开始是没有authorized_keys文件的,
cat id_rsa.pub >> authorized_keys
3、登录localhost,
hadoop@s15:~/.ssh$ ssh localhost
Welcome to Ubuntu 12.04 LTS (GNU/Linux 3.2.0-61-generic-pae i686)
 * Documentation:  https://help.ubuntu.com/
663 packages can be updated.
266 updates are security updates.
Last login: Sat May 10 13:08:03 2014 from localhost
4、执行退出命令,
hadoop@s15:~$ exit
登出
Connection to localhost closed.
七、安装hadoop
1、从共享文件夹thisceshi中将hadoop-0.20.2.tar.gz复制到安装目录 /usr/local/下
2、解压hadoop-0.20.203.tar.gz,
3、将解压出的文件夹改名为hadoop,
4、将该hadoop文件夹的属主用户设为hadoop,
sudo chown -R hadoop:hadoop hadoop
5、打开hadoop/conf/hadoop-env.sh文件,
6、配置conf/hadoop-env.sh(找到#export JAVA_HOME=…,去掉#,然后加上本机jdk的路径)
# The java implementation to use.  Required.
 export JAVA_HOME=/usr/local/java/jdk1.6.0_30
 export HADOOP_HOME=/usr/local/hadoop
 export PATH=$PATH:/usr/local/hadoop/bin
让环境立即生效,
source /usr/local/hadoop/conf/hadoop-env.sh
7、打开conf/core-site.xml文件,编辑如下:
<?xml version="1.0"?>
<?xml-stylesheet type="text/xsl" href="http://www.cndwzone.com/archives/configuration.xsl"?>
<!-- Put site-specific property overrides in this file. -->
  fs.default.name
  hdfs://localhost:9000
8、打开conf/mapred-site.xml文件,编辑如下:
<?xml version="1.0"?>
<?xml-stylesheet type="text/xsl" href="http://www.cndwzone.com/archives/configuration.xsl"?>
<!-- Put site-specific property overrides in this file. -->
  mapred.job.tracker
  localhost:9001
9、打开conf/hdfs-site.xml文件,编辑如下:
<?xml version="1.0"?>
<?xml-stylesheet type="text/xsl" href="http://www.cndwzone.com/archives/configuration.xsl"?>
<!-- Put site-specific property overrides in this file. -->
dfs.name.dir
/usr/local/hadoop/datalog1,/usr/local/hadoop/datalog2
dfs.data.dir
/usr/local/hadoop/data1,/usr/local/hadoop/data2
dfs.replication
2
10、打开conf/masters文件,添加作为secondarynamenode的主机名,因为是伪分布式,只有一个节点,这里只需填写localhost就可以。
11、打开conf/slaves文件,添加作为slave的主机名,一行一个。因为是伪分布式,只有一个节点,这里也只需填写localhost就可以。
八、在单机上运行hadoop
1、进入hadoop目录下,格式化hdfs文件系统,初次运行hadoop时一定要有该操作,当你看到下图时,就说明你的hdfs文件系统格式化成功了。

3、进入bin目录启动start-all.sh,
4、检测hadoop是否启动成功,

到此,hadoop伪分布式环境搭建完成。
在搭建过程中可能会遇到各种问题,到时大家不用着急,可以谷歌,百度一下。解决问题的过程就是加深学习的过程。我当时都忘了花了多久才将环境搭建好,最初的时候,连最基本的指令也不懂,也不知道怎么运行。我在这里说出来就是想说,开始的一无所知不要害怕,慢慢来就好,在那么一刻你就会有所知,有所明白。之后的文章中会介绍在hadoop环境下运行WordCount,hadoop中的HelloWorld。
 即上一篇《初步了解Hadoop》已经过去好多天了,今天继续hadoop学习之旅。大体了解hadoop原理,我们 […]

Hot AI Tools

Undresser.AI Undress
AI-powered app for creating realistic nude photos

AI Clothes Remover
Online AI tool for removing clothes from photos.

Undress AI Tool
Undress images for free

Clothoff.io
AI clothes remover

Video Face Swap
Swap faces in any video effortlessly with our completely free AI face swap tool!

Hot Article
Hot Tools

Notepad++7.3.1
Easy-to-use and free code editor

SublimeText3 Chinese version
Chinese version, very easy to use

Zend Studio 13.0.1
Powerful PHP integrated development environment

Dreamweaver CS6
Visual web development tools

SublimeText3 Mac version
God-level code editing software (SublimeText3)
Hot Topics


 Unable to boot into Windows recovery environment
Feb 19, 2024 pm 11:12 PM
Unable to boot into Windows recovery environment
Feb 19, 2024 pm 11:12 PM
Windows Recovery Environment (WinRE) is an environment used to repair Windows operating system errors. After entering WinRE, you can perform system restore, factory reset, uninstall updates, etc. If you are unable to boot into WinRE, this article will guide you through fixes to resolve the issue. Unable to boot into the Windows Recovery Environment If you cannot boot into the Windows Recovery Environment, use the fixes provided below: Check the status of the Windows Recovery Environment Use other methods to enter the Windows Recovery Environment Did you accidentally delete the Windows Recovery Partition? Perform an in-place upgrade or clean installation of Windows below, we have explained all these fixes in detail. 1] Check Wi
 What are the differences between Python and Anaconda?
Sep 06, 2023 pm 08:37 PM
What are the differences between Python and Anaconda?
Sep 06, 2023 pm 08:37 PM
In this article, we will learn about the differences between Python and Anaconda. What is Python? Python is an open source language that places great emphasis on making the code easy to read and understand by indenting lines and providing whitespace. Python's flexibility and ease of use make it ideal for a variety of applications, including but not limited to scientific computing, artificial intelligence, and data science, as well as creating and developing online applications. When Python is tested, it is immediately translated into machine language because it is an interpreted language. Some languages, such as C++, require compilation to be understood. Proficiency in Python is an important advantage because it is very easy to understand, develop, execute and read. This makes Python
 Java Errors: Hadoop Errors, How to Handle and Avoid
Jun 24, 2023 pm 01:06 PM
Java Errors: Hadoop Errors, How to Handle and Avoid
Jun 24, 2023 pm 01:06 PM
Java Errors: Hadoop Errors, How to Handle and Avoid When using Hadoop to process big data, you often encounter some Java exception errors, which may affect the execution of tasks and cause data processing to fail. This article will introduce some common Hadoop errors and provide ways to deal with and avoid them. Java.lang.OutOfMemoryErrorOutOfMemoryError is an error caused by insufficient memory of the Java virtual machine. When Hadoop is
 How to quickly build a statistical chart system under the Vue framework
Aug 21, 2023 pm 05:48 PM
How to quickly build a statistical chart system under the Vue framework
Aug 21, 2023 pm 05:48 PM
How to quickly build a statistical chart system under the Vue framework. In modern web applications, statistical charts are an essential component. As a popular front-end framework, Vue.js provides many convenient tools and components that can help us quickly build a statistical chart system. This article will introduce how to use the Vue framework and some plug-ins to build a simple statistical chart system. First, we need to prepare a Vue.js development environment, including installing Vue scaffolding and some related plug-ins. Execute the following command in the command line
 Can buildings be built in the wild in Mistlock Kingdom?
Mar 07, 2024 pm 08:28 PM
Can buildings be built in the wild in Mistlock Kingdom?
Mar 07, 2024 pm 08:28 PM
Players can collect different materials to build buildings when playing in the Mistlock Kingdom. Many players want to know whether to build buildings in the wild. Buildings cannot be built in the wild in the Mistlock Kingdom. They must be within the scope of the altar. . Can buildings be built in the wild in Mistlock Kingdom? Answer: No. 1. Buildings cannot be built in the wild areas of the Mist Lock Kingdom. 2. The building must be built within the scope of the altar. 3. Players can place the Spirit Fire Altar by themselves, but once they leave the range, they will not be able to construct buildings. 4. We can also directly dig a hole in the mountain as our home, so we don’t need to consume building materials. 5. There is a comfort mechanism in the buildings built by players themselves, that is to say, the better the interior, the higher the comfort. 6. High comfort will bring attribute bonuses to players, such as
 Best practices and precautions for building a web server under CentOS 7
Aug 25, 2023 pm 11:33 PM
Best practices and precautions for building a web server under CentOS 7
Aug 25, 2023 pm 11:33 PM
Best practices and precautions for building web servers under CentOS7 Introduction: In today's Internet era, web servers are one of the core components for building and hosting websites. CentOS7 is a powerful Linux distribution widely used in server environments. This article will explore the best practices and considerations for building a web server on CentOS7, and provide some code examples to help you better understand. 1. Install Apache HTTP server Apache is the most widely used w
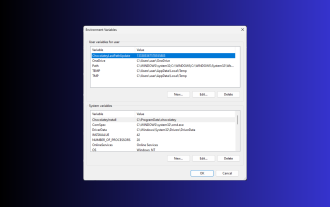 11 Ways to Set Environment Variables on Windows 3
Sep 15, 2023 pm 12:21 PM
11 Ways to Set Environment Variables on Windows 3
Sep 15, 2023 pm 12:21 PM
Setting environment variables on Windows 11 can help you customize your system, run scripts, and configure applications. In this guide, we'll discuss three methods along with step-by-step instructions so you can configure your system to your liking. There are three types of environment variables System environment variables – Global variables are the lowest priority and are accessible to all users and applications on Windows and are typically used to define system-wide settings. User Environment Variables – Higher priority, these variables only apply to the current user and process running under that account, and are set by the user or application running under that account. Process environment variables – have the highest priority, they are temporary and apply to the current process and its sub-processes, providing the program
 Using Hadoop and HBase in Beego for big data storage and querying
Jun 22, 2023 am 10:21 AM
Using Hadoop and HBase in Beego for big data storage and querying
Jun 22, 2023 am 10:21 AM
With the advent of the big data era, data processing and storage have become more and more important, and how to efficiently manage and analyze large amounts of data has become a challenge for enterprises. Hadoop and HBase, two projects of the Apache Foundation, provide a solution for big data storage and analysis. This article will introduce how to use Hadoop and HBase in Beego for big data storage and query. 1. Introduction to Hadoop and HBase Hadoop is an open source distributed storage and computing system that can
