

CSS implementation of sprites and font icons

This article mainly introduces the knowledge related to CSS implementation of sprites and font icons. It is very good and has reference value. Friends who need it can refer to it
Sprite:
In the past, each picture resource was an independent picture. When the browser accessed different web pages in the website, it repeatedly obtained these pictures, which meant that it needed to access Resources many times.
In order to reduce the number of resource accesses, multiple commonly used pictures are collected into one picture (the caching mechanism of the web page will omit existing local resources. If this resource is obtained previously, then it will be used later. It will not be accessed again until the cached resources expire. [The meaning is a bit like going to an amusement park. Some tickets can play all games, while some tickets can only play one game. If you hold a ticket that can play all games, then you You don’t have to bother buying tickets again and again]).
After gathering multiple commonly used pictures into one picture, set this picture as a background picture, and then use background-position to display different parts of the picture.
Example:
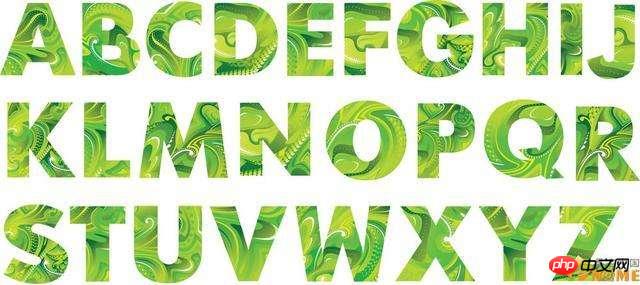
The following is a 26-letter alphabet. We use this picture to spell out a GOOGLE
<!DOCTYPE html>
<html>
<head>
<meta charset="UTF-8" />
<title>Document</title>
<style>
p{
display:inline-block;
}
p:first-child{
width:79px;
height: 79px;
background-image:url('abcd.jpg');
background-position:-396px 0;
}
p:nth-child(2){
width:82px;
height: 82px;
background-image:url('abcd.jpg');
background-position:-326px -98px;
}
p:nth-child(3){
width:82px;
height: 82px;
background-image:url('abcd.jpg');
background-position:-326px -98px;
}
p:nth-child(4){
width:79px;
height: 79px;
background-image:url('abcd.jpg');
background-position:-396px 0;
}
p:nth-child(5){
width:48px;
height: 77px;
background-image:url('abcd.jpg');
background-position:-81px -101px;
}
p:nth-child(6){
width:48px;
height: 77px;
background-image:url('abcd.jpg');
background-position:-286px 0;
}
</style>
</head>
<body>
<p></p>
<p></p>
<p></p>
<p></p>
<p></p>
<p></p>
</body>
</html>Result:

As shown in the above example, we can combine multiple pictures Put it into a large picture, and then use background-position to capture the content we want to see.
In reality, many background pictures use this technology.
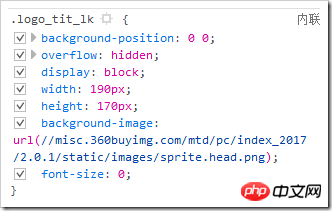
For example, JD.com’s LOGO:

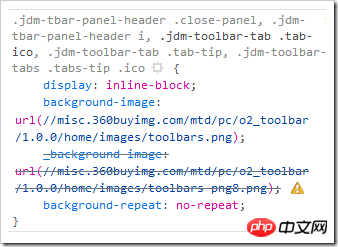
Some small icons of JD.com:
Font icon:
As we all know, the file size of a unit font is smaller than the size of the picture. Considering that the sprite map processes pictures one by one, someone had a wonderful idea - -Convert pictures into fonts (actually the fonts were originally designed this way.)
After converting into fonts, you can use special codes to display the specified pictures.
Font icons have a very obvious advantage over sprites. Because they are fonts, they can change the font color and the font size (without distortion).
Example: [The following only demonstrates the use, not how to make font icons]
I used icomoon to create a set of font icons, [icomoon has ready-made icon selections], and downloaded it. Below are the file names.
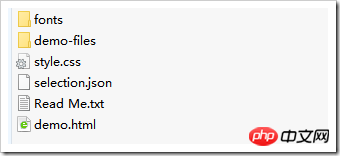
style.css can provide a way to use font icons
demo.html can provide a second way Ways to use font icons.

Then use:
<!DOCTYPE html>
<html>
<head>
<meta charset="UTF-8" />
<title>Document</title>
<style >
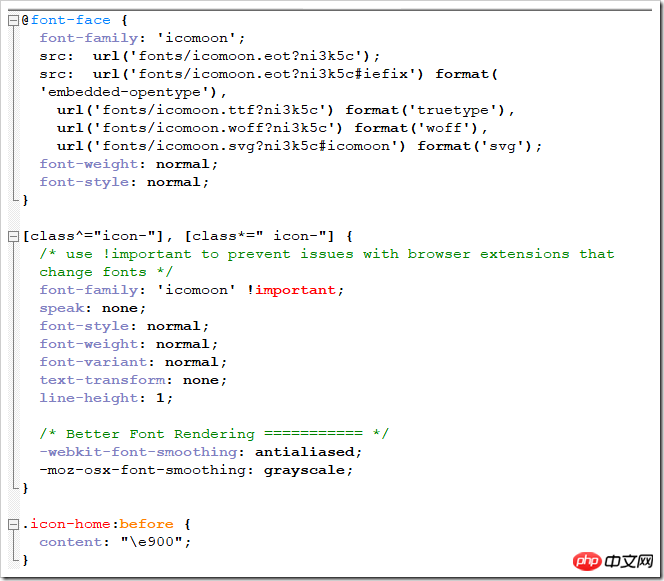
/* 声明字体 这下面一堆文字在下载的文件夹中的css文件中*/
@font-face {
font-family: 'icomoon';
src: url('fonts/icomoon.eot?ni3k5c');
src: url('fonts/icomoon.eot?ni3k5c#iefix') format('embedded-opentype'),
url('fonts/icomoon.ttf?ni3k5c') format('truetype'),
url('fonts/icomoon.woff?ni3k5c') format('woff'),
url('fonts/icomoon.svg?ni3k5c#icomoon') format('svg');
font-weight: normal;
font-style: normal;
}
/* 使用 */
[class^="icon-"], [class*=" icon-"] {
/* use !important to prevent issues with browser extensions that change fonts */
font-family: 'icomoon' !important;
speak: none;
font-style: normal;
font-weight: normal;
font-variant: normal;
text-transform: none;
line-height: 1;
/* Better Font Rendering =========== */
-webkit-font-smoothing: antialiased;
-moz-osx-font-smoothing: grayscale;
}
.icon-home:before {
content: "\e900";
}
.icon-image:before {
content: "\e90d";
}
.icon-music:before {
content: "\e911";
}
p{
font-family:'icomoon';/* 要与上面一致 */
}
</style>
</head>
<body>
<p class=".icon-imagee"></p>
<!-- 第一种使用方式:
导入style.css文件,并使用指定图标的类选择器的属性作为对应的class属性值
-->
<p></p> <!-- 第二种使用方式:
对标签进行字体声明,然后打开demo.html复制那个图标下来【左边一个代码,右边一个图标】
-->
<!-- 第一种方法是使用::before来增加,我们也可以使用别的::before方式来添加 -->
</body>
</html>Related recommendations:
CSS to achieve the effect of bookmark pattern
The above is the detailed content of CSS implementation of sprites and font icons. For more information, please follow other related articles on the PHP Chinese website!

Hot AI Tools

Undresser.AI Undress
AI-powered app for creating realistic nude photos

AI Clothes Remover
Online AI tool for removing clothes from photos.

Undress AI Tool
Undress images for free

Clothoff.io
AI clothes remover

Video Face Swap
Swap faces in any video effortlessly with our completely free AI face swap tool!

Hot Article
Hot Tools

Notepad++7.3.1
Easy-to-use and free code editor

SublimeText3 Chinese version
Chinese version, very easy to use

Zend Studio 13.0.1
Powerful PHP integrated development environment

Dreamweaver CS6
Visual web development tools

SublimeText3 Mac version
God-level code editing software (SublimeText3)
Hot Topics


 How to use bootstrap in vue
Apr 07, 2025 pm 11:33 PM
How to use bootstrap in vue
Apr 07, 2025 pm 11:33 PM
Using Bootstrap in Vue.js is divided into five steps: Install Bootstrap. Import Bootstrap in main.js. Use the Bootstrap component directly in the template. Optional: Custom style. Optional: Use plug-ins.
 The Roles of HTML, CSS, and JavaScript: Core Responsibilities
Apr 08, 2025 pm 07:05 PM
The Roles of HTML, CSS, and JavaScript: Core Responsibilities
Apr 08, 2025 pm 07:05 PM
HTML defines the web structure, CSS is responsible for style and layout, and JavaScript gives dynamic interaction. The three perform their duties in web development and jointly build a colorful website.
 How to write split lines on bootstrap
Apr 07, 2025 pm 03:12 PM
How to write split lines on bootstrap
Apr 07, 2025 pm 03:12 PM
There are two ways to create a Bootstrap split line: using the tag, which creates a horizontal split line. Use the CSS border property to create custom style split lines.
 Understanding HTML, CSS, and JavaScript: A Beginner's Guide
Apr 12, 2025 am 12:02 AM
Understanding HTML, CSS, and JavaScript: A Beginner's Guide
Apr 12, 2025 am 12:02 AM
WebdevelopmentreliesonHTML,CSS,andJavaScript:1)HTMLstructurescontent,2)CSSstylesit,and3)JavaScriptaddsinteractivity,formingthebasisofmodernwebexperiences.
 How to set up the framework for bootstrap
Apr 07, 2025 pm 03:27 PM
How to set up the framework for bootstrap
Apr 07, 2025 pm 03:27 PM
To set up the Bootstrap framework, you need to follow these steps: 1. Reference the Bootstrap file via CDN; 2. Download and host the file on your own server; 3. Include the Bootstrap file in HTML; 4. Compile Sass/Less as needed; 5. Import a custom file (optional). Once setup is complete, you can use Bootstrap's grid systems, components, and styles to create responsive websites and applications.
 How to insert pictures on bootstrap
Apr 07, 2025 pm 03:30 PM
How to insert pictures on bootstrap
Apr 07, 2025 pm 03:30 PM
There are several ways to insert images in Bootstrap: insert images directly, using the HTML img tag. With the Bootstrap image component, you can provide responsive images and more styles. Set the image size, use the img-fluid class to make the image adaptable. Set the border, using the img-bordered class. Set the rounded corners and use the img-rounded class. Set the shadow, use the shadow class. Resize and position the image, using CSS style. Using the background image, use the background-image CSS property.
 How to use bootstrap button
Apr 07, 2025 pm 03:09 PM
How to use bootstrap button
Apr 07, 2025 pm 03:09 PM
How to use the Bootstrap button? Introduce Bootstrap CSS to create button elements and add Bootstrap button class to add button text
 How to resize bootstrap
Apr 07, 2025 pm 03:18 PM
How to resize bootstrap
Apr 07, 2025 pm 03:18 PM
To adjust the size of elements in Bootstrap, you can use the dimension class, which includes: adjusting width: .col-, .w-, .mw-adjust height: .h-, .min-h-, .max-h-
