

CSS descendant selector
This time I will bring you the CSS descendant selector. What are the precautions when using the CSS descendant selector? Here is a practical case, let’s take a look.
The descendant selector is used to select all descendants of a tag, including children and grandchildren, etc.; while the descendant selector only selects the descendant tags of the specified parent (the first generation child elements of the specified tag element) .
The descendant selector uses an extra symbol (angle brackets > ) to indicate the relationship between two elements.
For example: body>h1 selects all the first-generation
tags in the tag.
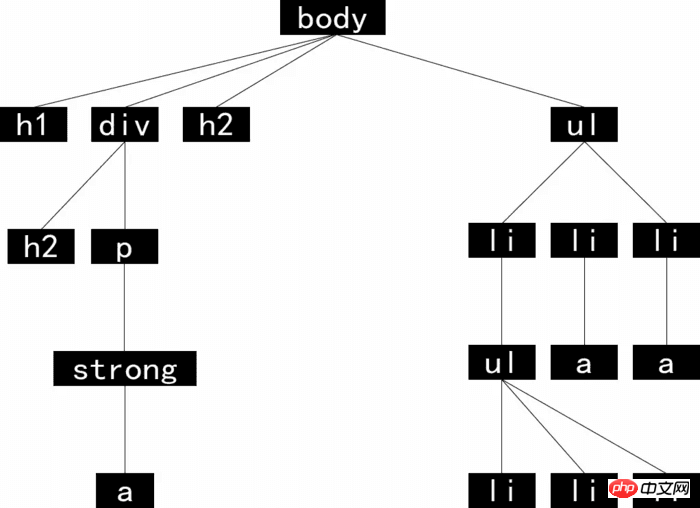
Relationship diagram of HTML tag
##HTML code
<h1>body里面的h1标题</h1>
<p>
    <h2>p里面的h2</h2>
    <p>
        p里面的p标签,p标签里面有一个<strong><a href="#">加粗的链接</a></strong>
    </p>
</p>
<h2>body里面的h2标题</h2>
<ul>
    <li>列表1
        <ul>
            <li>小列表a</li>
            <li>小列表b</li>
            <li>小列表c</li>
        </ul>
    </li>
    <li>
        <a href="#">列表2(带链接)</a>
    </li>
    <li>
        <a href="#">列表3(带链接)</a>
    </li>
</ul>
body>h2 {
    color: orange;
}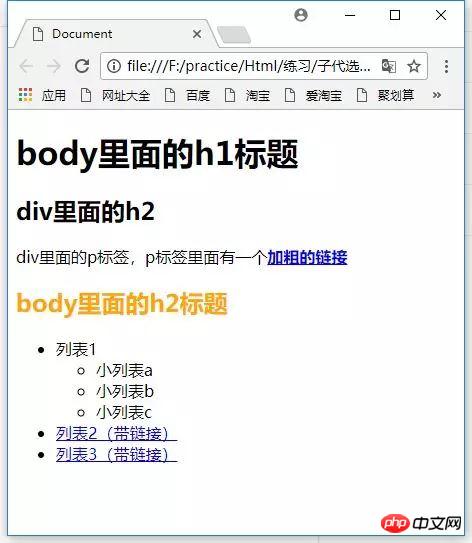
, and the other is inside
, so the above CSS code only works on the first
Label.
The following is a more interesting child selector
Select the first sub-tag. CSS codeh2:first-child {
color: orange;
}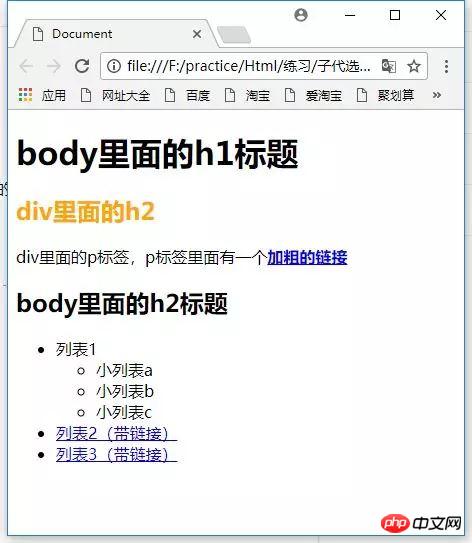
tags in the web page, and then find them through the tag parent element, and then determine whether the tag is ranked first in its parent element.
Here because the first tag of is tag is ranked first in its parent element.
, the child element of is not affected by the style.
Because in
is the first child element of
, so the
in
becomes orange.
:last-child
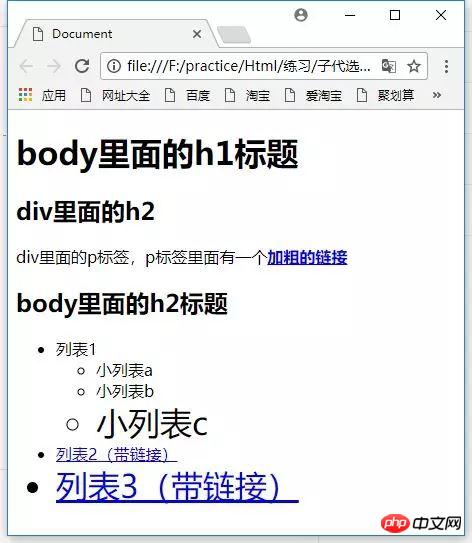
This selector is similar to the :first-child selector, but it selects the last child of an element. CSS codeli:last-child {
font-size: 2em;
}
:only-child
Select the only child of an element. HTML code<p> <p>第一个p的p</p> </p> <p> <p>第二个p的第一个p</p> <a href="#">第二个p的第一个a</a> </p>
p:only-child {
    color: orange;
}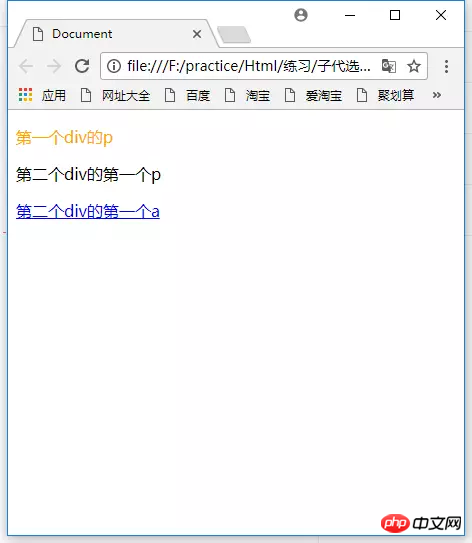
element. Since there are not only
elements in the second
HTML代码
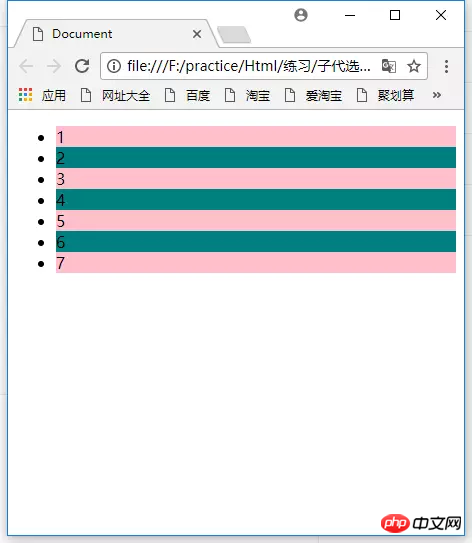
<ul> <a href="#">a</a> <li>1</li> <li>2</li> <li>3</li> <li>4</li> <li>5</li> <li>6</li> <li>7</li> </ul>
这时的效果是
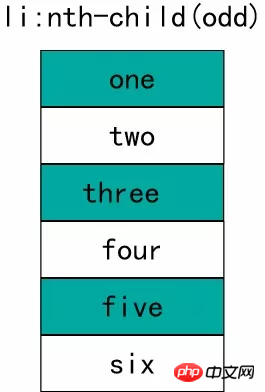
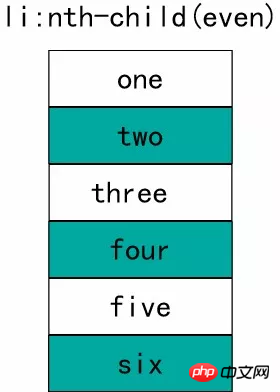
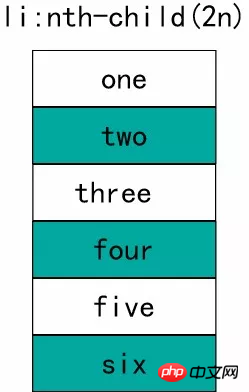
li:nth-child(odd) 的意思是找到
因为
- 的第一个元素是,第二个元素才是
- 。也就是说,第一个
- 的下标是2,所以第一个下标赋的样式是绿色的背景。
使用上面的方法可以让表格里的各行交替使用不同的样式特别简单。不过,:nth-child() 还有一些更妙更强大的用法。
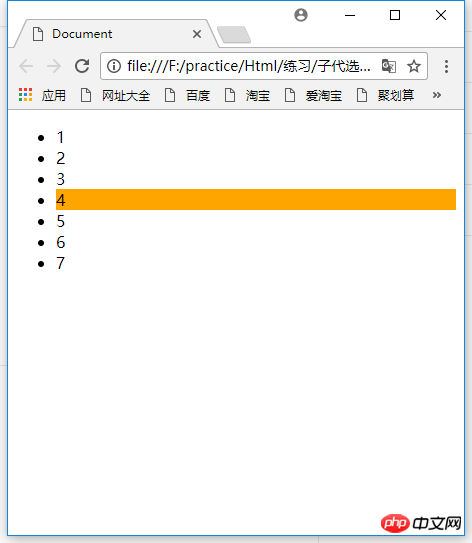
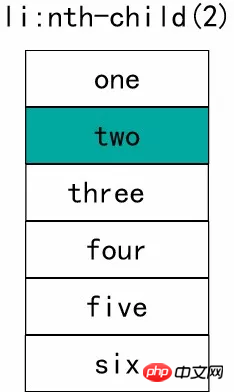
可以给 :nth-child() 指定一个数字,精确选择某个子代。比如说要让第4个
- 的背景色改成橙色。
HTML代码
<ul>
    <li>1</li>
    <li>2</li>
    <li>3</li>
    <li>4</li>
    <li>5</li>
    <li>6</li>
    <li>7</li>
</ul>
Copy after loginCopy after loginCSS代码
li:nth-child(4) { background: orange; }Copy after login
同样的,这里的 li:nth-child(4) 的意思,是找到
- 标签的父元素,然后查找父元素的第4个子元素。
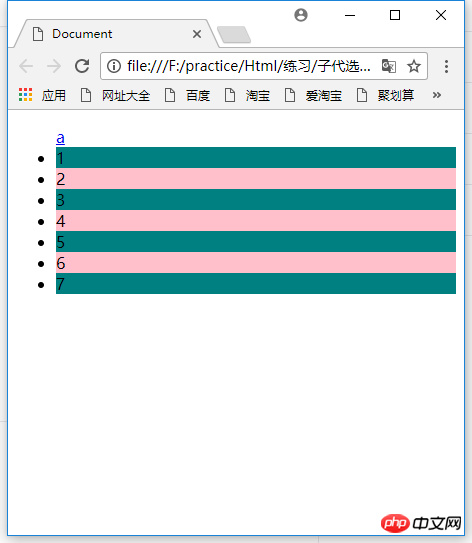
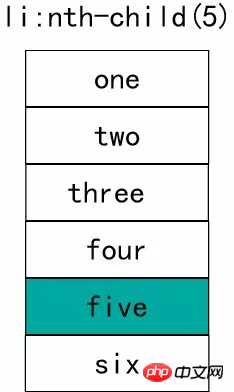
如果HTML代码是下面这样,CSS代码不变的情况下。
HTML代码
<ul>
    <a href="#">a</a>
    <li>1</li>
    <li>2</li>
    <li>3</li>
    <li>4</li>
    <li>5</li>
    <li>6</li>
    <li>7</li>
</ul>
Copy after loginCopy after login效果就会变成这样:
会选中第3个
- 。因为第3个
- 在其父元素里面是排第4的。
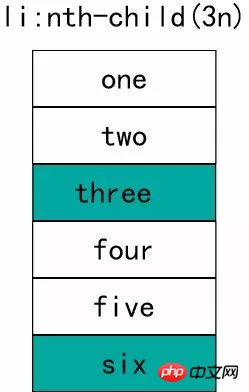
如果想每隔2个项目选中第三个项目,可以在数字后面加上字母n。
HTML代码
<ul>
    <li>1</li>
    <li>2</li>
    <li>3</li>
    <li>4</li>
    <li>5</li>
    <li>6</li>
    <li>7</li>
    <li>8</li>
    <li>9</li>
    <li>0</li>
</ul>
Copy after loginCopy after loginCSS代码
li:nth-child(3n) {
    background: orange;
}
Copy after login每当遇到3的整数倍的那个元素,就会应用规定的样式。
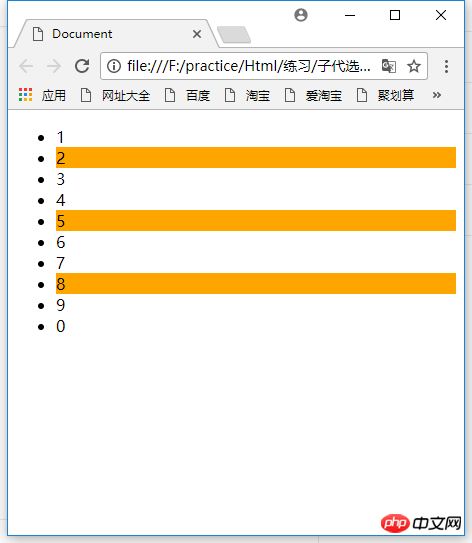
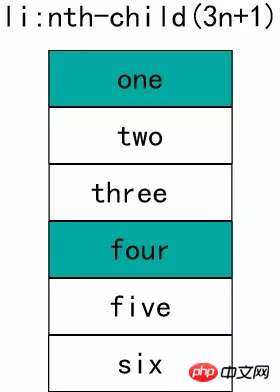
如果想从第二个子代元素开始算起,选取每隔2个元素的第三个子代元素。可以在3n后面加个2。
HTML代码
<ul>
    <li>1</li>
    <li>2</li>
    <li>3</li>
    <li>4</li>
    <li>5</li>
    <li>6</li>
    <li>7</li>
    <li>8</li>
    <li>9</li>
    <li>0</li>
</ul>
Copy after loginCopy after loginCSS代码
li:nth-child(3n+2) {
    background: orange;
}
Copy after login如果想从第5个开始算起,每隔2个元素的第三个子代元素更改样式。
CSS代码
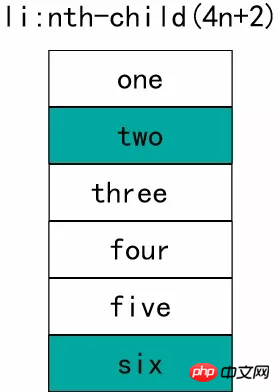
li:nth-child(3n+5) {
    background: orange;
}
Copy after login如果想反向遍历,n前面的倍数就要修改成负数。
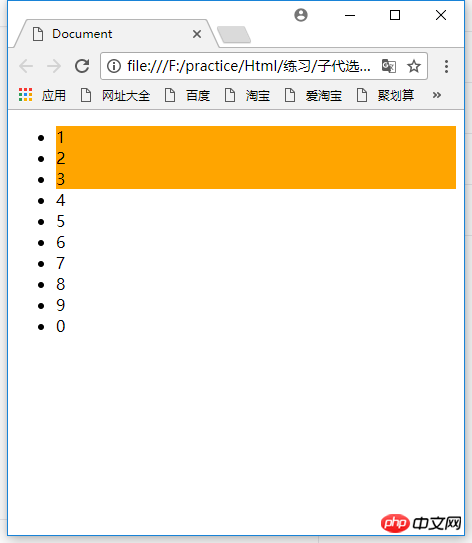
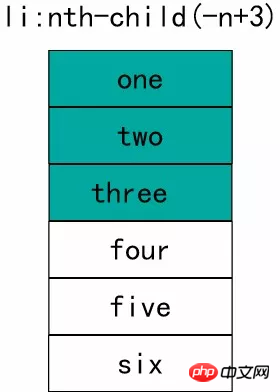
CSS代码
li:nth-child(-n+3) {
    background: orange;
}
Copy after login意思是:从列表的第三个条目算起,选取在此之前的每个条目。
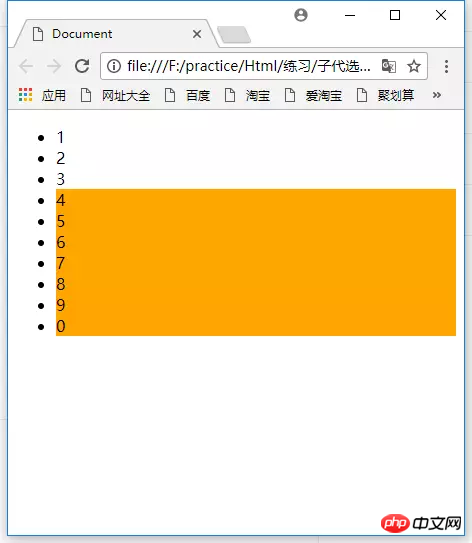
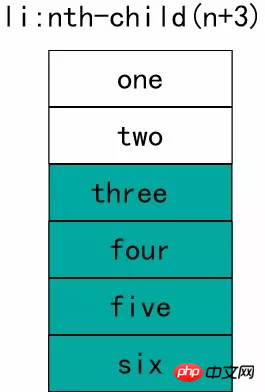
如果想从第4个元素开始,往下选取所有元素。可以这样写:
CSS代码
li:nth-child(n+4) {
    background: orange;
}
Copy after login以下是子代选择符总览表
# I believe you have mastered the method after reading the case in this article. Please pay attention for more exciting things. Other related articles on php Chinese website! Recommended reading:Detailed explanation of positioning properties of CSS
How to make a thin line smaller than one pixel in css3
The above is the detailed content of CSS descendant selector. For more information, please follow other related articles on the PHP Chinese website!


Hot AI Tools

Undresser.AI Undress
AI-powered app for creating realistic nude photos

AI Clothes Remover
Online AI tool for removing clothes from photos.

Undress AI Tool
Undress images for free

Clothoff.io
AI clothes remover

Video Face Swap
Swap faces in any video effortlessly with our completely free AI face swap tool!

Hot Article
Hot Tools

Notepad++7.3.1
Easy-to-use and free code editor

SublimeText3 Chinese version
Chinese version, very easy to use

Zend Studio 13.0.1
Powerful PHP integrated development environment

Dreamweaver CS6
Visual web development tools

SublimeText3 Mac version
God-level code editing software (SublimeText3)
Hot Topics


 How to use bootstrap in vue
Apr 07, 2025 pm 11:33 PM
How to use bootstrap in vue
Apr 07, 2025 pm 11:33 PM
Using Bootstrap in Vue.js is divided into five steps: Install Bootstrap. Import Bootstrap in main.js. Use the Bootstrap component directly in the template. Optional: Custom style. Optional: Use plug-ins.
 The Roles of HTML, CSS, and JavaScript: Core Responsibilities
Apr 08, 2025 pm 07:05 PM
The Roles of HTML, CSS, and JavaScript: Core Responsibilities
Apr 08, 2025 pm 07:05 PM
HTML defines the web structure, CSS is responsible for style and layout, and JavaScript gives dynamic interaction. The three perform their duties in web development and jointly build a colorful website.
 Understanding HTML, CSS, and JavaScript: A Beginner's Guide
Apr 12, 2025 am 12:02 AM
Understanding HTML, CSS, and JavaScript: A Beginner's Guide
Apr 12, 2025 am 12:02 AM
WebdevelopmentreliesonHTML,CSS,andJavaScript:1)HTMLstructurescontent,2)CSSstylesit,and3)JavaScriptaddsinteractivity,formingthebasisofmodernwebexperiences.
 How to set up the framework for bootstrap
Apr 07, 2025 pm 03:27 PM
How to set up the framework for bootstrap
Apr 07, 2025 pm 03:27 PM
To set up the Bootstrap framework, you need to follow these steps: 1. Reference the Bootstrap file via CDN; 2. Download and host the file on your own server; 3. Include the Bootstrap file in HTML; 4. Compile Sass/Less as needed; 5. Import a custom file (optional). Once setup is complete, you can use Bootstrap's grid systems, components, and styles to create responsive websites and applications.
 How to write split lines on bootstrap
Apr 07, 2025 pm 03:12 PM
How to write split lines on bootstrap
Apr 07, 2025 pm 03:12 PM
There are two ways to create a Bootstrap split line: using the tag, which creates a horizontal split line. Use the CSS border property to create custom style split lines.
 How to insert pictures on bootstrap
Apr 07, 2025 pm 03:30 PM
How to insert pictures on bootstrap
Apr 07, 2025 pm 03:30 PM
There are several ways to insert images in Bootstrap: insert images directly, using the HTML img tag. With the Bootstrap image component, you can provide responsive images and more styles. Set the image size, use the img-fluid class to make the image adaptable. Set the border, using the img-bordered class. Set the rounded corners and use the img-rounded class. Set the shadow, use the shadow class. Resize and position the image, using CSS style. Using the background image, use the background-image CSS property.
 How to use bootstrap button
Apr 07, 2025 pm 03:09 PM
How to use bootstrap button
Apr 07, 2025 pm 03:09 PM
How to use the Bootstrap button? Introduce Bootstrap CSS to create button elements and add Bootstrap button class to add button text
 How to resize bootstrap
Apr 07, 2025 pm 03:18 PM
How to resize bootstrap
Apr 07, 2025 pm 03:18 PM
To adjust the size of elements in Bootstrap, you can use the dimension class, which includes: adjusting width: .col-, .w-, .mw-adjust height: .h-, .min-h-, .max-h-
