1、问答: Ajax的工作原理分析(用自己语言组织)
答: Ajax的全称是 Asynchronous JavaScript and XML[异步的 JavaScript 和 XML];
主要特性在“异步”上,***端发送请求后,有两种方式:一是同步,等待服务器返回,在此过程中不进行任何操作;二是异步,在等待服务器返回的时间里做其他事情,同时进行多请求操作。
2.编程: Ajax用户登录验证
<!DOCTYPE html>
<html>
    <head>
        <title>Ajax 实战</title>
        <meta charset="UTF-8">
        <meta name="viewport" content="width=device-width, initial-scale=1.0">
    </head>
    <body>
        <h3>用户登录</h3>
        <form action="">
            <p>邮箱:<input type="email" name="email"></p>
            <p>密码:<input type="password" name="password"></p>
            <p><button type="button">提交</button></p>
        </form>

        <script>
            let btn = document.getElementsByTagName("button")[0];
            btn.onclick = function () {
                //1.创建xhr对象
                let xhr = new XMLHttpRequest();
                //2.监听响应状态
                xhr.onreadystatechange=function(){
                    if(4!==xhr.readyState)return false;
                    if(200!==xhr.status){
                        alert("响应失败:"+xhr.status);
                    }
                    let p=document.createElement('p');
                    p.style.color='red';
                    //获得服务器返回至
                    //let jsonData=JSON.parse(xhr.responseText);
                    console.log(xhr.responseText);
                    let jsonData = JSON.parse(xhr.responseText);
                    p.innerHTML=jsonData.msg;
                    document.getElementsByTagName('form')[0].appendChild(p);
                    btn.disabled=true;
                }

                //3.设置请求参数
                xhr.open('post','inc/check.php',true);

                //4. 设置头信息,将内容类型设置为表单提交方式
                xhr.setRequestHeader('Content-Type','application/x-www-form-urlencoded');

                //5.发送请求
                let data={
                    email:document.getElementsByName('email')[0].value,
                    password:document.getElementsByName('password')[0].value
                };
                let sendingData='data='+JSON.stringify(data);
                xhr.send(sendingData);

            }


        </script>
    </body>
</html>点击 "运行实例" 按钮查看在线实例
php
<?php

//print_r($_POST['data']);
//echo $data['email'];


$user = json_decode($_POST['data']);
//echo $user->email;
$email = $user->email;
$password = sha1($user->password);

$pdo = new PDO('mysql:host=localhost;dbname=php', 'root', 'root123');

$sql = "SELECT COUNT(*) FROM `user` WHERE `email`='{$email}' AND `password`='{$password}' ";

$stmt = $pdo->prepare($sql);

$stmt->execute();

if ($stmt->fetchColumn(0) == 1) {
    echo json_encode(['status' => 1, 'msg' => '登录成功,正在跳转...']);
    exit;
} else {
    echo json_encode(['status' => 0, 'msg' => '邮箱或密码错误,登录失败!']);
    exit;
}点击 "运行实例" 按钮查看在线实例
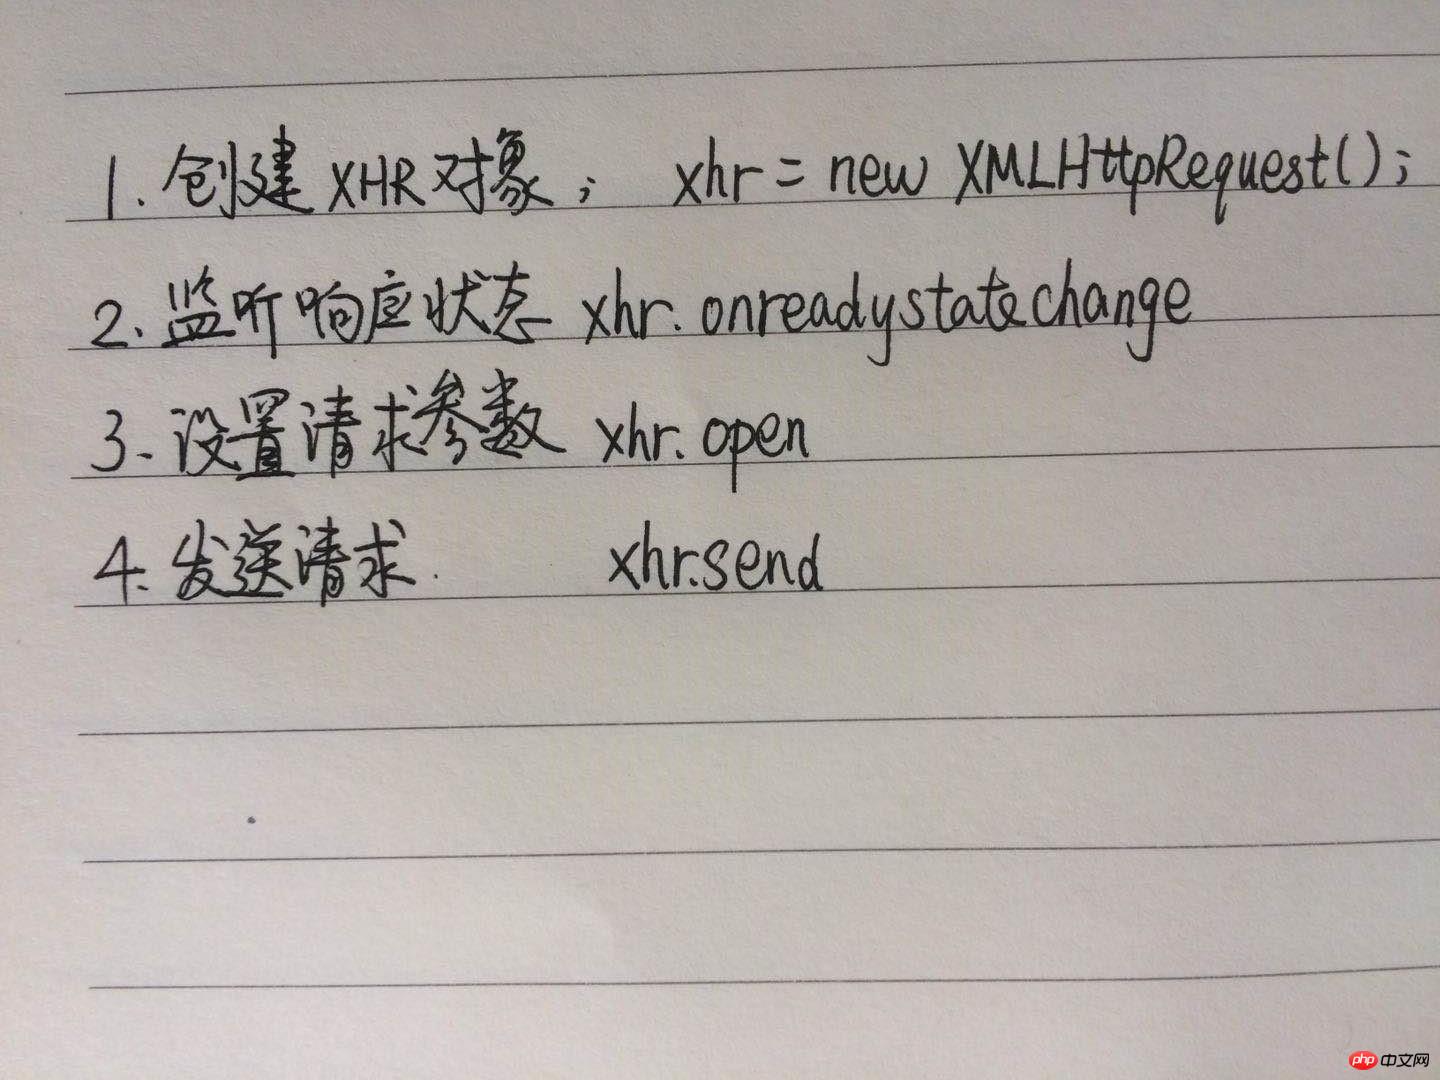
3.手写: Ajax的完整运行流程(以get为例),共四步。


Copyright 2014-2025 https://www.php.cn/ All Rights Reserved | php.cn | 湘ICP备2023035733号