所谓“配置绑定”就是把配置文件中的值与 JavaBean 中对应的属性进行绑定。通常,我们会把一些配置信息(例如,数据库配置)放在配置文件中,然后通过 Java 代码去读取该配置文件,并且把配置文件中指定的配置封装到 JavaBean(实体类) 中。
SpringBoot 提供了以下 2 种方式进行配置绑定:
通过 Spring Boot 提供的 @ConfigurationProperties 注解,可以将全局配置文件中的配置数据绑定到 JavaBean 中。
下面我们以 Spring Boot 项目 helloworld 为例,演示如何通过 @ConfigurationProperties 注解进行配置绑定。
1、在 helloworld 的全局配置文件 application.yml 中添加以下自定义属性。
person:lastName: 张三age: 18boss: falsebirth: 1990/12/12maps: { k1: v1,k2: 12 }lists:‐ lisi‐ zhaoliudog:name: 迪迪age: 5
2、在 helloworld 项目的 net.biancheng.www.bean 中创建一个名为 Person 的实体类,并将配置文件中的属性映射到这个实体类上,代码如下。
package net.biancheng.www.bean;import org.springframework.boot.context.properties.ConfigurationProperties;import org.springframework.stereotype.Component;import java.util.Date;import java.util.List;import java.util.Map;/*** 将配置文件中配置的每一个属性的值,映射到这个组件中** @ConfigurationProperties:告诉 SpringBoot 将本类中的所有属性和配置文件中相关的配置进行绑定;* prefix = "person":配置文件中哪个下面的所有属性进行一一映射** 只有这个组件是容器中的组件,才能使用容器提供的@ConfigurationProperties功能;*/@Component@ConfigurationProperties(prefix = "person")public class Person {private String lastName;private Integer age;private Boolean boss;private Date birth;private Map<String, Object> maps;private List<Object> lists;private Dog dog;public Person() {}public String getLastName() {return lastName;}public void setLastName(String lastName) {this.lastName = lastName;}public Integer getAge() {return age;}public void setAge(Integer age) {this.age = age;}public Boolean getBoss() {return boss;}public void setBoss(Boolean boss) {this.boss = boss;}public Date getBirth() {return birth;}public void setBirth(Date birth) {this.birth = birth;}public Map<String, Object> getMaps() {return maps;}public void setMaps(Map<String, Object> maps) {this.maps = maps;}public List<Object> getLists() {return lists;}public void setLists(List<Object> lists) {this.lists = lists;}public Dog getDog() {return dog;}public void setDog(Dog dog) {this.dog = dog;}public Person(String lastName, Integer age, Boolean boss, Date birth, Map<String, Object> maps, List<Object> lists, Dog dog) {this.lastName = lastName;this.age = age;this.boss = boss;this.birth = birth;this.maps = maps;this.lists = lists;this.dog = dog;}@Overridepublic String toString() {return "Person{" +"lastName='" + lastName + '\'' +", age=" + age +", boss=" + boss +", birth=" + birth +", maps=" + maps +", lists=" + lists +", dog=" + dog +'}';}}
注意:
3、在 net.biancheng.www.bean 中,创建一个名为 Dog 的 JavaBean,代码如下。
package net.biancheng.www.bean;public class Dog {private String name;private String age;public Dog() {}public Dog(String name, String age) {this.name = name;this.age = age;}public void setName(String name) {this.name = name;}public void setAge(String age) {this.age = age;}public String getName() {return name;}public String getAge() {return age;}}
4、修改 HelloController 的代码,在浏览器中展示配置文件中各个属性值,代码如下。
package net.biancheng.www.controller;import net.biancheng.www.bean.Person;import org.springframework.beans.factory.annotation.Autowired;import org.springframework.stereotype.Controller;import org.springframework.web.bind.annotation.RequestMapping;import org.springframework.web.bind.annotation.ResponseBody;@Controllerpublic class HelloController {@Autowiredprivate Person person;@ResponseBody@RequestMapping("/hello")public Person hello() {return person;}}
5、重启项目,使用浏览器访问 “http://localhost:8081/hello”,结果如下图。
当我们只需要读取配置文件中的某一个配置时,可以通过 @Value 注解获取。
1、以 Spring Boot 项目 helloworld 为例,修改实体类 Person 中的代码,使用 @Value 注解进行配置绑定,代码如下。
package net.biancheng.www.bean;import org.springframework.beans.factory.annotation.Value;import org.springframework.boot.context.properties.ConfigurationProperties;import org.springframework.stereotype.Component;import java.util.Date;import java.util.List;import java.util.Map;@Componentpublic class Person {@Value("${person.lastName}")private String lastName;@Value("${person.age}")private Integer age;@Value("${person.boss}")private Boolean boss;@Value("${person.birth}")private Date birth;private Map<String, Object> maps;private List<Object> lists;private Dog dog;public Person() {}public String getLastName() {return lastName;}public void setLastName(String lastName) {this.lastName = lastName;}public Integer getAge() {return age;}public void setAge(Integer age) {this.age = age;}public Boolean getBoss() {return boss;}public void setBoss(Boolean boss) {this.boss = boss;}public Date getBirth() {return birth;}public void setBirth(Date birth) {this.birth = birth;}public Map<String, Object> getMaps() {return maps;}public void setMaps(Map<String, Object> maps) {this.maps = maps;}public List<Object> getLists() {return lists;}public void setLists(List<Object> lists) {this.lists = lists;}public Dog getDog() {return dog;}public void setDog(Dog dog) {this.dog = dog;}public Person(String lastName, Integer age, Boolean boss, Date birth, Map<String, Object> maps, List<Object> lists, Dog dog) {this.lastName = lastName;this.age = age;this.boss = boss;this.birth = birth;this.maps = maps;this.lists = lists;this.dog = dog;}@Overridepublic String toString() {return "Person{" +"lastName='" + lastName + '\'' +", age=" + age +", boss=" + boss +", birth=" + birth +", maps=" + maps +", lists=" + lists +", dog=" + dog +'}';}}
2、重启项目,使用浏览器访问 “http://localhost:8081/hello”,结果如下图。
@Value 和 @ConfigurationProperties 注解都能读取配置文件中的属性值并绑定到 JavaBean 中,但两者存在以下不同。
person.firstNameperson.first-nameperson.first_namePERSON_FIRST_NAME
@Value 和 @ConfigurationProperties 两个注解之间,并没有明显的优劣之分,它们只是适合的应用场景不同而已。
如果将所有的配置都集中到 application.properties 或 application.yml 中,那么这个配置文件会十分的臃肿且难以维护,因此我们通常会将与 Spring Boot 无关的配置(例如自定义配置)提取出来,写在一个单独的配置文件中,并在对应的 JavaBean 上使用 @PropertySource 注解指向该配置文件。
1、以 helloworld 为例,将与 person 相关的自定义配置移动到 src/main/resources 下的 person.properties 中(注意,必须把 application.properties 或 application.yml 中的相关配置删除),如下图。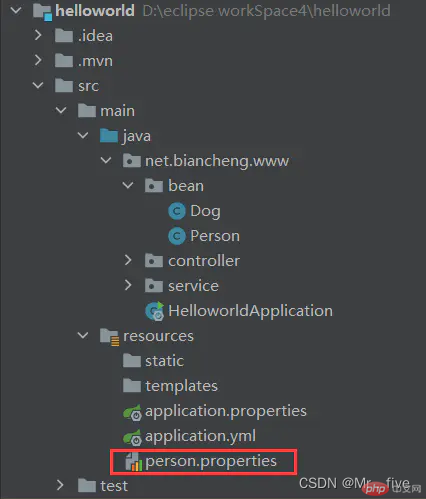
person.properties 的配置如下。
person.last-name=李四person.age=12person.birth=2000/12/15person.boss=falseperson.maps.k1=v1person.maps.k2=14person.lists=a,b,cperson.dog.name=dogperson.dog.age=2
2、在 Person 使用 @PropertySource 注解指向 person.properties,代码如下。
package net.biancheng.www.bean;import org.springframework.beans.factory.annotation.Value;import org.springframework.boot.context.properties.ConfigurationProperties;import org.springframework.context.annotation.PropertySource;import org.springframework.stereotype.Component;import java.util.Date;import java.util.List;import java.util.Map;@PropertySource(value = "classpath:person.properties")//指向对应的配置文件@Component@ConfigurationProperties(prefix = "person")public class Person {private String lastName;private Integer age;private Boolean boss;private Date birth;private Map<String, Object> maps;private List<Object> lists;private Dog dog;public Person() {}public String getLastName() {return lastName;}public void setLastName(String lastName) {this.lastName = lastName;}public Integer getAge() {return age;}public void setAge(Integer age) {this.age = age;}public Boolean getBoss() {return boss;}public void setBoss(Boolean boss) {this.boss = boss;}public Date getBirth() {return birth;}public void setBirth(Date birth) {this.birth = birth;}public Map<String, Object> getMaps() {return maps;}public void setMaps(Map<String, Object> maps) {this.maps = maps;}public List<Object> getLists() {return lists;}public void setLists(List<Object> lists) {this.lists = lists;}public Dog getDog() {return dog;}public void setDog(Dog dog) {this.dog = dog;}public Person(String lastName, Integer age, Boolean boss, Date birth, Map<String, Object> maps, List<Object> lists, Dog dog) {this.lastName = lastName;this.age = age;this.boss = boss;this.birth = birth;this.maps = maps;this.lists = lists;this.dog = dog;}@Overridepublic String toString() {return "Person{" +"lastName='" + lastName + '\'' +", age=" + age +", boss=" + boss +", birth=" + birth +", maps=" + maps +", lists=" + lists +", dog=" + dog +'}';}}
3、重启项目,使用浏览器访问 “http://localhost:8081/hello”,结果如下图。
加入
QQ群:722461036
微信群:
一起督促、学习、练习、温习、复习 ~ ~ ~

Copyright 2014-2025 https://www.php.cn/ All Rights Reserved | php.cn | 湘ICP备2023035733号