


 PHPz
PHPz批改状态:合格
老师批语:完成的非常好,只是下次提交作业的时候要在“我的课程作业”界面中选择“我要做作业”就行提交,并且在提交界面的状态一栏选择“作业”即可

通过3月15日直播课程的学习,熟悉了选择器中的伪类选择器的应用,掌握了关于选择器权重的相关知识,以及box-sizing属性的实际用法和好处。
伪类选择器分类两种:一是结构伪类选择器,二是状态伪类选择器。
:nth-child():first-child:last-child:ntf-last-child()运行效果如下:
/* 伪类选择器实例css *//* 用结构伪类中的:nth-child()实现精准控制某个元素 */.list > .item:nth-child(2){background-color:red;}.list > .item:nth-child(5){background-color: blueviolet;}/* 用结构伪类中的:first-child控制第一个元素 */.list > .item:first-child{background-color: blueviolet;}/* 用结构伪类中的:last-child控制最后一个元素 */.list > .item:last-child{background-color: chartreuse;}/* 用结构伪类中的:nth-last-child()控制从最后一个元素倒数的第某个元素 */.list > .item:nth-last-child(2){background-color: darkcyan;}.list > .item:nth-last-child(3){background-color: darkgoldenrod;}

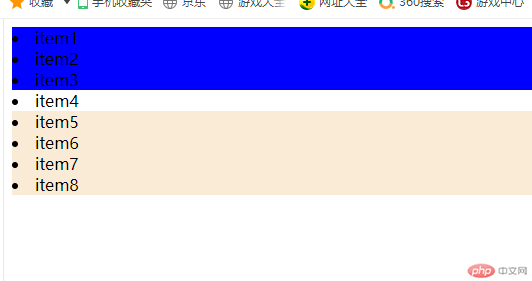
/* 通过:nth-child(-n+3)实现控制前3个元素 */.list > .item:nth-child(-n+3){background-color: blue;}/* 通过:nth-last-child(-n+3)实现控制倒数前4个元素 */.list > .item:nth-last-child(-n+4){background-color: antiquewhite;}
运行效果如下:
/* 通过:nth-child(n)实现控制所有元素 */.list > .item:nth-child(n){background-color: brown;}
运行效果如下:

/* 通过:nth-child(n+3)实现控制从第3个元素开始的所有元素 */.list > .item:nth-child(n+3){background-color: bisque;}
运行结果如下:

/* 通过:nth-last-child(n+5)实现控制倒数第5个元素开始的往前数所有元素 */.list > .item:nth-last-child(n+5){background-color: bisque;}
运行结果如下:

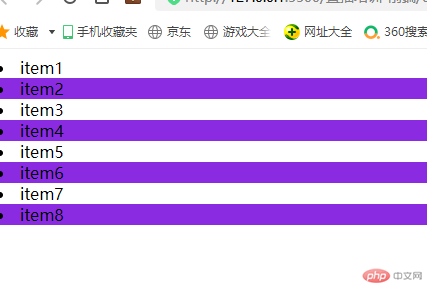
/* 通过结构伪类:nth-child(2n)或者:nth-child(even)实现控制偶数元素 */.list > .item:nth-child(even){background-color: blueviolet;}
运行结果如下:
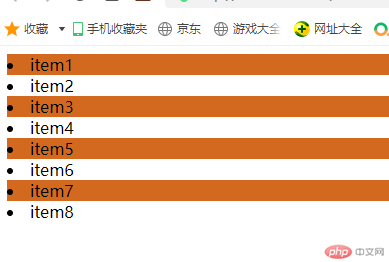
/* 通过结构伪类:nth-child(2n+1)或者:nth-child(odd)实现对奇数元素的控制 */.list > .item:nth-child(odd){background-color: chocolate;}
运行结果如下:
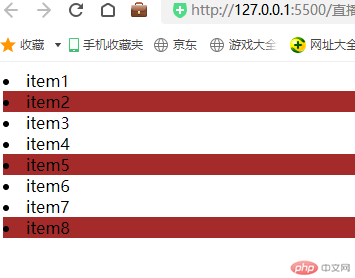
/* nth-child(an+b) 当a>=2时,固定间隔a-1,可以用偏移量b来进行微调,可正可负*/.list > .item:nth-child(3n+2){background-color: brown;}
运行结果如下:
:hover:鼠标悬停enabled:有效控件disabled:禁用控件checked:选中控件required:必填控件focus:焦点控件not():过滤掉某些元素empty:空状态伪类主要用于修饰链接和表单
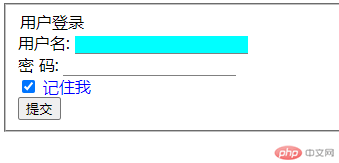
<form action=""><fieldset class="login"><div><legend class="title">用户登录</legend><label for="uname">用户名:</label><input type="text" name="uname" id="uname"></div><div><label for="pwd">密 码:</label><input type="password" name="pwd" id="pwd"></div><div class="remember"><input type="checkbox"><label for="rem">记住我</label></div><button class="submit">提交</button></fieldset></form>
1.状态伪类中的焦点控件:focus
/* 状态伪类实例 */div>input{border: none;border-bottom: 1px solid gray;}/* :focus焦点类实现点击触发焦点后,input文本框边框加上红色 */.login :focus{outline: 1px solid red;border-bottom: none;}
实现效果如下

2.状态伪类中的必填控件::required
首先在表单中input文本框中加入必填属性
<input type="text" name="uname" id="uname" required>
在css中加入:required
/* 状态伪类实例 */div>input{border: none;border-bottom: 1px solid gray;}/* :focus焦点类实现点击触发焦点后,input文本框边框加上红色 */.login :focus{outline: 1px solid red;border-bottom: none;}.login :required{background-color: aqua;}
实现效果如下:

3.状态伪类中的选中控件:checked
.login input:checked + label{color: blue;}
实现效果如下:
4.状态伪类中的鼠标悬停::hover
.login>.submit:hover{background-color: brown;color: white;cursor: pointer;}
执行效果如下:

元素 = 标签 + 属性
原子选择器:标签(tag)+类(class)+id
权重大小:
tag:1, class:10, id:100
权重需要累加
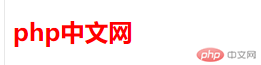
<h2 class="title" id="header">php中文网</h2>
/* 类class的 权重是10,字体颜色为红色*/.title{color: red;}
效果如下
/* 类class:title 权重是10,id:header 的权重是100,权重高于,title,因此字体显示蓝色blue*/#header{color: blue;}.title{color: red;}
执行效果如下:

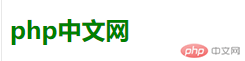
* 类class:title 权重是10,id:header 的权重是100,h2是标签,权重是1. h2#header总共权重是101,为最高权重,因此字体显示绿色green*/h2#header{color: green;}#header{color: blue;}.title{color: red;}
执行效果如下:
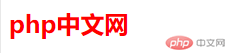
* 在类.title加了!important为最高权重,因此显示字体为红色*/h2#header{color: green;}#header{color: blue;}.title{color: red!important;}
执行效果如下:
添加一个盒子<div class="box"></div>
css代码如下:
/* 宽度设置为100px,高度设置为50px,但是实际的盒子大小是122*72宽度是:100+20+2,高度是50+20+2 是加上边框border和内边距padding后的结果*/.box{width: 100px;height: 50px;border: 1px solid red;padding: 10px;}
这是因为盒子大小计算方法的属性box-sizing的默认值是content-boxcontent-box计算方法是:盒子大小需要设置的宽高加上边框+内边距.border-box计算方法是:盒子大小直接以设置的width和height为准.
/* 宽度设置为100px,高度设置为50px,因为box-sizing的值是:border-box所以盒子大小就是100*50*/.box{width: 100px;height: 50px;border: 1px solid red;padding: 10px;box-sizing: border-box;}
通过这次直播课程,掌握了结构伪类和状态伪类两种伪类选择器使用方法,熟悉了选择器权重的知识,懂得了box-sizing属性值的运用.

Copyright 2014-2025 https://www.php.cn/ All Rights Reserved | php.cn | 湘ICP备2023035733号


