

Layout management that you must learn every day in PyQt5

This article mainly introduces in detail the relevant information about layout management that must be learned every day in PyQt5. It has a certain reference value. Interested friends can refer to it.
There is a guide in GUI programming The part that cannot be ignored is layout management. Layout management controls how our controls are placed in the application window. Layout management can be done in two ways. We can use absolute positioning or layout class methods to control the position of controls in the program window.
Absolute positioning
Each control is placed at the position specified by the programmer. When you use absolute positioning, we need to be aware of the following limitations:
If we resize the window the size and position of the control remain the same
The application may look different on different platforms
Changing fonts may break the layout of the application
If you decide to change the layout, we Each control must be completely modified, which is tedious and time-consuming
The following example is the absolute coordinate positioning method of the control.
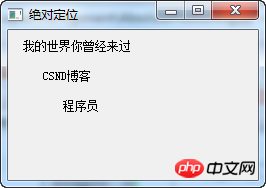
#!/usr/bin/python3
# -*- coding: utf-8 -*-

"""
PyQt5 教程

这个例子显示了在窗口中使用绝对定位的三个标签。

作者:我的世界你曾经来过
博客:http://blog.csdn.net/weiaitaowang
最后编辑:2016年7月31日
"""

import sys
from PyQt5.QtWidgets import QApplication, QWidget, QLabel

class Example(QWidget):

 def __init__(self):
  super().__init__()

  self.initUI()

 def initUI(self):

  lbl1 = QLabel('我的世界你曾经来过', self)
  lbl1.move(15, 10)

  lbl2 = QLabel('CSND博客', self)
  lbl2.move(35, 40)

  lbl3 = QLabel('程序员', self)
  lbl3.move(55, 70)

  self.setGeometry(300, 300, 250, 150)
  self.setWindowTitle('绝对定位')
  self.show()

if __name__ == '__main__':

 app = QApplication(sys.argv)
 ex = Example()
 sys.exit(app.exec_())
In our examples, labels are used. We position them by providing x and y coordinate values. The origin of the coordinate system is the upper left corner of the control. The x value increases from left to right. The y value increases from top to bottom.
lbl1 = QLabel('我的世界你曾经来过', self)
lbl1.move(15, 10)
The label control is placed at x=15 and y=10.
After program execution
Box layout box layout
How to use layout class for layout management More flexible and practical. It is the preferred way to place a control in a window. QHBoxLayout and QVBoxLayout are the basic layout classes for horizontally and vertically aligned controls respectively.
Just imagine, we want to put two buttons in the lower right corner of the program. To create such a layout, we can use two boxes, one horizontal and one vertical. To create the necessary free space, we will add a stretch factor.
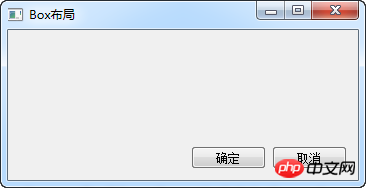
#!/usr/bin/python3
# -*- coding: utf-8 -*-

"""
PyQt5 教程

在这个例子中,我们在窗口的右下角放置两个按钮。

作者:我的世界你曾经来过
博客:http://blog.csdn.net/weiaitaowang
最后编辑:2016年7月31日
"""

import sys
from PyQt5.QtWidgets import (QApplication, QWidget,
  QPushButton, QVBoxLayout, QHBoxLayout)

class Example(QWidget):

 def __init__(self):
  super().__init__()

  self.initUI()

 def initUI(self):

  okButton = QPushButton('确定')
  cancelButton = QPushButton('取消')

  hbox = QHBoxLayout()
  hbox.addStretch(1)
  hbox.addWidget(okButton)
  hbox.addWidget(cancelButton)

  vbox = QVBoxLayout()
  vbox.addStretch(1)
  vbox.addLayout(hbox)

  self.setLayout(vbox)

  self.setGeometry(300, 300, 350, 150)
  self.setWindowTitle('Box布局')
  self.show()

if __name__ == '__main__':

 app = QApplication(sys.argv)
 ex = Example()
 sys.exit(app.exec_())
This example places two buttons in the lower right corner of the window. When we resize application windows, they are fixed to the lower right corner. We use both HBoxLayout and QVBoxLayout layouts.
okButton = QPushButton('确定')
 cancelButton = QPushButton('取消')
Here we have created two buttons.
hbox = QHBoxLayout()
hbox.addStretch(1)
hbox.addWidget(okButton)
hbox.addWidget(cancelButton)
We created a horizontal box layout, increased the stretch factor (addStretch), and added (addWidget) two buttons. Added a stretch factor before adding the two buttons, which will push the two buttons to the right side of the window.
vbox = QVBoxLayout()
vbox.addStretch(1)
vbox.addLayout(hbox)
To get the layout we want, we also need to put the horizontal layout into a vertical layout. A stretch factor on the vertical box will push the horizontal box, including the controls inside it, to the bottom of the window.
self.setLayout(vbox)
Finally, we set the main layout of the window.
After program execution
QGridLayout Grid layout
The most commonly used layout class is grid layout . This layout divides the space into rows and columns. To create a grid layout, we use the QGridLayout class.
#!/usr/bin/python3
# -*- coding: utf-8 -*-
"""
PyQt5 教程
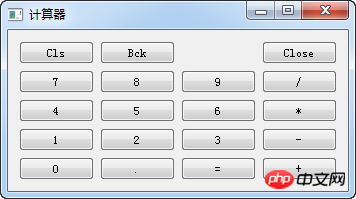
在这个例子中,我们使用网格布局创建一个计算器的框架。
作者:我的世界你曾经来过
博客:http://blog.csdn.net/weiaitaowang
最后编辑:2016年7月31日
"""
import sys
from PyQt5.QtWidgets import (QApplication, QWidget,
QPushButton, QGridLayout)
class Example(QWidget):
def __init__(self):
super().__init__()
self.initUI()
def initUI(self):
grid = QGridLayout()
self.setLayout(grid)
names = ['Cls', 'Bck', '', 'Close',
'7', '8', '9', '/',
'4', '5', '6', '*',
'1', '2', '3', '-',
'0', '.', '=', '+',]
positions = [(i, j) for i in range(5) for j in range(4)]
for position, name in zip(positions, names):
if name == '':
continue
button = QPushButton(name)
grid.addWidget(button, *position)
self.move(300, 150)
self.setWindowTitle('计算器')
self.show()
if __name__ == '__main__':
app = QApplication(sys.argv)
ex = Example()
sys.exit(app.exec_())In our example, we will place the created button control in a grid.
grid = QGridLayout()
self.setLayout(grid)
Instantiate QGridLayout and set the layout of the application window.
 names = ['Cls', 'Bck', '', 'Close',
  '7', '8', '9', '/',
  '4', '5', '6', '*',
  '1', '2', '3', '-',
  '0', '.', '=', '+',]
This is the button label that will be used in the future.
positions = [(i, j) for i in range(5) for j in range(4)]
xWe create a list of grid locations.
for position, name in zip(positions, names):

   if name == '':
    continue
   button = QPushButton(name)
grid.addWidget(button, *position)Create a button and add (addWidget) to the layout.
After the program is executed
Expand the grid layout
The controls in the window can span across the grid Multiple columns or rows. In the following example we illustrate this.
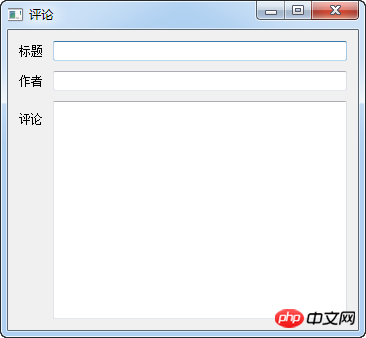
#!/usr/bin/python3
# -*- coding: utf-8 -*-

"""
PyQt5 教程

在这个例子中,我们使用GridLayout的跨行创建了一个更复杂的窗口布局。

作者:我的世界你曾经来过
博客:http://blog.csdn.net/weiaitaowang
最后编辑:2016年7月31日
"""

import sys
from PyQt5.QtWidgets import (QApplication, QWidget, QLabel,
QTextEdit, QLineEdit, QGridLayout)

class Example(QWidget):

 def __init__(self):
  super().__init__()

  self.initUI()

 def initUI(self):

  title = QLabel('标题')
  author = QLabel('作者')
  review = QLabel('评论')

  titleEdit = QLineEdit()
  authorEdit = QLineEdit()
  reviewEdit = QTextEdit()

  grid =QGridLayout()
  grid.setSpacing(10)

  grid.addWidget(title, 1, 0)
  grid.addWidget(titleEdit, 1, 1)

  grid.addWidget(author, 2, 0)
  grid.addWidget(authorEdit, 2, 1)

  grid.addWidget(review, 3, 0)
  grid.addWidget(reviewEdit, 3, 1, 5, 1)

  self.setLayout(grid)

  self.setGeometry(300, 300, 350, 300)
  self.setWindowTitle('评论')
  self.show()

if __name__ == '__main__':

 app = QApplication(sys.argv)
 ex = Example()
 sys.exit(app.exec_())
The program we created contains three labels, two single-line text input boxes and a text editing control. Use QGridLayout layout.
grid =QGridLayout()
grid.setSpacing(10)
Instance the grid layout and set the spacing.
grid.addWidget(reviewEdit, 3, 1, 5, 1)
Add a control to the grid layout, we can use row span or column span for this control. In our example, we require the reviewEdit control to span 5 rows.
After program execution
This part of the PyQt5 tutorial is dedicated to layout management. The event-related content of PyQt5 will be introduced later.
related suggestion:
PyQt5 Must Learn Every Day Check Boxes with Labels
PyQt5 Must Learn Every Day Create Window Centering Effect
PyQt5 Must learn to close the window every day
The above is the detailed content of Layout management that you must learn every day in PyQt5. For more information, please follow other related articles on the PHP Chinese website!

Hot AI Tools

Undresser.AI Undress
AI-powered app for creating realistic nude photos

AI Clothes Remover
Online AI tool for removing clothes from photos.

Undress AI Tool
Undress images for free

Clothoff.io
AI clothes remover

Video Face Swap
Swap faces in any video effortlessly with our completely free AI face swap tool!

Hot Article
Hot Tools

Notepad++7.3.1
Easy-to-use and free code editor

SublimeText3 Chinese version
Chinese version, very easy to use

Zend Studio 13.0.1
Powerful PHP integrated development environment

Dreamweaver CS6
Visual web development tools

SublimeText3 Mac version
God-level code editing software (SublimeText3)
Hot Topics


 How to use Redis to implement distributed transaction management
Nov 07, 2023 pm 12:07 PM
How to use Redis to implement distributed transaction management
Nov 07, 2023 pm 12:07 PM
How to use Redis to implement distributed transaction management Introduction: With the rapid development of the Internet, the use of distributed systems is becoming more and more widespread. In distributed systems, transaction management is an important challenge. Traditional transaction management methods are difficult to implement in distributed systems and are inefficient. Using the characteristics of Redis, we can easily implement distributed transaction management and improve the performance and reliability of the system. 1. Introduction to Redis Redis is a memory-based data storage system with efficient read and write performance and rich data
 How to install pyqt5
Nov 30, 2023 pm 02:05 PM
How to install pyqt5
Nov 30, 2023 pm 02:05 PM
pyqt5 installation steps: 1. Make sure that Python and pip are installed on the computer; 2. Enter the "pip install PyQt5" command in the terminal or command prompt to install PyQt5; 3. After the installation is complete, you can import the PyQt5 module in the Python script and Get started; 4. You can install some specific functions or components by entering the "pip install PyQt5.QtGui" command; 5. If you encounter any problems, you can try to upgrade pip and setuptools.
 How to implement student performance management function in Java?
Nov 04, 2023 pm 12:00 PM
How to implement student performance management function in Java?
Nov 04, 2023 pm 12:00 PM
How to implement student performance management function in Java? In the modern education system, student performance management is a very important task. By managing student performance, schools can better monitor students' learning progress, understand their weaknesses and strengths, and make more targeted teaching plans based on this information. In this article, we will discuss how to use Java programming language to implement student performance management functions. First, we need to determine the data structure of student grades. Typically, student grades can be represented as a
 Guide to solving misalignment of WordPress web pages
Mar 05, 2024 pm 01:12 PM
Guide to solving misalignment of WordPress web pages
Mar 05, 2024 pm 01:12 PM
Guide to solving misaligned WordPress web pages In WordPress website development, sometimes we encounter web page elements that are misaligned. This may be due to screen sizes on different devices, browser compatibility, or improper CSS style settings. To solve this misalignment, we need to carefully analyze the problem, find possible causes, and debug and repair it step by step. This article will share some common WordPress web page misalignment problems and corresponding solutions, and provide specific code examples to help develop
 How to create a responsive carousel layout using HTML and CSS
Oct 20, 2023 pm 04:24 PM
How to create a responsive carousel layout using HTML and CSS
Oct 20, 2023 pm 04:24 PM
How to create a responsive carousel layout using HTML and CSS Carousels are a common element in modern web design. It can attract the user's attention, display multiple contents or images, and switch automatically. In this article, we will introduce how to create a responsive carousel layout using HTML and CSS. First, we need to create a basic HTML structure and add the required CSS styles. The following is a simple HTML structure: <!DOCTYPEhtml&g
 What to do if the right-click menu management cannot be opened in Windows 10
Jan 04, 2024 pm 07:07 PM
What to do if the right-click menu management cannot be opened in Windows 10
Jan 04, 2024 pm 07:07 PM
When we use the win10 system, when we use the mouse to right-click the desktop or the right-click menu, we find that the menu cannot be opened and we cannot use the computer normally. At this time, we need to restore the system to solve the problem. Win10 right-click menu management cannot be opened: 1. First open our control panel, and then click. 2. Then click under Security and Maintenance. 3. Click on the right to restore the system. 4. If it still cannot be used, check whether there is something wrong with the mouse itself. 5. If you are sure there is no problem with the mouse, press + and enter. 6. After the execution is completed, restart the computer.
 Introducing the window arrangement method in win7
Dec 26, 2023 pm 04:37 PM
Introducing the window arrangement method in win7
Dec 26, 2023 pm 04:37 PM
When we open multiple windows at the same time, win7 has the function of arranging multiple windows in different ways and then displaying them at the same time, which allows us to view the contents of each window more clearly. So how many window arrangements are there in win7? What do they look like? Let’s take a look with the editor. There are several ways to arrange Windows 7 windows: three, namely cascading windows, stacked display windows and side-by-side display windows. When we open multiple windows, we can right-click on an empty space on the taskbar. You can see three window arrangements. 1. Cascading windows: 2. Stacked display windows: 3. Display windows side by side:
 Flexible application skills of position attribute in H5
Dec 27, 2023 pm 01:05 PM
Flexible application skills of position attribute in H5
Dec 27, 2023 pm 01:05 PM
How to flexibly use the position attribute in H5. In H5 development, the positioning and layout of elements are often involved. At this time, the CSS position property will come into play. The position attribute can control the positioning of elements on the page, including relative positioning, absolute positioning, fixed positioning and sticky positioning. This article will introduce in detail how to flexibly use the position attribute in H5 development.
