

PS给桌面上立体小方盒添加玲珑剔透倒影技巧介绍

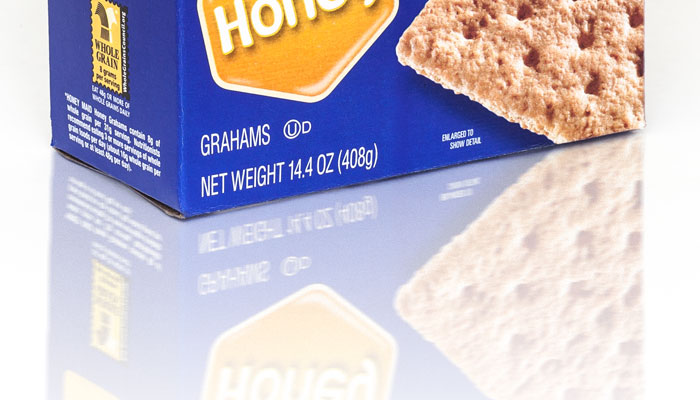
本教程将教你如何给一个立体小方盒添加了一个玲珑剔透的倒影,让图片看起来不至于那么单调,教程中主要用到了智能对象,图层蒙板和滤镜。在很多行业里都会要求产品图片的背景色为白色,但这样会看起来会很单调,尤其是在广告行业里。先看下最终效果:
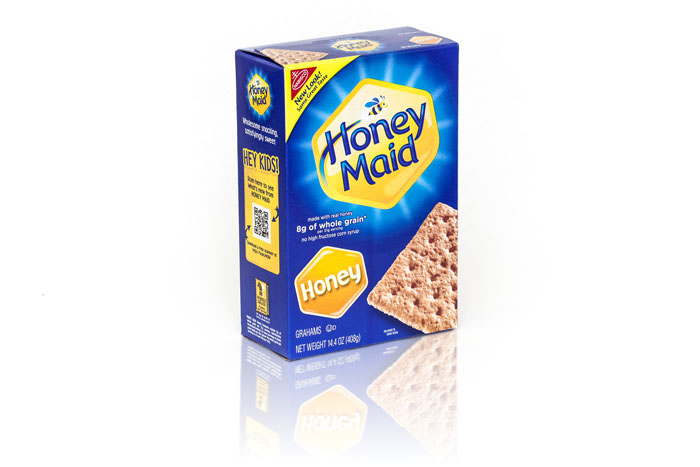
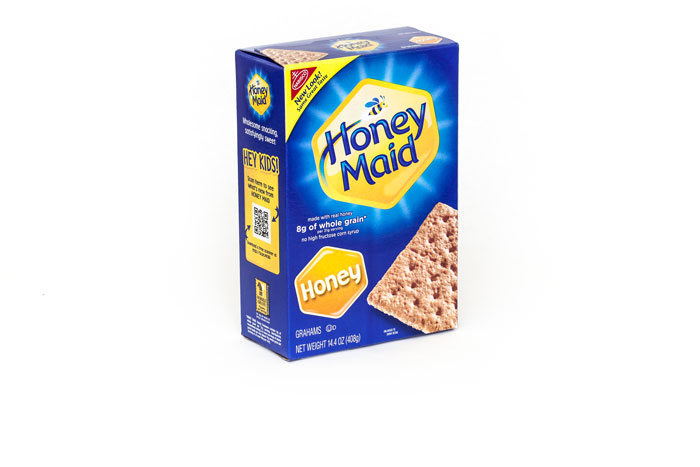
一、我们选择一个最基本的产品包装盒,可以看到它和背景白色衔接紧密。
二、按W或点击左侧工具栏的魔棒工具选择快速选择工具。在白色背景上单击并拖动,先粗略的选中图片的白色背景。使用左上方的添加选区或者减去选区工具去处理盒子和背景的边缘,使盒子的选区边缘清晰,精确。单击顶部工具栏中的调整边缘按钮,并进行如下设置。
这些设置将对选区进行调整,你也可以根据自己的图片进行设置,看看它们改变后到底会引起什么变化。
三、右键单击画布,并选择>选择反向。然后按CTRL + C复制和CTRL + V粘贴将选区到粘贴到一个新图层。为了以下的步骤比较好操作,我们将原始图层隐藏。
我们需要把盒子的每一面分割成一个单独的图层。按L或者点击左侧工具栏的套索工具选择多边形套索工具。
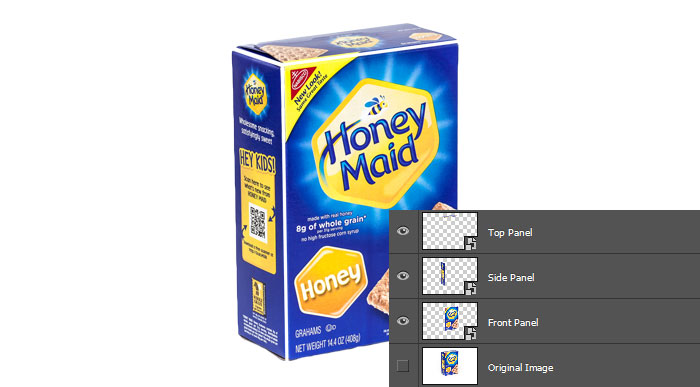
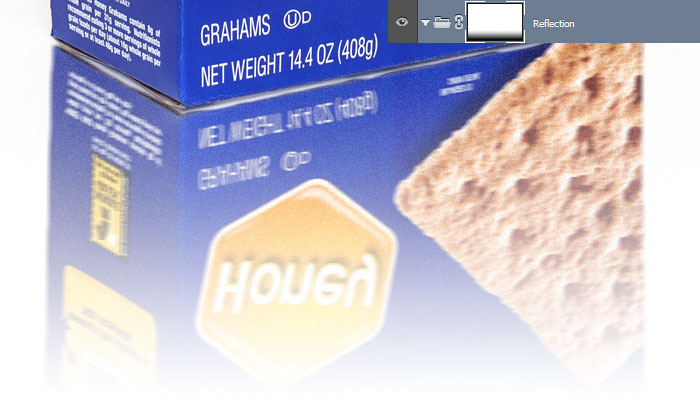
将盒子的正面选中,按CTRL + X剪切,CTRL + SHIFT + V粘贴,这时盒子的正面还在原来的位置,只不过是在一个新的图层。右键单击图层面板上的该图层,将其转换为智能对象,然后把它隐藏起来。重复这个过程,将侧面和上方的面剪切到新图层,要确保将它们转换为智能对象。
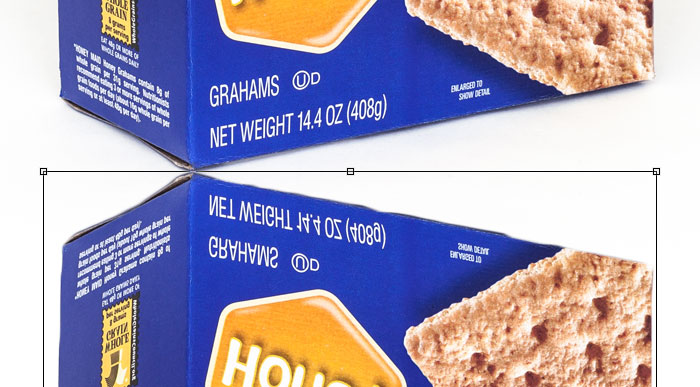
如果仍有盒子的各个面仍有缝隙,就轻微移动一下该层,使缝隙闭合。下图中图像间的间隔表明这三个面是在独立的新层。
四、创建一个新图层组并命名为“倒影”。把上述3个单独的智能对象的图层移动到这个图层组。
选中图层组,然后按CTRL + T进入自由变换模式。右键单击画布并选择垂直翻转。
显示原始图层,拖动图层组至盒子的下角与原始图层盒子的下角重合,然后按下Enter。如图:
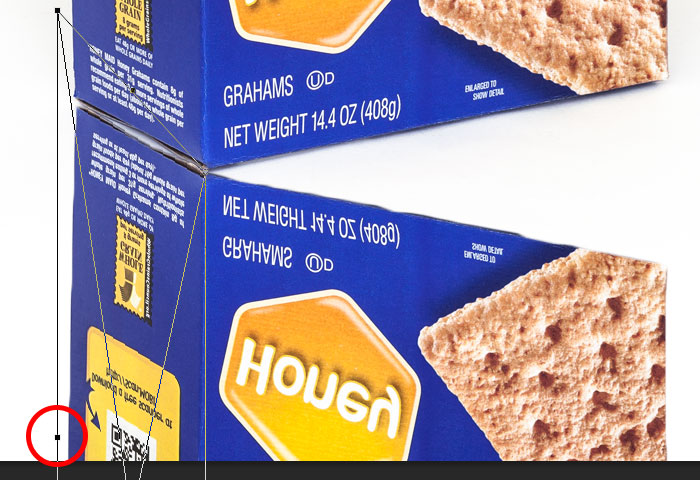
五、选择侧面的图层面板,按CTRL + T进入自由变换模式,然后右键单击画布并选择扭曲。
单击并拖动变形方框左侧边的中心点(如图:红色),使侧面的最上方边与原始图片的边重合,然后按回车。
六、对正面的图层进行如步骤4的操作。如果闭合不严密,你可以对整个智能对象的图层进行微调,让图片的边缘对齐。
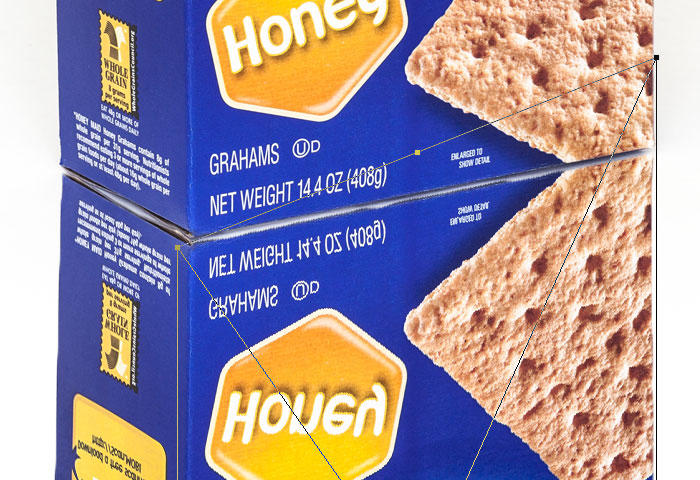
对于上方的面,因为它在倒影中不可见,我们就不再对它处理,你也可以选择删除它。
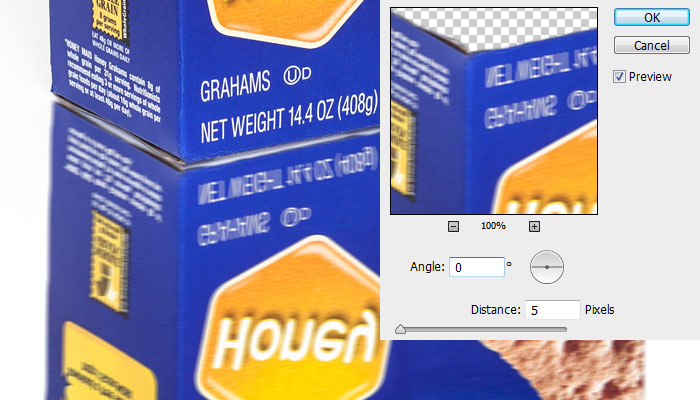
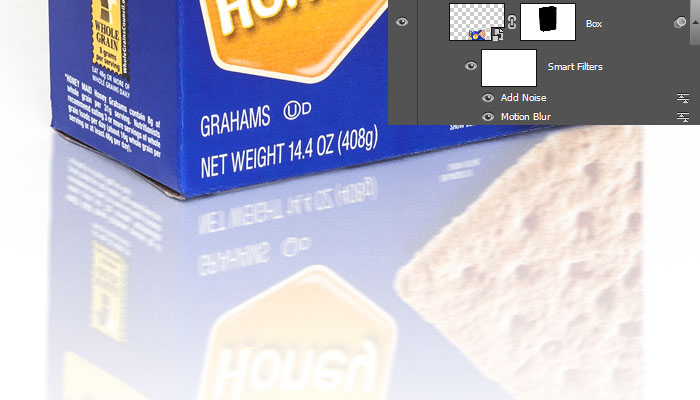
七、选中“倒影”组里的所有图层,在图层面板中右键单击并将其转换成智能对象,这时两个合成了一个图层。点击滤镜>模糊>动感模糊,设置距离:5,角度:0。
八、点击滤镜>杂色>添加杂色。设置数量为3%,选择高斯分布,选择单色。

九、为“倒影”组添加一个图层蒙版。按G或点击左侧栏的油漆桶工具选择渐变工具。确保梯度设置从白色到黑色,然后在画布上拉渐变,形成倒影效果。如图:
十、改变该组的图层混合模式为正片叠底,不透明度为35%。选择组里的智能对象图层,向上轻移,直到盒子和倒影之间没有缝隙。
十一、最后,我们需要屏蔽我们的反射,所以它不会对我们的原始图像重叠。它几乎无法察觉,但应该做。
在原始图层上选择>快速选择工具,选中背景白色,右键,选择>选择反向。
然后,选中倒影组里的智能对象图层,点击面板底部的添加图层蒙版。
现在可以看到给刚才的盒子选区创建了一个图层蒙版。最后,按CTRL +I反转图层蒙板,原始图像以外的盒子形状将是可见的,而任何重叠的原始盒子将会看不见的。
最终效果:

给立体盒子添加倒影其实很简单,但需要达到玲珑剔透的效果的话需要花点时间。
通过一段时间的练习,相信你能在五分钟之内或者更短的时间完成它,甚至是比这个更复杂的图片也能够花很少的时间完成。
教程非常简单,用途也很广泛,希望你能好好练习,要喜欢这个教程哦!

Hot AI Tools

Undresser.AI Undress
AI-powered app for creating realistic nude photos

AI Clothes Remover
Online AI tool for removing clothes from photos.

Undress AI Tool
Undress images for free

Clothoff.io
AI clothes remover

Video Face Swap
Swap faces in any video effortlessly with our completely free AI face swap tool!

Hot Article
Hot Tools

Notepad++7.3.1
Easy-to-use and free code editor

SublimeText3 Chinese version
Chinese version, very easy to use

Zend Studio 13.0.1
Powerful PHP integrated development environment

Dreamweaver CS6
Visual web development tools

SublimeText3 Mac version
God-level code editing software (SublimeText3)
Hot Topics


 Why are there black borders on the left and right sides of the win11 monitor? How to solve the dark border on the left side of the win11 desktop
Feb 29, 2024 pm 01:00 PM
Why are there black borders on the left and right sides of the win11 monitor? How to solve the dark border on the left side of the win11 desktop
Feb 29, 2024 pm 01:00 PM
We all encounter some operational problems when using the win11 system. Recently, many users have asked what to do if there is a dark box on the left side of the win11 desktop? Users can directly select the recommended settings under the screen resolution, and then proceed with the operation. Let this site carefully introduce to users the analysis of the problem of dark boxes on the left side of the win11 desktop. Analysis of the problem of dark boxes on the left side of the win11 desktop. Adjust the screen resolution: right-click a blank area of the desktop, select "Display Settings", and select the appropriate resolution in the "Resolution" column. Update the graphics card driver: Open Device Manager, expand "Display Adapters", right-click
 How to send web pages to desktop as shortcut in Edge browser?
Mar 14, 2024 pm 05:22 PM
How to send web pages to desktop as shortcut in Edge browser?
Mar 14, 2024 pm 05:22 PM
How to send web pages to the desktop as a shortcut in Edge browser? Many of our users want to display frequently used web pages on the desktop as shortcuts for the convenience of directly opening access pages, but they don’t know how to do it. In response to this problem, the editor of this issue will share the solution with the majority of users. , let’s take a look at the content shared in today’s software tutorial. The shortcut method of sending web pages to the desktop in Edge browser: 1. Open the software and click the "..." button on the page. 2. Select "Install this site as an application" in "Application" from the drop-down menu option. 3. Finally, click it in the pop-up window
 Solution to the inability to connect to the RPC server and the inability to enter the desktop
Feb 18, 2024 am 10:34 AM
Solution to the inability to connect to the RPC server and the inability to enter the desktop
Feb 18, 2024 am 10:34 AM
What should I do if the RPC server is unavailable and cannot be accessed on the desktop? In recent years, computers and the Internet have penetrated into every corner of our lives. As a technology for centralized computing and resource sharing, Remote Procedure Call (RPC) plays a vital role in network communication. However, sometimes we may encounter a situation where the RPC server is unavailable, resulting in the inability to enter the desktop. This article will describe some of the possible causes of this problem and provide solutions. First, we need to understand why the RPC server is unavailable. RPC server is a
 How to clear all desktop background images in Win7? Tips for deleting personalized background images in Win7
Jun 02, 2024 am 09:01 AM
How to clear all desktop background images in Win7? Tips for deleting personalized background images in Win7
Jun 02, 2024 am 09:01 AM
In Win7 system, many users want to delete personalized desktop background images, but do not know how to delete them. This article will show you how to delete personalized background images in Win7 system. 1. First, open the control panel interface of the Win7 system and click to enter the "Appearance and Personalization" settings; 2. Then, in the opened interface, click the "Change Desktop Background" setting; 3. Then, click below "Desktop background" option; 4. Then, select Select all, and then click Clear all. Of course, you can also use it under "Customize", right-click the theme you want to delete, and then click &q on the shortcut menu
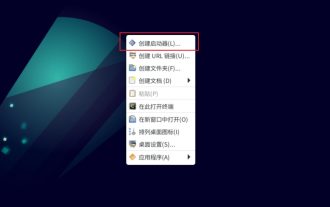 How to add desktop shortcut icon on Debian11
Jan 09, 2024 am 10:06 AM
How to add desktop shortcut icon on Debian11
Jan 09, 2024 am 10:06 AM
How to create application shortcuts on the desktop in Debian11? Windows system installation programs generally create application shortcuts on the desktop. How to create them in Debian11? Let’s take a look at the detailed tutorial below. Right-click on a blank space on the desktop and select [Create Launcher]. In the pop-up interface, set the program to create a shortcut in [Command]. The editor takes the terminal emulator as an example. The user can set the icon by himself. After the setting is completed, click [Create]. Then you can see the shortcut, as shown in the picture below. When the shortcut is no longer needed, right-click on the icon and select [Delete].
 Win11 desktop quick printing tutorial
Jan 09, 2024 pm 04:14 PM
Win11 desktop quick printing tutorial
Jan 09, 2024 pm 04:14 PM
In win10 and win7, we can directly right-click the document we want to print to print, but in win11, we can't find how to print directly by right-clicking on the desktop. This is actually hidden in the secondary menu. Tutorial on how to print directly by right-clicking on the win11 desktop: 1. First, right-click the content you want to print. 2. Then click "Show more options" at the bottom. 3. Click "Print" to print it out. 4. Printing in this way will use the default printer, so we need to go to the "Printers and Scanners" of Bluetooth first. 5. Choose the printer you want to use in advance. 6. Set it as default
 How to restore WIN10 desktop to black and white_Steps to restore WIN10 desktop to black and white
Mar 27, 2024 pm 07:51 PM
How to restore WIN10 desktop to black and white_Steps to restore WIN10 desktop to black and white
Mar 27, 2024 pm 07:51 PM
1. Click the Start menu, then click Settings (the small gear icon). 2. Enter the main interface of Windows settings and click [Personalization]. 3. Click the [Color] option in the left column, go to the right column and pull down the scroll wheel. Find [High Contrast Settings] under the relevant settings and click to enter. 4. Turn off the switch button for applying color filters.
 Introduction to the process of extracting line drawings in PS
Apr 01, 2024 pm 12:51 PM
Introduction to the process of extracting line drawings in PS
Apr 01, 2024 pm 12:51 PM
1. Open the software and import a piece of material, as shown in the picture below. 2. Then ctrl+shift+u to remove color. 3. Then press ctrl+J to copy the layer. 4. Then reverse ctrl+I, and then set the layer blending mode to Color Dodge. 5. Click Filter--Others--Minimum. 6. In the pop-up dialog box, set the radius to 2 and click OK. 7. Finally, you can see the line draft extracted.
