Tutorial sharing on creating multiple ueditor instances in vue
This article mainly introduces you to the relevant information on how to create multiple ueditors in Vue. The article introduces it in great detail through sample code. It has certain reference and learning value for everyone's study or work. Friends who need it follow below. Let’s learn together. Hope it helps everyone.
Preface
Some time ago, the company's Vue.js project needed to use the UEditor rich text editor. I searched around on Baidu and found no detailed instructions, so I decided to try it myself. , finally got it done after a busy day.
ueditor is Baidu editor, official website address: http://ueditor.baidu.com/website/
For complete function demonstration, you can refer to: http://ueditor.baidu.com /website/onlinedemo.html
I recently requested an upgrade at work and needed to create multiple ueditor instances in vue. I used neditor, which actually beautified the ueditor style. The rest is almost the same as ueditor. I won’t say anything below. Enough said, let’s take a look at the detailed introduction.
Screenshot
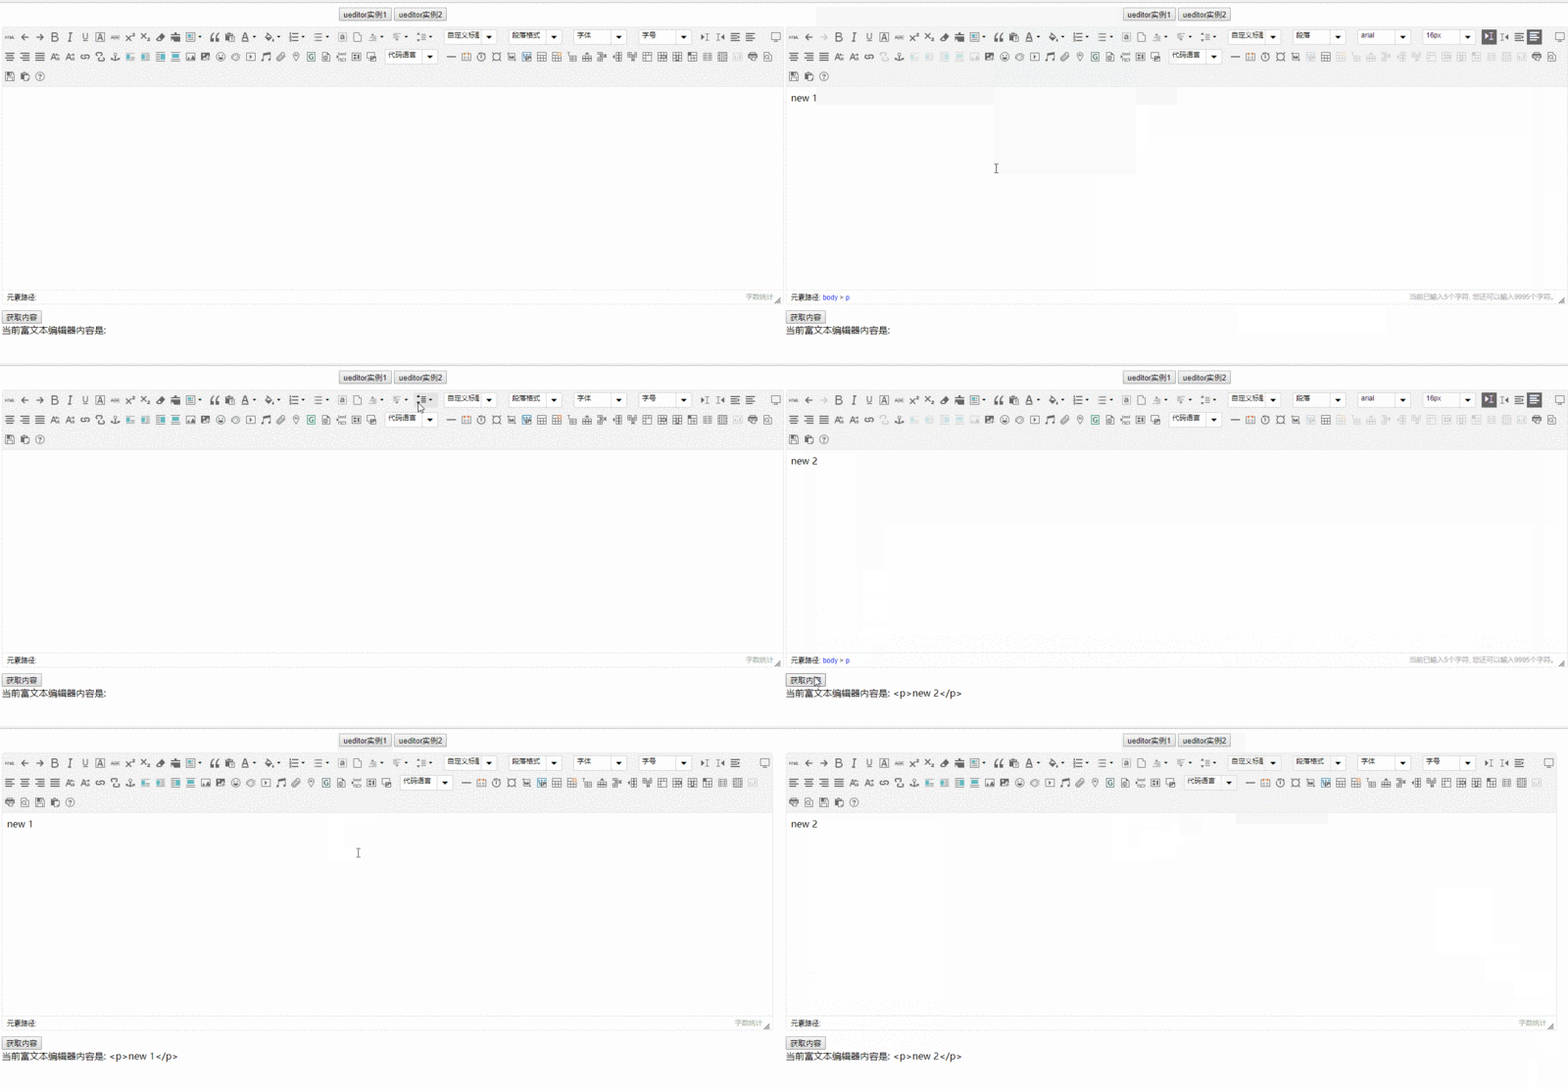
Instructions
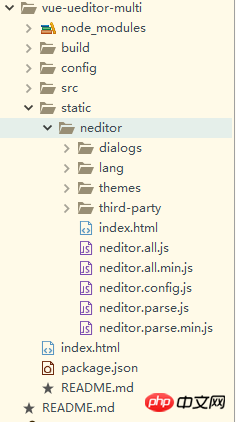
Download the ueditor or neditor source code and copy it to the static directory
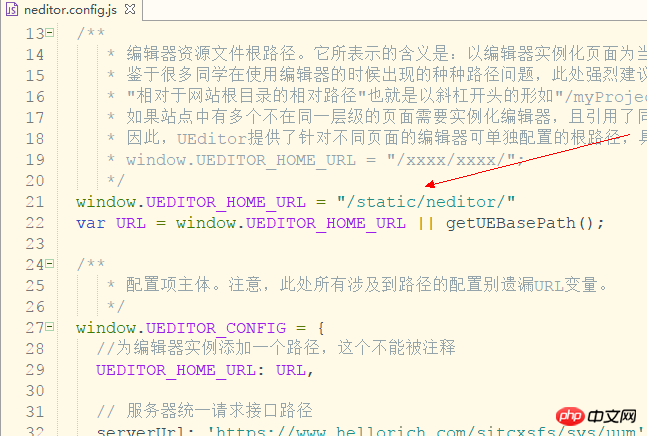
Then modify the ueditor.config.js configuration file
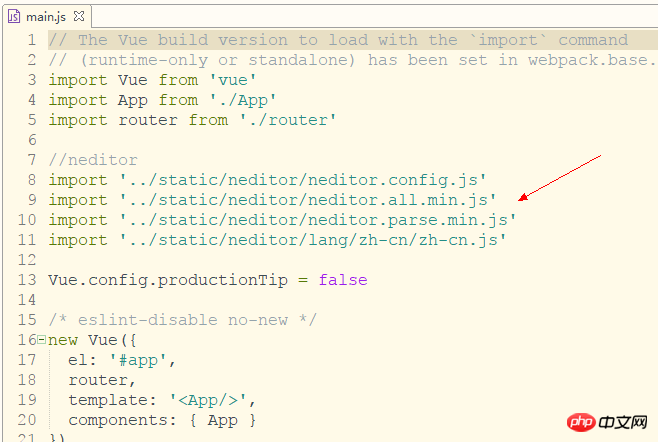
Add ueditor reference in the main.js of the vue project
Create 3 new pages home, tab1, tab2. tab1 and tab2 are sub-pages under home
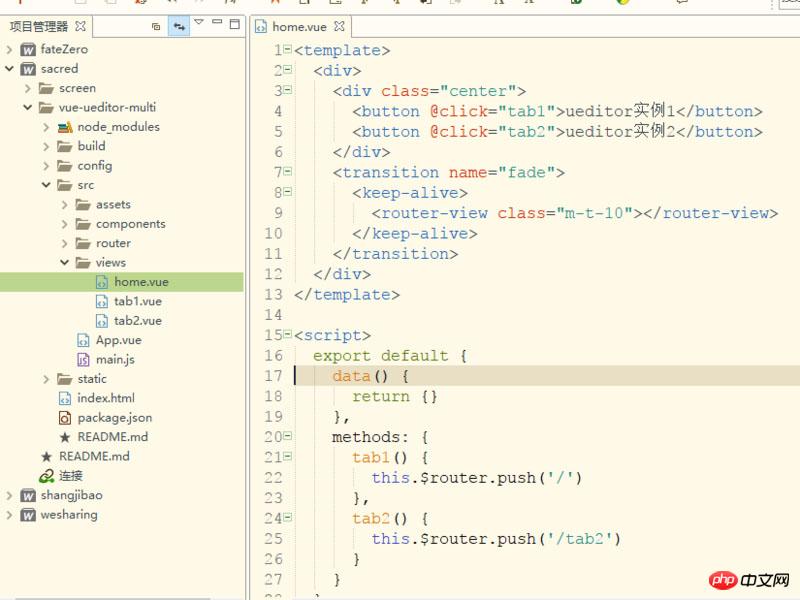
 <template>
 <p>
 <editor ref="editor" id="tab1Editor"></editor>
 <button @click="getContent" class="m-t-10">获取内容</button>
 <p>
 <span>当前富文本编辑器内容是: {{content}}</span>
 </p>
 </p>
 </template>

 <script>
 import Editor from '@/components/editor'
 export default {
 name: 'tab1',
 components: { Editor },
 data() {
 return {
 content:''
 }
 },
 methods: {
 //获取内容
 getContent(){
 this.content = this.$refs.editor.content
 }
 }
 }
 </script>

 <style scoped>
 .m-t-10{
 margin-top: 10px;
 }
</style> Ensure that ueditor will be re-rendered every time you enter the page, in deactivated Call ueditor's destroy method to ensure that the editor instance
will be destroyed every time you leave the page, so that multiple ueditor instances can be rendered, and the editor content can be saved every time you switch.
 <template>
 <p>
 <p :id="this.id"></p>
 </p>
 </template>

 <script>
 export default {
 name: 'editor',
 props: ['id'],
 data() {
 return {
 ue: '', //ueditor实例
 content: '', //编辑器内容
 }
 },
 methods: {
 //初始化编辑器
 initEditor() {
 this.ue = UE.getEditor(this.id, {
 initialFrameWidth: '100%',
 initialFrameHeight: '350',
 scaleEnabled: true
 })
 //编辑器准备就绪后会触发该事件
 this.ue.addListener('ready',()=>{
 //设置可以编辑
 this.ue.setEnabled()
 })
 //编辑器内容修改时
 this.selectionchange()
 },
 //编辑器内容修改时
 selectionchange() {
 this.ue.addListener('selectionchange', () => {
 this.content = this.ue.getContent()
 })
 }
 },
 activated() {
 //初始化编辑器
 this.initEditor()
 },
 deactivated() {
 //销毁编辑器实例,使用textarea代替
 this.ue.destroy()
 //重置编辑器,可用来做多个tab使用同一个编辑器实例
 //如果要使用同一个实例,请注释destroy()方法
 //this.ue.reset()
 }
 }
</script>Easyui ueditor cannot edit problem integration
##ueditor editor usage graphic tutorial10 recommended articles about ueditor editorThe above is the detailed content of Tutorial sharing on creating multiple ueditor instances in vue. For more information, please follow other related articles on the PHP Chinese website!

Hot AI Tools

Undresser.AI Undress
AI-powered app for creating realistic nude photos

AI Clothes Remover
Online AI tool for removing clothes from photos.

Undress AI Tool
Undress images for free

Clothoff.io
AI clothes remover

Video Face Swap
Swap faces in any video effortlessly with our completely free AI face swap tool!

Hot Article

Hot Tools

Notepad++7.3.1
Easy-to-use and free code editor

SublimeText3 Chinese version
Chinese version, very easy to use

Zend Studio 13.0.1
Powerful PHP integrated development environment

Dreamweaver CS6
Visual web development tools

SublimeText3 Mac version
God-level code editing software (SublimeText3)

Hot Topics
 Tutorial on how to use Dewu
Mar 21, 2024 pm 01:40 PM
Dewu APP is currently a very popular brand shopping software, but most users do not know how to use the functions in Dewu APP. The most detailed usage tutorial guide is compiled below. Next is the Dewuduo that the editor brings to users. A summary of function usage tutorials. Interested users can come and take a look! Tutorial on how to use Dewu [2024-03-20] How to use Dewu installment purchase [2024-03-20] How to obtain Dewu coupons [2024-03-20] How to find Dewu manual customer service [2024-03-20] How to check the pickup code of Dewu [2024-03-20] Where to find Dewu purchase [2024-03-20] How to open Dewu VIP [2024-03-20] How to apply for return or exchange of Dewu
 In summer, you must try shooting a rainbow
Jul 21, 2024 pm 05:16 PM
After rain in summer, you can often see a beautiful and magical special weather scene - rainbow. This is also a rare scene that can be encountered in photography, and it is very photogenic. There are several conditions for a rainbow to appear: first, there are enough water droplets in the air, and second, the sun shines at a low angle. Therefore, it is easiest to see a rainbow in the afternoon after the rain has cleared up. However, the formation of a rainbow is greatly affected by weather, light and other conditions, so it generally only lasts for a short period of time, and the best viewing and shooting time is even shorter. So when you encounter a rainbow, how can you properly record it and photograph it with quality? 1. Look for rainbows. In addition to the conditions mentioned above, rainbows usually appear in the direction of sunlight, that is, if the sun shines from west to east, rainbows are more likely to appear in the east.
 What software is photoshopcs5? -photoshopcs5 usage tutorial
Mar 19, 2024 am 09:04 AM
PhotoshopCS is the abbreviation of Photoshop Creative Suite. It is a software produced by Adobe and is widely used in graphic design and image processing. As a novice learning PS, let me explain to you today what software photoshopcs5 is and how to use photoshopcs5. 1. What software is photoshop cs5? Adobe Photoshop CS5 Extended is ideal for professionals in film, video and multimedia fields, graphic and web designers who use 3D and animation, and professionals in engineering and scientific fields. Render a 3D image and merge it into a 2D composite image. Edit videos easily
 DisplayX (monitor testing software) tutorial
Mar 04, 2024 pm 04:00 PM
Testing a monitor when buying it is an essential part to avoid buying a damaged one. Today I will teach you how to use software to test the monitor. Method step 1. First, search and download the DisplayX software on this website, install it and open it, and you will see many detection methods provided to users. 2. The user clicks on the regular complete test. The first step is to test the brightness of the display. The user adjusts the display so that the boxes can be seen clearly. 3. Then click the mouse to enter the next link. If the monitor can distinguish each black and white area, it means the monitor is still good. 4. Click the left mouse button again, and you will see the grayscale test of the monitor. The smoother the color transition, the better the monitor. 5. In addition, in the displayx software we
 Tutorial on how to turn off the payment sound on WeChat
Mar 26, 2024 am 08:30 AM
1. First open WeChat. 2. Click [+] in the upper right corner. 3. Click the QR code to collect payment. 4. Click the three small dots in the upper right corner. 5. Click to close the voice reminder for payment arrival.
 Experts teach you! The Correct Way to Cut Long Pictures on Huawei Mobile Phones
Mar 22, 2024 pm 12:21 PM
With the continuous development of smart phones, the functions of mobile phones have become more and more powerful, among which the function of taking long pictures has become one of the important functions used by many users in daily life. Long screenshots can help users save a long web page, conversation record or picture at one time for easy viewing and sharing. Among many mobile phone brands, Huawei mobile phones are also one of the brands highly respected by users, and their function of cropping long pictures is also highly praised. This article will introduce you to the correct method of taking long pictures on Huawei mobile phones, as well as some expert tips to help you make better use of Huawei mobile phones.
 PHP Tutorial: How to convert int type to string
Mar 27, 2024 pm 06:03 PM
PHP Tutorial: How to Convert Int Type to String In PHP, converting integer data to string is a common operation. This tutorial will introduce how to use PHP's built-in functions to convert the int type to a string, while providing specific code examples. Use cast: In PHP, you can use cast to convert integer data into a string. This method is very simple. You only need to add (string) before the integer data to convert it into a string. Below is a simple sample code
 Honor mobile phone Hongmeng system upgrade tutorial
Mar 23, 2024 pm 12:45 PM
Honor mobile phones have always been favored by consumers because of their excellent performance and stable system. Recently, Honor mobile phones have released a new Hongmeng system, which has attracted the attention and expectations of many users. Hongmeng system is known as the system that "unifies the world". It has a smoother operating experience and higher security, allowing users to experience a new world of smartphones. Many users have expressed that they want to upgrade their Honor mobile phone system to the Hongmeng system. So, let’s take a look at the upgrade tutorial of the Honor mobile phone’s Hongmeng system. firstly, I


