

Nodejs sample code for image preview and upload

This article mainly introduces the sample code for nodejs image preview and upload. The editor thinks it is quite good. Now I will share it with you and give it as a reference. Let’s follow the editor and take a look.
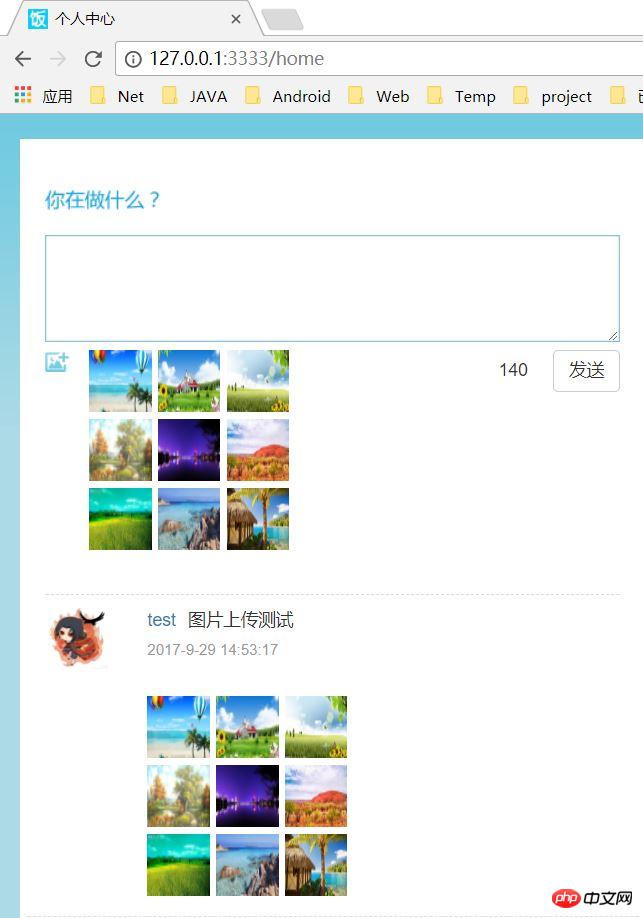
This article introduces the sample code for nodejs image preview and upload, and shares it with everyone. The details are as follows:
The effect is as follows:
Preface
Generally, you need to temporarily preview the image locally before uploading it.
The front-end image preview uses the readAsDataURL method of FileReader
nodejs image upload uses the middleware Multer
Local Image Preview
The FileReader object allows a web application to asynchronously read the contents of a file (or raw data buffer) stored on the user's computer, using a File or Blob object to specify the file to read or data.
The readAsDataURL method is used to read the contents of the specified Blob or file. When the read operation is completed, readyState is completed and loadend is triggered. At that point, the result attribute contains the data as a URL representing the file, as a base64-encoded string.
Single image preview
html part
<input type="file" onchange="previewFile()"><br>
<img src="" height="200" alt="Image preview...">
javascript part
function previewFile() {
 var preview = document.querySelector('img');
 var file  = document.querySelector('input[type=file]').files[0];
 var reader = new FileReader();

 reader.addEventListener("load", function () {
  preview.src = reader.result;
 }, false);

 if (file) {
  reader.readAsDataURL(file);
 }
}Multiple picture preview
html part
<input id="browse" type="file" onchange="previewFiles()" multiple>
<p id="preview"></p>
javascript part
function previewFiles() {

 var preview = document.querySelector('#preview');
 var files  = document.querySelector('input[type=file]').files;

 function readAndPreview(file) {

  // 支持的图片类型(可自定义)
  if ( /\.(jpe?g|png|gif)$/i.test(file.name) ) {
   var reader = new FileReader();

   reader.addEventListener("load", function () {
    var image = new Image();
    image.height = 100;
    image.title = file.name;
    image.src = this.result;
    preview.appendChild( image );
   }, false);

   reader.readAsDataURL(file);
  }

 }
 //files 就是input选中的文件,你也可以对上传图片个数进行限制 (files.length)
 if (files) {
  [].forEach.call(files, readAndPreview);
 }

}Used in the project
Front-end part
html
<input id="txtUploadFile" type="file">
<input id="txtUploadFileList" type="file" accept="image/jpeg,image/png,image/gif" multiple class="upload-file">
<p id="preview"></p>
<input id="btnSend" type="button" value="发送" class="btn btn-default">
javascript
js The method part is broken down and it is a bit long to put it in one code block (please check the context when reading)
 $(function(){
    var upload={
      txtUploadFile:$('#txtUploadFile'), //上传单个文件
      txtUploadFileList:$('#txtUploadFileList'), //上传多个文件
      btnSend:$('#btnSend'), //上传文件
      preview:$('#preview'),//图片预览盒子
      //预览图片加载
      previewImgLoad:function(fileList){
        for(var i=0;i<fileList.length;i++){
          var tempFile=fileList[i];
          var reader = new FileReader();
          reader.readAsDataURL(tempFile);
          reader.onload=function (e) {
            var image = new Image();
            image.height = 100;
            image.title = tempFile.name;
            image.src = e.target.result;
            upload.preview.append(image);
          }
        }
      }
    }
}); /*
上传单个文件
这里是input改变时后直接上传(用于修改用户头像)
你也可以在点击上传按钮后再上传,下面的多图上传会给出案例
*/
upload.txtUploadFile.change(function(){
var formData = new FormData();
formData.append('avatar',upload.txtUploadFile[0].files[0]);
$.ajax({
url: '/upload/file',
type: 'post',
cache: false,
data: formData,
processData: false,
contentType: false,
success:function(res){
console.log('upload success');
},
error:function(){
console.log('upload faild');
}
});
}); //加载预览图片
upload.txtUploadFileList.change(function(){
var fileList=this.files;
upload.previewImgLoad(fileList);
});//上传多张图片
upload.btnSend.click(function(){
var files = upload.txtUploadFileList.prop('files');
if(files.length==0){
//没有选择文件直接返回
return;
}
var formData=new FormData();
for(var i=0;i<files.length;i++){
formData.append('photos',files[i]);
}
$.ajax({
url: '/upload/filesList',
type: 'post',
cache: false,
data: formData,
processData: false,
contentType: false,
success:function(res){
console.log('upload success');
//到这里图片已经上传成功了.你可根据返回结果处理其他的业务逻辑
if(res.status==1){
// todo something
}
},
error:function(){
console.log('upload faild');
}
});
});nodejs part
nodejs uses Multer Middleware, this middleware is mainly used to upload files
Install Multer
npm install --save multer
Multer is used in nodejs
var express = require('express');
var multer = require('multer');
var app = express();

//磁盘存储引擎(说白了就是指定上传的文件存储到哪,当然你也可以对文件重命名等等)
var storage=multer.diskStorage({
  destination: function (req, file, cb) {
    //我这里是存储在public下的uploads目录
    cb(null, 'public/uploads/')
  },
  filename: function (req, file, cb) {
    cb(null, file.fieldname + '-' + Date.now()+"_" + file.originalname)
  }
});Single picture upload
//如果图片上传成功会返回图片的存储路径
app.post('/upload/file', upload.single('avatar'), function(req, res) {
  if (!req.file) {
    console.log("no file received");
    return res.send({
      status: 0,
      filePath:''
    });
  } else {
    console.log('file received');
    res.send({
      status:1,
      filePath: '/uploads/' + path.basename(req.file.path)
    });
  }
});Multiple picture upload
// 如果图片上传成功会返回图片的存储路径(数组)
app.post('/upload/filesList', upload.array('photos',9), function(req, res) {
if (req.files==undefined) {
console.log("no files received");
return res.send({
status: 0,
filePath:''
});
} else {
var filesPathArr=[];
for(var i=0;i<req.files.length;i++){
filesPathArr.push('/uploads/' + path.basename(req.files[i].path));
}
res.send({
status:1,
filesPath: filesPathArr
});
}
});The above is the detailed content of Nodejs sample code for image preview and upload. For more information, please follow other related articles on the PHP Chinese website!

Hot AI Tools

Undresser.AI Undress
AI-powered app for creating realistic nude photos

AI Clothes Remover
Online AI tool for removing clothes from photos.

Undress AI Tool
Undress images for free

Clothoff.io
AI clothes remover

Video Face Swap
Swap faces in any video effortlessly with our completely free AI face swap tool!

Hot Article
Hot Tools

Notepad++7.3.1
Easy-to-use and free code editor

SublimeText3 Chinese version
Chinese version, very easy to use

Zend Studio 13.0.1
Powerful PHP integrated development environment

Dreamweaver CS6
Visual web development tools

SublimeText3 Mac version
God-level code editing software (SublimeText3)
Hot Topics


 Is nodejs a backend framework?
Apr 21, 2024 am 05:09 AM
Is nodejs a backend framework?
Apr 21, 2024 am 05:09 AM
Node.js can be used as a backend framework as it offers features such as high performance, scalability, cross-platform support, rich ecosystem, and ease of development.
 How to connect nodejs to mysql database
Apr 21, 2024 am 06:13 AM
How to connect nodejs to mysql database
Apr 21, 2024 am 06:13 AM
To connect to a MySQL database, you need to follow these steps: Install the mysql2 driver. Use mysql2.createConnection() to create a connection object that contains the host address, port, username, password, and database name. Use connection.query() to perform queries. Finally use connection.end() to end the connection.
 What are the global variables in nodejs
Apr 21, 2024 am 04:54 AM
What are the global variables in nodejs
Apr 21, 2024 am 04:54 AM
The following global variables exist in Node.js: Global object: global Core module: process, console, require Runtime environment variables: __dirname, __filename, __line, __column Constants: undefined, null, NaN, Infinity, -Infinity
 What is the difference between npm and npm.cmd files in the nodejs installation directory?
Apr 21, 2024 am 05:18 AM
What is the difference between npm and npm.cmd files in the nodejs installation directory?
Apr 21, 2024 am 05:18 AM
There are two npm-related files in the Node.js installation directory: npm and npm.cmd. The differences are as follows: different extensions: npm is an executable file, and npm.cmd is a command window shortcut. Windows users: npm.cmd can be used from the command prompt, npm can only be run from the command line. Compatibility: npm.cmd is specific to Windows systems, npm is available cross-platform. Usage recommendations: Windows users use npm.cmd, other operating systems use npm.
 Is there a big difference between nodejs and java?
Apr 21, 2024 am 06:12 AM
Is there a big difference between nodejs and java?
Apr 21, 2024 am 06:12 AM
The main differences between Node.js and Java are design and features: Event-driven vs. thread-driven: Node.js is event-driven and Java is thread-driven. Single-threaded vs. multi-threaded: Node.js uses a single-threaded event loop, and Java uses a multi-threaded architecture. Runtime environment: Node.js runs on the V8 JavaScript engine, while Java runs on the JVM. Syntax: Node.js uses JavaScript syntax, while Java uses Java syntax. Purpose: Node.js is suitable for I/O-intensive tasks, while Java is suitable for large enterprise applications.
 Is nodejs a back-end development language?
Apr 21, 2024 am 05:09 AM
Is nodejs a back-end development language?
Apr 21, 2024 am 05:09 AM
Yes, Node.js is a backend development language. It is used for back-end development, including handling server-side business logic, managing database connections, and providing APIs.
 Which one to choose between nodejs and java?
Apr 21, 2024 am 04:40 AM
Which one to choose between nodejs and java?
Apr 21, 2024 am 04:40 AM
Node.js and Java each have their pros and cons in web development, and the choice depends on project requirements. Node.js excels in real-time applications, rapid development, and microservices architecture, while Java excels in enterprise-grade support, performance, and security.
 How to deploy nodejs project to server
Apr 21, 2024 am 04:40 AM
How to deploy nodejs project to server
Apr 21, 2024 am 04:40 AM
Server deployment steps for a Node.js project: Prepare the deployment environment: obtain server access, install Node.js, set up a Git repository. Build the application: Use npm run build to generate deployable code and dependencies. Upload code to the server: via Git or File Transfer Protocol. Install dependencies: SSH into the server and use npm install to install application dependencies. Start the application: Use a command such as node index.js to start the application, or use a process manager such as pm2. Configure a reverse proxy (optional): Use a reverse proxy such as Nginx or Apache to route traffic to your application
