

Detailed example of Bootstrap form validation formValidation

This article mainly introduces the Bootstrap form validation formValidation to realize the form dynamic validation function. Friends who need it can refer to the Bootstrap tutorial
Dynamicly add input and dynamically Add new verification method!
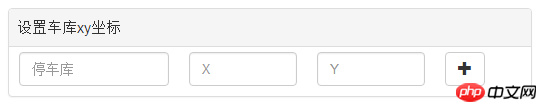
init status:
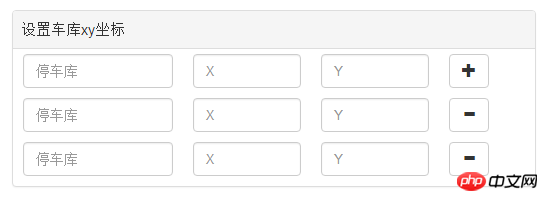
After clicking "+":
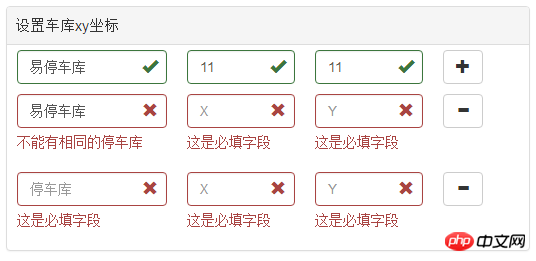
After verification:
Knowledge points:
1 First go to the official website to download: formvalidation.io/
2. Import the file. I won’t go into details about the precautions. I have already mentioned them in the remote verification article.
3 Keywords used: addField, removeField, different
4 Note that the names of the examples on the official website are different. I'm a bit lazy here. And when the project is ajaxed, the form is not used for submission, but is submitted as json by itself, so the names of x and y have the same name.
Good start:
First of all, there must be a "+" in the html, marked as addPos, and then there must be a "-" marked as "removPos,
<p id="posXY" class=" panel panel-default ">
<!-- 添加-->
                <p class="panel-heading" >设置车库xy坐标</p>
                <p class="addPos form-group">
                  <p class="col-lg-4 col-sm-4 col-xs-4" >
                    <input type="text" class="form-control text-left" name="garageNo" placeholder="停车库" style="min-width: 150px"/>
                  </p>
                  <p class="col-lg-3 col-sm-3 col-xs-3" >
                    <input type="text" class="form-control" name="posX" placeholder="X"/>
                  </p>
                  <p class="col-lg-3 col-sm-3 col-xs-3" >
                    <input type="text" class="form-control" name="posY" placeholder="Y"/>
                  </p>
                  <p class="col-lg-2 col-sm-2 col-xs-2" >
                    <button type="button" class="btn btn-default addButtonPos"><i class="glyphicon glyphicon-plus"></i></button>
                  </p>
                </p>
                <!-- 删除 -->
                <p class="removPos form-group hide" id="posTemplate">
                  <p class="col-lg-4 col-sm-4 col-xs-4" >
                    <input type="text" class="form-control text-left" name="garageNo" placeholder="停车库" style="min-width: 150px"/>
                  </p>
                  <p class="col-lg-3 col-sm-3 col-xs-3" >
                    <input type="text" class="form-control" name="posX" placeholder="X"/>
                  </p>
                  <p class="col-lg-3 col-sm-3 col-xs-3" >
                    <input type="text" class="form-control" name="posY" placeholder="Y"/>
                  </p>
                  <p class="col-lg-2 col-sm-2 col-xs-2" >
                    <button type="button" class="btn btn-default removeButtonPos"><i class="glyphicon glyphicon-minus"></i></button>
                  </p>
                </p>
</p>Then Here is a js:
/**
   * pos添加
   * @param $that
   */
  function addButtonPosClick($that){
    var panelId = $that.parents(".topTemplate").attr("id");
    var $form=$('#'+panelId+"form")
//    defaultPanel(panelId)
    var bookIndex=typeObj[panelId]++;
    console.log(panelId,bookIndex)
    var $template = $('#'+panelId+' #posTemplate'),
      $clone =$template
        .clone()
        .removeClass('hide')
        .removeAttr('id')
        .attr('step',bookIndex)
        .insertBefore($template);
    // Update the name attributes
    $clone
      .find('[name="garageNo"]').attr({"step":bookIndex,"name":"garageNo"+bookIndex})
      .click(function(){
        clickBindGarageNo(panelId,bookIndex)
      }).end()
      .find('[name="posX"]').attr("step",bookIndex).end()
      .find('[name="posY"]').attr("step",bookIndex).end()
    // Add new fields
    // Note that we also pass the validator rules for new field as the third parameter
//    $('#defaultForm')
//    gFieldArr.push(panelId+'[' + bookIndex + '].garageNo')
    $form
      .formValidation('addField', "garageNo"+bookIndex, formObj.sameAs(false))
      .formValidation('addField', 'posX', myPosXY)
      .formValidation('addField', 'posY', myPosXY)
  }
 function myFormValidation($form){
//    var $form=$("#"+$panelId+"form")
    $form
        .formValidation({
          framework: 'bootstrap',
          locale: 'zh_CN',
          message: '值无效',
          icon: {
            valid: 'glyphicon glyphicon-ok',
            invalid: 'glyphicon glyphicon-remove',
            validating: 'glyphicon glyphicon-refresh'
          },
          fields:
          {
            myimg:{
              validators: {
                notEmpty: {
                  message: '请选择一个文件上传'
                },
                file: {
                  extension: 'jpeg,jpg,png',
                  type: 'image/jpeg,image/png',
                  maxSize: 1*1024 * 1024,
                  message: '该文件必须为jpeg,jpg,png格式和必须不超过1MB的大小'
                }
              }
            }
          }
        })
        .on('click', '.addButtonPos', function() {
          addButtonPosClick($(this))
        })
        //Remove button click handler
        .on('click', '.removeButtonPos', function() {
          var $that   = $(this)
          var panelId = $that.parents(".topTemplate").attr("id");
//           defaultPanel(panelId)
          var $row = $(this).parents('.form-group'),
              index = $row.attr('step');
//          var myname='[' +index + ']'
          var bookIndex= typeObj[panelId]--;
//          $('#defaultForm')
          $form
                   .formValidation('removeField', $row.find('[name="garageNo'+bookIndex+'"]'))
                   .formValidation('removeField', $row.find('[name="posX"]'))
                   .formValidation('removeField', $row.find('[name="posY"]'))
          // Remove element containing the fields
          $row.remove();
})Because my project has multiple form submissions, but the business is similar, I use these functions
For example: var form=("#" +panelId+”form”)Use panelId to distinguish multiple forms.
As mentioned above, the names of x and y are the same, but if you are careful, you will find that garageNo has a different name. . Bookindex was added later, why.
Because of business requirements. For example, the identity number of each person cannot be the same. The tablemates can be both female and 18 years old...
The keywords removeField and addField
## cannot be the same. How to do it. Please see below:var differentValid= function(diffstr){
var vv={
validators: {
different: {
field: diffstr,
message: '不能有相同的停车库'
}
}
}
return vv
}clickBindGarageNo(panelId,idx){
$form.formValidation('addField', "garageNo"+idx, differentValid(diffArr.toString()))
var fv =$form.data('formValidation');
fv.validate();
}String of nameFor example: there are 3 entries, idx=1 and the focus is on 1. Then diffArr=["garageNo0","garageNo2",]
$form.formValidation('revalidateField', "field");
$btn.click(function(){
//....
retrun false;
)}##1.
Javascript Free Video Tutorial2. Detailed examples of commonly used middleware body-parser in Nodejs
3. JavaScript form verification implementation code_javascript skills
4. Single line of JS to implement money format inspection on the mobile terminal
5. Example tutorial of vue v-model form control binding
The above is the detailed content of Detailed example of Bootstrap form validation formValidation. For more information, please follow other related articles on the PHP Chinese website!

Hot AI Tools

Undresser.AI Undress
AI-powered app for creating realistic nude photos

AI Clothes Remover
Online AI tool for removing clothes from photos.

Undress AI Tool
Undress images for free

Clothoff.io
AI clothes remover

Video Face Swap
Swap faces in any video effortlessly with our completely free AI face swap tool!

Hot Article
Hot Tools

Notepad++7.3.1
Easy-to-use and free code editor

SublimeText3 Chinese version
Chinese version, very easy to use

Zend Studio 13.0.1
Powerful PHP integrated development environment

Dreamweaver CS6
Visual web development tools

SublimeText3 Mac version
God-level code editing software (SublimeText3)
Hot Topics


 How to get the bootstrap search bar
Apr 07, 2025 pm 03:33 PM
How to get the bootstrap search bar
Apr 07, 2025 pm 03:33 PM
How to use Bootstrap to get the value of the search bar: Determines the ID or name of the search bar. Use JavaScript to get DOM elements. Gets the value of the element. Perform the required actions.
 How to use bootstrap in vue
Apr 07, 2025 pm 11:33 PM
How to use bootstrap in vue
Apr 07, 2025 pm 11:33 PM
Using Bootstrap in Vue.js is divided into five steps: Install Bootstrap. Import Bootstrap in main.js. Use the Bootstrap component directly in the template. Optional: Custom style. Optional: Use plug-ins.
 How to do vertical centering of bootstrap
Apr 07, 2025 pm 03:21 PM
How to do vertical centering of bootstrap
Apr 07, 2025 pm 03:21 PM
Use Bootstrap to implement vertical centering: flexbox method: Use the d-flex, justify-content-center, and align-items-center classes to place elements in the flexbox container. align-items-center class method: For browsers that do not support flexbox, use the align-items-center class, provided that the parent element has a defined height.
 How to write split lines on bootstrap
Apr 07, 2025 pm 03:12 PM
How to write split lines on bootstrap
Apr 07, 2025 pm 03:12 PM
There are two ways to create a Bootstrap split line: using the tag, which creates a horizontal split line. Use the CSS border property to create custom style split lines.
 How to set up the framework for bootstrap
Apr 07, 2025 pm 03:27 PM
How to set up the framework for bootstrap
Apr 07, 2025 pm 03:27 PM
To set up the Bootstrap framework, you need to follow these steps: 1. Reference the Bootstrap file via CDN; 2. Download and host the file on your own server; 3. Include the Bootstrap file in HTML; 4. Compile Sass/Less as needed; 5. Import a custom file (optional). Once setup is complete, you can use Bootstrap's grid systems, components, and styles to create responsive websites and applications.
 How to insert pictures on bootstrap
Apr 07, 2025 pm 03:30 PM
How to insert pictures on bootstrap
Apr 07, 2025 pm 03:30 PM
There are several ways to insert images in Bootstrap: insert images directly, using the HTML img tag. With the Bootstrap image component, you can provide responsive images and more styles. Set the image size, use the img-fluid class to make the image adaptable. Set the border, using the img-bordered class. Set the rounded corners and use the img-rounded class. Set the shadow, use the shadow class. Resize and position the image, using CSS style. Using the background image, use the background-image CSS property.
 How to use bootstrap button
Apr 07, 2025 pm 03:09 PM
How to use bootstrap button
Apr 07, 2025 pm 03:09 PM
How to use the Bootstrap button? Introduce Bootstrap CSS to create button elements and add Bootstrap button class to add button text
 How to resize bootstrap
Apr 07, 2025 pm 03:18 PM
How to resize bootstrap
Apr 07, 2025 pm 03:18 PM
To adjust the size of elements in Bootstrap, you can use the dimension class, which includes: adjusting width: .col-, .w-, .mw-adjust height: .h-, .min-h-, .max-h-
