
 Backend Development
PHP Tutorial
Getting started with message queue RabbitMQ and detailed explanation of PHP examples
Backend Development
PHP Tutorial
Getting started with message queue RabbitMQ and detailed explanation of PHP examples
Getting started with message queue RabbitMQ and detailed explanation of PHP examples

This article brings you relevant knowledge about PHP, which mainly introduces the introduction of message queue RabbitMQ and some practical details. The message queue is a communication method between applications. Let’s talk about it together. Take a look, hope it helps everyone.

Recommended study: "PHP Video Tutorial"
Introduction to message queue and message queue application scenarios
RabbitMQ
Description
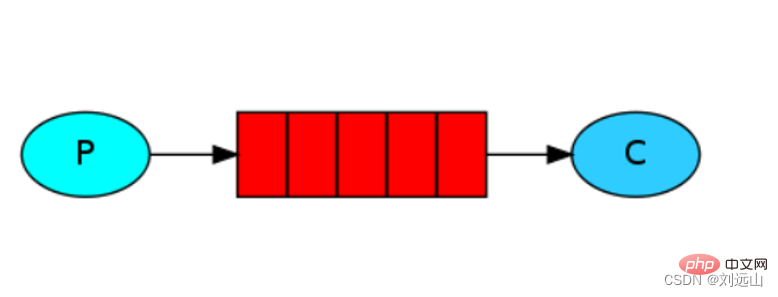
MQ (Message Queue) is a message queue, which is a communication method between applications. The message can be returned immediately after it is sent. , the message system ensures reliable delivery of messages. "Message queue" is a container that saves messages during their transmission. It is typical: producer, consumer model. Producers continue to produce messages into the message queue, and consumers continue to obtain messages from the queue. Because the production and consumption of messages are asynchronous, and only care about the sending and receiving of messages, there is no intrusion of business logic, thus achieving the decoupling of producers and consumers.
Why use message middleware?
The message queue is an important component in the distributed system. It solves problems such as application decoupling, asynchronous messaging, and traffic peak shaving, and achieves high concurrency, high availability, scalability, and eventual consistency architecture
Asynchronous processing
Users need to send emails and registration text messages after registering information
1. After the user registration information is written into the database, even if the registration is successful, information about successful registration is returned
2. Sending emails and registration text messages Executed asynchronously through the message queue, the user does not need to wait for these two operations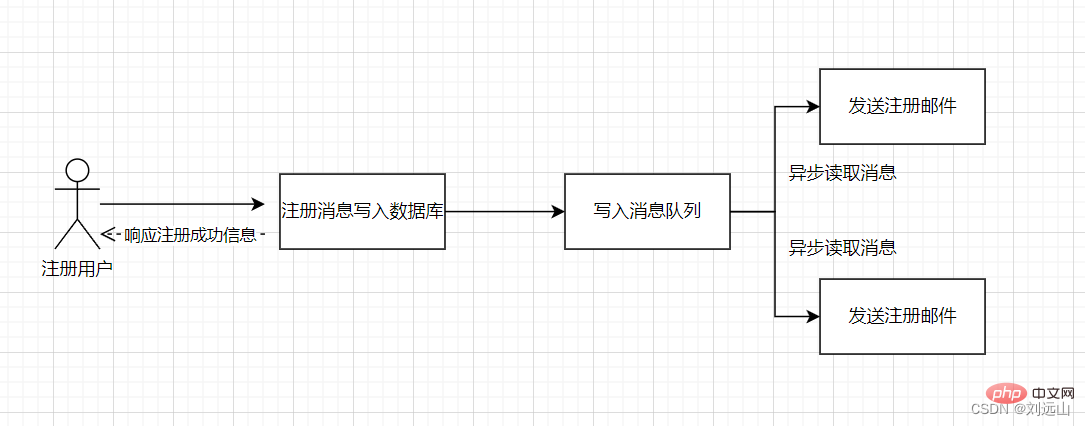
#Application decoupling
After the user places an order, the order system needs to notify the inventory system. The traditional approach is that the order system calls the interface of the inventory system to increase or decrease inventory
1. The user places an order for production and returns a success prompt
2. The queue consumption inventory system increases or decreases inventory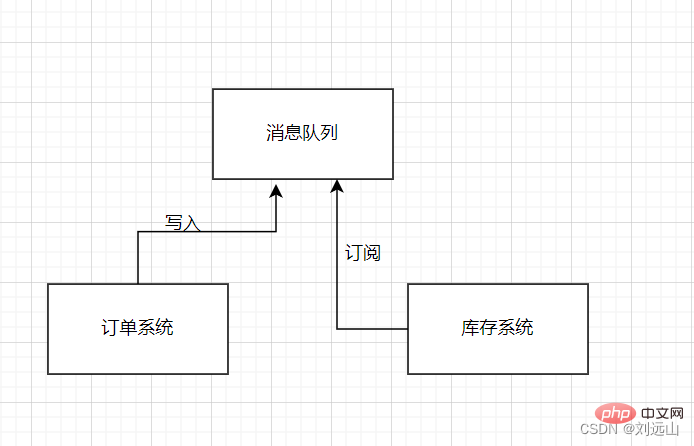
Traffic peak shaving
Traffic peak shaving is also a common scenario in message queues. It is generally used extensively in flash sales or group grab activities
1. When a group of users Requests come and enter the queue, and the number of queues is controlled. If the number exceeds a certain number, the flash sale will end.
2. Then the queues will be consumed one by one according to the first-in-first-out method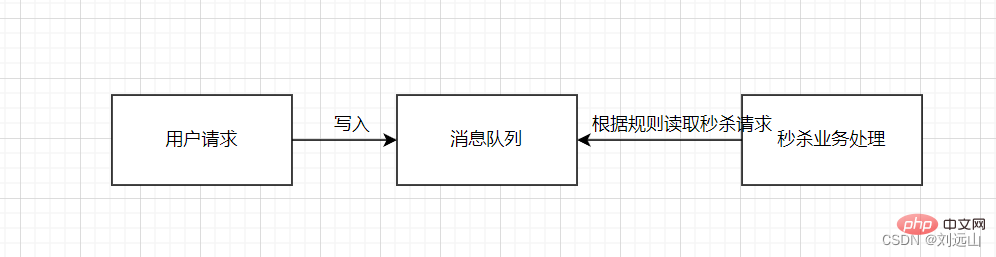
Rabbitmq Features
Reliability RabbitMQ uses some mechanisms to ensure reliability, such as persistence, transmission confirmation, and release confirmation.
Flexible Routing The message is routed through Exchange before the message enters the queue. For typical routing functionality, RabbitMQ already provides some built-in Exchange implementations. For more complex routing functions, multiple Exchanges can be bound together, and your own Exchange can also be implemented through the plug-in mechanism.
Message Clustering Multiple RabbitMQ servers can form a cluster to form a logical Broker.
Highly Available Queues Queues can be mirrored on machines in the cluster, so that the queues are still available if some nodes have problems.
Multi-protocol RabbitMQ supports multiple message queue protocols, such as STOMP, MQTT, etc.
Multi-language clients (Many Clients) RabbitMQ supports almost all commonly used languages, such as PHP Java, .NET, Ruby, etc.
Management UI (Management UI) RabbitMQ provides an easy-to-use user interface that allows users to monitor and manage many aspects of the message Broker.
Tracing mechanism (Tracing) If the message is abnormal, RabbitMQ provides a message tracking mechanism so that users can find out what happened.
Plugin System RabbitMQ provides many plug-ins to expand in many aspects, and you can also write your own plug-ins.
How RabbitMQ works
Broker: An application that receives and distributes messages, RabbitMQ Server is the Message Broker.
Virtual host: Similar to mysql database, when multiple different users use the services provided by the same RabbitMQ server, multiple vhosts can be divided, and each user can use the service provided by the same RabbitMQ server. vhost creates exchange/queue, etc.
Connection: TCP connection between publisher/consumer and broker.
Channel: If a Connection is established every time RabbitMQ is accessed, the overhead of establishing a TCP Connection will be huge and the efficiency will be low when the message volume is large. Channel is a logical connection established inside the connection. As a lightweight Connection, Channel greatly reduces the cost of establishing a TCP connection by the operating system.
Exchange: The message reaches the first stop of the broker. According to the distribution rules, it matches the routing key in the query table and distributes the message to the queue. Commonly used types are: direct (point-to-point), topic (publish-subscribe) and fanout (multicast).
Queue: The message is finally sent here to be picked up by the consumer. A message can be copied to multiple queues at the same time.
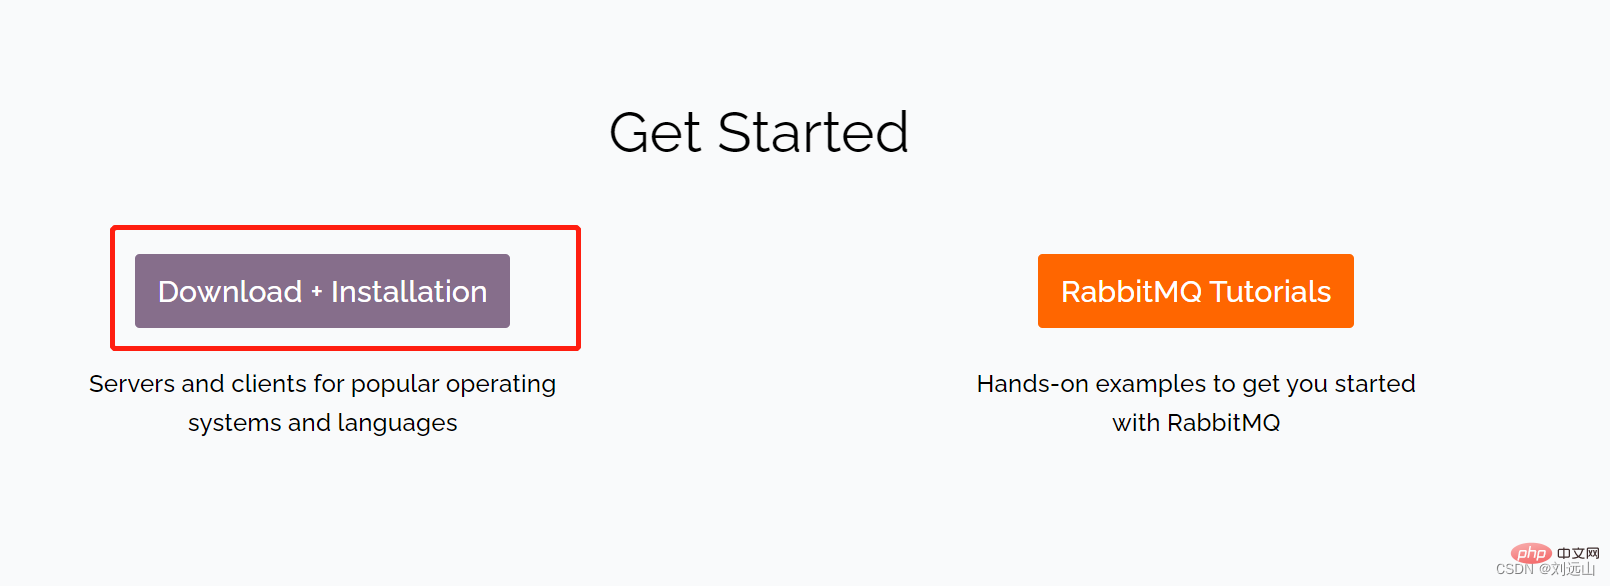
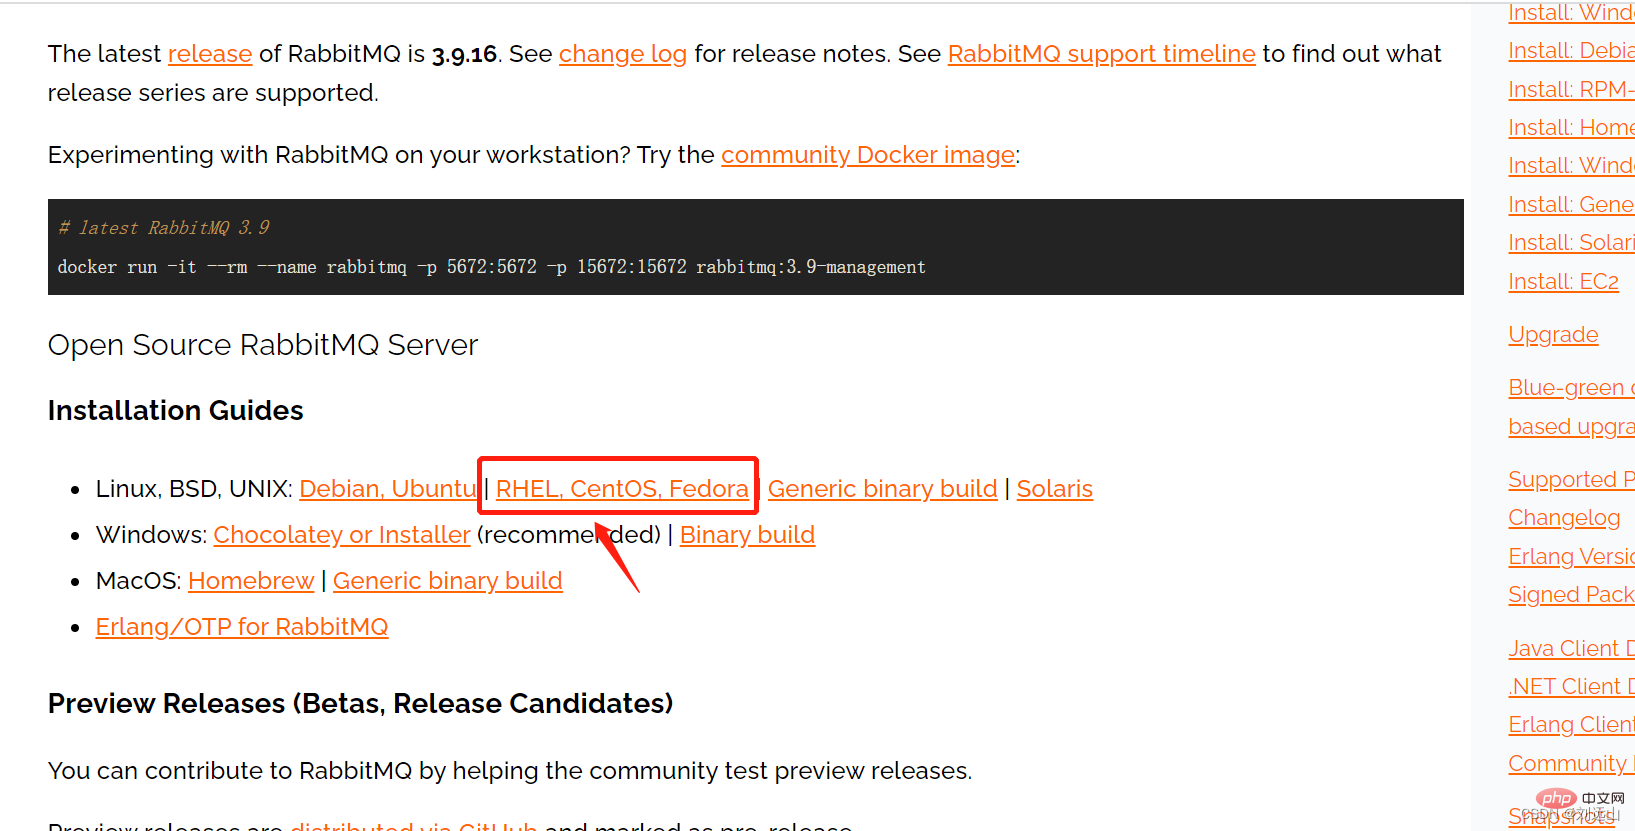
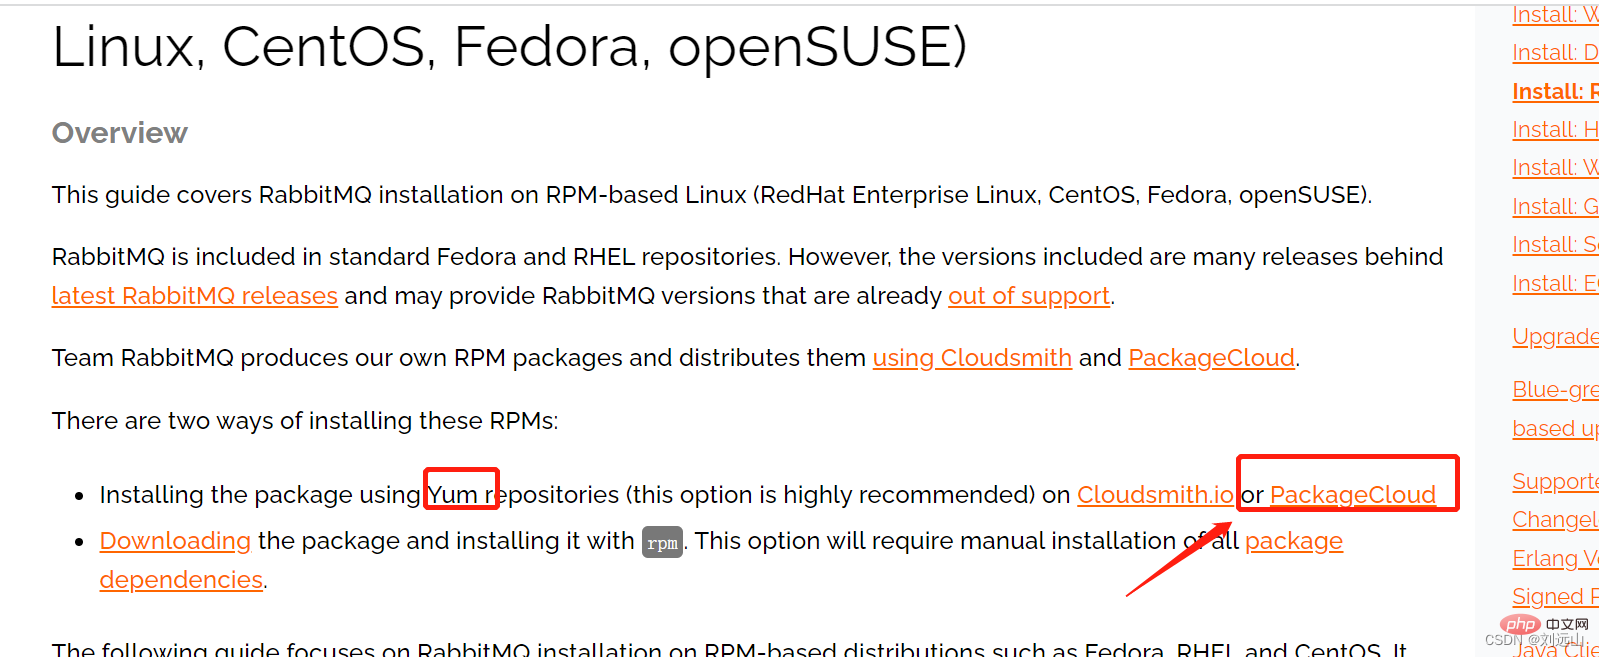
rabbitmq installation startup
RabbitMQ official address: http://www.rabbitmq.com
To install rabbitmq, you need to install erlang first
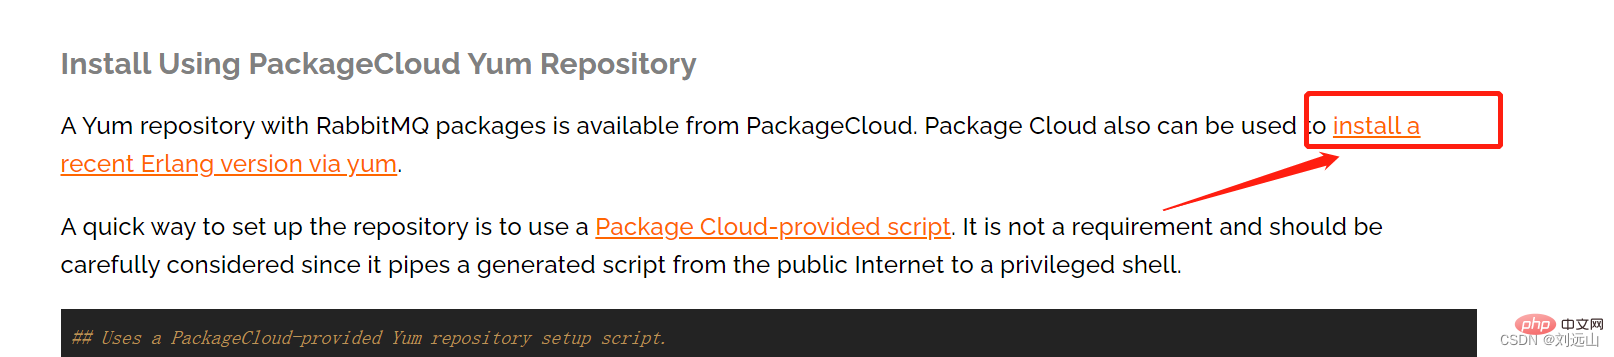
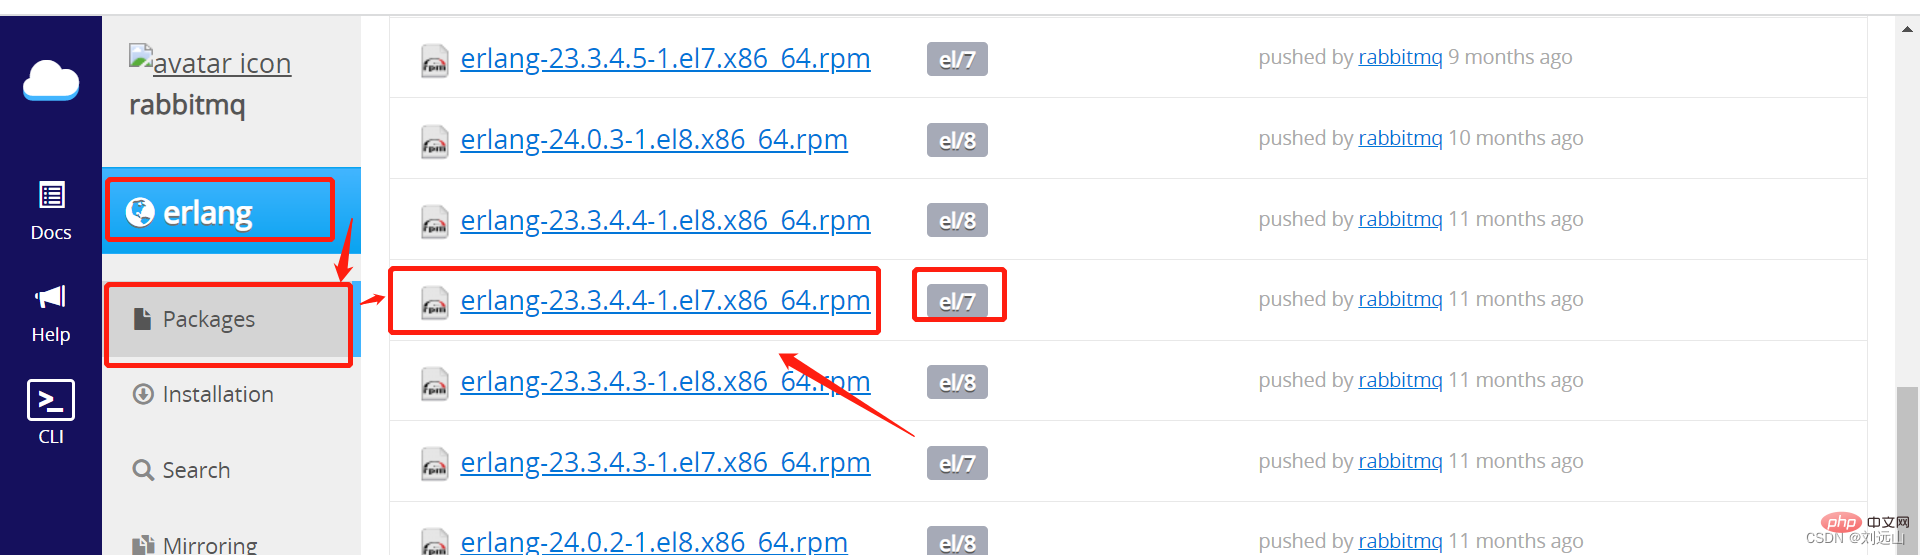
The first step: Erlang installation
To install rabbitmq, you need to install erlang first. Centos7 does not support the installation of erlang 24 version
Download: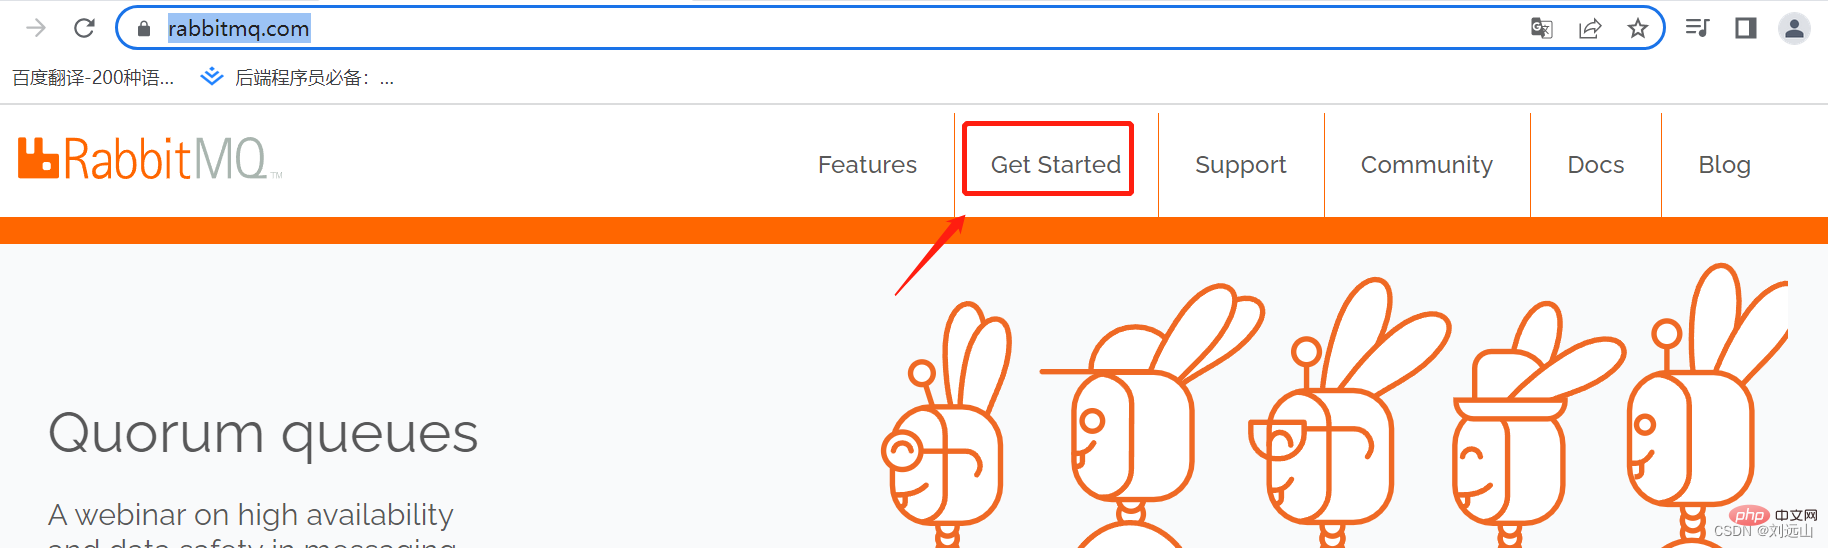
 ##
##
# 系统  centos 7# 下载erlang包,手动下载后上传至服务器,我在使用wget下载后无法安装,这里没明白


# 安装
yum install erlang-23.3.4.4-1.el7.x86_64.rpm

# 验证安装是否成功
erl

Second Step: Install rabbitmq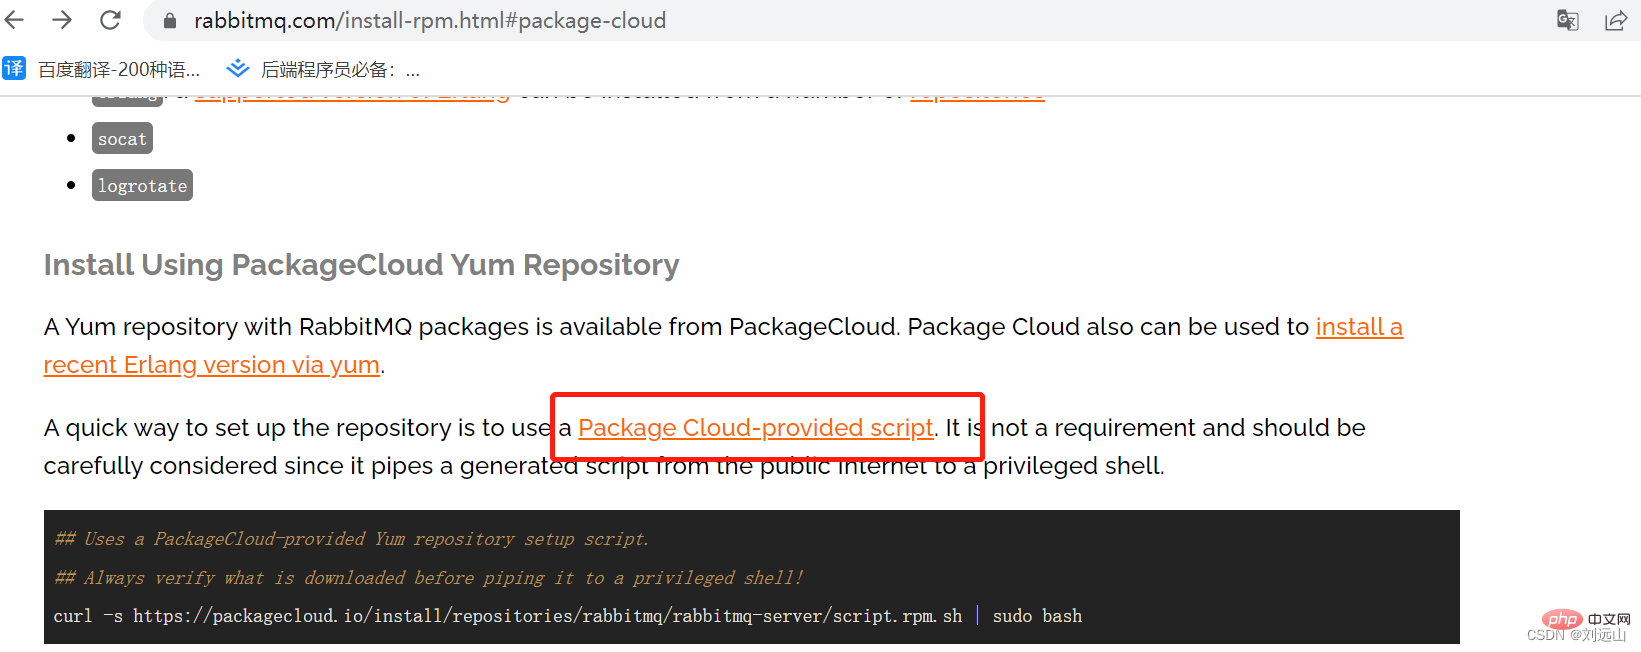
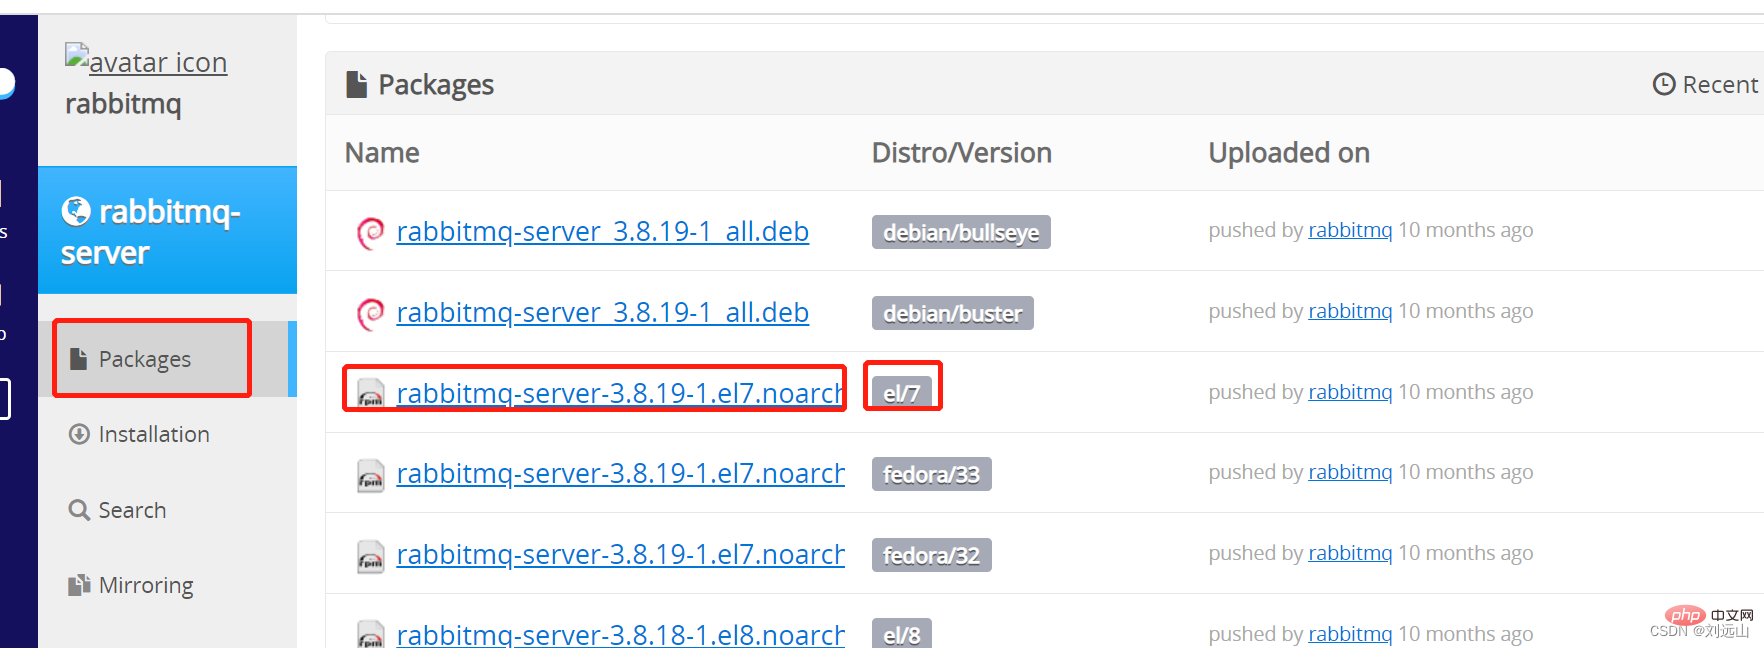

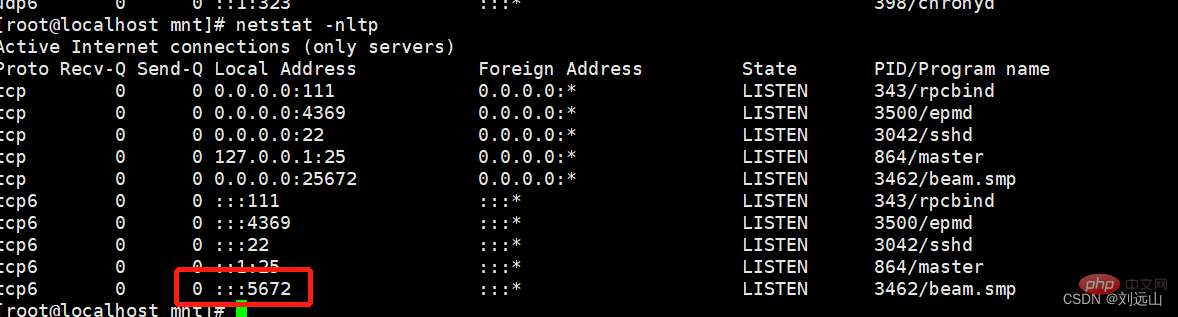
# 系统  centos 7# 下载rabbitmq包,手动下载后上传至服务器,我在使用wget下载后无法安装,这里没明白


# 安装
yum install rabbitmq-server-3.8.19-1.el7.noarch.rpm

# 启动
systemctl start rabbitmq-server

# 关闭
systemctl stop rabbitmq-server

# 查看默认端口服务是否启动
netstat -tunlp
rabbitmq Management Command Start 15672: HTTP API client, management UI (only when the management plug-in is enabled)
# 启动rabbitmq_management插件
rabbitmq-plugins  enable  rabbitmq_management

# 查看所有插件
rabbitmq-plugins  list
http://192.168.10.105:15672/
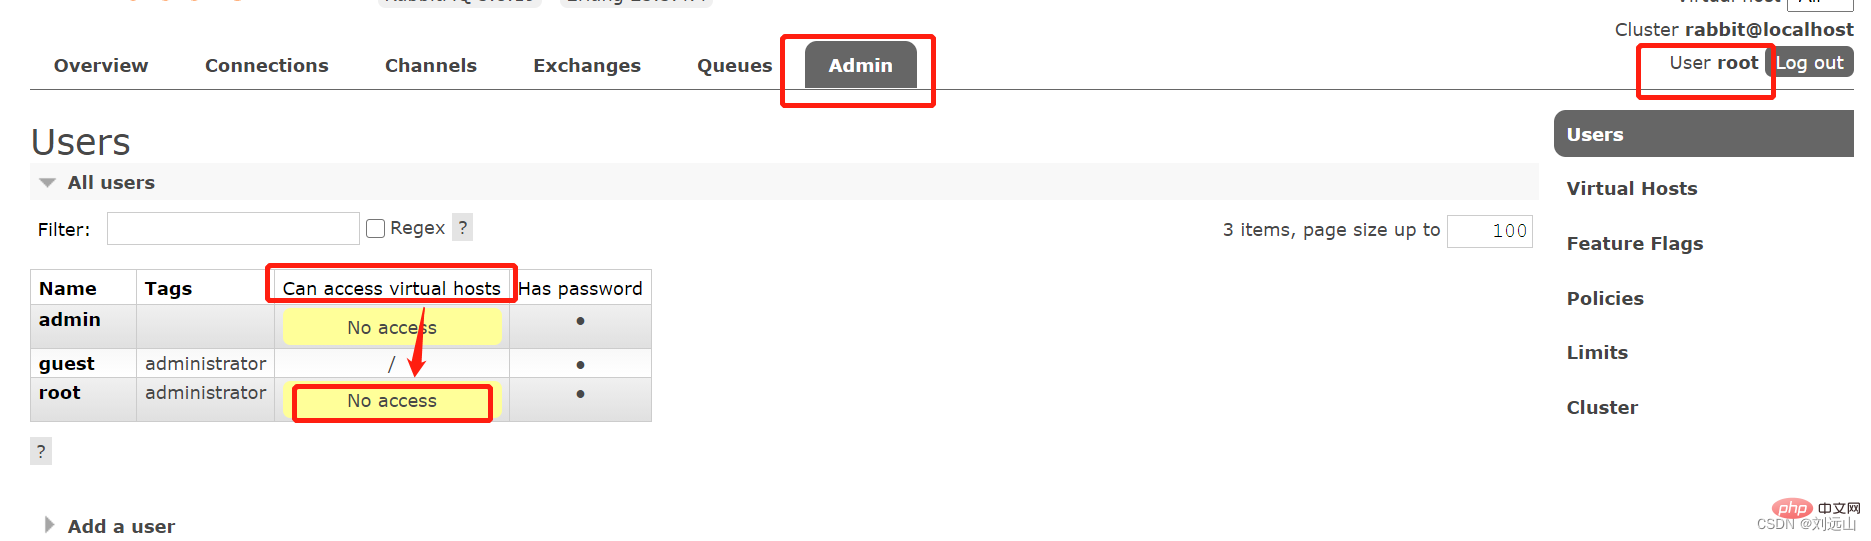
rabbitmq configuration management interface
# 新增一个用户
rabbitmqctl add_user 【用户名Username】 【密码Password】
rabbitmqctl add_user root root
# 删除一个用户
rabbitmqctl delete_user Username

# 修改用户的密码
rabbitmqctl change_password Username Newpassword

# 查看当前用户列表
rabbitmqctl list_users

# 设置用户角色的命令为:
rabbitmqctl set_user_tags User Tag
rabbitmqctl set_user_tags root administrator
# User为用户名, Tag为角色名(对应于上面的administrator,monitoring,policymaker,management,或其他自定义名称)。
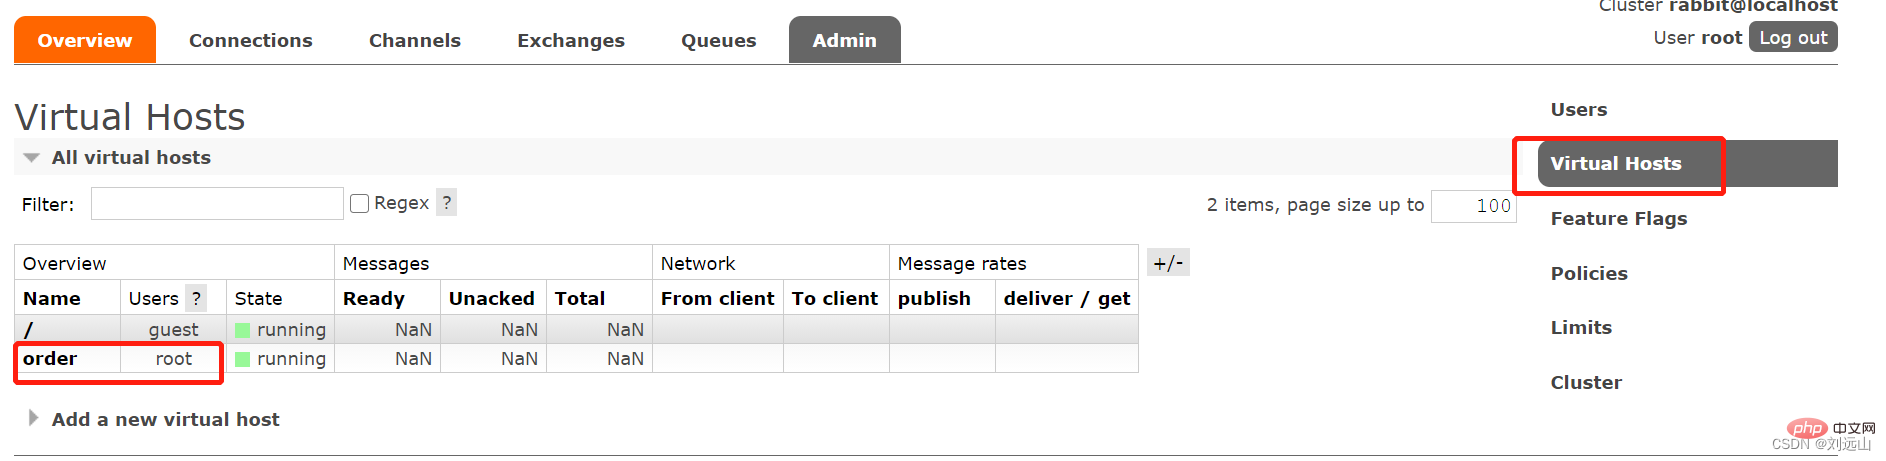
Command line to create vhost and PHP extension installation Similar to mysql database, when multiple different users use the services provided by the same RabbitMQ server, multiple vhosts can be divided, and each user creates exchange/queue, etc. in their own vhost. .
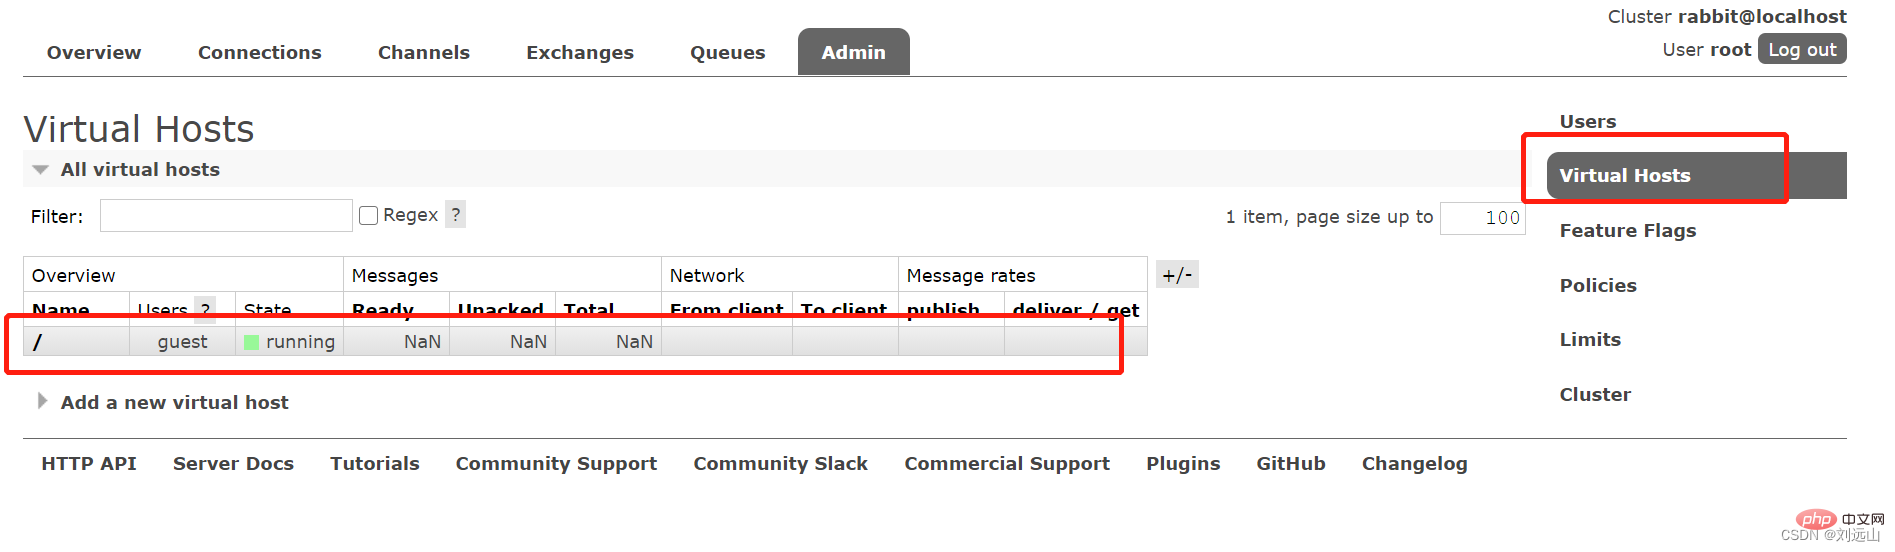
# 新增vhost
rabbitmqctl add_vhost   vhostname
rabbitmqctl add_vhost order

# 查看vhost列表
rabbitmqctl  list_vhosts

#为vhost添加用户
rabbitmqctl set_permissions -p vhostname username ".*" ".*" ".*"rabbitmqctl set_permissions -p order root ".*" ".*" ".*"
 ".*" ".*" ".*"后边三个.*分别代表:配置权限、写权限、读权限
https://github.com/php-amqplib/php-amqplib Extension installation
composer config -g repo.packagist composer https://mirrors.aliyun.com/composer/
. If the download is unsuccessful, upgrade composer, php.ini, open sockets, expand and switch domestic mirrors
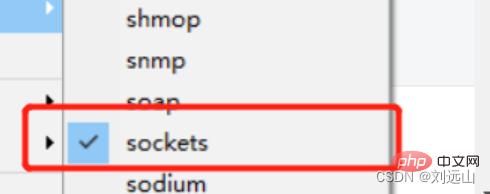
# 升级composer
composer self-update

#php.ini 打开 sockets 扩展

#下载指定版本
composer require php-amqplib/php-amqplib=^3.0
Simple mode producer messages are pushed to the message queue Documentation:
https://www.rabbitmq.com/tutorials/tutorial-one-php.html
 Producer code
http://localhost/rabbitmq/simple/pro.php
<?php require_once "../vendor/autoload.php"; use PhpAmqpLib\Connection\AMQPStreamConnection; use PhpAmqpLib\Message\AMQPMessage; //生产者 //Connection: publisher/consumer和broker之间的TCP连接 //Channel: 如果每一次访问RabbitMQ都建立一个Connection,在消息量大的时候建立TCP Connection的开销将是巨大的,效率也较低。Channel是在connection内部建立的逻辑连接Channel作为轻量级的Connection极大减少了操作系统建立TCP connection的开销。 //建立connction $connection = new AMQPStreamConnection('192.168.10.105', 5672, 'root', 'root', 'order'); //Channel $channel = $connection->channel(); //声明队列名为:goods $queue_name = 'goods'; $channel->queue_declare($queue_name, false, true, false, false); //生产数据 $data = 'this is messge'; //创建消息 $msg = new AMQPMessage($data, ['delivery_mode' => AMQPMessage::DELIVERY_MODE_NON_PERSISTENT]); //发布消息 $channel->basic_publish($msg, $exchange = '', $queue_name); //关闭连接 $channel->close(); $connection->close();
运行生产者脚本:
http://localhost/rabbitmq/simple/pro.php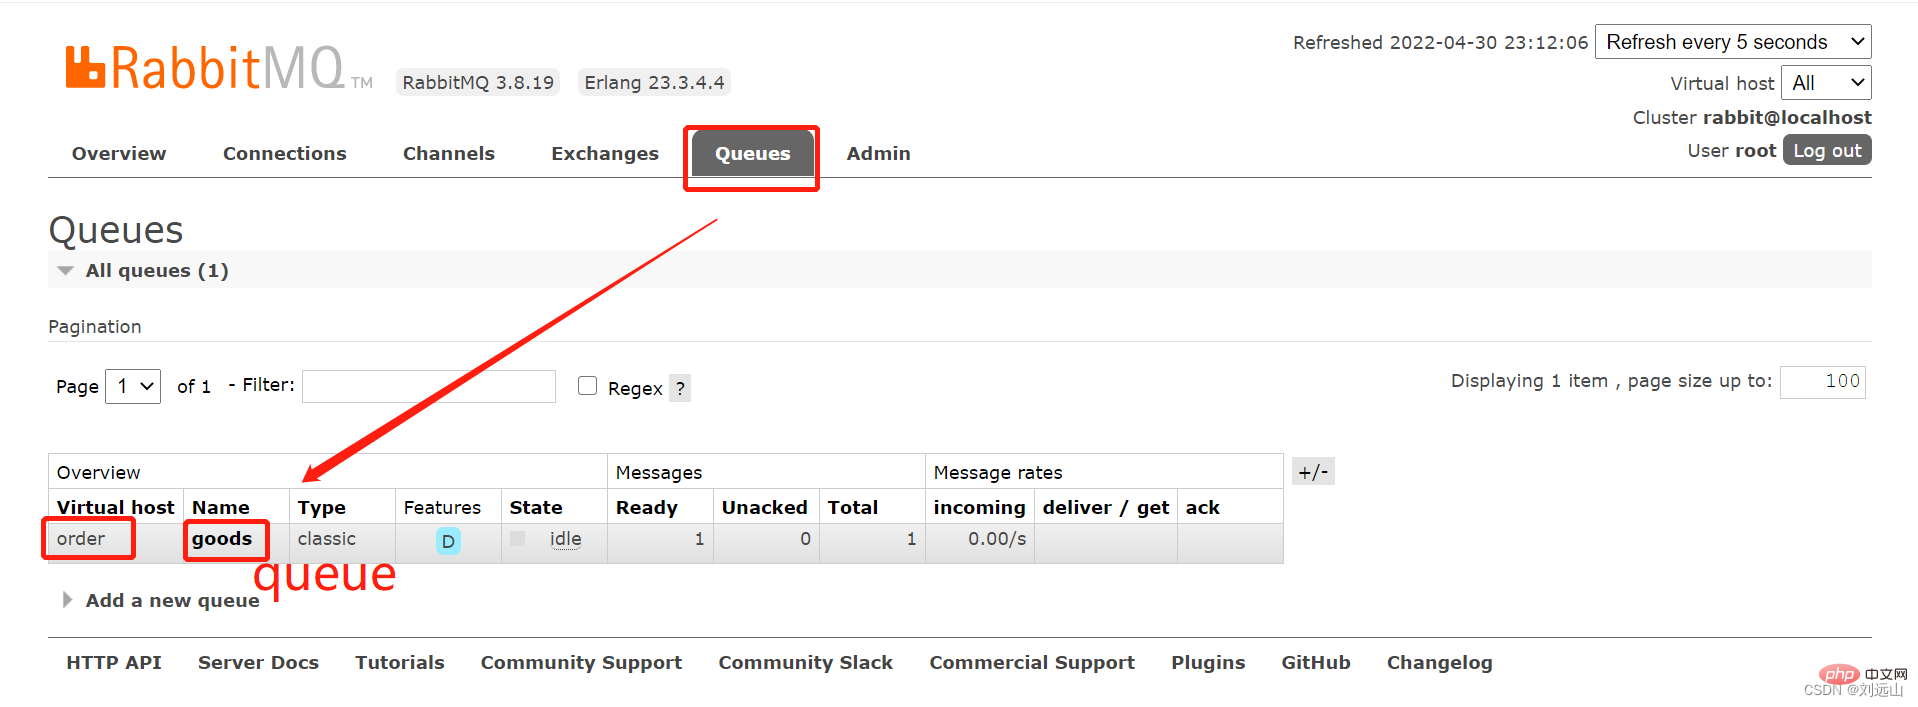
点击goods队列可以进入到消息详情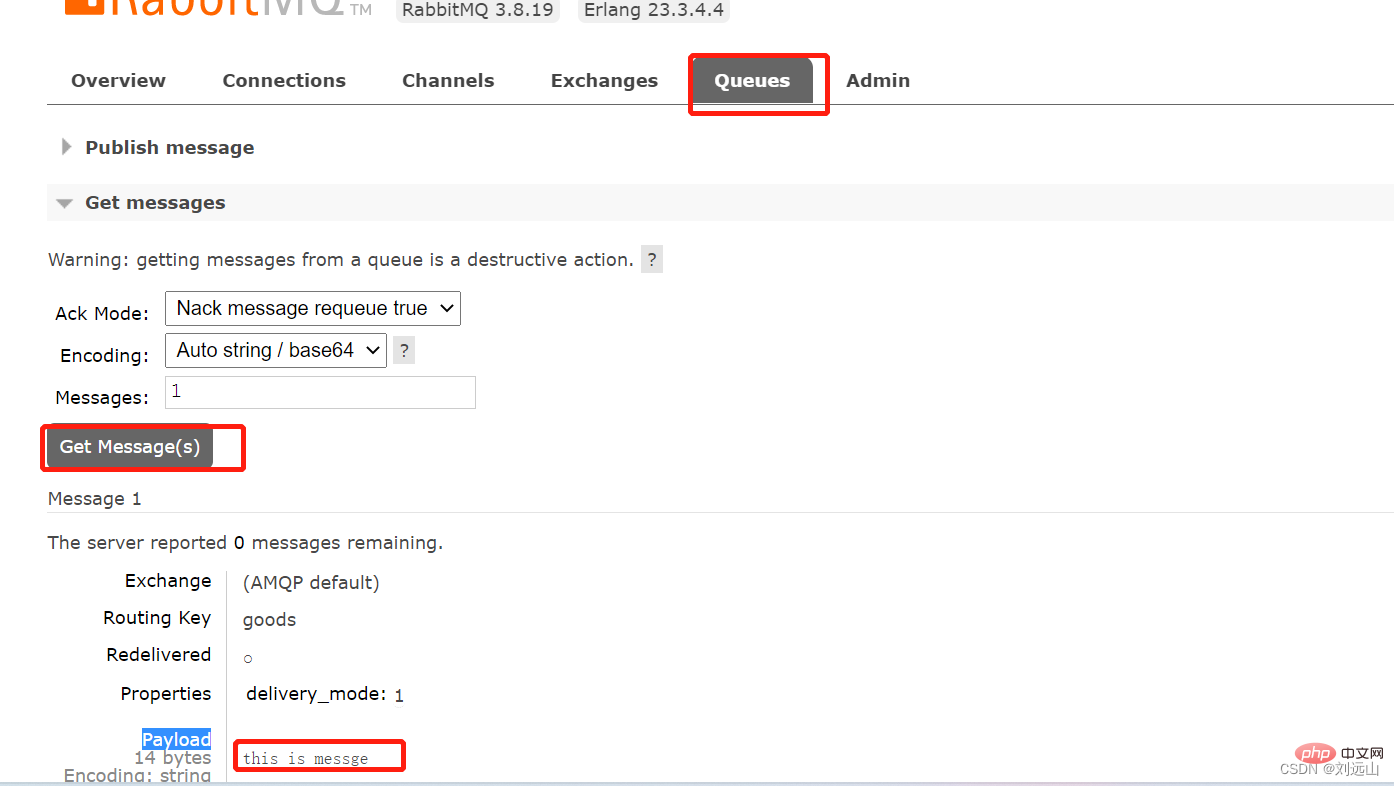
simple模式消费者接受消息
http://localhost/rabbitmq/simple/con.php
<?php require_once "../vendor/autoload.php";
use PhpAmqpLib\Connection\AMQPStreamConnection;
//建立connction
$connection = new AMQPStreamConnection('192.168.10.105', 5672, 'root', 'root', 'order');
//Channel
$channel = $connection->channel();
//声明队列名为:goods
$queue_name = 'goods';
$channel->queue_declare($queue_name, false, true, false, false);
echo " [*] Waiting for messages. To exit press CTRL+C\n";
$callback = function ($msg) {
echo 'received = ', $msg->body . "\n";
};
//开启消费
$channel->basic_consume($queue_name, '', false, true, false, false, $callback);
//不断的循环进行消费
while ($channel->is_open()) {
$channel->wait();
}
//关闭连接
$channel->close();
$connection->close();worker模式生产消费消息
rabbitmq Work Queues
一个生产者对应多个消费者,消费特别慢时增加几个消费分发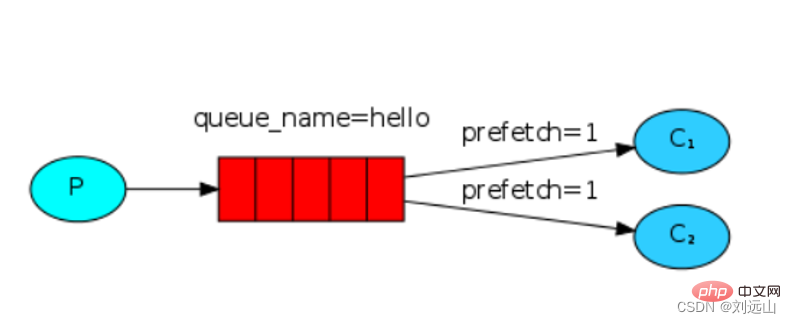
生产者,和上文生产者不变
<?php require_once "../vendor/autoload.php"; use PhpAmqpLib\Connection\AMQPStreamConnection; use PhpAmqpLib\Message\AMQPMessage; //生产者 //Connection: publisher/consumer和broker之间的TCP连接 //Channel: 如果每一次访问RabbitMQ都建立一个Connection,在消息量大的时候建立TCP Connection的开销将是巨大的,效率也较低。Channel是在connection内部建立的逻辑连接Channel作为轻量级的Connection极大减少了操作系统建立TCP connection的开销。 //建立connction $connection = new AMQPStreamConnection('192.168.10.105', 5672, 'root', 'root', 'order'); //Channel $channel = $connection->channel(); //声明队列名为:task_queue $queue_name = 'task_queue'; $channel->queue_declare($queue_name, false, true, false, false); for ($i = 0; $i AMQPMessage::DELIVERY_MODE_NON_PERSISTENT]); //发布消息 $channel->basic_publish($msg, $exchange = '', $queue_name); } //关闭连接 $channel->close(); $connection->close();
消费者worker1
D:\phpstudy_pro\WWW\rabbitmq\worker\worker1.php
<?php require_once "../vendor/autoload.php";
use PhpAmqpLib\Connection\AMQPStreamConnection;
//建立connction
$connection = new AMQPStreamConnection('192.168.10.105', 5672, 'root', 'root', 'order');
//Channel
$channel = $connection->channel();
//声明队列名为:task_queue
$queue_name = 'task_queue';
$channel->queue_declare($queue_name, false, true, false, false);
echo " [*] Waiting for messages. To exit press CTRL+C\n";
$callback = function ($msg) {
echo 'received = ', $msg->body . "\n";
};
//开启消费
$channel->basic_consume($queue_name, '', false, true, false, false, $callback);
//不断的循环进行消费
while ($channel->is_open()) {
$channel->wait();
}
//关闭连接
$channel->close();
$connection->close();消费者worker2,代码和worker1一样,同时运行开启后会一起消费
D:\phpstudy_pro\WWW\rabbitmq\worker\worker2.php
消费者消费消息ack确认
用以确认不会丢失消息
消费消息
basic_consume($queue = ‘’, $consumer_tag = ‘’, $no_local = false, $no_ack = false, $exclusive = false, $nowait = false, $callback = null, $ticket = null, $arguments = array())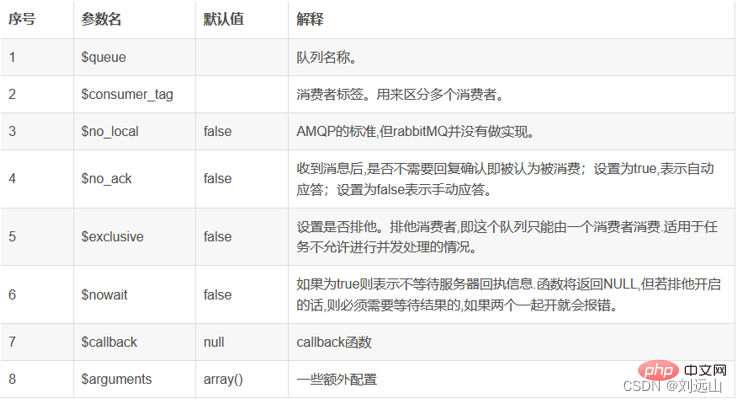
no_ack=false,设置为手动应答
开启后需要进行消息的消费确认后才会进行移除,否者该消息会一直存在消息队列中
消费端代码
D:\phpstudy_pro\WWW\rabbitmq\worker\worker1.php
<?php require_once "../vendor/autoload.php";
use PhpAmqpLib\Connection\AMQPStreamConnection;
//建立connction
$connection = new AMQPStreamConnection('192.168.10.105', 5672, 'root', 'root', 'order');
//Channel
$channel = $connection->channel();
//声明队列名为:task_queue
$queue_name = 'task_queue';
$channel->queue_declare($queue_name, false, true, false, false);
echo " [*] Waiting for messages. To exit press CTRL+C\n";
$callback = function ($msg) {
echo 'received = ', $msg->body . "\n";
//确认消息已被消费,从生产队列中移除
$msg->ack();
};
//设置消费成功后才能继续进行下一个消费
$channel->basic_qos(null, 1, null);
//开启消费no_ack=false,设置为手动应答
$channel->basic_consume($queue_name, '', false, false, false, false, $callback);
//不断的循环进行消费
while ($channel->is_open()) {
$channel->wait();
}
//关闭连接
$channel->close();
$connection->close();fanout模式生产者推送到交换器
发布/订阅模式
是要是公用一个交换机的消费端都能收到同样的消息,类似广播的功能
文档:rabbitmq Publish/Subscribe
https://www.rabbitmq.com/tutorials/tutorial-three-php.html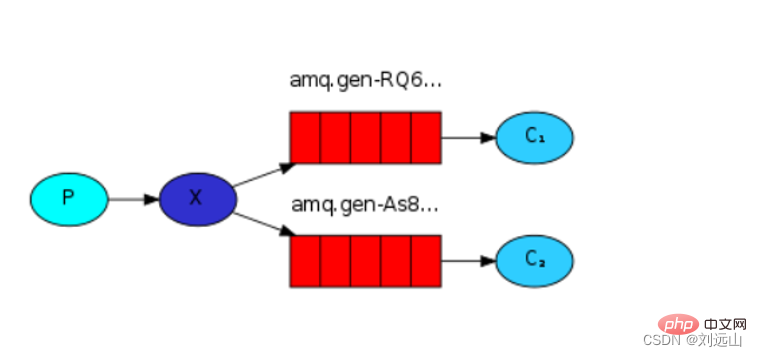
rabbitmq Exchange类型
交换器、路由键、绑定

    Exchange:交换器。发送消息的AMQP实体。交换器拿到一个消息之后将它路由给一个或几个队列。它使用哪种路由算法是由交换机类型和被称作绑定(Binding)的规则所决定的。RabbitMQ有四种类型。

    RoutingKey:路由键。生产者将消息发送给交换器。一般会指定一个RoutingKey,用来指定这个消息的路由规则,而这个RoutingKey需要与交换器类型和绑定键(BindingKey)联合使用才能最终失效。

    Binding:绑定。绑定(Binding)是交换机(Exchange)将消息(Message)路由给队列(Queue)所需遵循的规则。

# 四种模式
Direct  定向 消息与一个特定的路由键完全匹配

Topic  通配符 路由键和某模式进行匹配

Fanout  广播 发送到该类型交换机的消息都会被广播到与该交换机绑定的所有队列
Headers 不处理路由键,而是根据发送的消息内容中的headers属性进行匹配
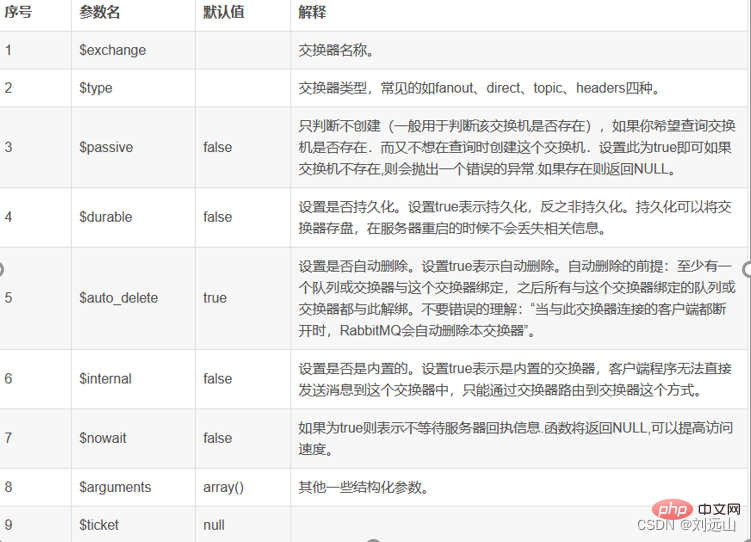
exchange_declare($exchange, $type, $passive = false, $durable = false, $auto_delete = true, $internal = false, $nowait = false, $arguments = array(), $ticket = null) 。试探性申请一个交换器,若该交换器不存在,则创建;若存在,则跳过。
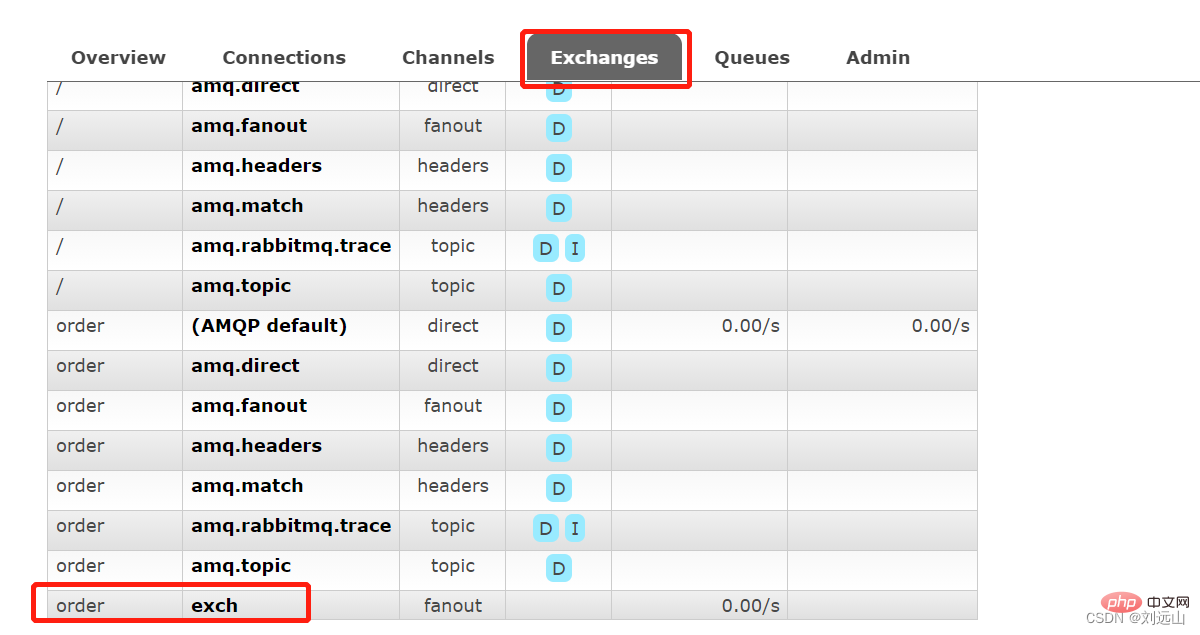
生产者代码
D:\phpstudy_pro\WWW\rabbitmq\ps\pro.php
<?php require_once "../vendor/autoload.php"; use PhpAmqpLib\Connection\AMQPStreamConnection; use PhpAmqpLib\Message\AMQPMessage; //建立connction $connection = new AMQPStreamConnection('192.168.10.105', 5672, 'root', 'root', 'order'); //Channel $channel = $connection->channel(); //声明交换器 $exc_name = 'exch'; $channel->exchange_declare($exc_name, 'fanout', false, false, false); //声明数据 $data = 'this is fanout message'; //创建消息 $msg = new AMQPMessage($data, ['delivery_mode' => AMQPMessage::DELIVERY_MODE_NON_PERSISTENT]); //发布消息 $channel->basic_publish($msg, $exc_name); //关闭连接 $channel->close(); $connection->close();
fanout模式消费者消费消息
是要是公用一个交换机的消费端都能收到同样的消息,类似广播的功能
当消费端运行时才会显示该队列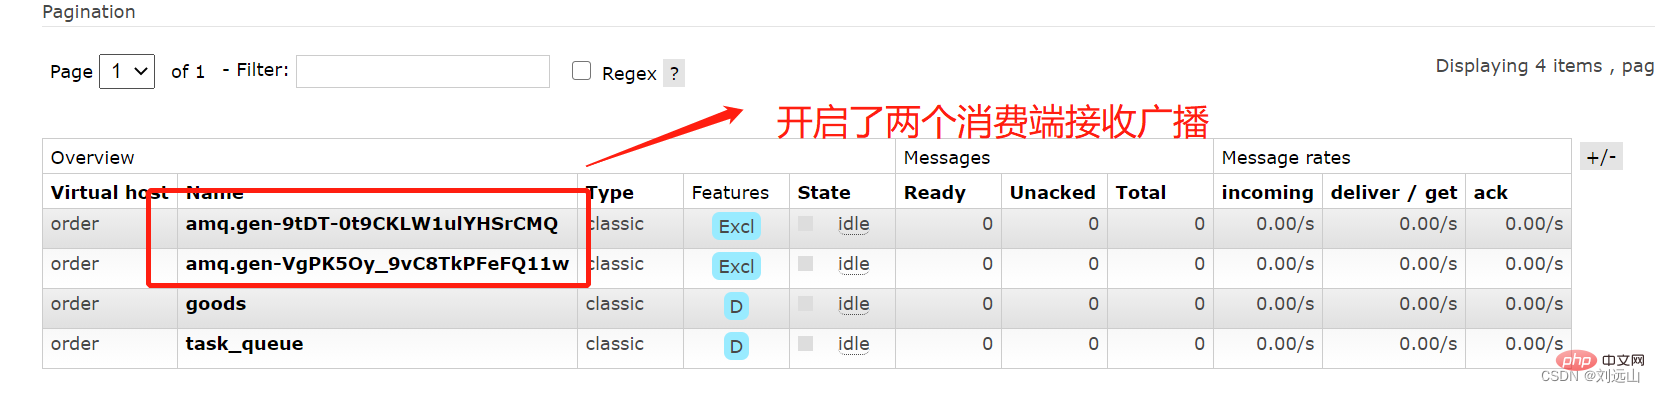
消费端:
D:\phpstudy_pro\WWW\rabbitmq\ps\worker1.php
<?php require_once "../vendor/autoload.php";
use PhpAmqpLib\Connection\AMQPStreamConnection;
//建立connction
$connection = new AMQPStreamConnection('192.168.10.105', 5672, 'root', 'root', 'order');
//Channel
$channel = $connection->channel();
//声明交换器
$exc_name = 'exch';
$channel->exchange_declare($exc_name, 'fanout', false, false, false);
//获取系统生成的消息队列名称
list($queue_name, ,) = $channel->queue_declare('', false, false, true, false);
//将队列名与交换器名进行绑定
$channel->queue_bind($queue_name,$exc_name);
$callback = function ($msg) {
echo 'received = ', $msg->body . "\n";
//确认消息已被消费,从生产队列中移除
$msg->ack();
};
//设置消费成功后才能继续进行下一个消费
$channel->basic_qos(null, 1, null);
//开启消费no_ack=false,设置为手动应答
$channel->basic_consume($queue_name, '', false, false, false, false, $callback);
//不断的循环进行消费
while ($channel->is_open()) {
$channel->wait();
}
//关闭连接
$channel->close();
$connection->close();direct模式消息队列使用
文档:
https://www.rabbitmq.com/tutorials/tutorial-four-php.html
用来指定不同的交换机和指定routing_key,在消费端进行消费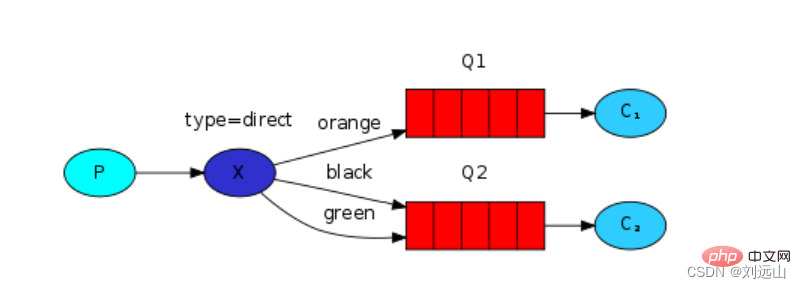
生产者代码:
D:\phpstudy_pro\WWW\rabbitmq\routing\pro.php
<?php require_once "../vendor/autoload.php"; use PhpAmqpLib\Connection\AMQPStreamConnection; use PhpAmqpLib\Message\AMQPMessage; //建立connction $connection = new AMQPStreamConnection('192.168.10.105', 5672, 'root', 'root', 'order'); //Channel $channel = $connection->channel(); //声明交换器 $exc_name = 'direct_log'; //指定routing_key $routing_key = 'info'; //指定交换机类型为direct $channel->exchange_declare($exc_name, 'direct', false, false, false); //声明数据 $data = 'this is ' . $routing_key . ' message'; //创建消息 $msg = new AMQPMessage($data, ['delivery_mode' => AMQPMessage::DELIVERY_MODE_NON_PERSISTENT]); //发布消息 //指定使用的routing_key $channel->basic_publish($msg, $exc_name, $routing_key); //关闭连接 $channel->close(); $connection->close();
消费者代码
D:\phpstudy_pro\WWW\rabbitmq\routing\info.php
<?php require_once "../vendor/autoload.php";
use PhpAmqpLib\Connection\AMQPStreamConnection;
//建立connction
$connection = new AMQPStreamConnection('192.168.10.105', 5672, 'root', 'root', 'order');
//Channel
$channel = $connection->channel();
//声明交换器
$exc_name = 'direct_log';
//指定routing_key
$routing_key = 'info';
$channel->exchange_declare($exc_name, 'direct', false, false, false);
//获取系统生成的消息队列名称
list($queue_name, ,) = $channel->queue_declare('', false, false, true, false);
//将队列名与交换器名进行绑定,并指定routing_key
$channel->queue_bind($queue_name,$exc_name,$routing_key);
$callback = function ($msg) {
echo 'received = ', $msg->body . "\n";
//确认消息已被消费,从生产队列中移除
$msg->ack();
};
//设置消费成功后才能继续进行下一个消费
$channel->basic_qos(null, 1, null);
//开启消费no_ack=false,设置为手动应答
$channel->basic_consume($queue_name, '', false, false, false, false, $callback);
//不断的循环进行消费
while ($channel->is_open()) {
$channel->wait();
}
//关闭连接
$channel->close();
$connection->close();topic模式消息队列使用
通配符的匹配模式
如消费端中routing_key = ‘user.*’;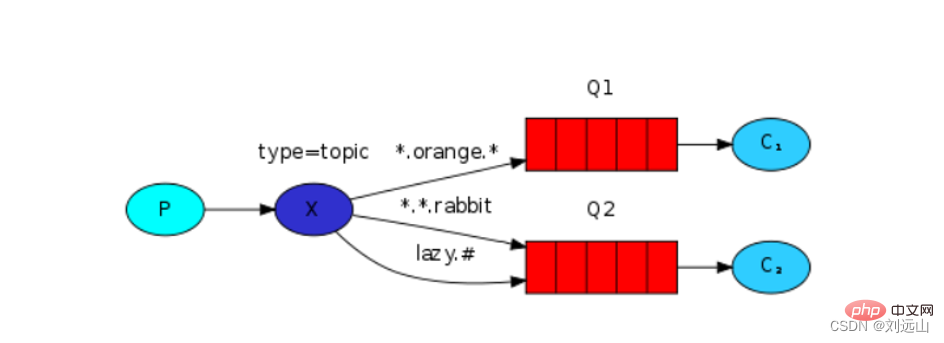
生产者:
指定routing_key= ‘user.top’
<?php require_once "../vendor/autoload.php"; use PhpAmqpLib\Connection\AMQPStreamConnection; use PhpAmqpLib\Message\AMQPMessage; //建立connction $connection = new AMQPStreamConnection('192.168.10.105', 5672, 'root', 'root', 'order'); //Channel $channel = $connection->channel(); //声明交换器 $exc_name = 'topic_log'; //指定routing_key $routing_key = 'user.top'; //指定交换机类型为direct $channel->exchange_declare($exc_name, 'topic', false, false, false); //声明数据 $data = 'this is ' . $routing_key . ' message'; //创建消息 $msg = new AMQPMessage($data, ['delivery_mode' => AMQPMessage::DELIVERY_MODE_NON_PERSISTENT]); //发布消息 //指定使用的routing_key $channel->basic_publish($msg, $exc_name, $routing_key); //关闭连接 $channel->close(); $connection->close();
消费者
消费端中routing_key = ‘user.*’;
<?php require_once "../vendor/autoload.php";
use PhpAmqpLib\Connection\AMQPStreamConnection;
//建立connction
$connection = new AMQPStreamConnection('192.168.10.105', 5672, 'root', 'root', 'order');
//Channel
$channel = $connection->channel();
//声明交换器
$exc_name = 'direct_log';
//指定routing_key
$routing_key = 'user.*';
$channel->exchange_declare($exc_name, 'topic', false, false, false);
//获取系统生成的消息队列名称
list($queue_name, ,) = $channel->queue_declare('', false, false, true, false);
//将队列名与交换器名进行绑定,并指定routing_key
$channel->queue_bind($queue_name,$exc_name,$routing_key);
$callback = function ($msg) {
echo 'received = ', $msg->body . "\n";
//确认消息已被消费,从生产队列中移除
$msg->ack();
};
//设置消费成功后才能继续进行下一个消费
$channel->basic_qos(null, 1, null);
//开启消费no_ack=false,设置为手动应答
$channel->basic_consume($queue_name, '', false, false, false, false, $callback);
//不断的循环进行消费
while ($channel->is_open()) {
$channel->wait();
}
//关闭连接
$channel->close();
$connection->close();推荐学习:《PHP视频教程》
The above is the detailed content of Getting started with message queue RabbitMQ and detailed explanation of PHP examples. For more information, please follow other related articles on the PHP Chinese website!

Hot AI Tools

Undresser.AI Undress
AI-powered app for creating realistic nude photos

AI Clothes Remover
Online AI tool for removing clothes from photos.

Undress AI Tool
Undress images for free

Clothoff.io
AI clothes remover

Video Face Swap
Swap faces in any video effortlessly with our completely free AI face swap tool!

Hot Article
Hot Tools

Notepad++7.3.1
Easy-to-use and free code editor

SublimeText3 Chinese version
Chinese version, very easy to use

Zend Studio 13.0.1
Powerful PHP integrated development environment

Dreamweaver CS6
Visual web development tools

SublimeText3 Mac version
God-level code editing software (SublimeText3)
Hot Topics
 1667
1667
 14
1426
52
1328
25
1273
29
1255
24
14
1426
52
1328
25
1273
29
1255
24

 PHP: A Key Language for Web Development
Apr 13, 2025 am 12:08 AM
PHP: A Key Language for Web Development
Apr 13, 2025 am 12:08 AM
PHP is a scripting language widely used on the server side, especially suitable for web development. 1.PHP can embed HTML, process HTTP requests and responses, and supports a variety of databases. 2.PHP is used to generate dynamic web content, process form data, access databases, etc., with strong community support and open source resources. 3. PHP is an interpreted language, and the execution process includes lexical analysis, grammatical analysis, compilation and execution. 4.PHP can be combined with MySQL for advanced applications such as user registration systems. 5. When debugging PHP, you can use functions such as error_reporting() and var_dump(). 6. Optimize PHP code to use caching mechanisms, optimize database queries and use built-in functions. 7
 PHP and Python: Comparing Two Popular Programming Languages
Apr 14, 2025 am 12:13 AM
PHP and Python: Comparing Two Popular Programming Languages
Apr 14, 2025 am 12:13 AM
PHP and Python each have their own advantages, and choose according to project requirements. 1.PHP is suitable for web development, especially for rapid development and maintenance of websites. 2. Python is suitable for data science, machine learning and artificial intelligence, with concise syntax and suitable for beginners.
 PHP vs. Python: Understanding the Differences
Apr 11, 2025 am 12:15 AM
PHP vs. Python: Understanding the Differences
Apr 11, 2025 am 12:15 AM
PHP and Python each have their own advantages, and the choice should be based on project requirements. 1.PHP is suitable for web development, with simple syntax and high execution efficiency. 2. Python is suitable for data science and machine learning, with concise syntax and rich libraries.
 PHP in Action: Real-World Examples and Applications
Apr 14, 2025 am 12:19 AM
PHP in Action: Real-World Examples and Applications
Apr 14, 2025 am 12:19 AM
PHP is widely used in e-commerce, content management systems and API development. 1) E-commerce: used for shopping cart function and payment processing. 2) Content management system: used for dynamic content generation and user management. 3) API development: used for RESTful API development and API security. Through performance optimization and best practices, the efficiency and maintainability of PHP applications are improved.
 The Enduring Relevance of PHP: Is It Still Alive?
Apr 14, 2025 am 12:12 AM
The Enduring Relevance of PHP: Is It Still Alive?
Apr 14, 2025 am 12:12 AM
PHP is still dynamic and still occupies an important position in the field of modern programming. 1) PHP's simplicity and powerful community support make it widely used in web development; 2) Its flexibility and stability make it outstanding in handling web forms, database operations and file processing; 3) PHP is constantly evolving and optimizing, suitable for beginners and experienced developers.
 PHP and Python: Different Paradigms Explained
Apr 18, 2025 am 12:26 AM
PHP and Python: Different Paradigms Explained
Apr 18, 2025 am 12:26 AM
PHP is mainly procedural programming, but also supports object-oriented programming (OOP); Python supports a variety of paradigms, including OOP, functional and procedural programming. PHP is suitable for web development, and Python is suitable for a variety of applications such as data analysis and machine learning.
 PHP vs. Other Languages: A Comparison
Apr 13, 2025 am 12:19 AM
PHP vs. Other Languages: A Comparison
Apr 13, 2025 am 12:19 AM
PHP is suitable for web development, especially in rapid development and processing dynamic content, but is not good at data science and enterprise-level applications. Compared with Python, PHP has more advantages in web development, but is not as good as Python in the field of data science; compared with Java, PHP performs worse in enterprise-level applications, but is more flexible in web development; compared with JavaScript, PHP is more concise in back-end development, but is not as good as JavaScript in front-end development.
 PHP and Python: Code Examples and Comparison
Apr 15, 2025 am 12:07 AM
PHP and Python: Code Examples and Comparison
Apr 15, 2025 am 12:07 AM
PHP and Python have their own advantages and disadvantages, and the choice depends on project needs and personal preferences. 1.PHP is suitable for rapid development and maintenance of large-scale web applications. 2. Python dominates the field of data science and machine learning.
