

php message system (2)

1. After the overall framework is determined with reference to the previous (mvc framework summary), the default parameters of the request will become:
<span>//</span><span>默认请求首页:
    </span><span>//</span><span>P=front
    </span><span>//</span><span>C=fIndex
</span><span>//</span><span>A=show</span>1.1 Find the action under the controller fIndexController:
<span>//</span><span>首页展示动作</span>
        <span>public</span><span> function showAction()
        {
            </span><span>//</span><span>防止恶意调用</span>
            $<span>this</span>-><span>checkAuthority();
            </span><span>//</span><span>不需要具体模型,直接载入模版</span>
            require CUR_VIE_PATH.<span>'</span><span>index.html</span><span>'</span><span>;
}</span>2. Preventing malicious calls is placed at our Controller level. It is used by almost all models, so it is placed in the basic model.
<span>/*</span><span>
     * 防止恶意调用方法,适用于全部方法
     </span><span>*/</span>
    <span>protected</span><span> function checkAuthority()
    {
        </span><span>if</span>(!defined(<span>'</span><span>IN_NG</span><span>'</span><span>))
        {
            exit(</span><span>"</span><span>you no authority</span><span>"</span><span>);
        }
}</span>Call this method at any time
3. Reject the lower version of php. Since it is always running, put it directly into the initial file Framework.class.php
4.1 Make CSS an include file
Every page must import CSS, which is really troublesome. Let’s define a file title.inc.html.
But each page has a different CSS, so you can define a constant to prove this page.
define('SCRIPT','index');
<title>Your Title</title>
    <?<span>php
        require </span><span>'</span><span>application/view/front/title.inc.html</span><span>'</span>
    ?>
</head>
The title.inc.html code
<link rel=<span>"</span><span>shortcut icon</span><span>"</span> href=<span>"</span><span>favicon.ico</span><span>"</span> />
<link rel=<span>"</span><span>stylesheet</span><span>"</span> type=<span>"</span><span>text/css</span><span>"</span> href=<span>"</span><span>public/front/css/1/basic.css</span><span>"</span> />
<link rel=<span>"</span><span>stylesheet</span><span>"</span> type=<span>"</span><span>text/css</span><span>"</span> href=<span>"</span><span>public/front/css/1/<?php echo SCRIPT?>.css<span>"</span> />
5.2 Create registration page register.html
<span>参数请求为:
    请求注册页
        P</span>=<span>front
        C</span>=<span>fRegister
A</span>=showThe code is:
<div id=<span>"</span><span>register</span><span>"</span>>
        <h2>会员注册</h2>
        <form method=<span>"</span><span>post</span><span>"</span> action=<span>"</span><span>post.php</span><span>"</span>>
            <dl>
                <dt>请认真填写一下内容</dt>
                <dd><span>
                    用 户 名:</span><input type=<span>"</span><span>text</span><span>"</span> name=<span>"</span><span>username</span><span>"</span> <span>class</span>=<span>"</span><span>text</span><span>"</span> />(*<span>必填,至少两位)
                </span></dd>
                <dd><span>
                    密 码:</span><input type=<span>"</span><span>password</span><span>"</span> name=<span>"</span><span>password</span><span>"</span> <span>class</span>=<span>"</span><span>text</span><span>"</span> />(*<span>必填,至少六位)
                </span></dd>
                <dd><span>
                    确认密码:</span><input type=<span>"</span><span>password</span><span>"</span> name=<span>"</span><span>notpassword</span><span>"</span> <span>class</span>=<span>"</span><span>text</span><span>"</span> />(*<span>必填,同上)
                </span></dd>
                <dd><span>
                    密码提示:</span><input type=<span>"</span><span>text</span><span>"</span> name=<span>"</span><span>passt</span><span>"</span> <span>class</span>=<span>"</span><span>text</span><span>"</span> />(*<span>必填,至少两位)
                </span></dd>
                <dd><span>
                    密码回答:</span><input type=<span>"</span><span>text</span><span>"</span> name=<span>"</span><span>passd</span><span>"</span> <span>class</span>=<span>"</span><span>text</span><span>"</span> />(*<span>必填,至少两位)
                </span></dd>
                <dd><span>
                    性 别:</span><input type=<span>"</span><span>radio</span><span>"</span> name=<span>"</span><span>sex</span><span>"</span> value=<span>"</span><span>男</span><span>"</span> <span>checked</span>=<span>"</span><span>checked</span><span>"</span> /><span>男
                    </span><input type=<span>"</span><span>radio</span><span>"</span> name=<span>"</span><span>sex</span><span>"</span> value=<span>"</span><span>女</span><span>"</span> /><span>女
                </span></dd>
                <dd <span>class</span>=<span>"</span><span>face</span><span>"</span>>
                    <img src=<span>"</span><span>public/front/face/m01.gif</span><span>"</span> alt=<span>"</span><span>头像选择</span><span>"</span><span>
                        onclick</span>=<span>"</span><span>javascript:window.open('face.php','face','width=400,height=400,top=0,left=0')</span><span>"</span> />
                </dd>
                <dd><span>
                    电子邮件:</span><input type=<span>"</span><span>text</span><span>"</span> name=<span>"</span><span>email</span><span>"</span> <span>class</span>=<span>"</span><span>text</span><span>"</span> />
                </dd>
                <dd><span>
                    Q Q :</span><input type=<span>"</span><span>text</span><span>"</span> name=<span>"</span><span>qq</span><span>"</span> <span>class</span>=<span>"</span><span>text</span><span>"</span> />
                </dd>
                <dd><span>
                    主页地址:</span><input type=<span>"</span><span>text</span><span>"</span> name=<span>"</span><span>url</span><span>"</span> <span>class</span>=<span>"</span><span>text</span><span>"</span> value=<span>"</span><span>http://</span><span>"</span> />
                </dd>
                <dd><span>
                    验 证 码:</span><input type=<span>"</span><span>text</span><span>"</span> name=<span>"</span><span>yzm</span><span>"</span> <span>class</span>=<span>"</span><span>text yzm</span><span>"</span> />
                </dd>
                <dd>
                    <input type=<span>"</span><span>submit</span><span>"</span> <span>class</span>=<span>"</span><span>submit</span><span>"</span> value=<span>"</span><span>注册</span><span>"</span> />
                </dd>
            </dl>
        </form>
    </div>
5.3 Click on the avatar to pop up the avatar selection box:
<img src=<span>"</span><span>public/front/face/m01.gif</span><span>"</span> alt=<span>"</span><span>头像选择</span><span>"</span><span>
                        onclick</span>=<span>"</span><span>javascript:window.open('face.php','face','width=400,height=400,top=0,left=0')</span><span>"</span> />
This page stores 64 avatar pages, which can be listed through an array loop
<?php <span>foreach</span> (range(<span>1</span>,<span>9</span>) <span>as</span> $number) {?>
<dd><img src=<span>"</span><span>face/m0<?php echo $number?>.gif<span>"</span> /></dd>
<?php }?> 6. Submit data
To submit data to this page, you must make a name-value pair to determine whether the data has been submitted.
?action=<span>register
也可以设计一个隐藏字段来做名值对
</span><<span>input
type</span>=<span>"</span><span>hidden</span><span>"</span><span>
name</span>=<span>"</span><span>action</span><span>"</span><span>
value</span>=<span>"</span><span>register</span><span>"</span>
/>
6.1 Check the verification code
The purpose of the verification code is to prevent malicious registration and some form forgery cross-site attacks.
The verification code is stored in the session, which can be used to determine whether the current form is submitted. After refreshing once, the verification code changes with
, which can also prevent multiple malicious registrations.
<span>if</span> (!($_POST[<span>'</span><span>yzm</span><span>'</span>] == $_SESSION[<span>'</span><span>code</span><span>'</span><span>])) {
_alert_back(</span><span>'</span><span>验证码有误,请重新输入!</span><span>'</span><span>);
}</span>6.2. Accept data
<span>设计变量,将数据提交出来赋值给变量
$_username
</span>=<span>
$_POST[</span><span>'</span><span>username</span><span>'</span><span>];
也可以通过一个数组来存放提交过来的值
$_clean
</span>=<span>
array();
$_clean[</span><span>'</span><span>username</span><span>'</span><span>]
</span>=<span>
$_POST[</span><span>'</span><span>username</span><span>'</span>]
6.3 Various restrictions and filtering
<span>1.首先,必须去掉两边的空格
$_string </span>= trim($_string);
<span>2.其次长度限制
</span><span>if</span> (mb_strlen($_string,<span>'</span><span>utf-8</span><span>'</span>) < $_min_num || mb_strlen($_string,<span>'</span><span>utf-8</span><span>'</span>) > $_max_num)
<span>3.敏感字符限制
$_char_pattern </span>= <span>'</span><span>/[<>\'\"\ \ ]/</span><span>'</span><span>;
</span><span>if</span> (preg_match($_char_pattern,$_string)) {}
<span>4.敏感用户名限制
$_mg[</span><span>0</span>] = <span>'</span><span>22</span><span>'</span><span>;
$_mg[</span><span>1</span>] = <span>'</span><span>11</span><span>'</span><span>;
$_mg[</span><span>2</span>] = <span>'</span><span>33</span><span>'</span><span>;
</span><span>foreach</span> ($_mg <span>as</span><span> $value) {
$_mg_string .</span>= <span>'</span><span>[</span><span>'</span>.$value.<span>'</span><span>]</span><span>'</span>.<span>'</span><span>\n</span><span>'</span><span>;
}
</span><span>if</span><span> (in_array($_string,$_mg)) {
_alert_back($_mg_string.</span><span>'</span><span>以上敏感用户名不得注册!</span><span>'</span><span>);
}</span>
<span>5.转义输入,有效防止SQL 注入问题
</span><span>//</span><span>mysql_escape_string();
</span><span>//</span><span>addslashes()</span>
<span>return</span> mysql_real_escape_string($_string); <span>//</span><span>这个mysql_是需要连接数据库的</span>
The above introduces the PHP message system (2), including the relevant content. I hope it will be helpful to friends who are interested in PHP tutorials.

Hot AI Tools

Undresser.AI Undress
AI-powered app for creating realistic nude photos

AI Clothes Remover
Online AI tool for removing clothes from photos.

Undress AI Tool
Undress images for free

Clothoff.io
AI clothes remover

Video Face Swap
Swap faces in any video effortlessly with our completely free AI face swap tool!

Hot Article
Hot Tools

Notepad++7.3.1
Easy-to-use and free code editor

SublimeText3 Chinese version
Chinese version, very easy to use

Zend Studio 13.0.1
Powerful PHP integrated development environment

Dreamweaver CS6
Visual web development tools

SublimeText3 Mac version
God-level code editing software (SublimeText3)
Hot Topics
 1658
1658
 14
1415
52
1309
25
1257
29
1231
24
14
1415
52
1309
25
1257
29
1231
24

 What are the differences between Huawei GT3 Pro and GT4?
Dec 29, 2023 pm 02:27 PM
What are the differences between Huawei GT3 Pro and GT4?
Dec 29, 2023 pm 02:27 PM
Many users will choose the Huawei brand when choosing smart watches. Among them, Huawei GT3pro and GT4 are very popular choices. Many users are curious about the difference between Huawei GT3pro and GT4. Let’s introduce the two to you. . What are the differences between Huawei GT3pro and GT4? 1. Appearance GT4: 46mm and 41mm, the material is glass mirror + stainless steel body + high-resolution fiber back shell. GT3pro: 46.6mm and 42.9mm, the material is sapphire glass + titanium body/ceramic body + ceramic back shell 2. Healthy GT4: Using the latest Huawei Truseen5.5+ algorithm, the results will be more accurate. GT3pro: Added ECG electrocardiogram and blood vessel and safety
 Fix: Snipping tool not working in Windows 11
Aug 24, 2023 am 09:48 AM
Fix: Snipping tool not working in Windows 11
Aug 24, 2023 am 09:48 AM
Why Snipping Tool Not Working on Windows 11 Understanding the root cause of the problem can help find the right solution. Here are the top reasons why the Snipping Tool might not be working properly: Focus Assistant is On: This prevents the Snipping Tool from opening. Corrupted application: If the snipping tool crashes on launch, it might be corrupted. Outdated graphics drivers: Incompatible drivers may interfere with the snipping tool. Interference from other applications: Other running applications may conflict with the Snipping Tool. Certificate has expired: An error during the upgrade process may cause this issu simple solution. These are suitable for most users and do not require any special technical knowledge. 1. Update Windows and Microsoft Store apps
 Solve Ubuntu mounting mobile hard disk error: unknown file system type exfat
Jan 05, 2024 pm 01:18 PM
Solve Ubuntu mounting mobile hard disk error: unknown file system type exfat
Jan 05, 2024 pm 01:18 PM
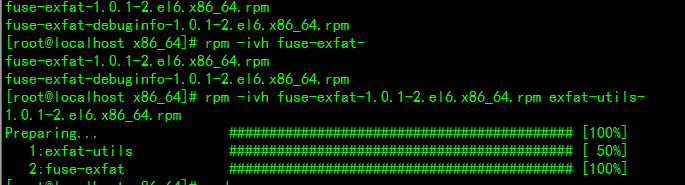
An error occurs when ubuntu mounts a mobile hard disk: mount: unknownfilesystemtype'exfat'. The processing method is as follows: Ubuntu13.10 or install exfat-fuse: sudoapt-getinstallexfat-fuseUbuntu13.04 or below sudoapt-add-repositoryppa:relan/exfatsudoapt-getupdatesudoapt-getinstallfuse- exfatCentOS Linux mount exfat format USB disk error solution to load extfa in CentOS
 What are the uses of the Type keyword in Go?
Sep 06, 2023 am 09:58 AM
What are the uses of the Type keyword in Go?
Sep 06, 2023 am 09:58 AM
The usage of the Type keyword in Go includes defining new type aliases or creating new structure types. Detailed introduction: 1. Type alias. Use the "type" keyword to create an alias for an existing type. This alias does not create a new type, but only provides a new name for the existing type. Type aliases can improve code. The readability of the code makes the code clearer; 2. Structure type. Use the "type" keyword to create a new structure type. The structure is a composite type that can be used to define custom types containing multiple fields. etc.
 How to implement laravel input hidden field
Dec 12, 2022 am 10:07 AM
How to implement laravel input hidden field
Dec 12, 2022 am 10:07 AM
How to implement the laravel input hidden field: 1. Find and open the Blade template file; 2. Use the method_field method in the Blade template to create a hidden field. The creation syntax is "{{ method_field('DELETE') }}".
 How to encapsulate input components and unified form data in vue3
May 12, 2023 pm 03:58 PM
How to encapsulate input components and unified form data in vue3
May 12, 2023 pm 03:58 PM
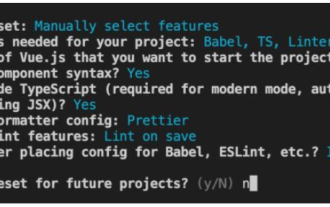
Preparation Use vuecreateexample to create a project. The parameters are roughly as follows: use native input. Native input is mainly value and change. The data needs to be synchronized when changing. App.tsx is as follows: import{ref}from'vue';exportdefault{setup(){//username is the data constusername=ref('Zhang San');//When the input box changes, synchronize the data constonInput=;return( )=>({
 What to do if there is no cursor when clicking on the input box
Nov 24, 2023 am 09:44 AM
What to do if there is no cursor when clicking on the input box
Nov 24, 2023 am 09:44 AM
Solutions for clicking the input box without a cursor: 1. Confirm the focus of the input box; 2. Clear the browser cache; 3. Update the browser; 4. Use JavaScript; 5. Check the hardware device; 6. Check the input box properties; 7. Debug JavaScript code; 8. Check other elements of the page; 9. Consider browser compatibility.
 How to Fix Can't Connect to App Store Error on iPhone
Jul 29, 2023 am 08:22 AM
How to Fix Can't Connect to App Store Error on iPhone
Jul 29, 2023 am 08:22 AM
Part 1: Initial Troubleshooting Steps Checking Apple’s System Status: Before delving into complex solutions, let’s start with the basics. The problem may not lie with your device; Apple's servers may be down. Visit Apple's System Status page to see if the AppStore is working properly. If there's a problem, all you can do is wait for Apple to fix it. Check your internet connection: Make sure you have a stable internet connection as the "Unable to connect to AppStore" issue can sometimes be attributed to a poor connection. Try switching between Wi-Fi and mobile data or resetting network settings (General > Reset > Reset Network Settings > Settings). Update your iOS version:
